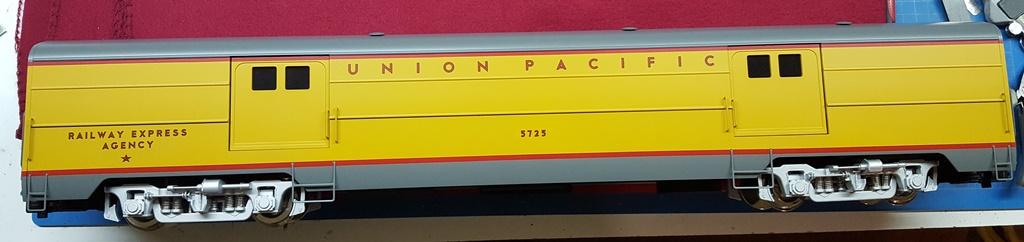
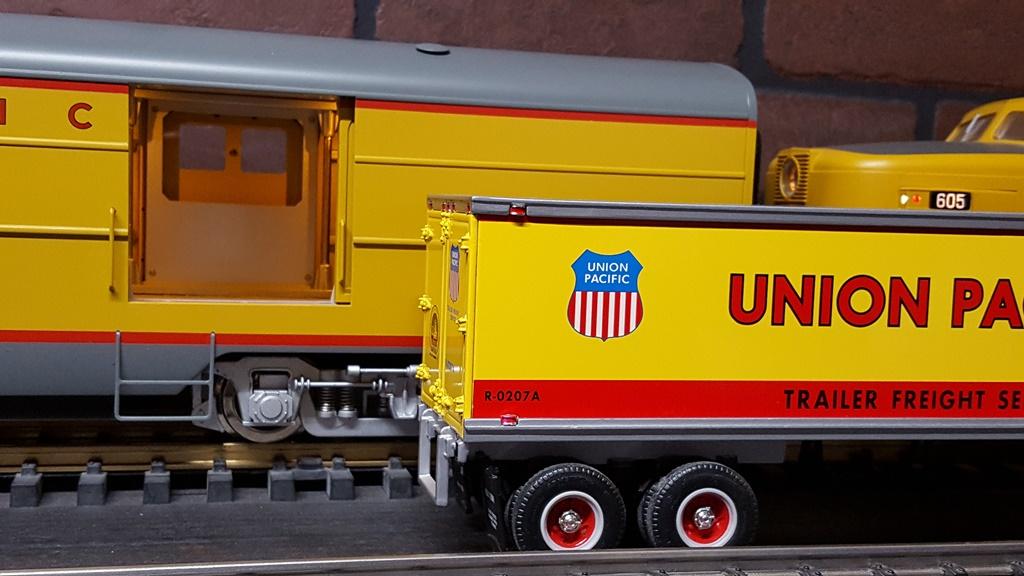
Just finished up painting and decaling a USA Trains 60' double door boxcar. The UP had like 100 of the 60' boxcars for passenger train Express Service. They also had 40' and 50' boxcars. All total something like 250 of them at one time in various paint schemes.
I was thinking about lettering it as car 9336 that was used up to a few years ago on the UP Steam trains as a tool car but they smashed it up and I don't plan on modelling the current era.
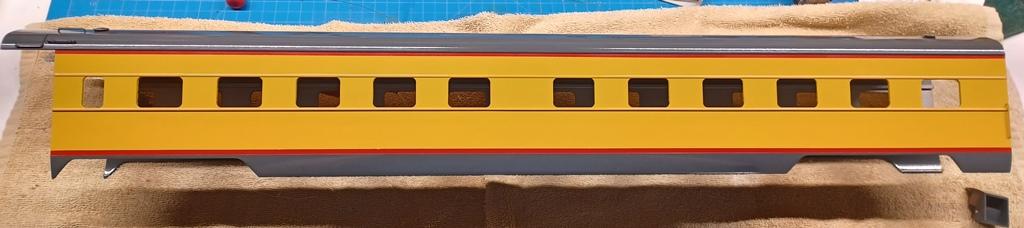
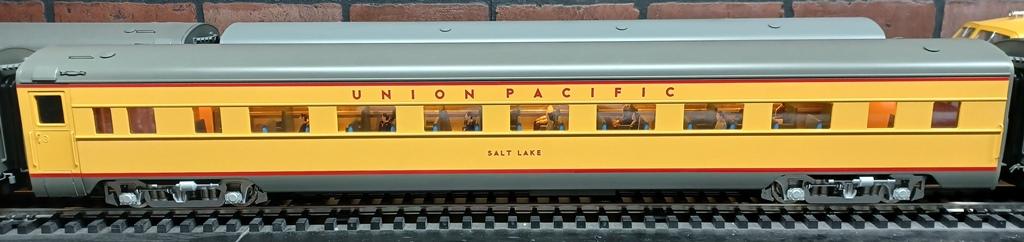
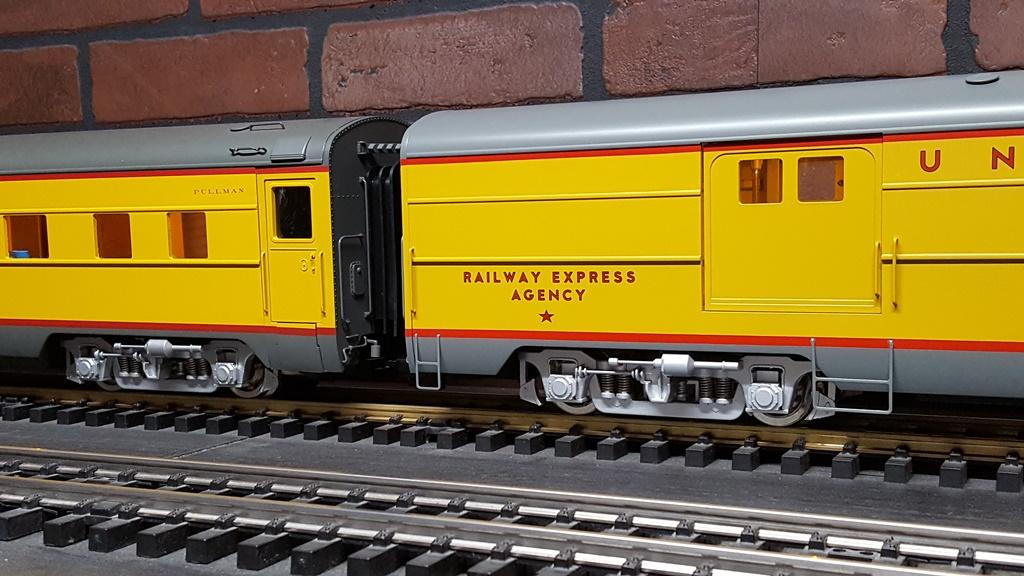
I also recently picked up a Pullman sleeper car that was decorated for PRR. No pictures of it in original paint just this one in UP paint before decaling.
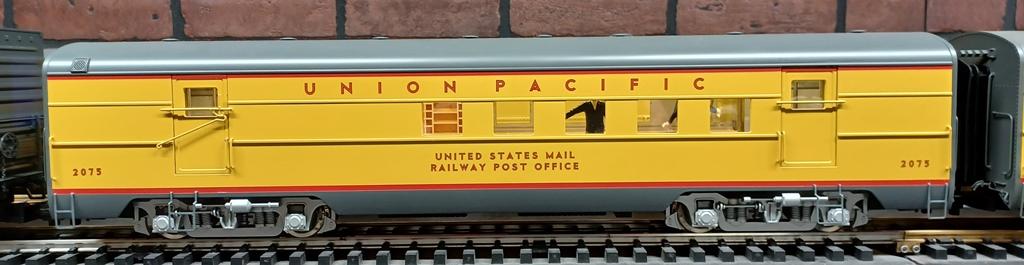
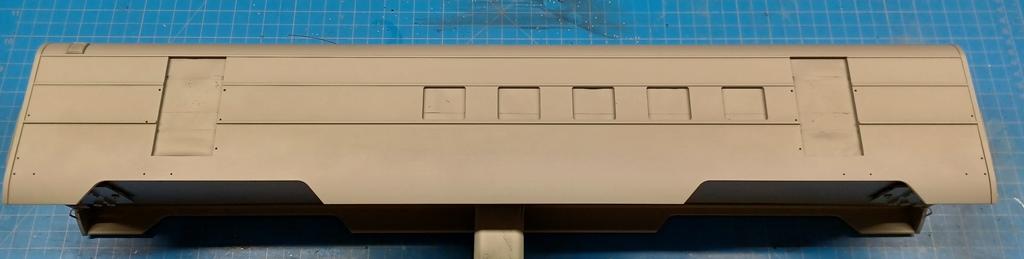
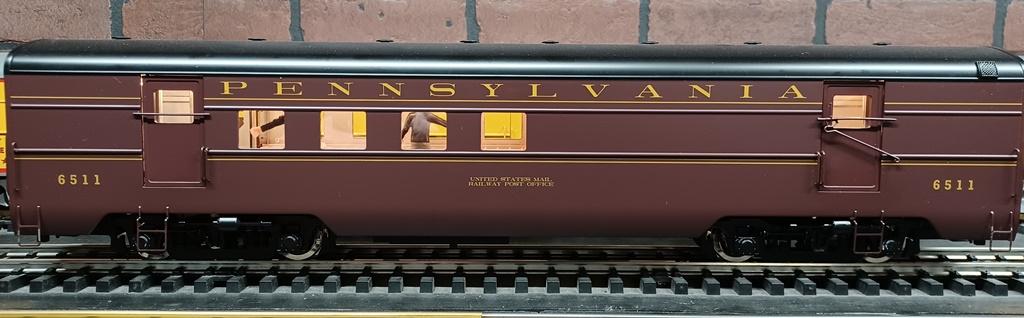
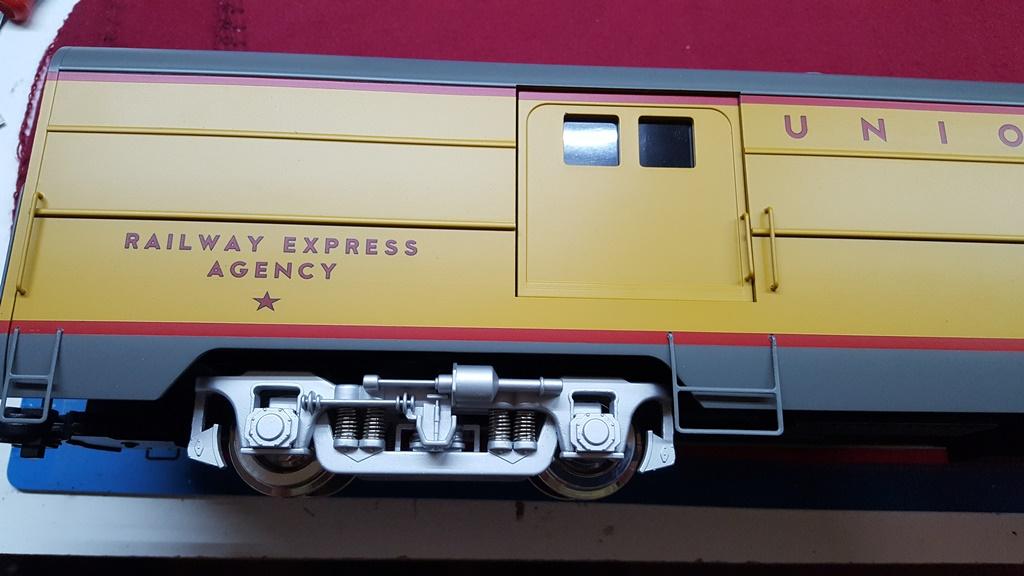
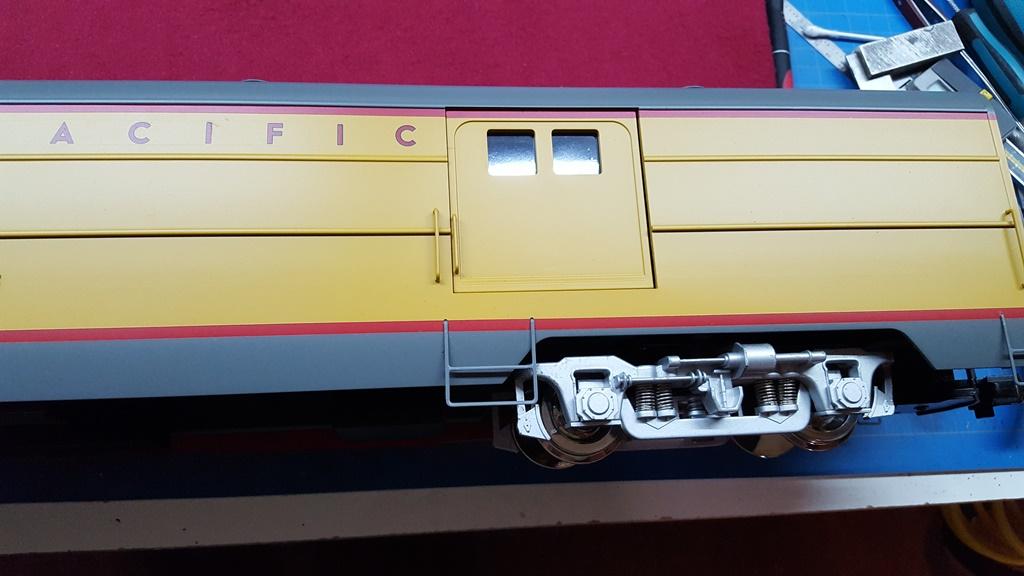
The RPO is all finished up. When doing the lettering I always use a different car number or name than what USA used just so incase I find the originals the train won't have the exact same car.
Well in between the cool weather and rainy days I managed to get the PA "B" unit shell painted and decaled. And got the RPO painted. Next be decaling the RPO and then clear coat both with either flat or matte...depends on which will be compatible with the Valspar paint. I quit using the Krylon Acrylic Catalyst Hardener as that was actually making the paint dry slower.
Well made it thru the winter months and can start thinking about painting outdoors. I really should build an indoor paint booth but it would have to be very big to paint 1:29 trains and since I use a automotive type spray gun it would take a big exhaust fan and ductwork to vent it outdoors not to mention the heated makeup air it would consume.
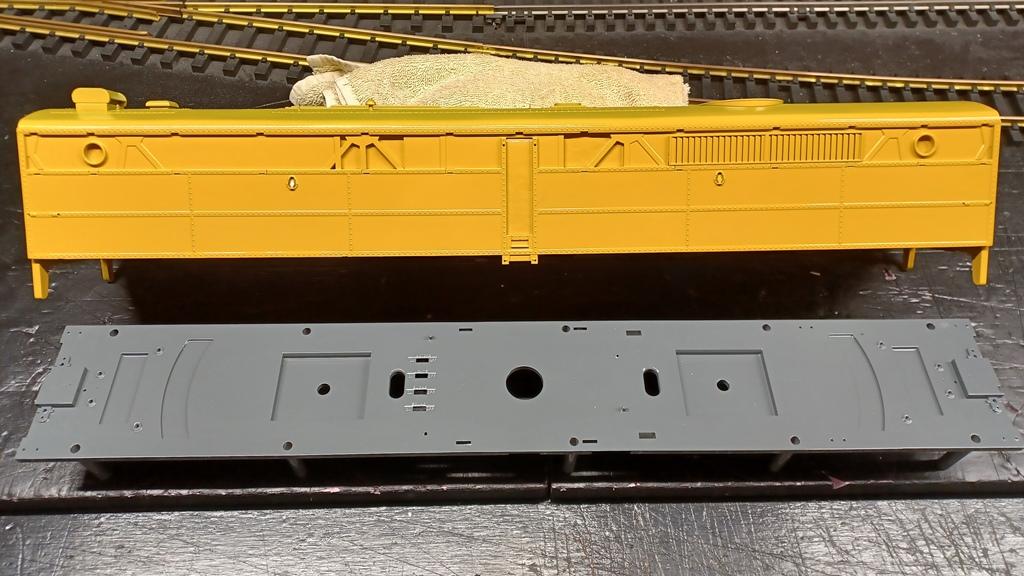
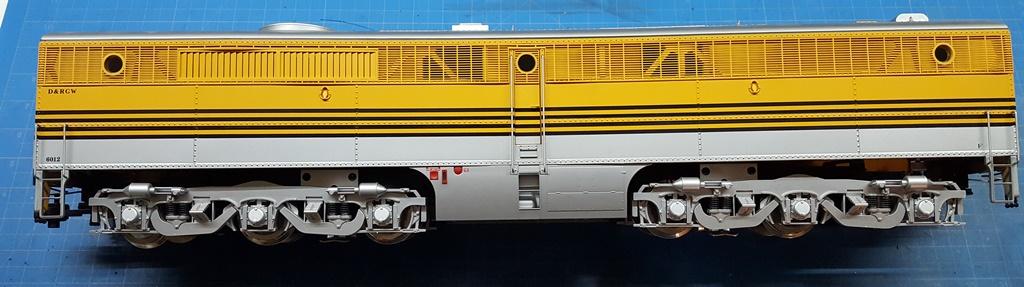
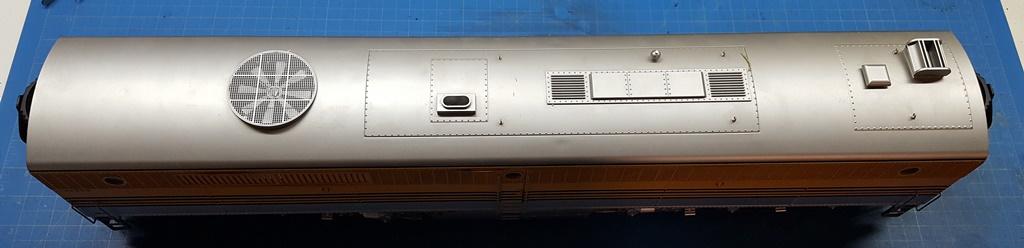
Anyways got the ex D&RGW PA "B" Unit stripped and primed. Also have the shell and parts painted in Armour yellow, chassis and parts in Harbor Mist grey.
I tried Scale Coat II UP yellow and grey but it didn't match the USAT colors. Yellow was to "bright" and the grey way too "dark". I ended up taking a skirt and a combine door into Farm & Fleet and having them scan the pieces and mix up custom blended paint. It's Valspar Alkyd enamel oil based. Quarts cost $12 and I chose the gloss base. Nobody else could custom mix unless it was latex paint. Years ago I would have just went to a local auto body jobber and have them mix it up in either DuPont Dulux or Centari Acrylic Enamel.
Valspar Alkyd is okay just takes days to dry...So does Scale Coat II as basically same stuff for 20X the price. Valspar is super thick so I thinned it at least 50% with Naptha which is a step above mineral spirits. I could probably use Xylol but that stuff is nasty and really stinks! Naptha is basically Ronsonal lighter fluid. I also add some Krylon Catalyst Acrylic Hardener to the paint to help speed up the drying time.
Here I stripped and primed the ex PRR RPO car so I'm starting to gain on my projects. Need to stop buying as have a PRR Pullman car awaiting to be stripped and painted along with a NH wide vision caboose and a 44 Tonner.
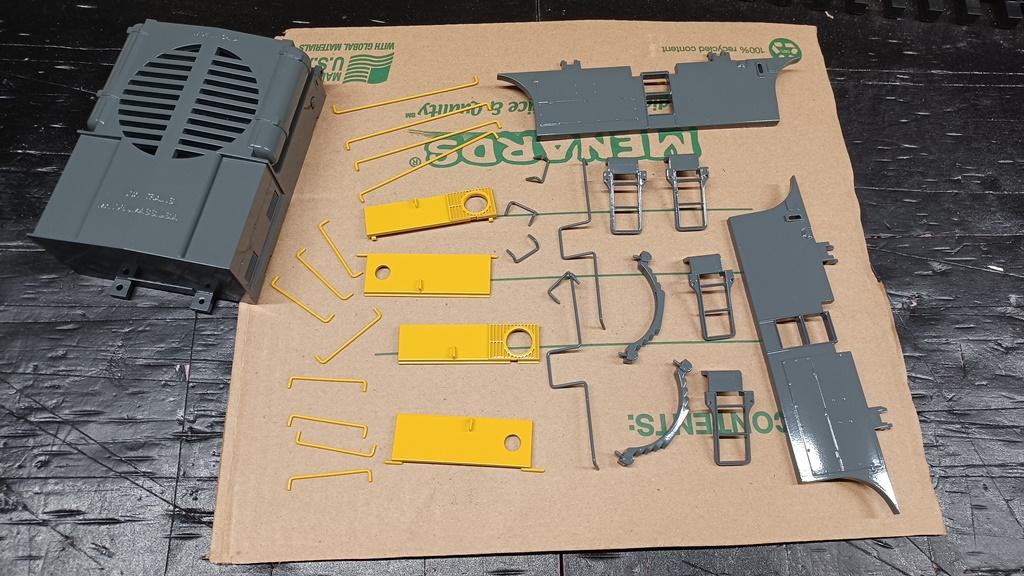
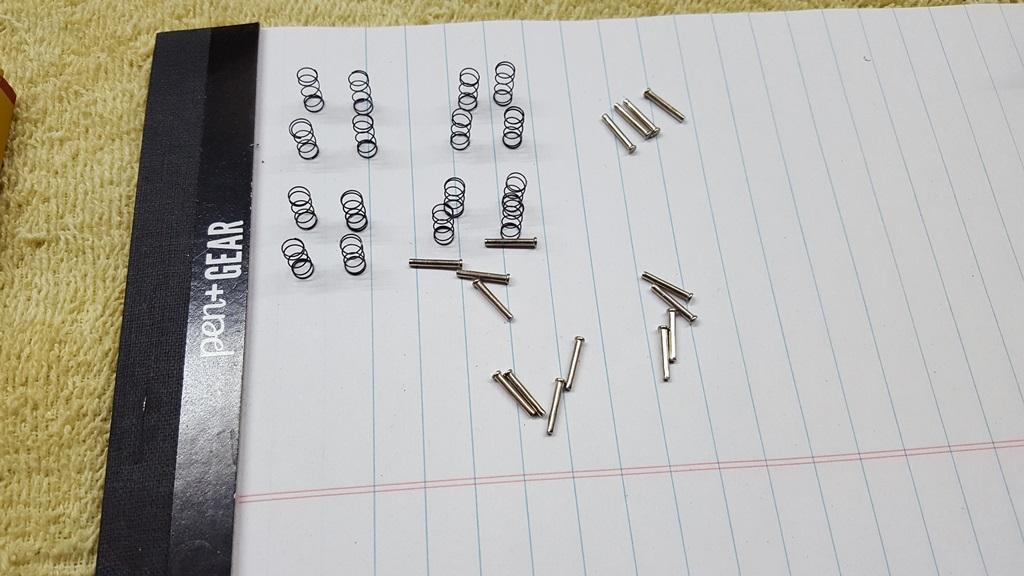
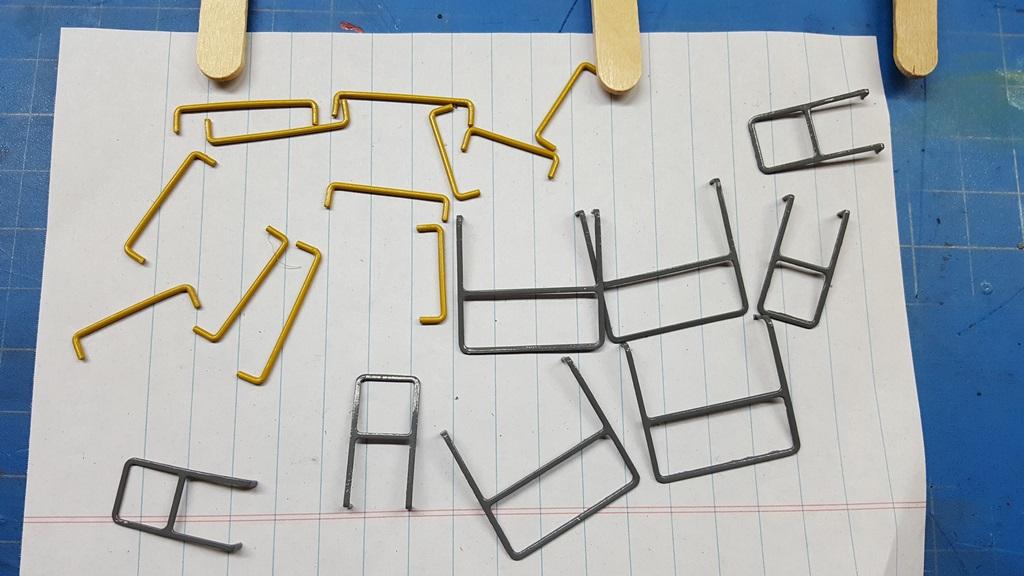
Small parts...
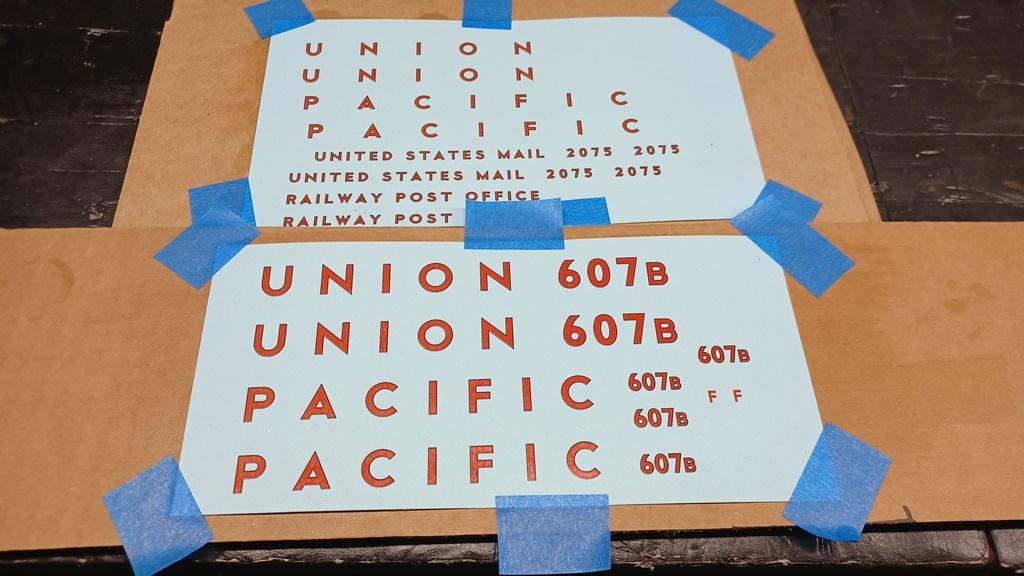
Last few rainy cold days we had I managed to get the decals made for both B Unit and RPO...
Picked up a USAT RPO in Pennsy paint. These things are getting tough to find and Ro says the 3 headend cars will not be made again so I'll strip and paint this one into Union Pacific colors.
Okay as here's something I don't really care for. That is Tru-Color's Harbor Mist Grey and UP Yellow are to "light" of hues compared to USAT colors. Next paint I'll try is Scalecoat II armour yellow and harbor mist grey.
Just ran across this video on You Tube about the 20 year old K-Line O Gauge 21" aluminum passenger cars. I heard a story years ago the Charles Ro never went to China to check on production. Basically all he did was walk over to say a Lionel Big Boy, pick it up and send it to Sanda Kan with the instructions "Make this for me (USA Trains) in 1:29 scale and send me the bill. I highly doubt that but you never know and it makes for a good story.
Anyway I've always that the USAT streamliners were copied from the K-Line cars. Seeing they were built in the same factory I wouldn't be surprised.
This video shows what I mean. There is some differences such as details but have to remember that the o gauge market is something like $100 million a year.
The observation car I had was the new flat blunt end style that Ro makes these days. I bought a new one but really didn't like it. I have been watching the various auction sites, dealer sites, online g scale markets etc. for a few years and the original rounded boat tail car never shows up.
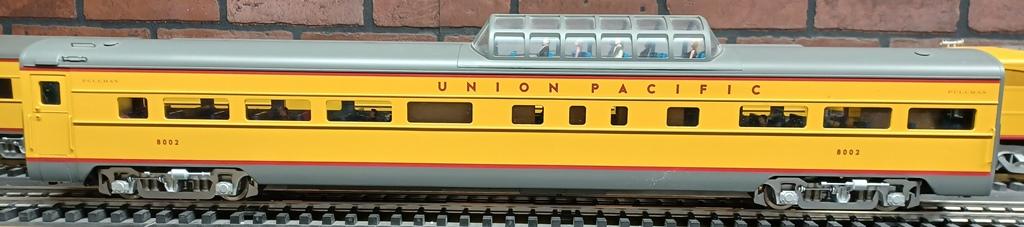
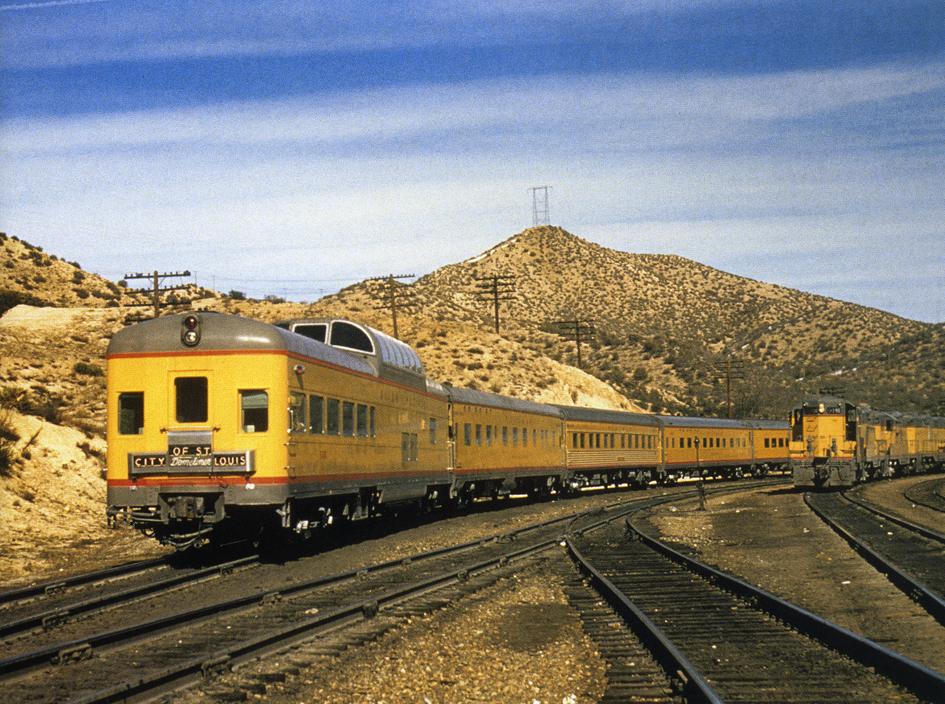
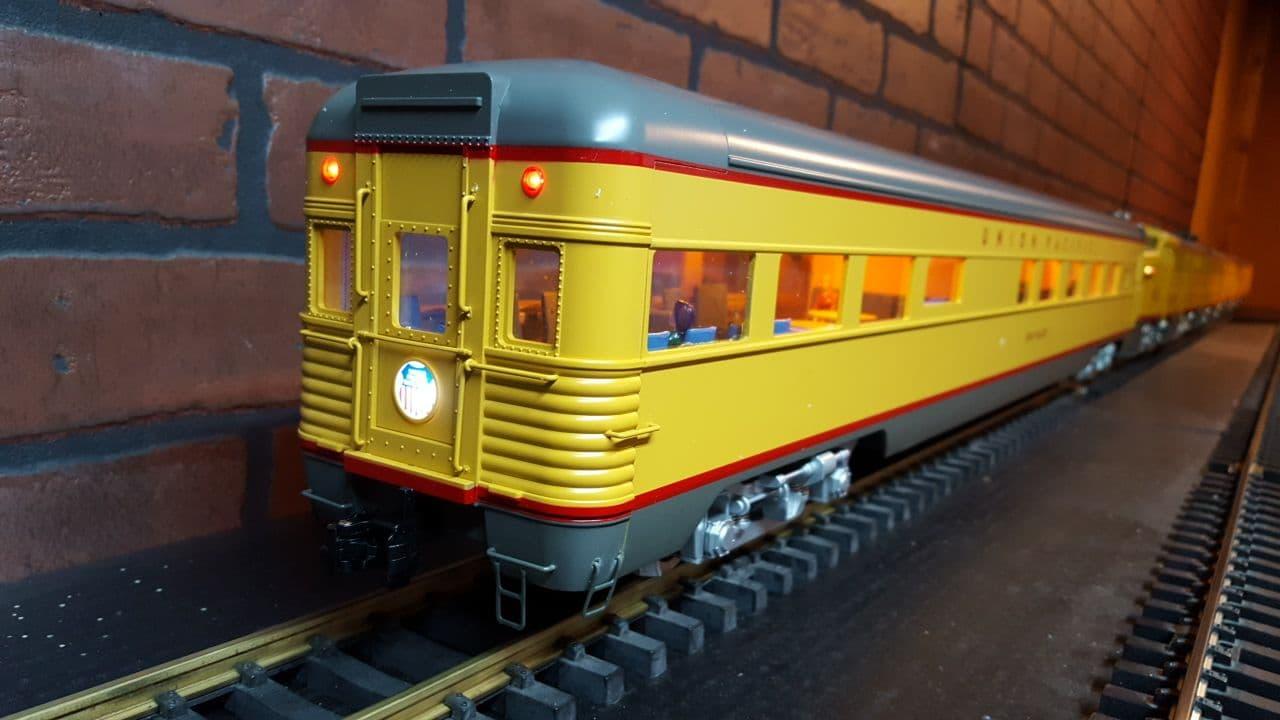
The UP did have some but they also had domes. They called them domeliners and were on mainly the higher end City Of trains. Like this one, the City of Saint Louis. I do like it but I don't really at this time feel like cutting a hole in one of these aluminum cars for a dome...maybe in a year or so.
Here's the USAT flat end car I had. I question what's with the ribs when the car is a smoothside?
I came across the boat tail end car and bought it. Sold off the flat end version.
Upon inspection of my "new" old car I recognized that this was the very same car that I owned years ago and sold! Could tell by the way I mounted the Kadee coupler on the end and the extra passengers that I installed.
I converted lighting over to the USAT Led board and changed the 4 lights on rear of car to Led's. That being red rear light, drumhead and 2 side markers.
Much better and much more elegant way to end a streamliner!
Oh also had to replace the diaphragm as old one was falling apart. Changing those on the vestibule end is a project within itself. Next one I change I'll take pictures and post a how to article as after changing quite a few think I found out the "easiest" method.
Also have replacement steps on the rear of car as mine are broken. I received silver ones so have to repaint them tomorrow.
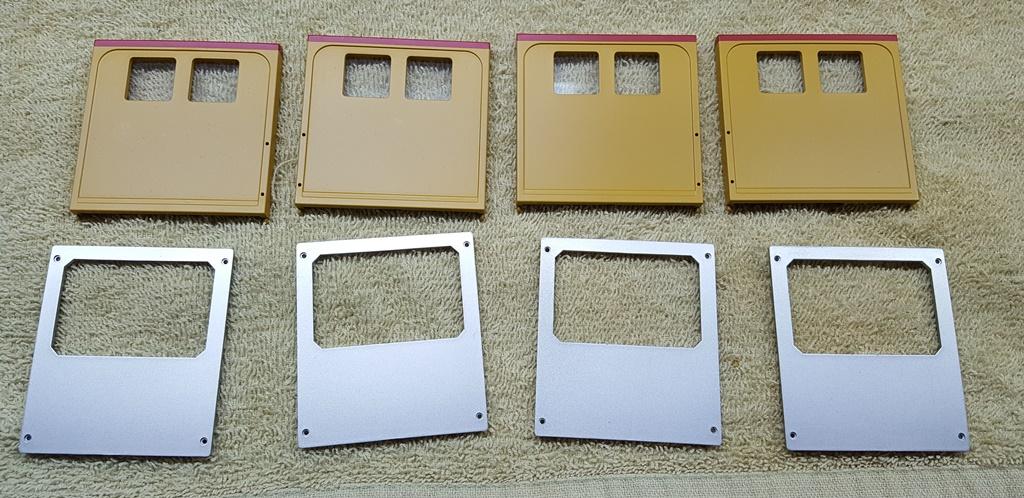
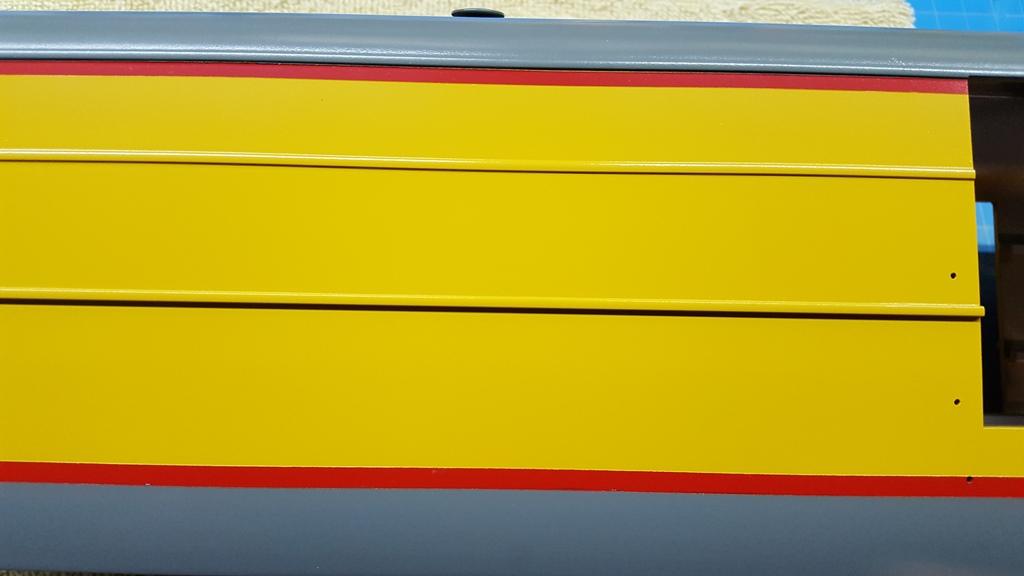
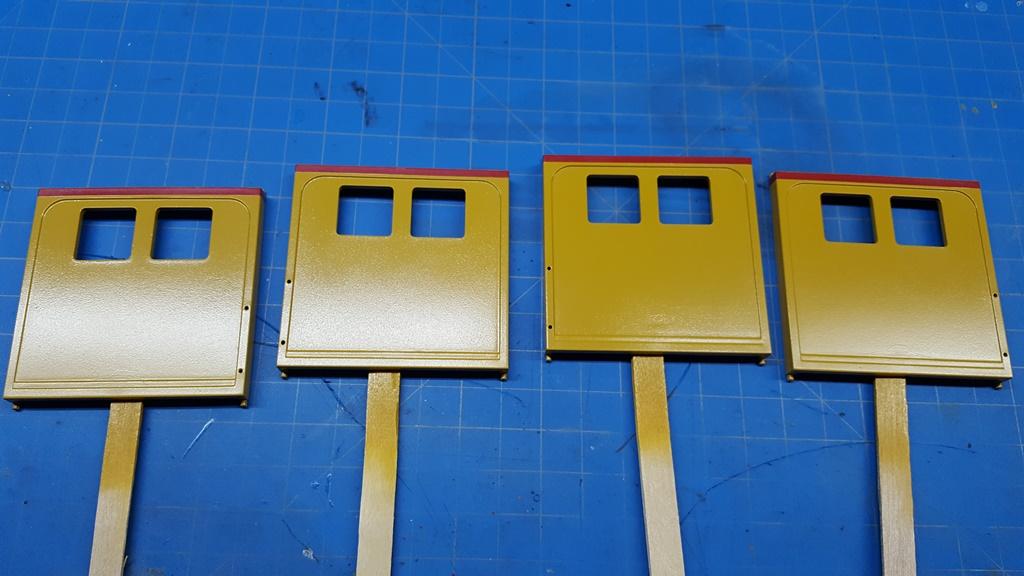
Well I clear coated the car doors and installed the clear windows.
Hot soldering iron to melt the windows to doors. I use a Hakko set at 750 deg. with the standard chisel tip.
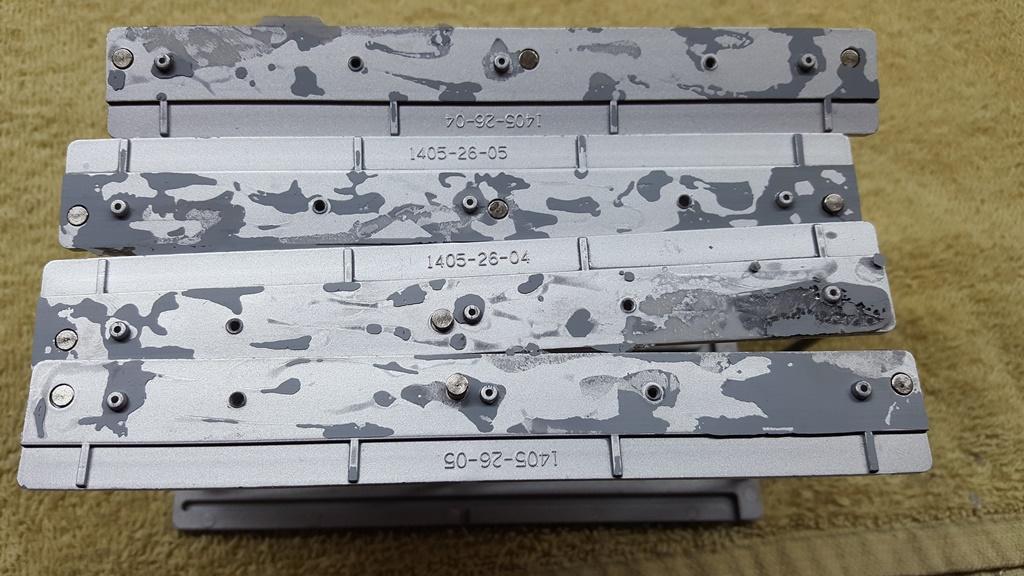
If wondering here's how USA makes the doors operate. They slide just like doors on the RPO and combine.
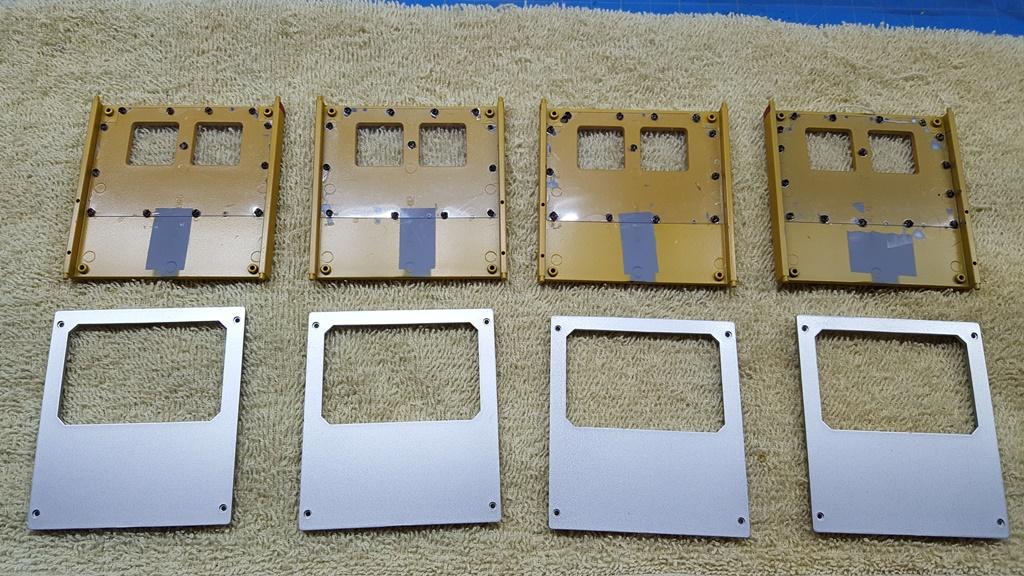
Here's the parts...Just springs and pins. This is for all 4 doors.
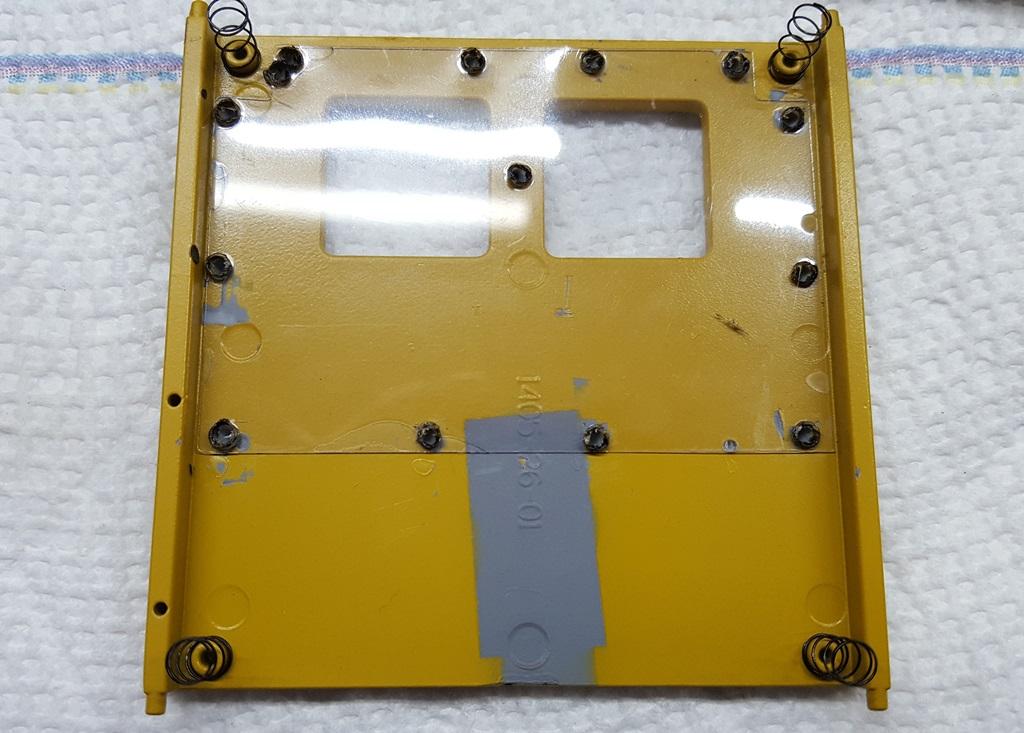
Springs set on door.
Just set the backside on and depress. Hold down with one hand and press the pins in. They're a snug fit but I can push them "home" with a thumbnail...just don't slip as that's an "ouch" moment. Hmm...something like a thimble would have been nice but I don't have one.
Assembled door. Simple design.
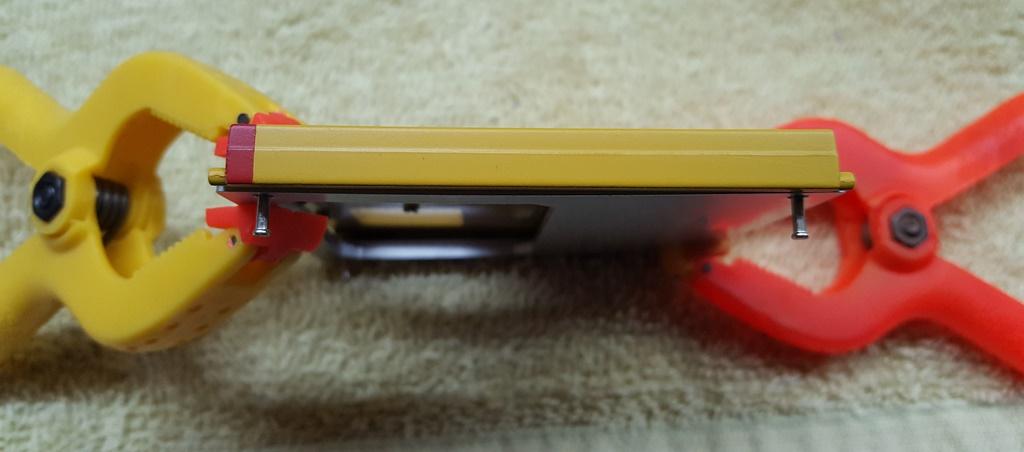
Compressed door...That's what happens when they're pushed in to slide.
Door tracks.
Here's the bottoms of them and what a mess. They were screwed and glued mainly because the small screws they used stripped out. The assembly lines don't shut down when something like that happens..."they just fix it" and move on.
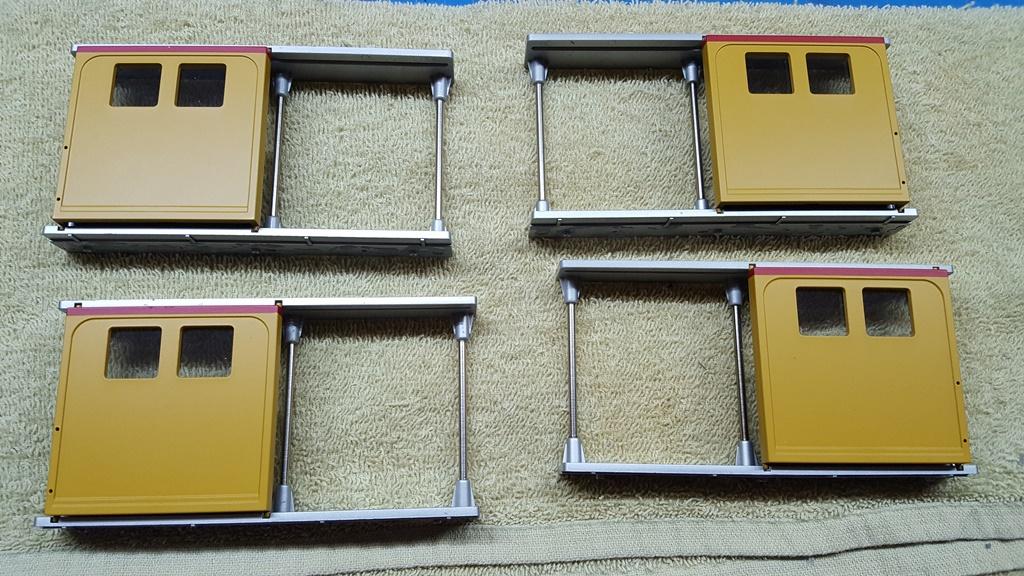
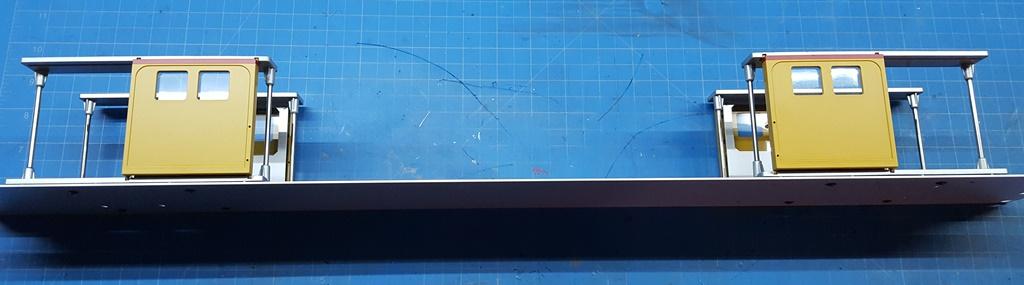
Doors and track installed. This one is in the open position. They're easy to install into tracks as just pull top piece up a bit and insert door then push top down. You have to think it thru a bit as doors slide to towards the ends. Also leave grabrails off the doors as they interfere with sliding the car floor back into shell. And remove before sliding floor out.
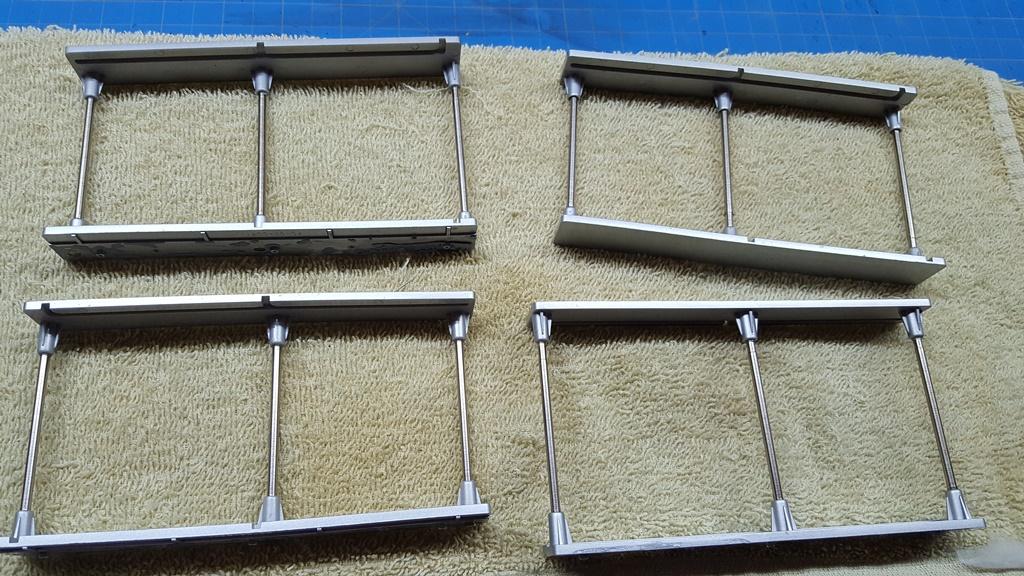
All 4 assembled...
Mounted on floor...
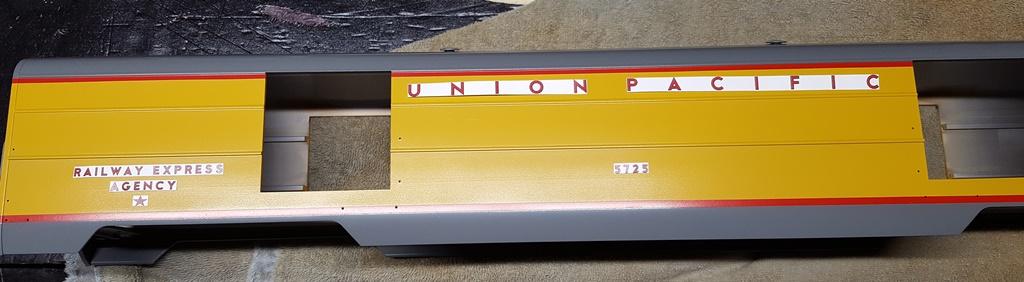
That's as far as I can go until my decal paper arrives so I made the artwork using Microsoft Word.
Here's a proof test that I settled on. These are just printed on paper.
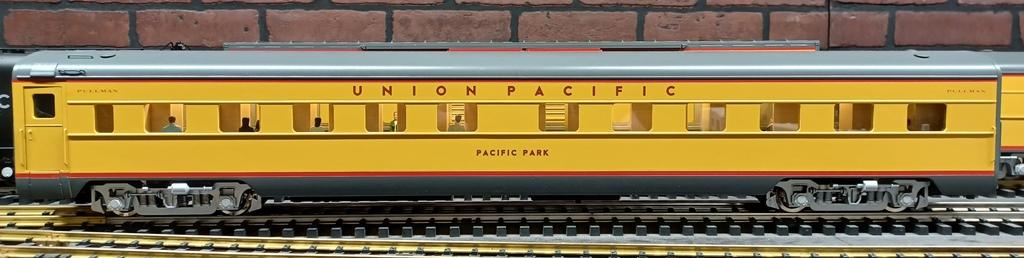
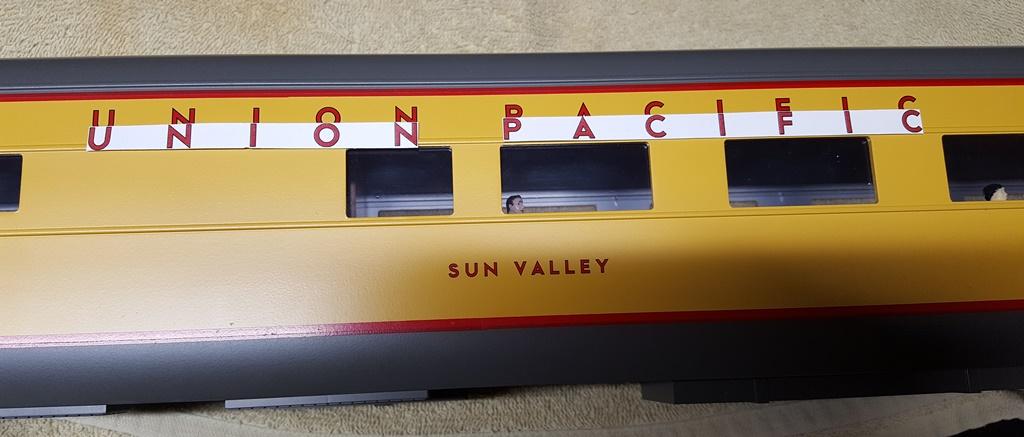
Letterboard compared to USA's version on a observation car. Red with black outline. Font style is City Of and I found it online for free. The Union Pacific lettering isn't a real font...or it wasn't back then. It was more of the sign painters artistic abilities along with some geometry. For the rest of the lettering I just used same size font as seen here with Sun Valley.
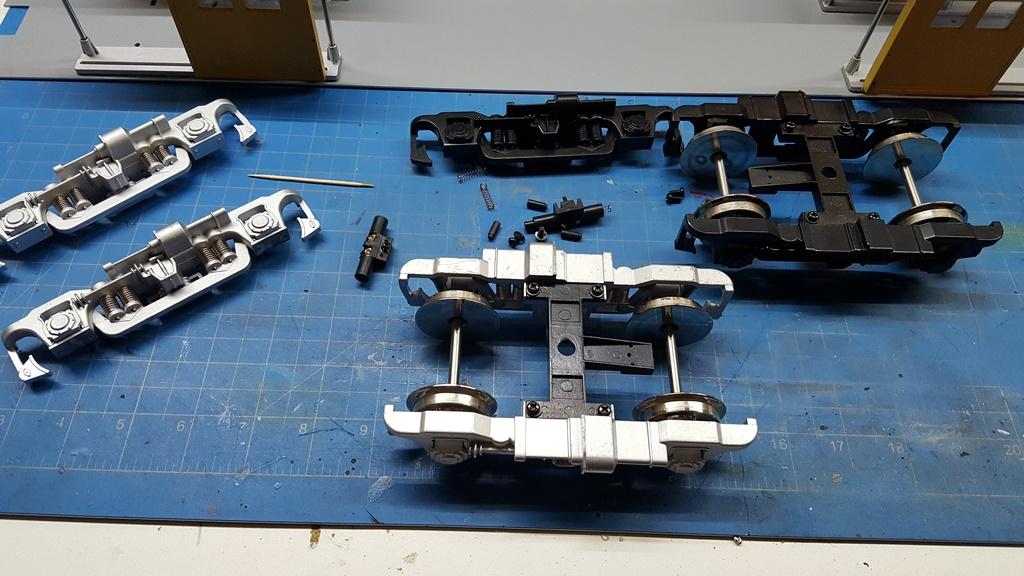
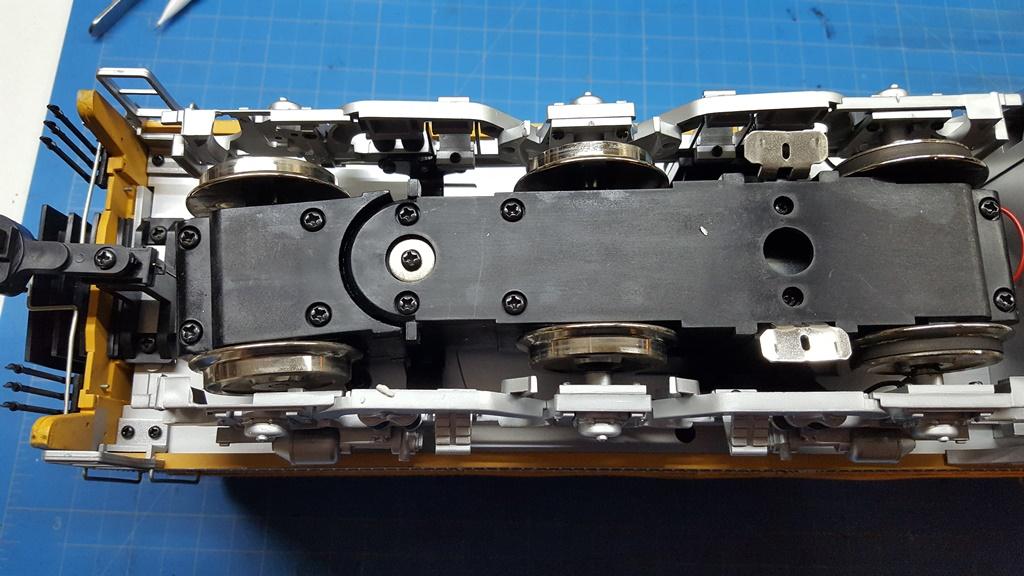
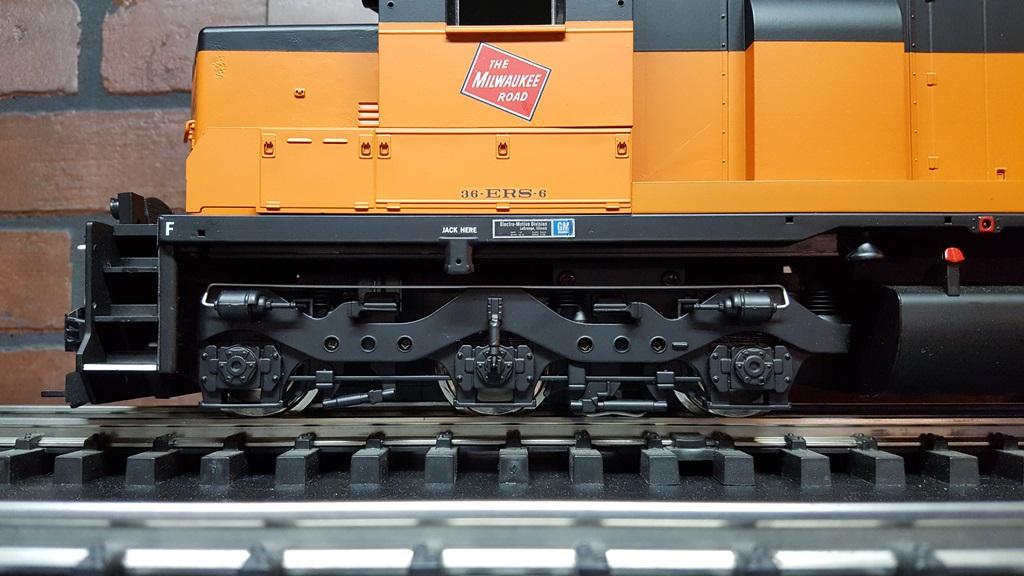
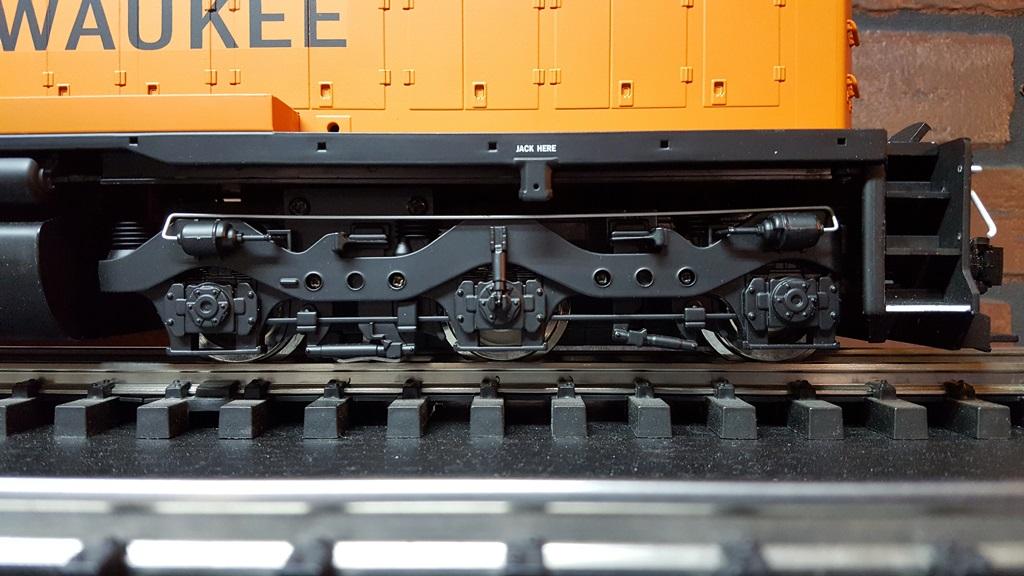
Oh the trucks were black and the UP uses silver. I had 3 used silver frames in stock so I painted 1 black frame silver. Also had extra shiny springs so just swapped parts around.
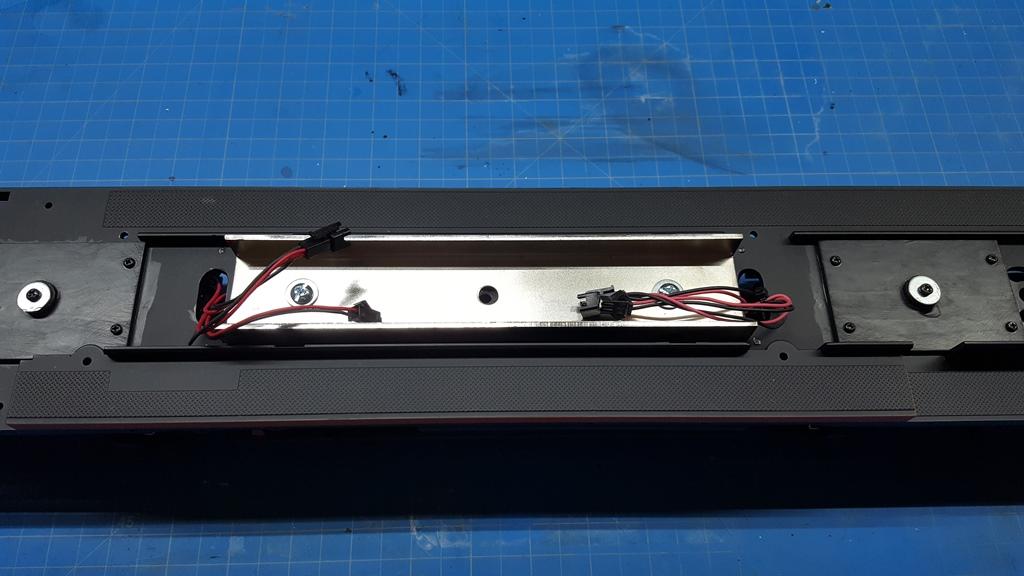
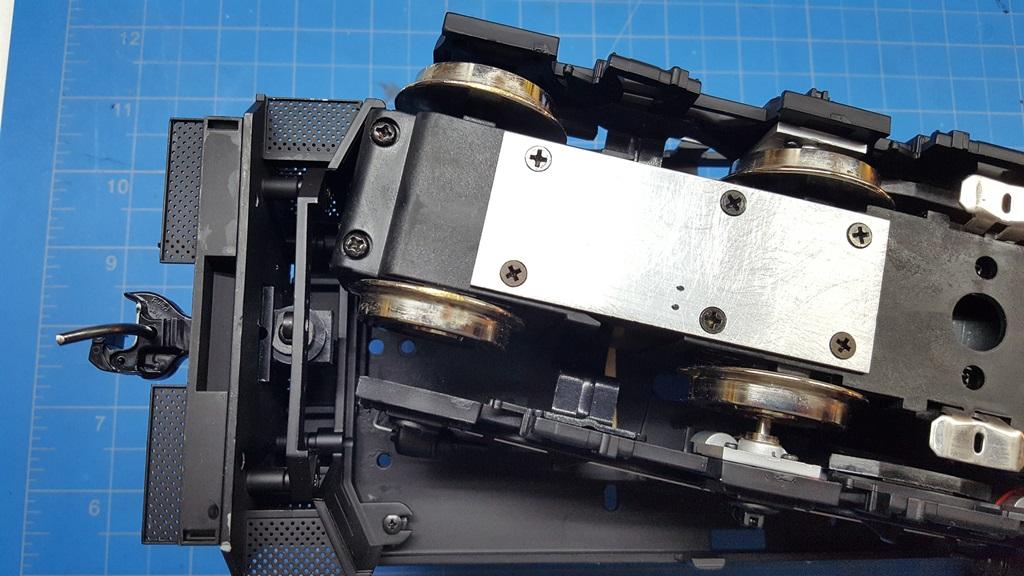
So I decided to close the "gap" between bottom of chassis and top of truck...and/ or to hide the wiring.
I just sorta mimicked the frame rails?? that USA uses on the SD40-2 chassis...as to me the USA Trains engines "look right"
Aristo-Craft had a very annoying habit of making freight cars, passenger cars and engines sit way too high. The Dash-9's had at least a 1/4" gap between motor truck top and chassis bottom. The streamlined passenger cars have plenty of articles published over the years to lower them. Some of the freight cars were so bad that Aristo used to offer a lowered floor for the 40' boxcars, reefers etc.
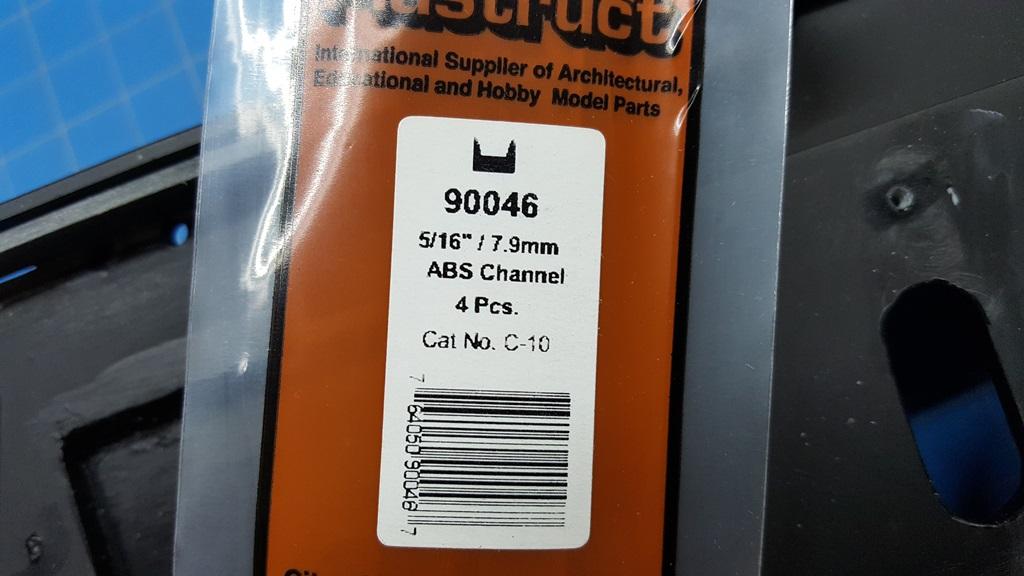
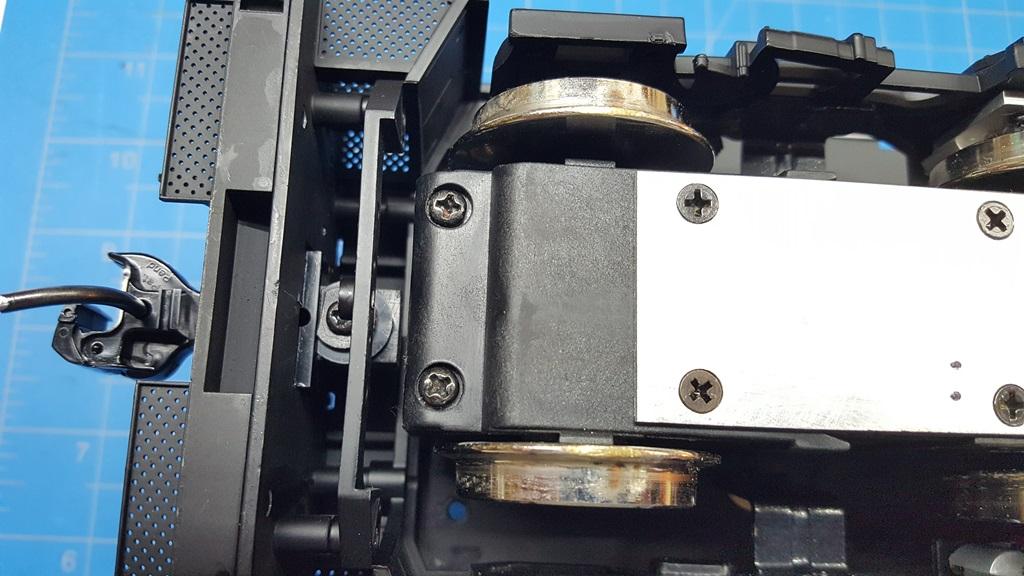
Anyway here's what I used. Plastruct 90046 5/16" channel iron so maybe it'll look like some frame rail? I also opted to use a channel type so had a wider base to glue to chassis...make it more of a stable mod than just a piece of styrene sheet glued on.
Here's one being glued...
Here's compared to what USA did...
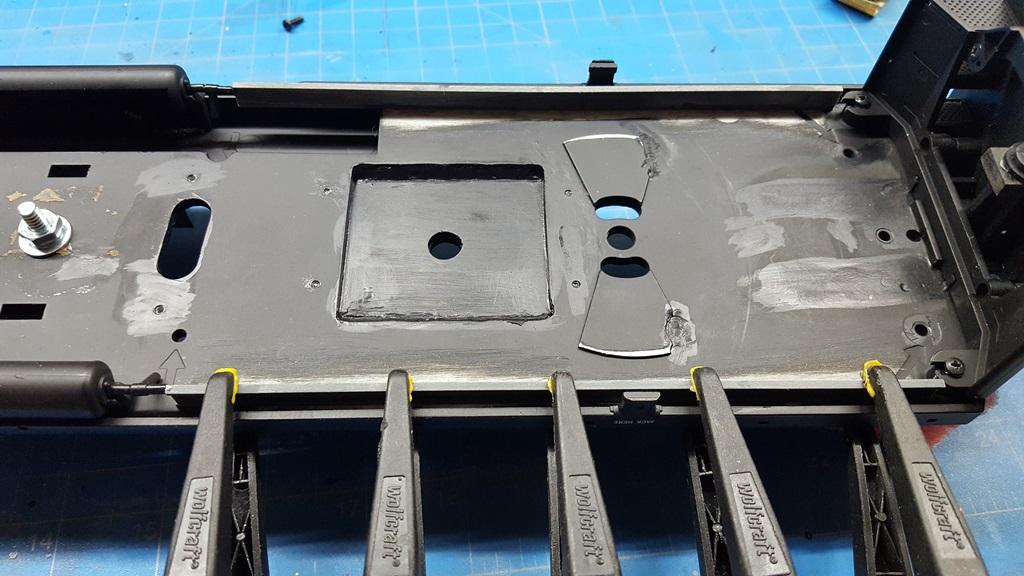
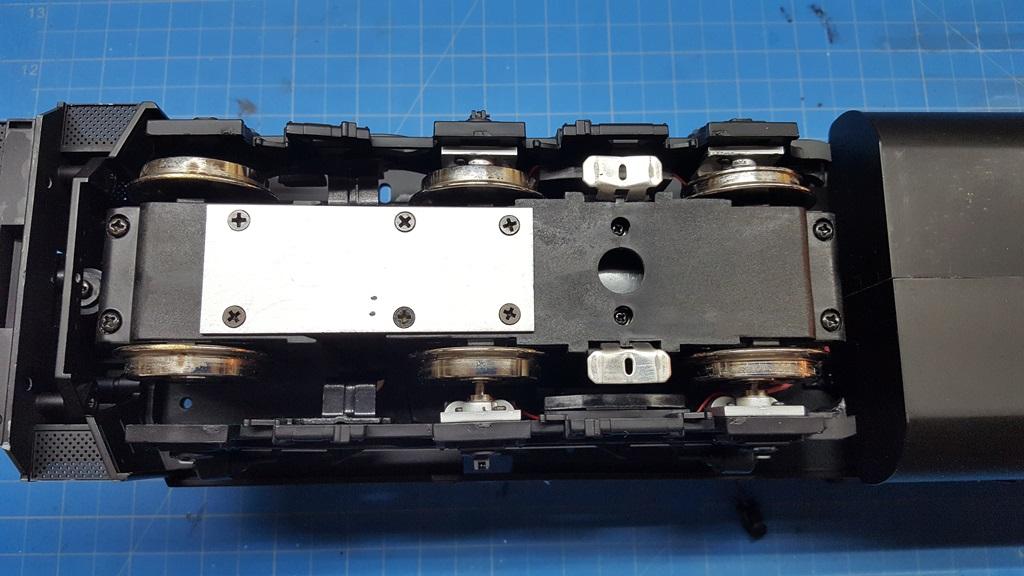
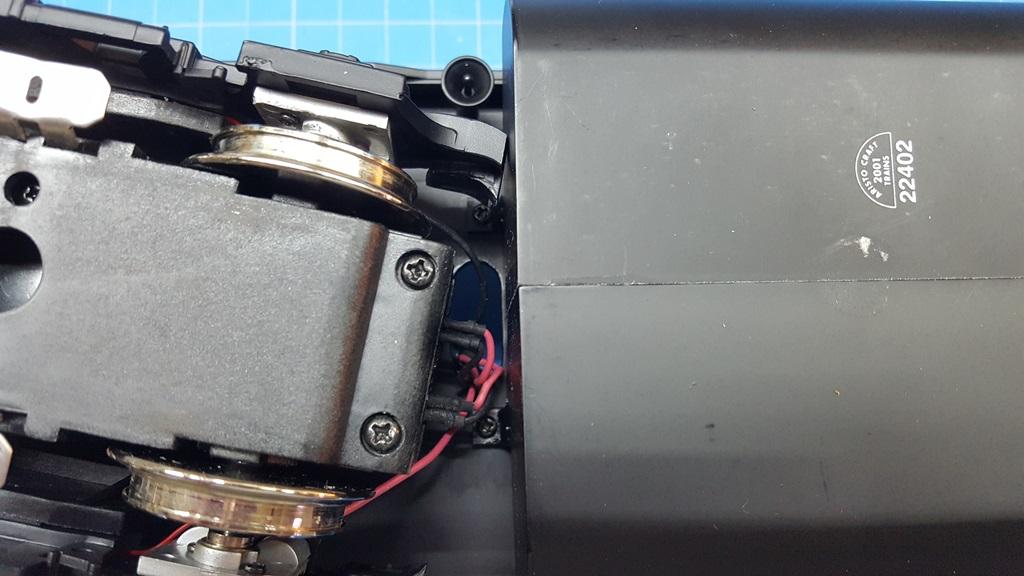
Here I cut down and mounted the Aristo steel channel that goes on the inside of chassis. I decided to shorten it compared to leaving long and then having to modify by cutting new holes, shimming to fit over new bolsters, etc. Then the cab probably wouldn't fit over it being raised as interior would hit then have to notch it. I did feel the need to use it shortened as Aristo has no screws for chassis to shell in this area...more of Aristo cutting manufacturing corners.
It's bad enough that it was designed for the fuel tank to "snap" into place which to me is just crazy! I modified the fuel tank and now it uses 4 screws to fasten onto chassis.
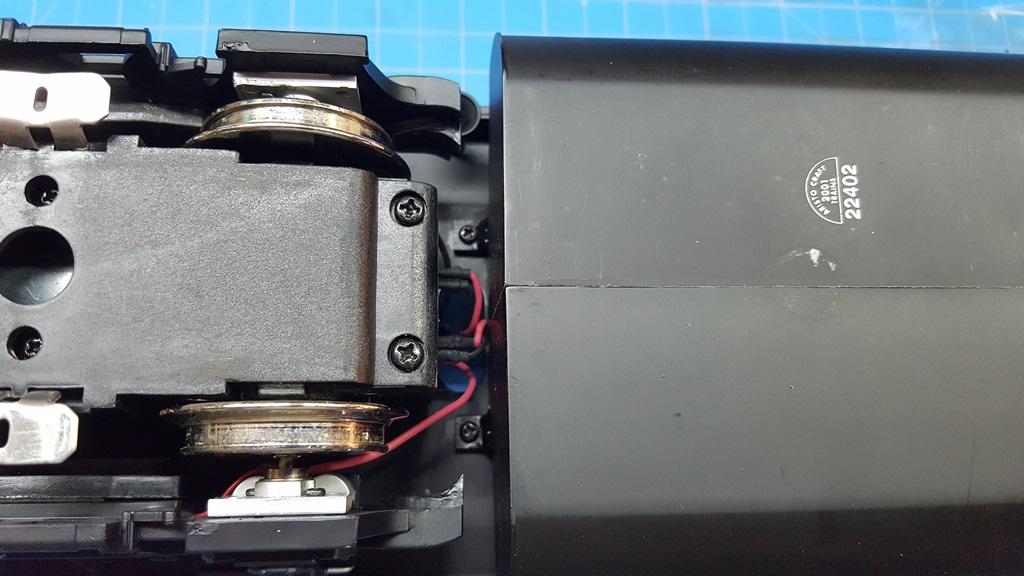
Here's the finished look after painting a bit with some flat black...I like it!
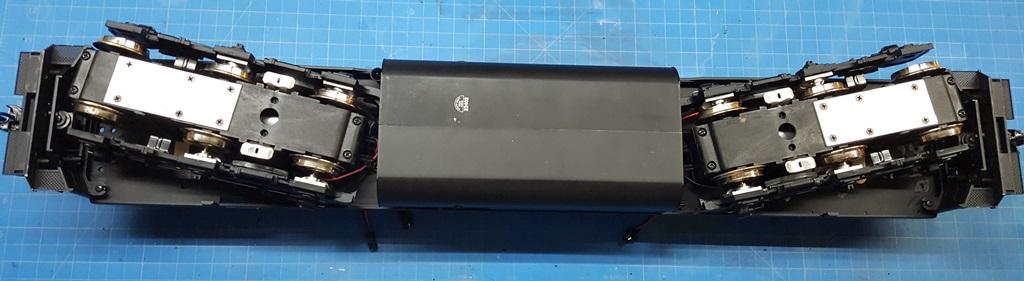
All that's left is to install a MTH DCS ProtoSounds 3 Upgrade kit

(149xauto-130).gif.067990352f01d5c948df18827a12623f.gif)
(149xauto-130).thumb.gif.e34a14c0b3a921d31a6330a26b1e278b.gif)


.png ":Slightly_Smiling_Face_Emoji(24x24):")
.png ":Clapping_Hands_Emoji_large(24x24):")


.png ":Thumbs_Up_Hand_Sign_Emoji_large(24x24):")


.png ":Heart_Eyes_Emoji_large(24x24):")

UP Passenger Train
in Chuck's Blog
A blog by Chuck in General
Posted
Just finished up painting and decaling a USA Trains 60' double door boxcar. The UP had like 100 of the 60' boxcars for passenger train Express Service. They also had 40' and 50' boxcars. All total something like 250 of them at one time in various paint schemes.
I was thinking about lettering it as car 9336 that was used up to a few years ago on the UP Steam trains as a tool car but they smashed it up and I don't plan on modelling the current era.