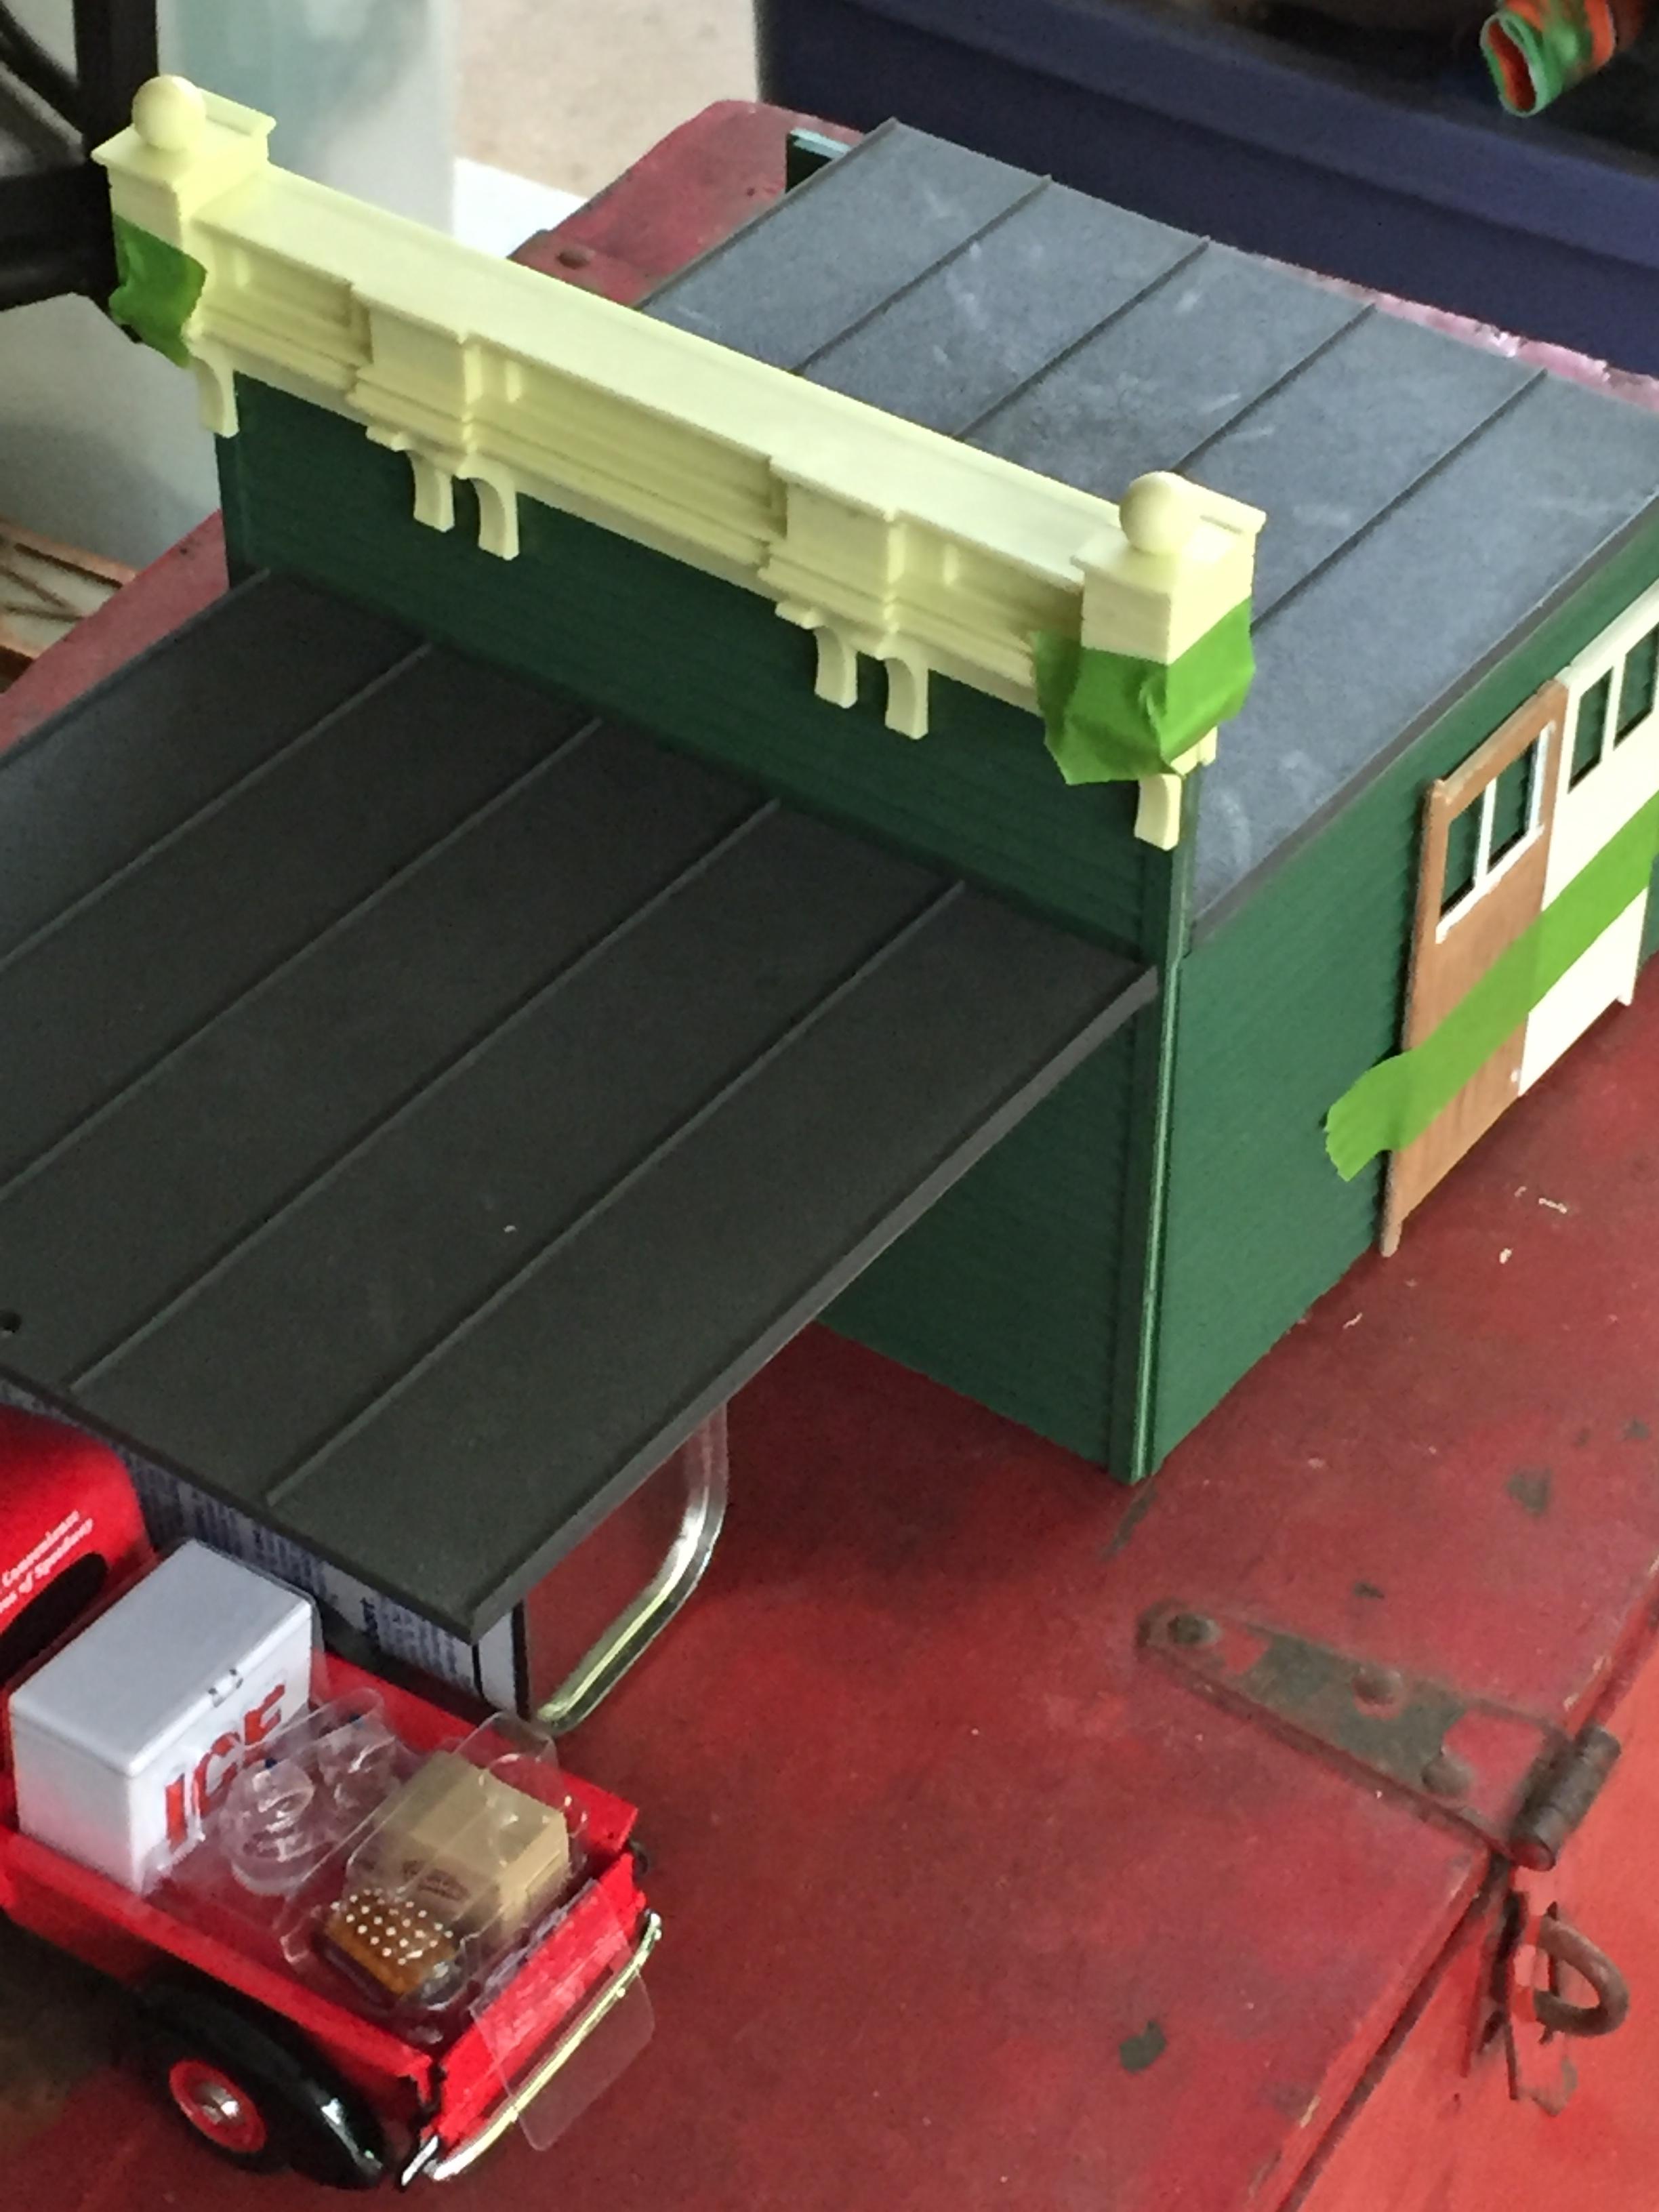
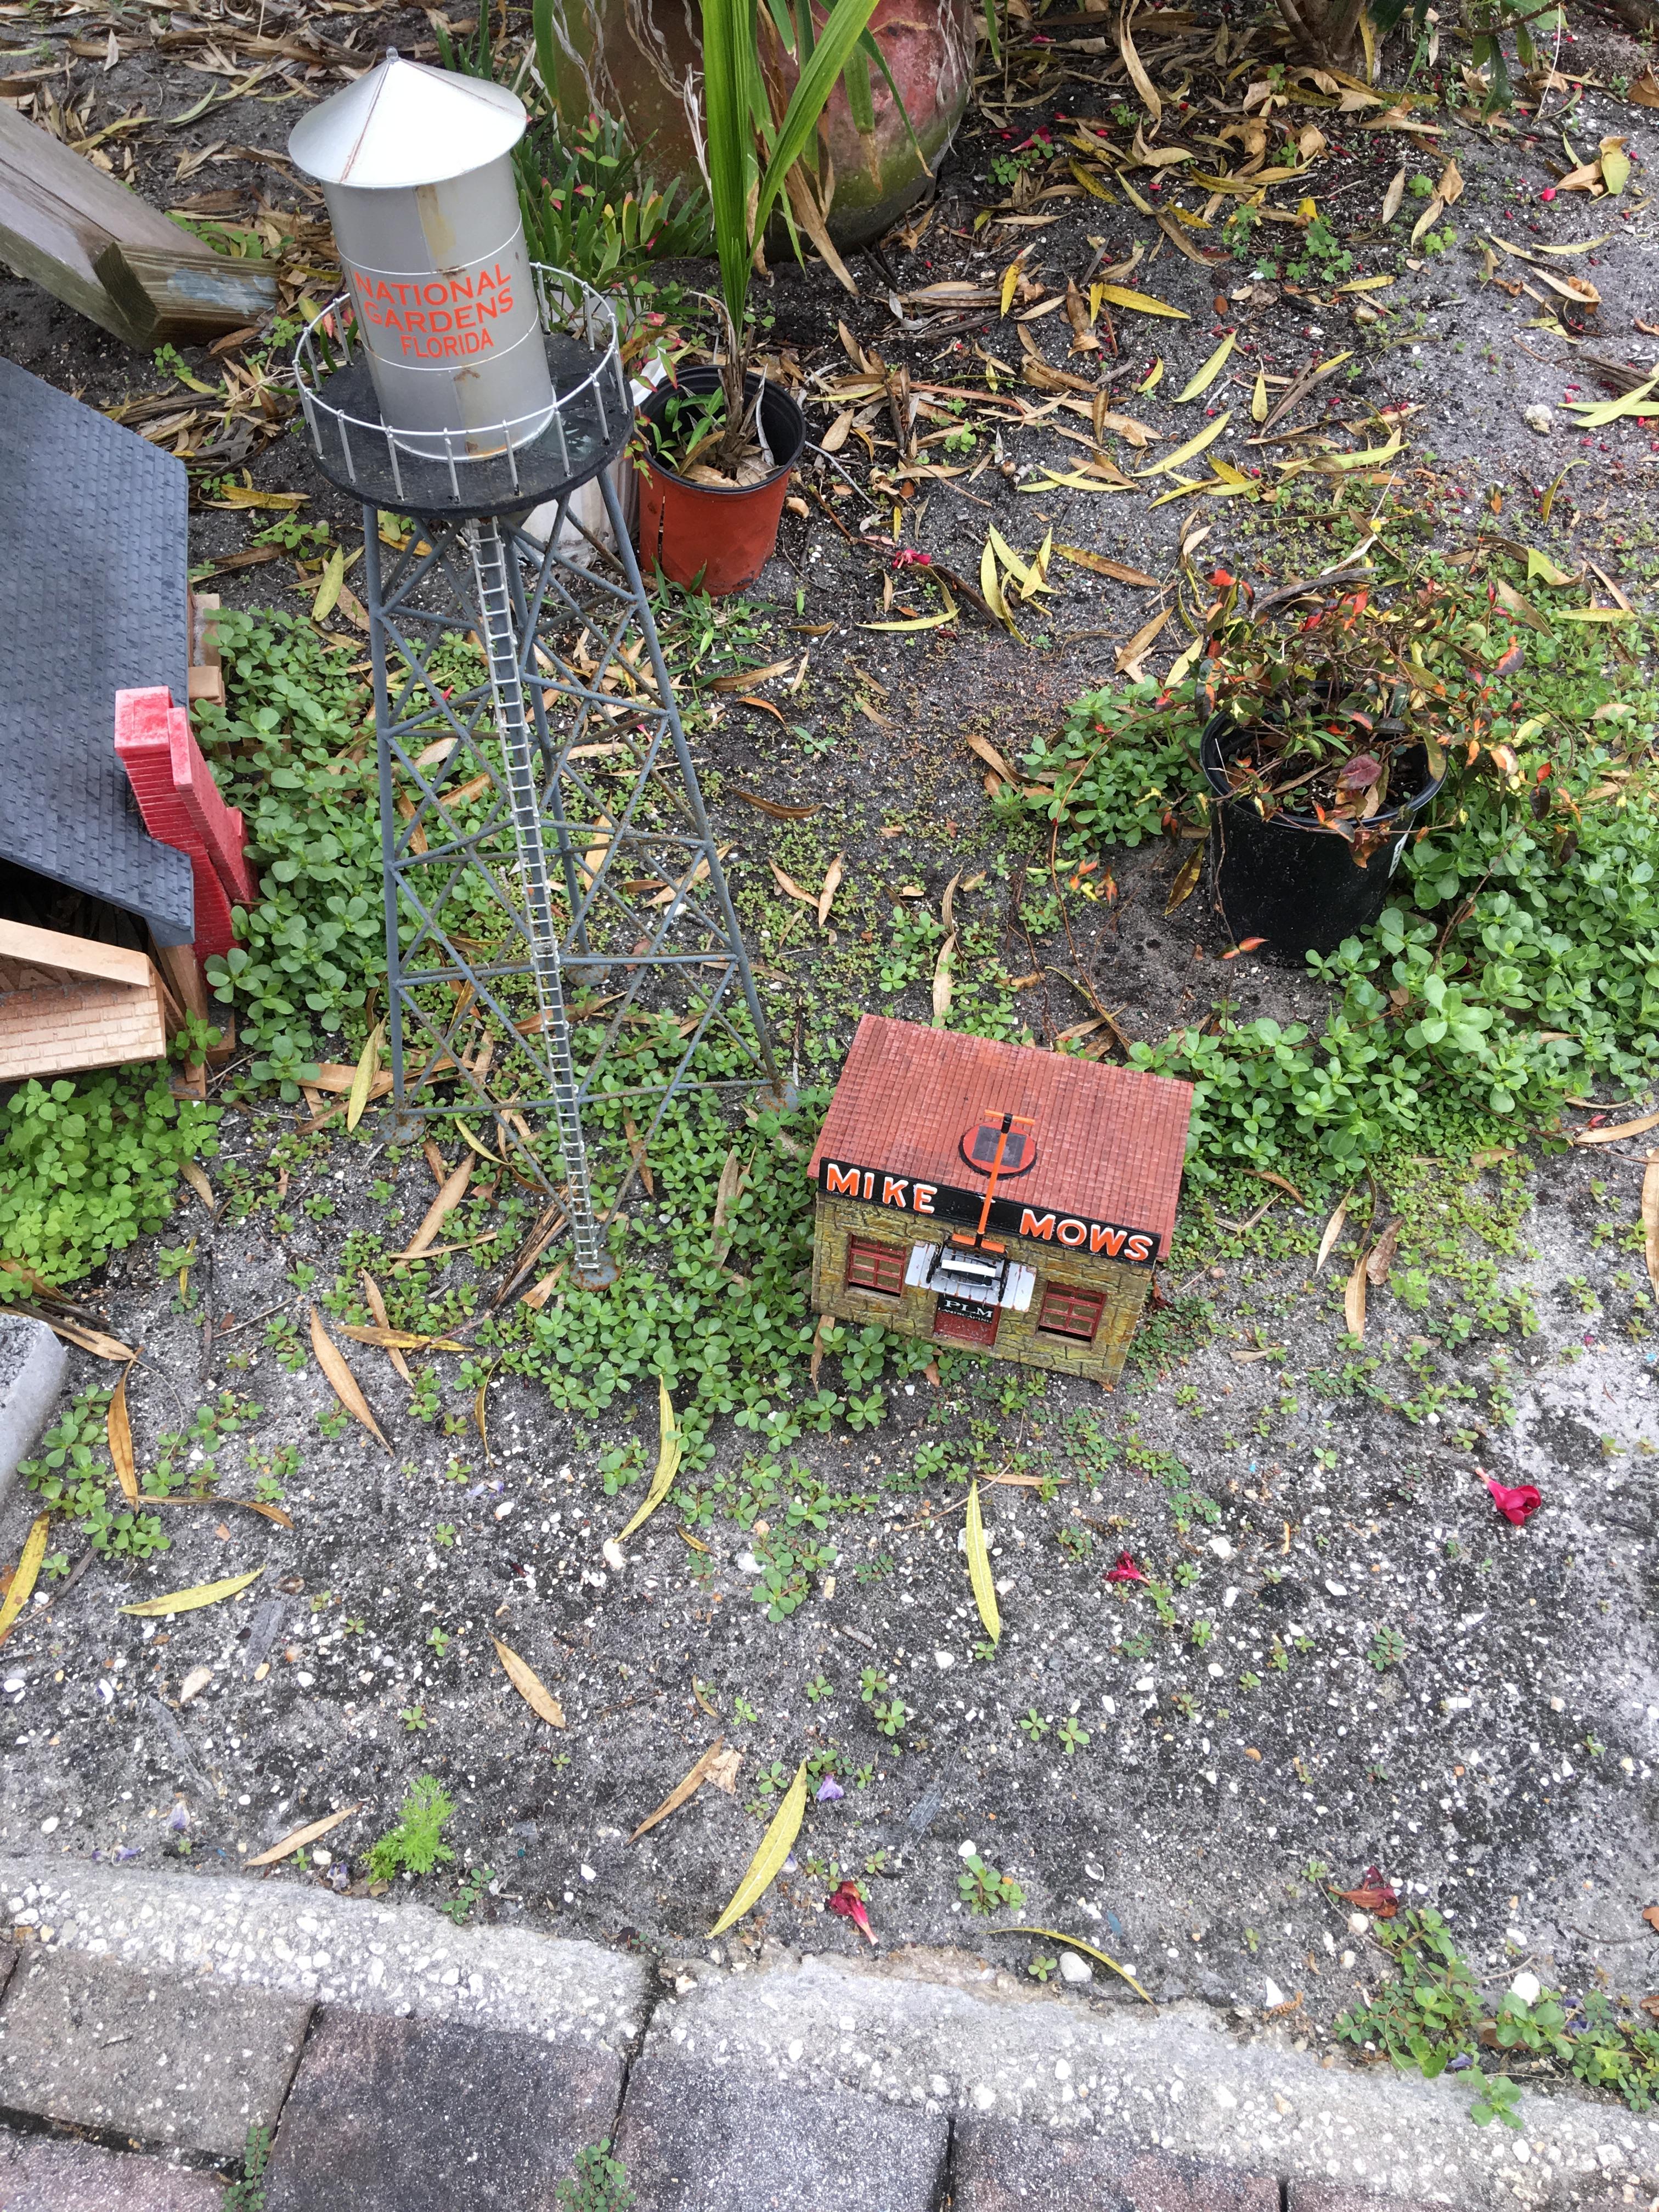
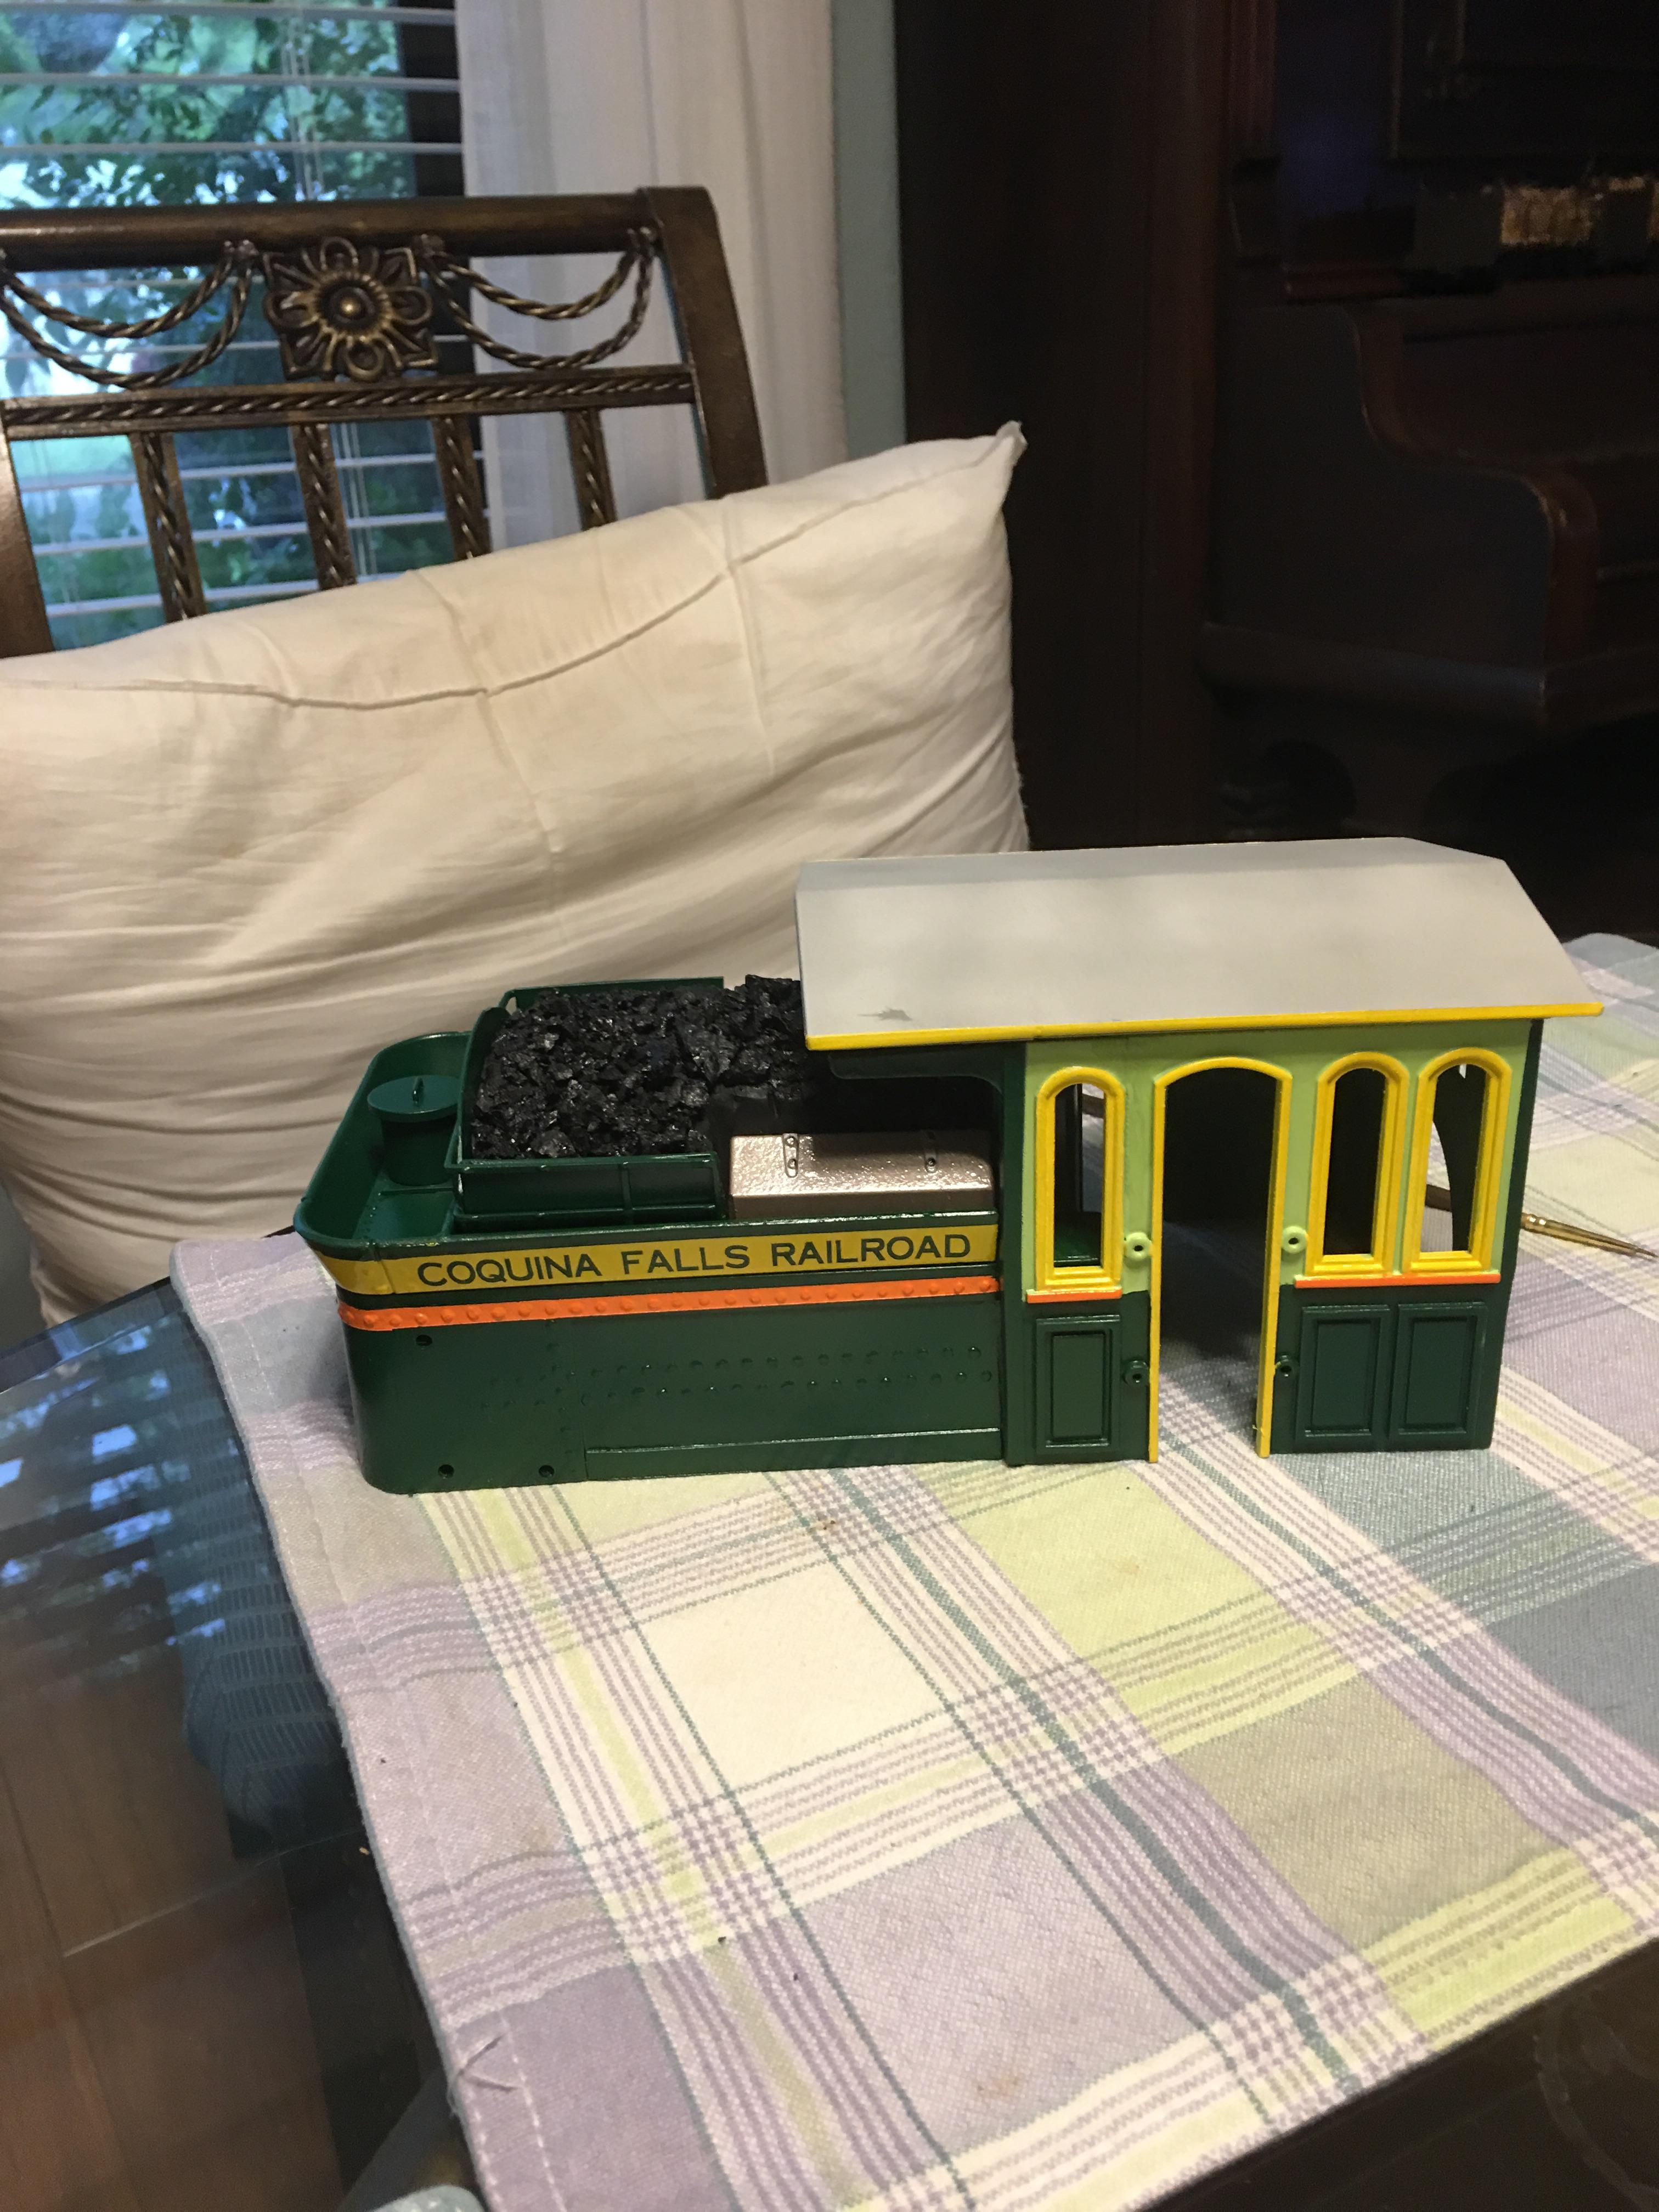
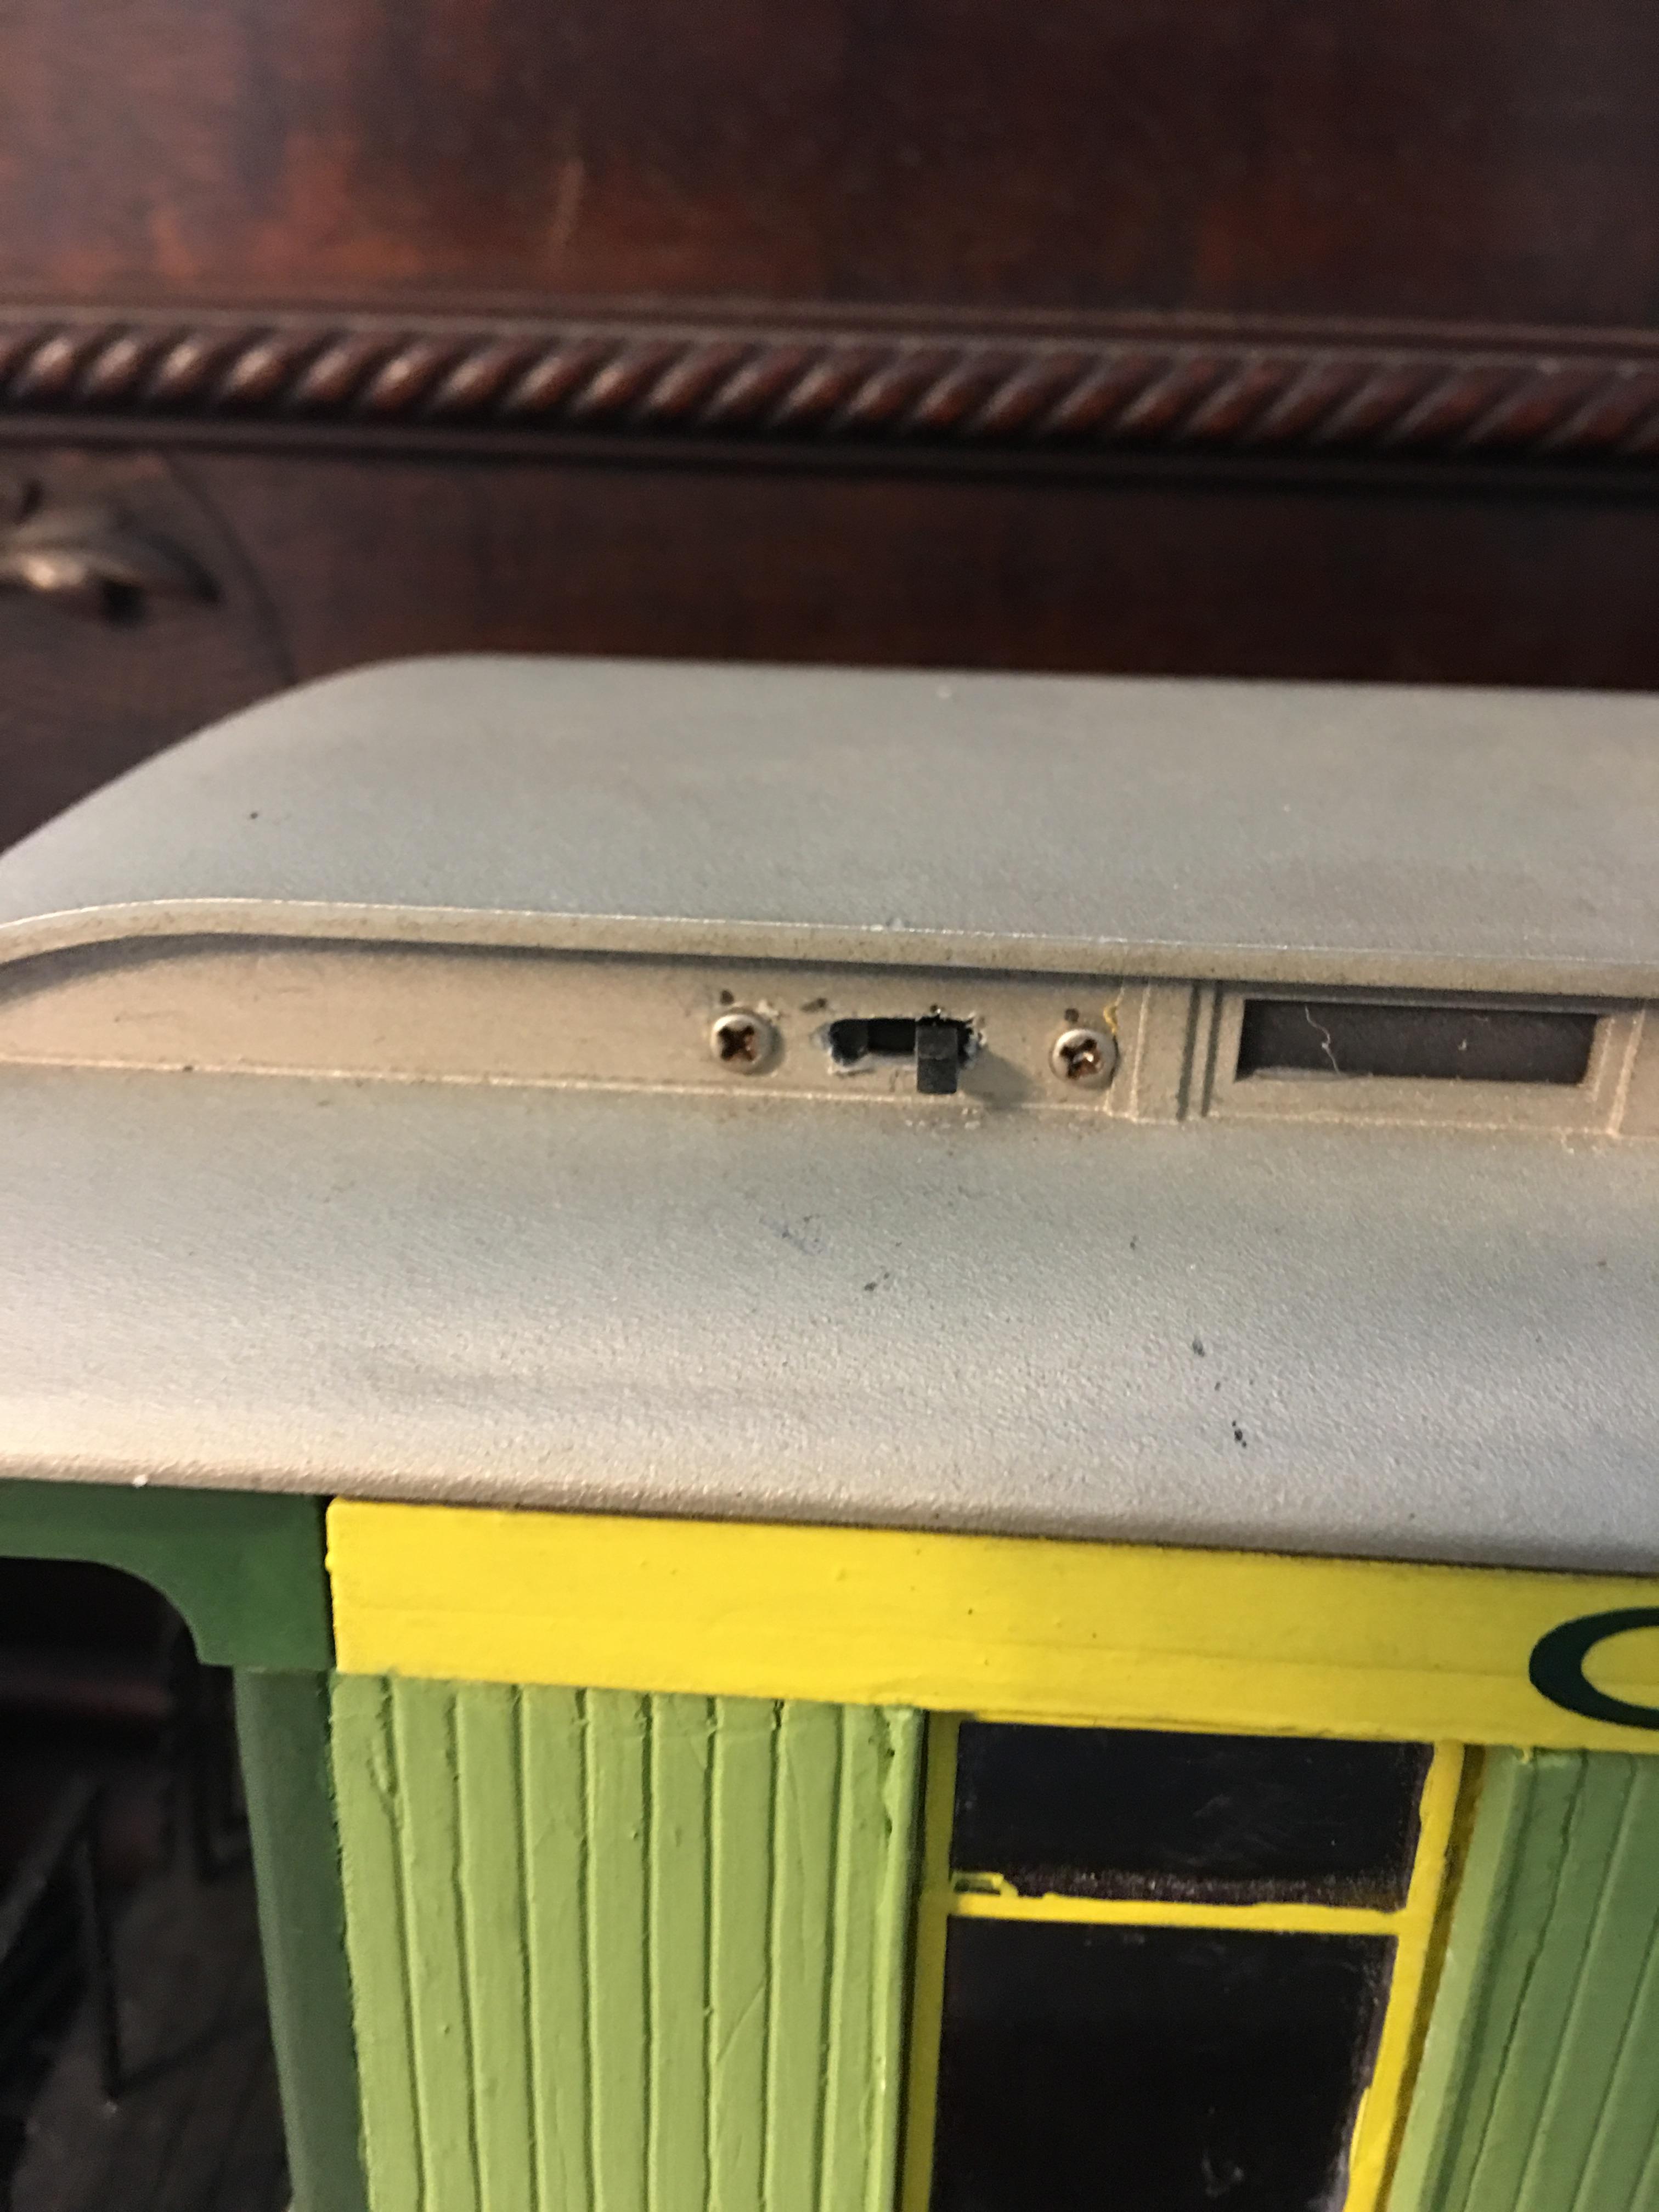
Well in order to finish Rosy's caboose I was missing ladders and roof cat walks, I found plastruct ladders on eBay @ $10.95 + 4.95 shipping but luckily I found a Bachmann caboose less chassis for $ 10.50 with free shipping plus it had the cat walks and ladders, win-win. Caboose finished and off to new project, what to do with my new caboose shell. Decided on a yard office, painted it a dark gray primer with white trim, new roof out of evergreen, and base from old Pola bridge footing. Labeled it using silhouette and putting them on old Pola plates designed for stickers. Being as there were 2 doors 1 at each end I decided that one end would be yard office and the other MOW office, added radio antenna to end where I forgot to putty ladder holes, other end will get something but not sure at this time, and I still have a caboose cupola left, another project yet to come, maybe a drover caboose on a Kalamazoo combine. Bill
Looking tor this to kit bash, the body of a 2-4-2 rogers , doesn't need any motors or running gear, just body and cab, give me a shout if you have old parts, Bill.. billbarnwell09@gmail.com
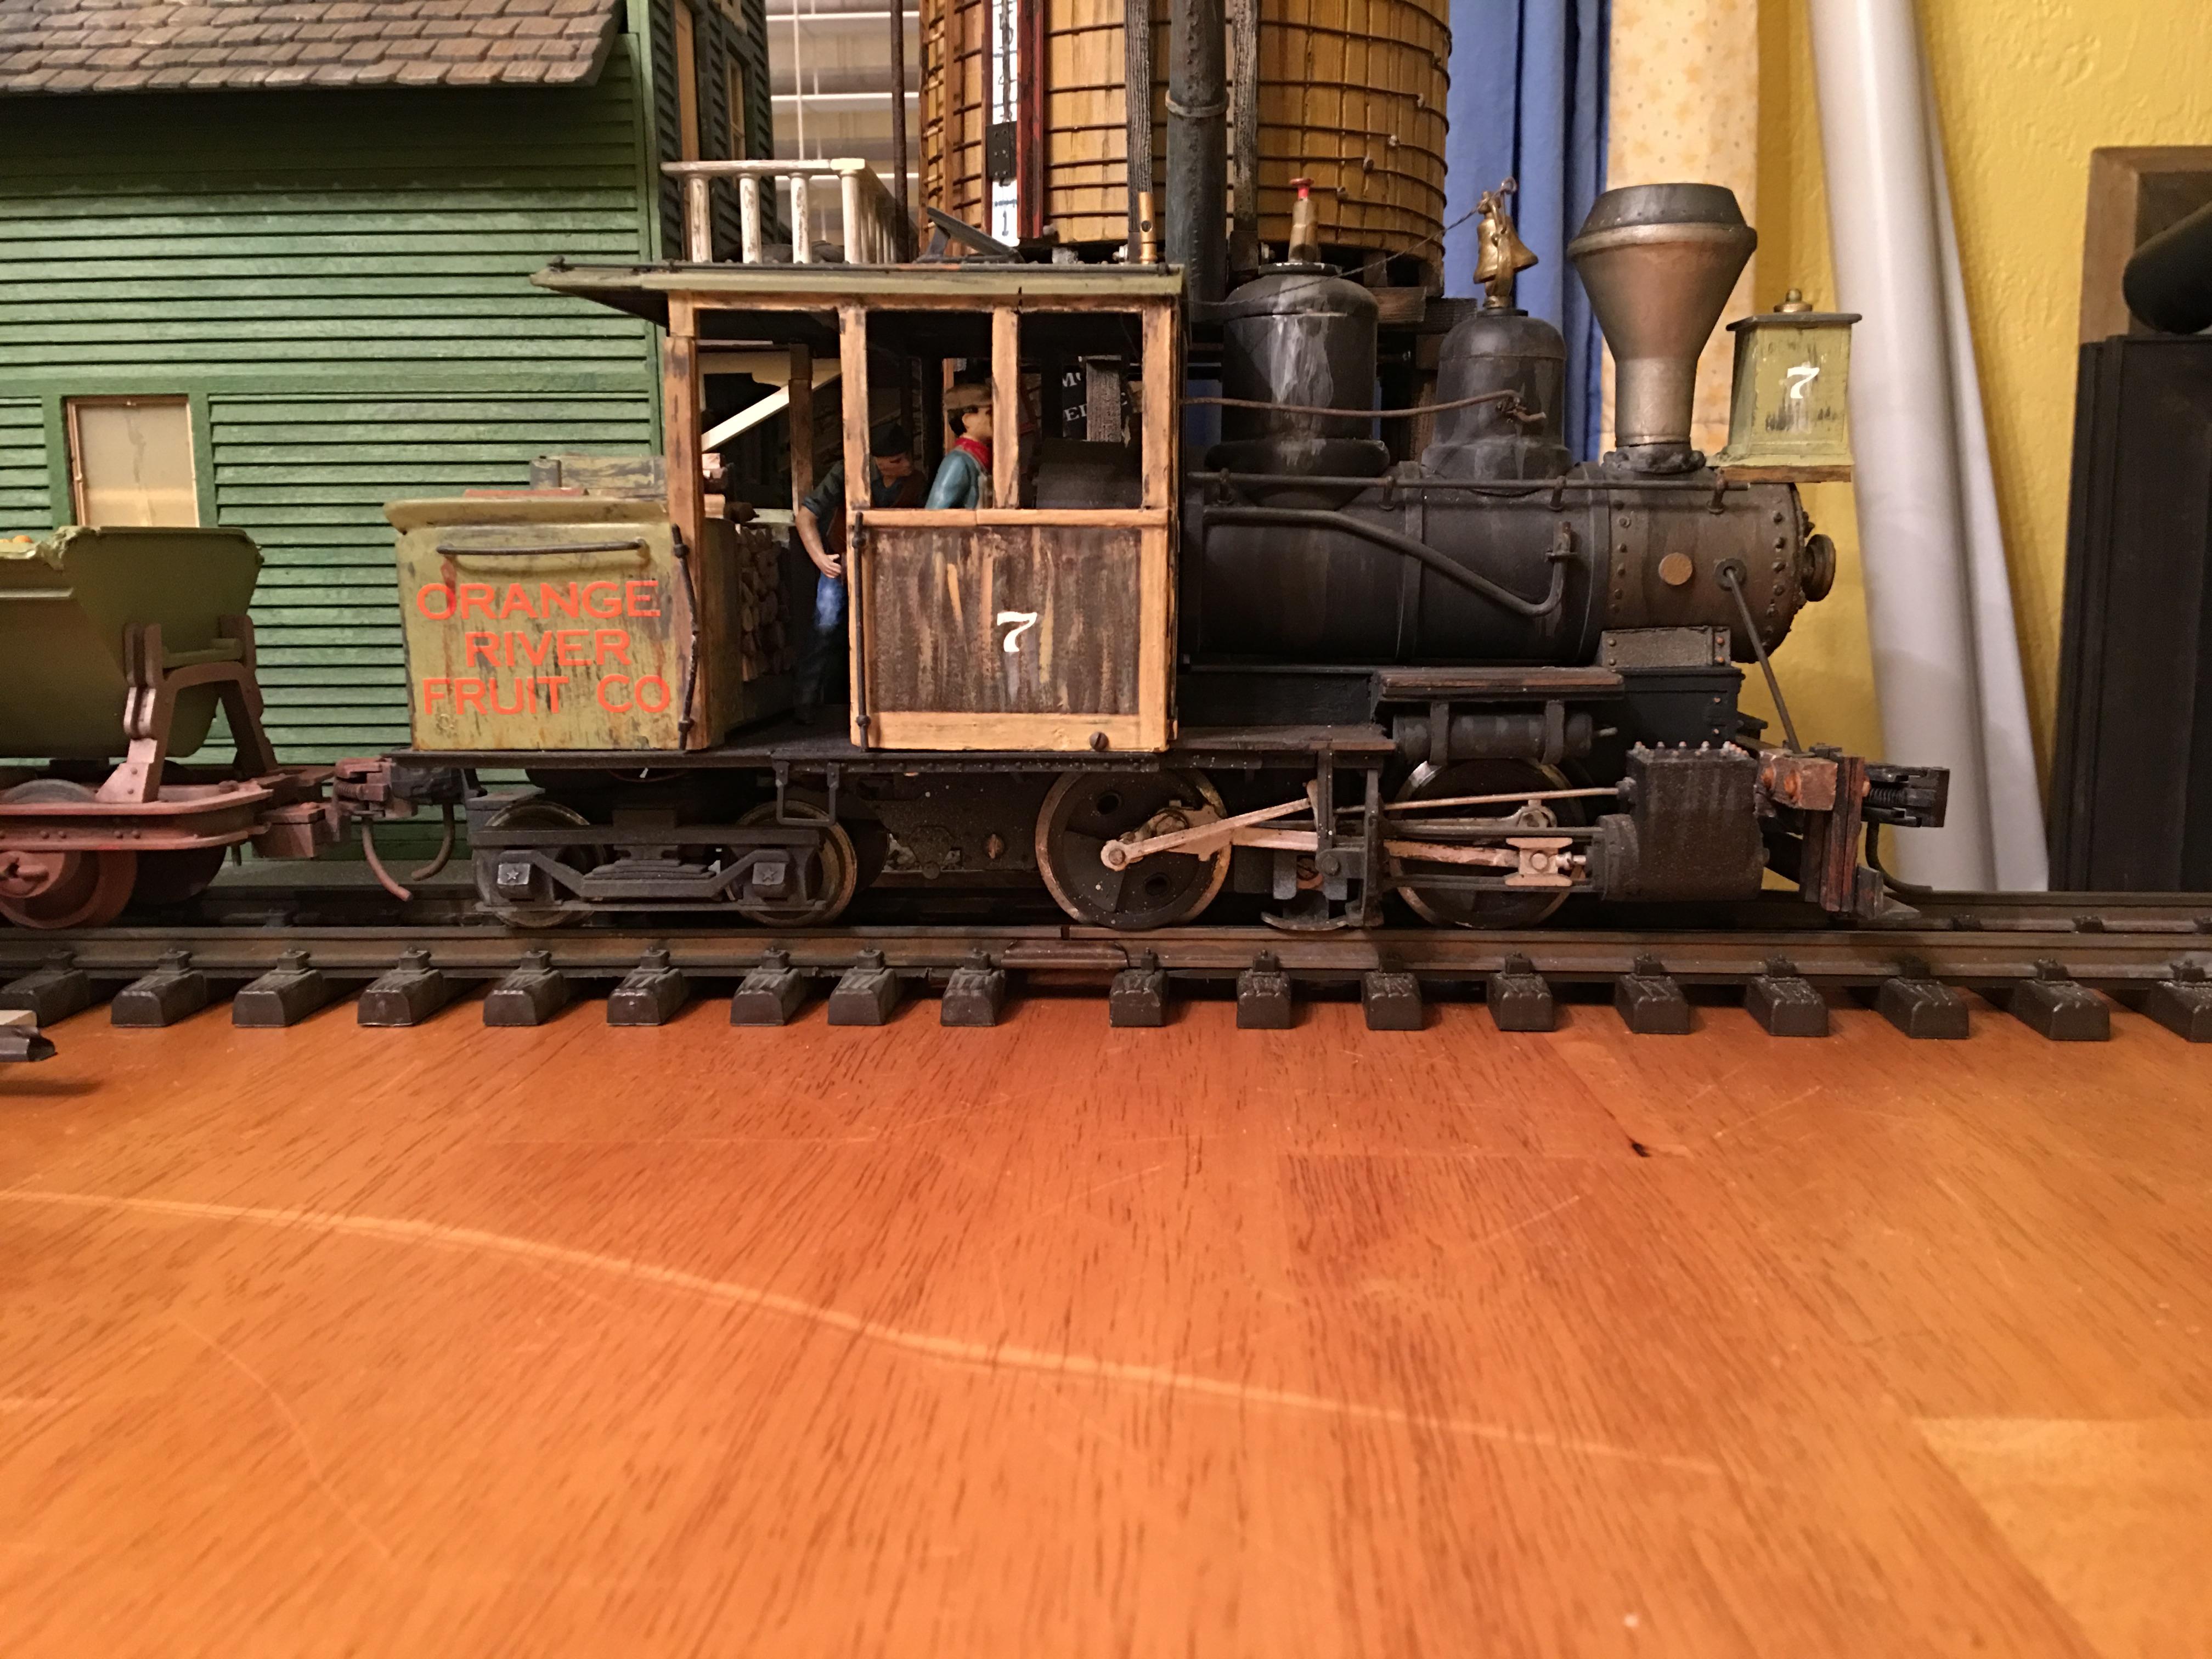
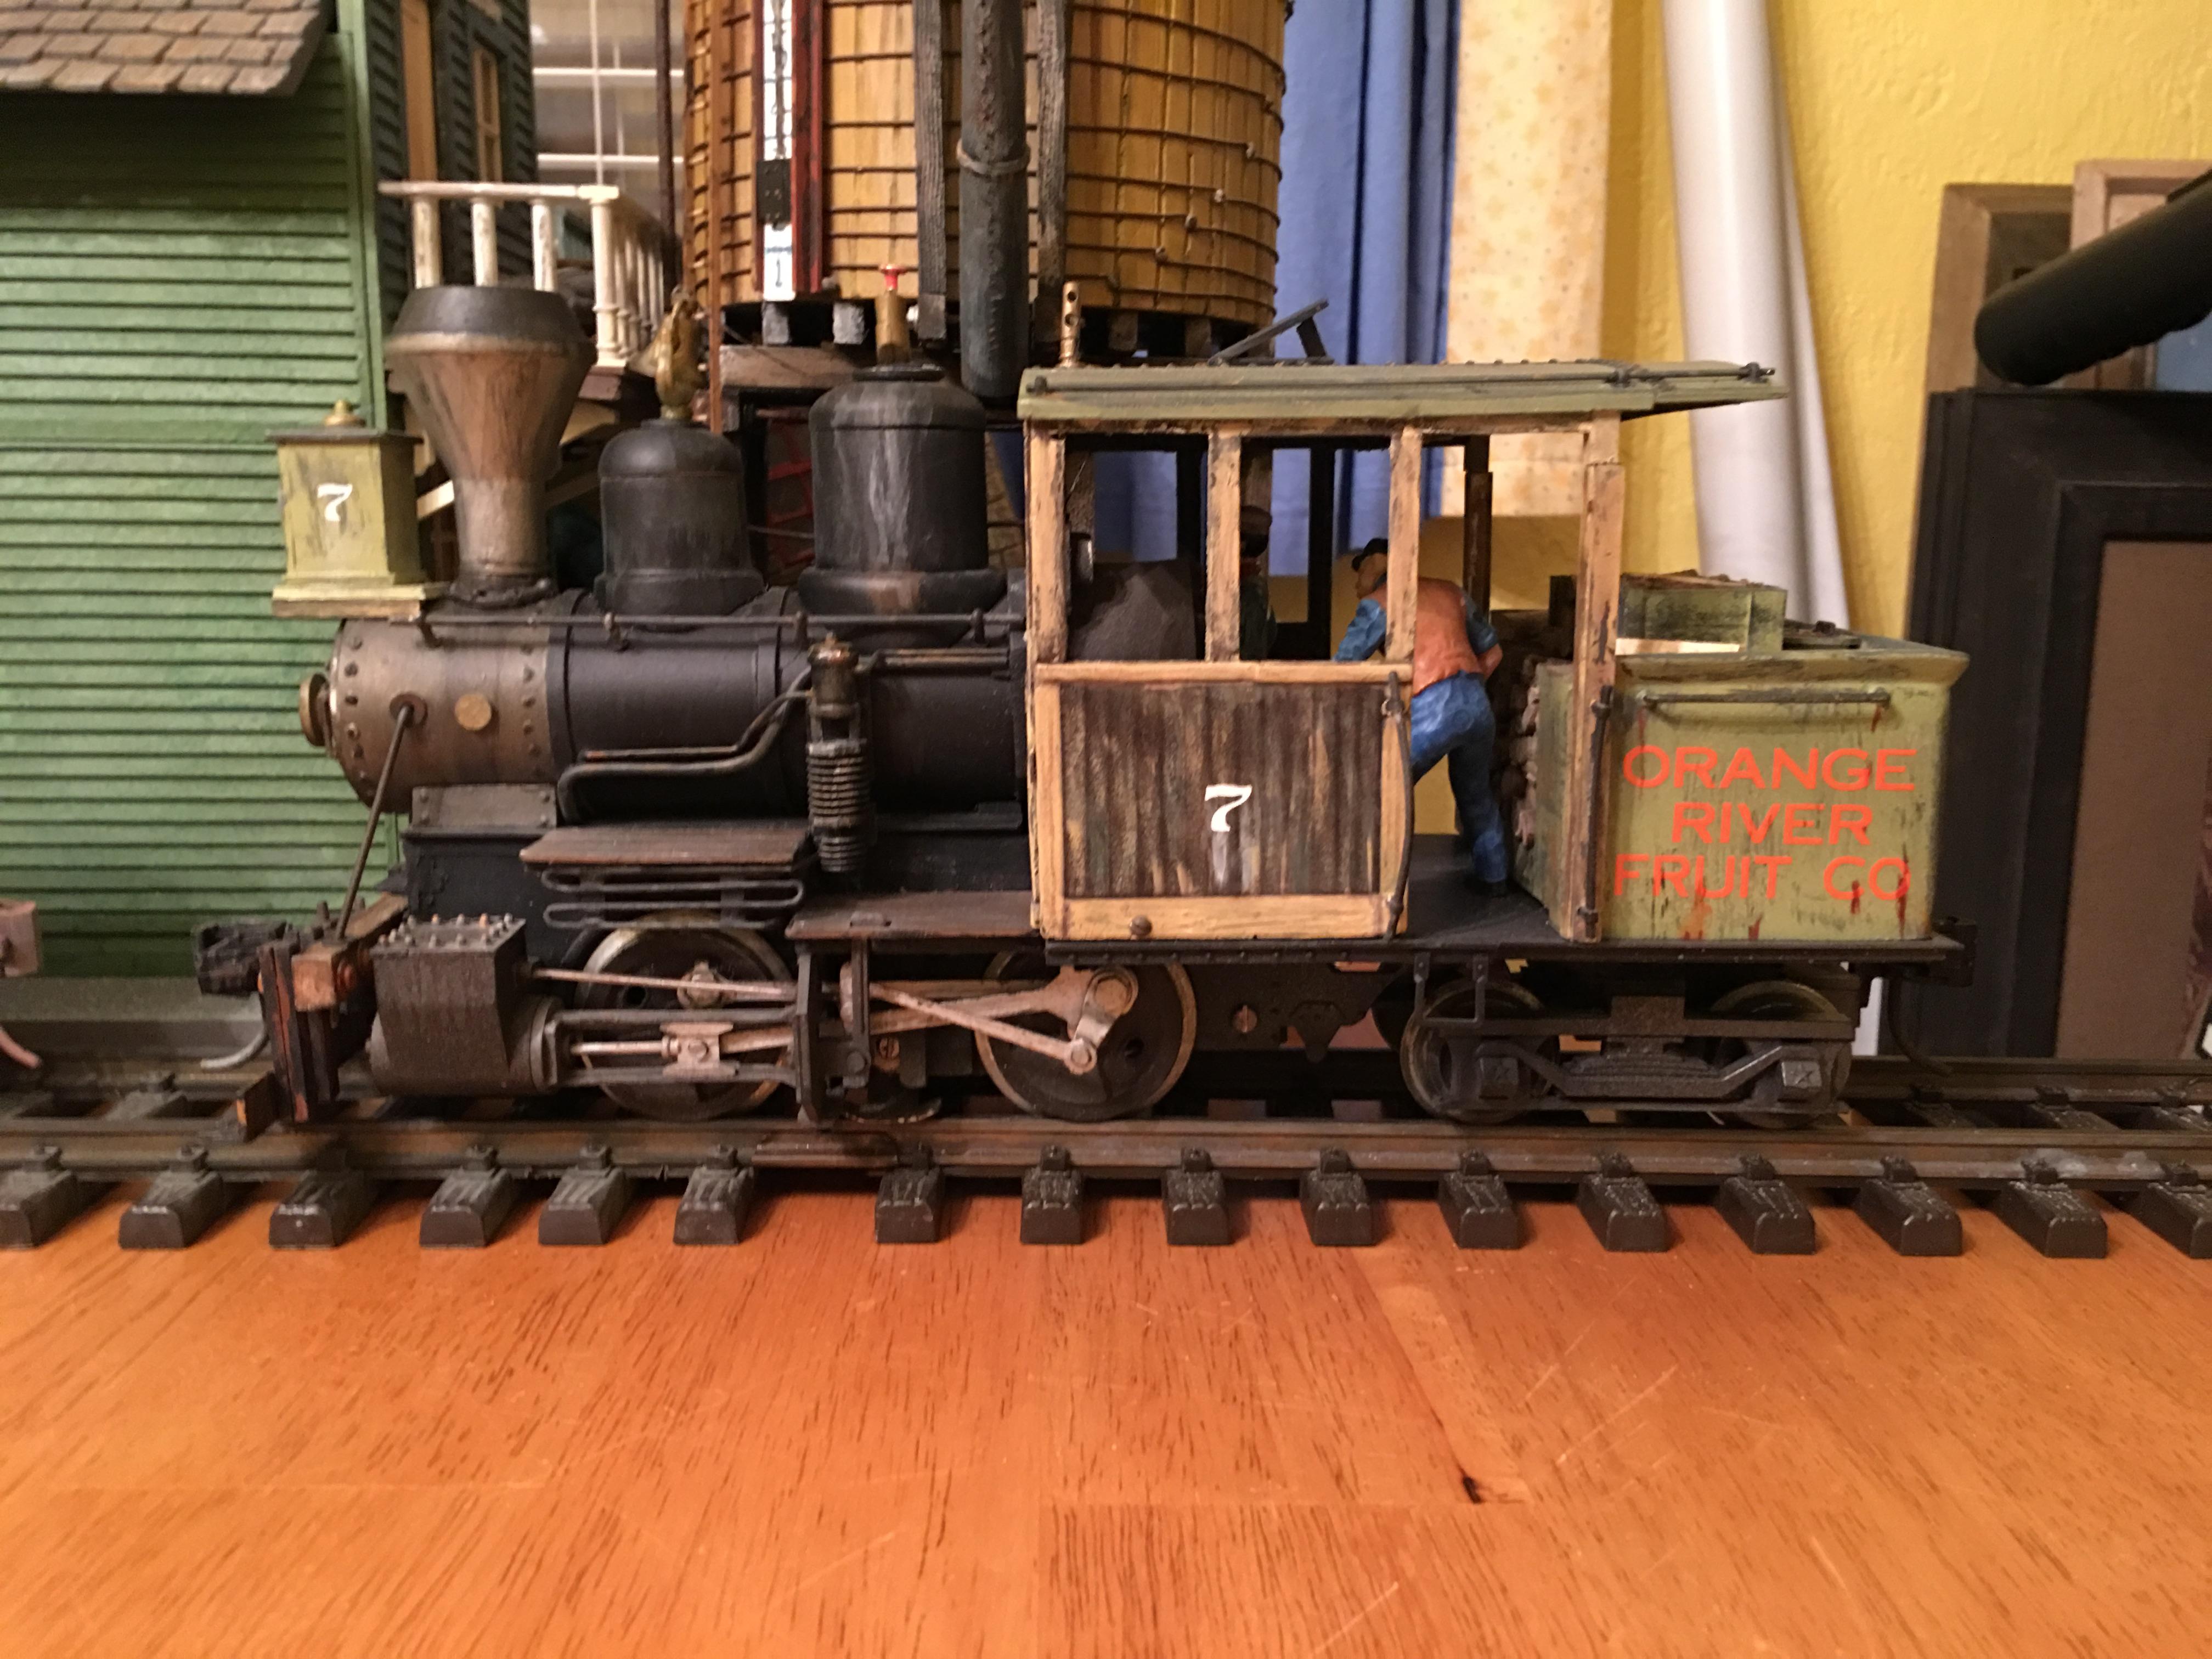
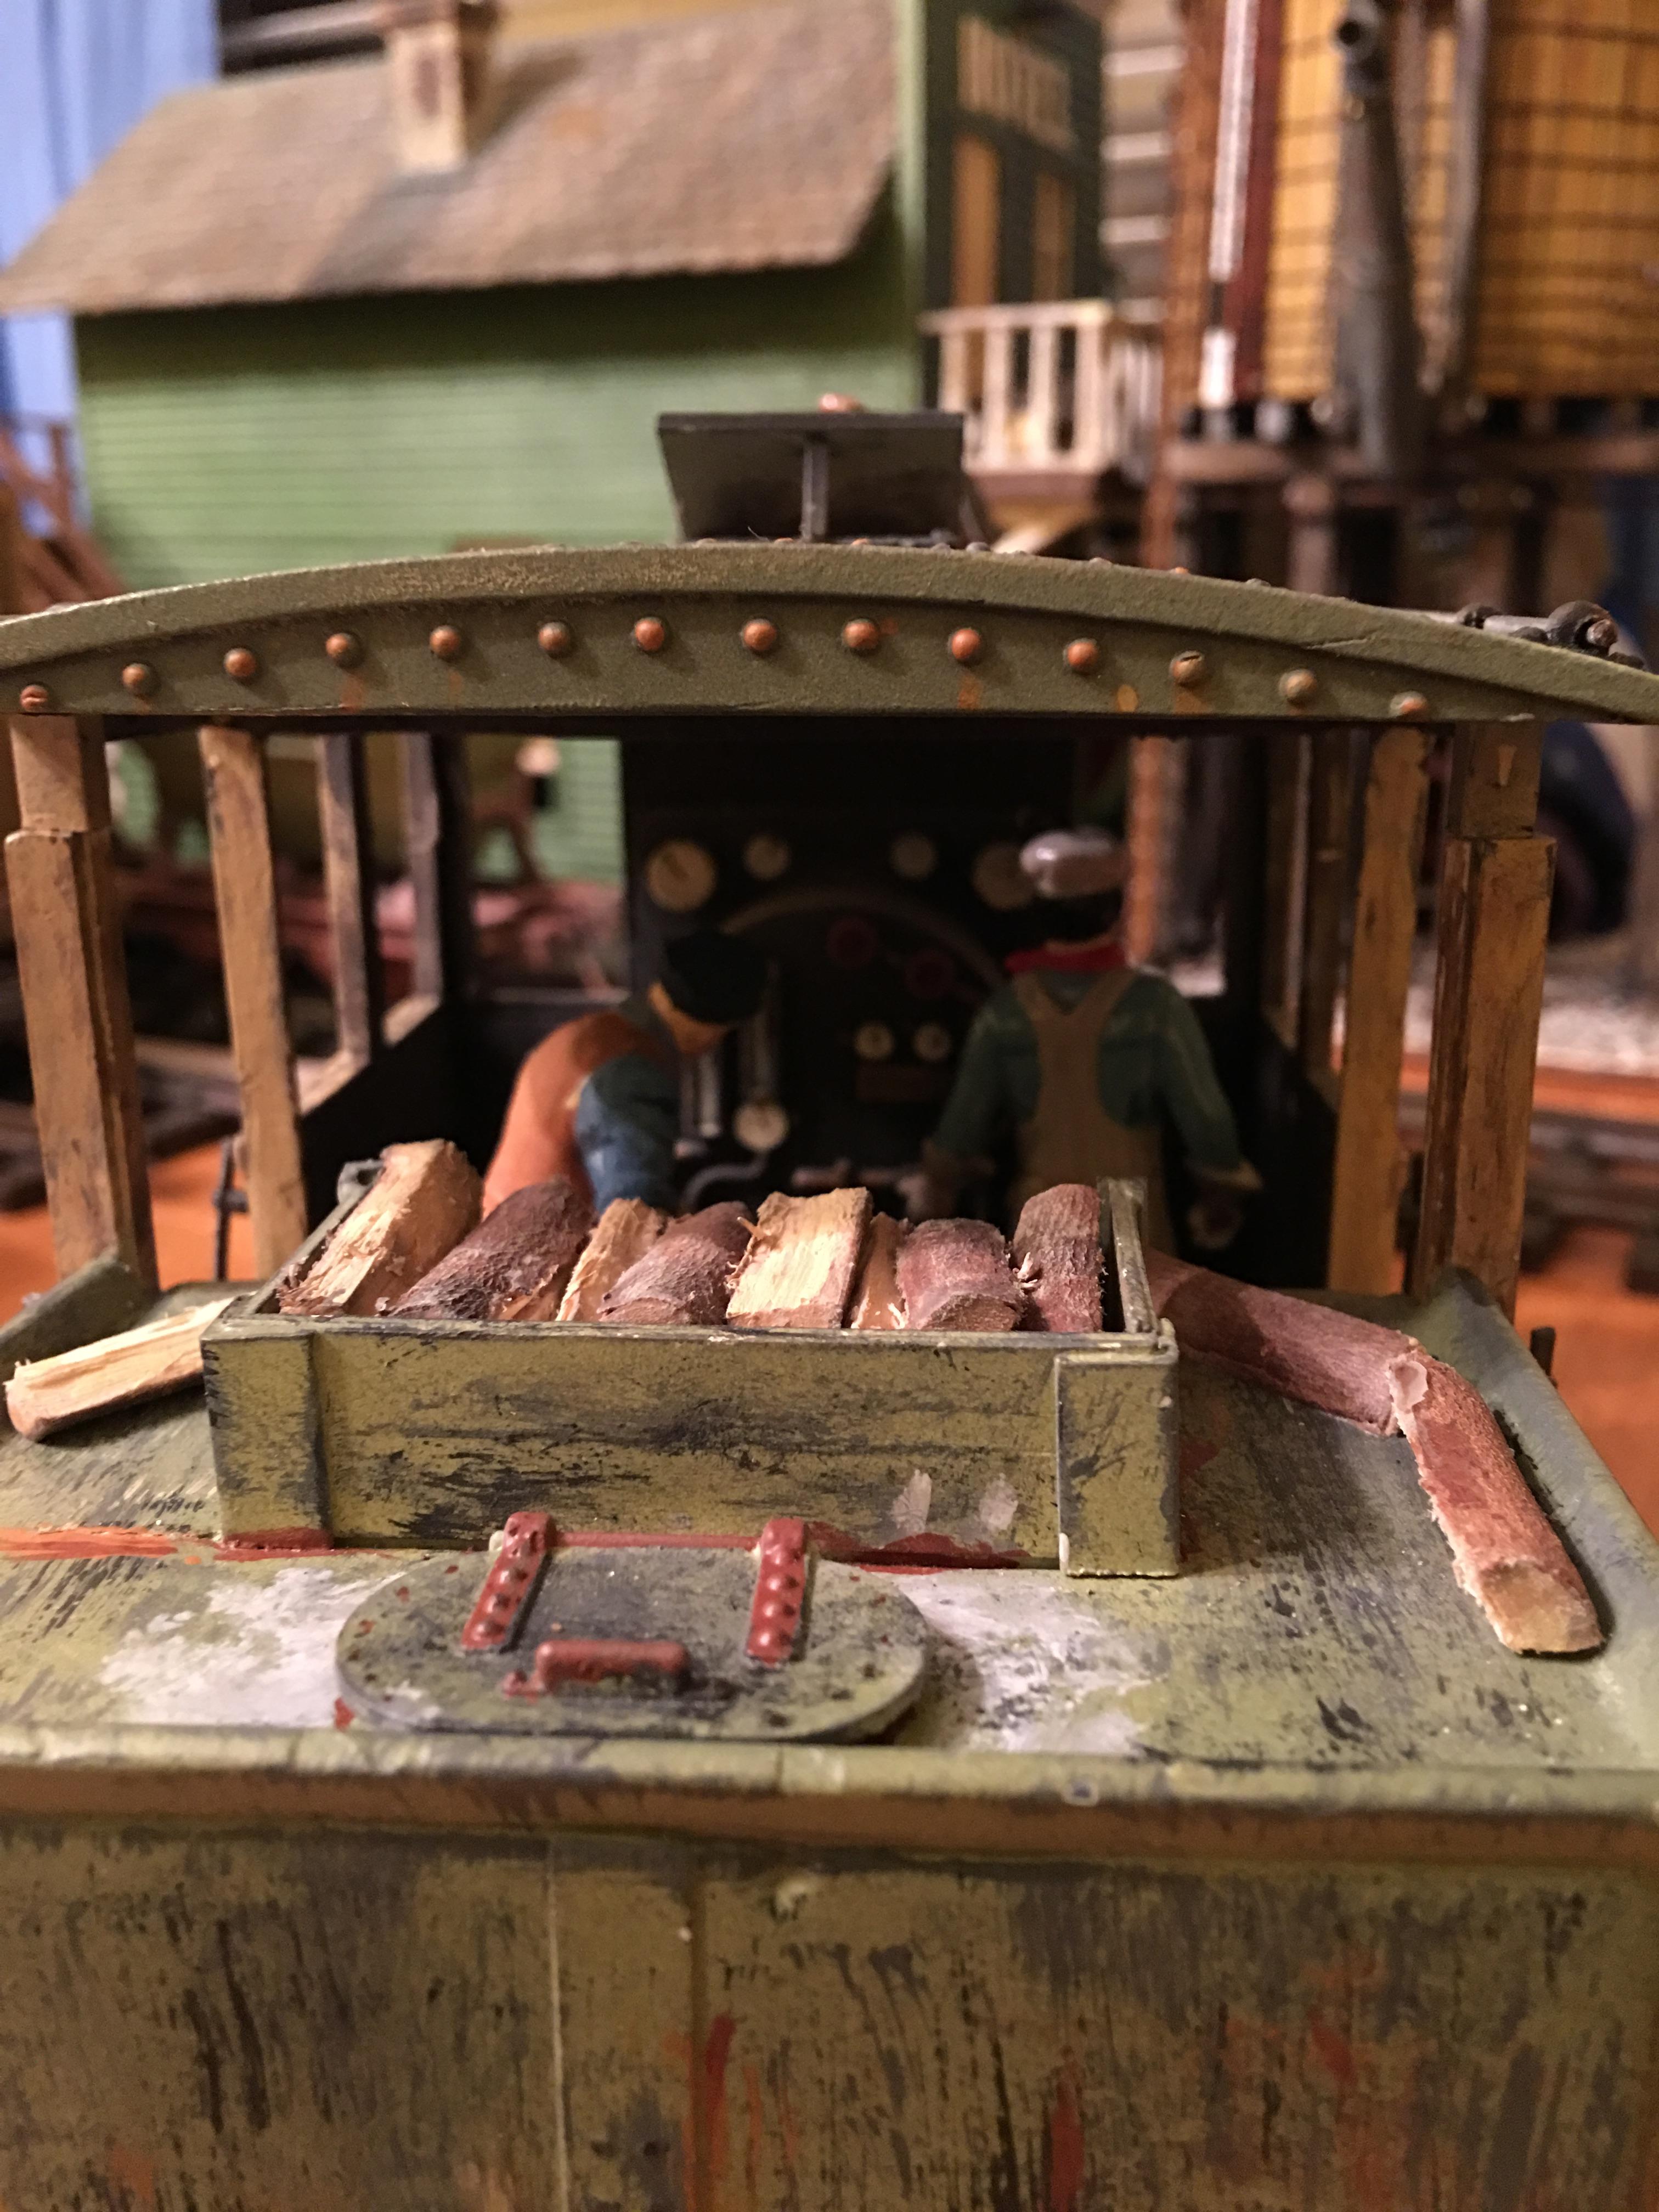
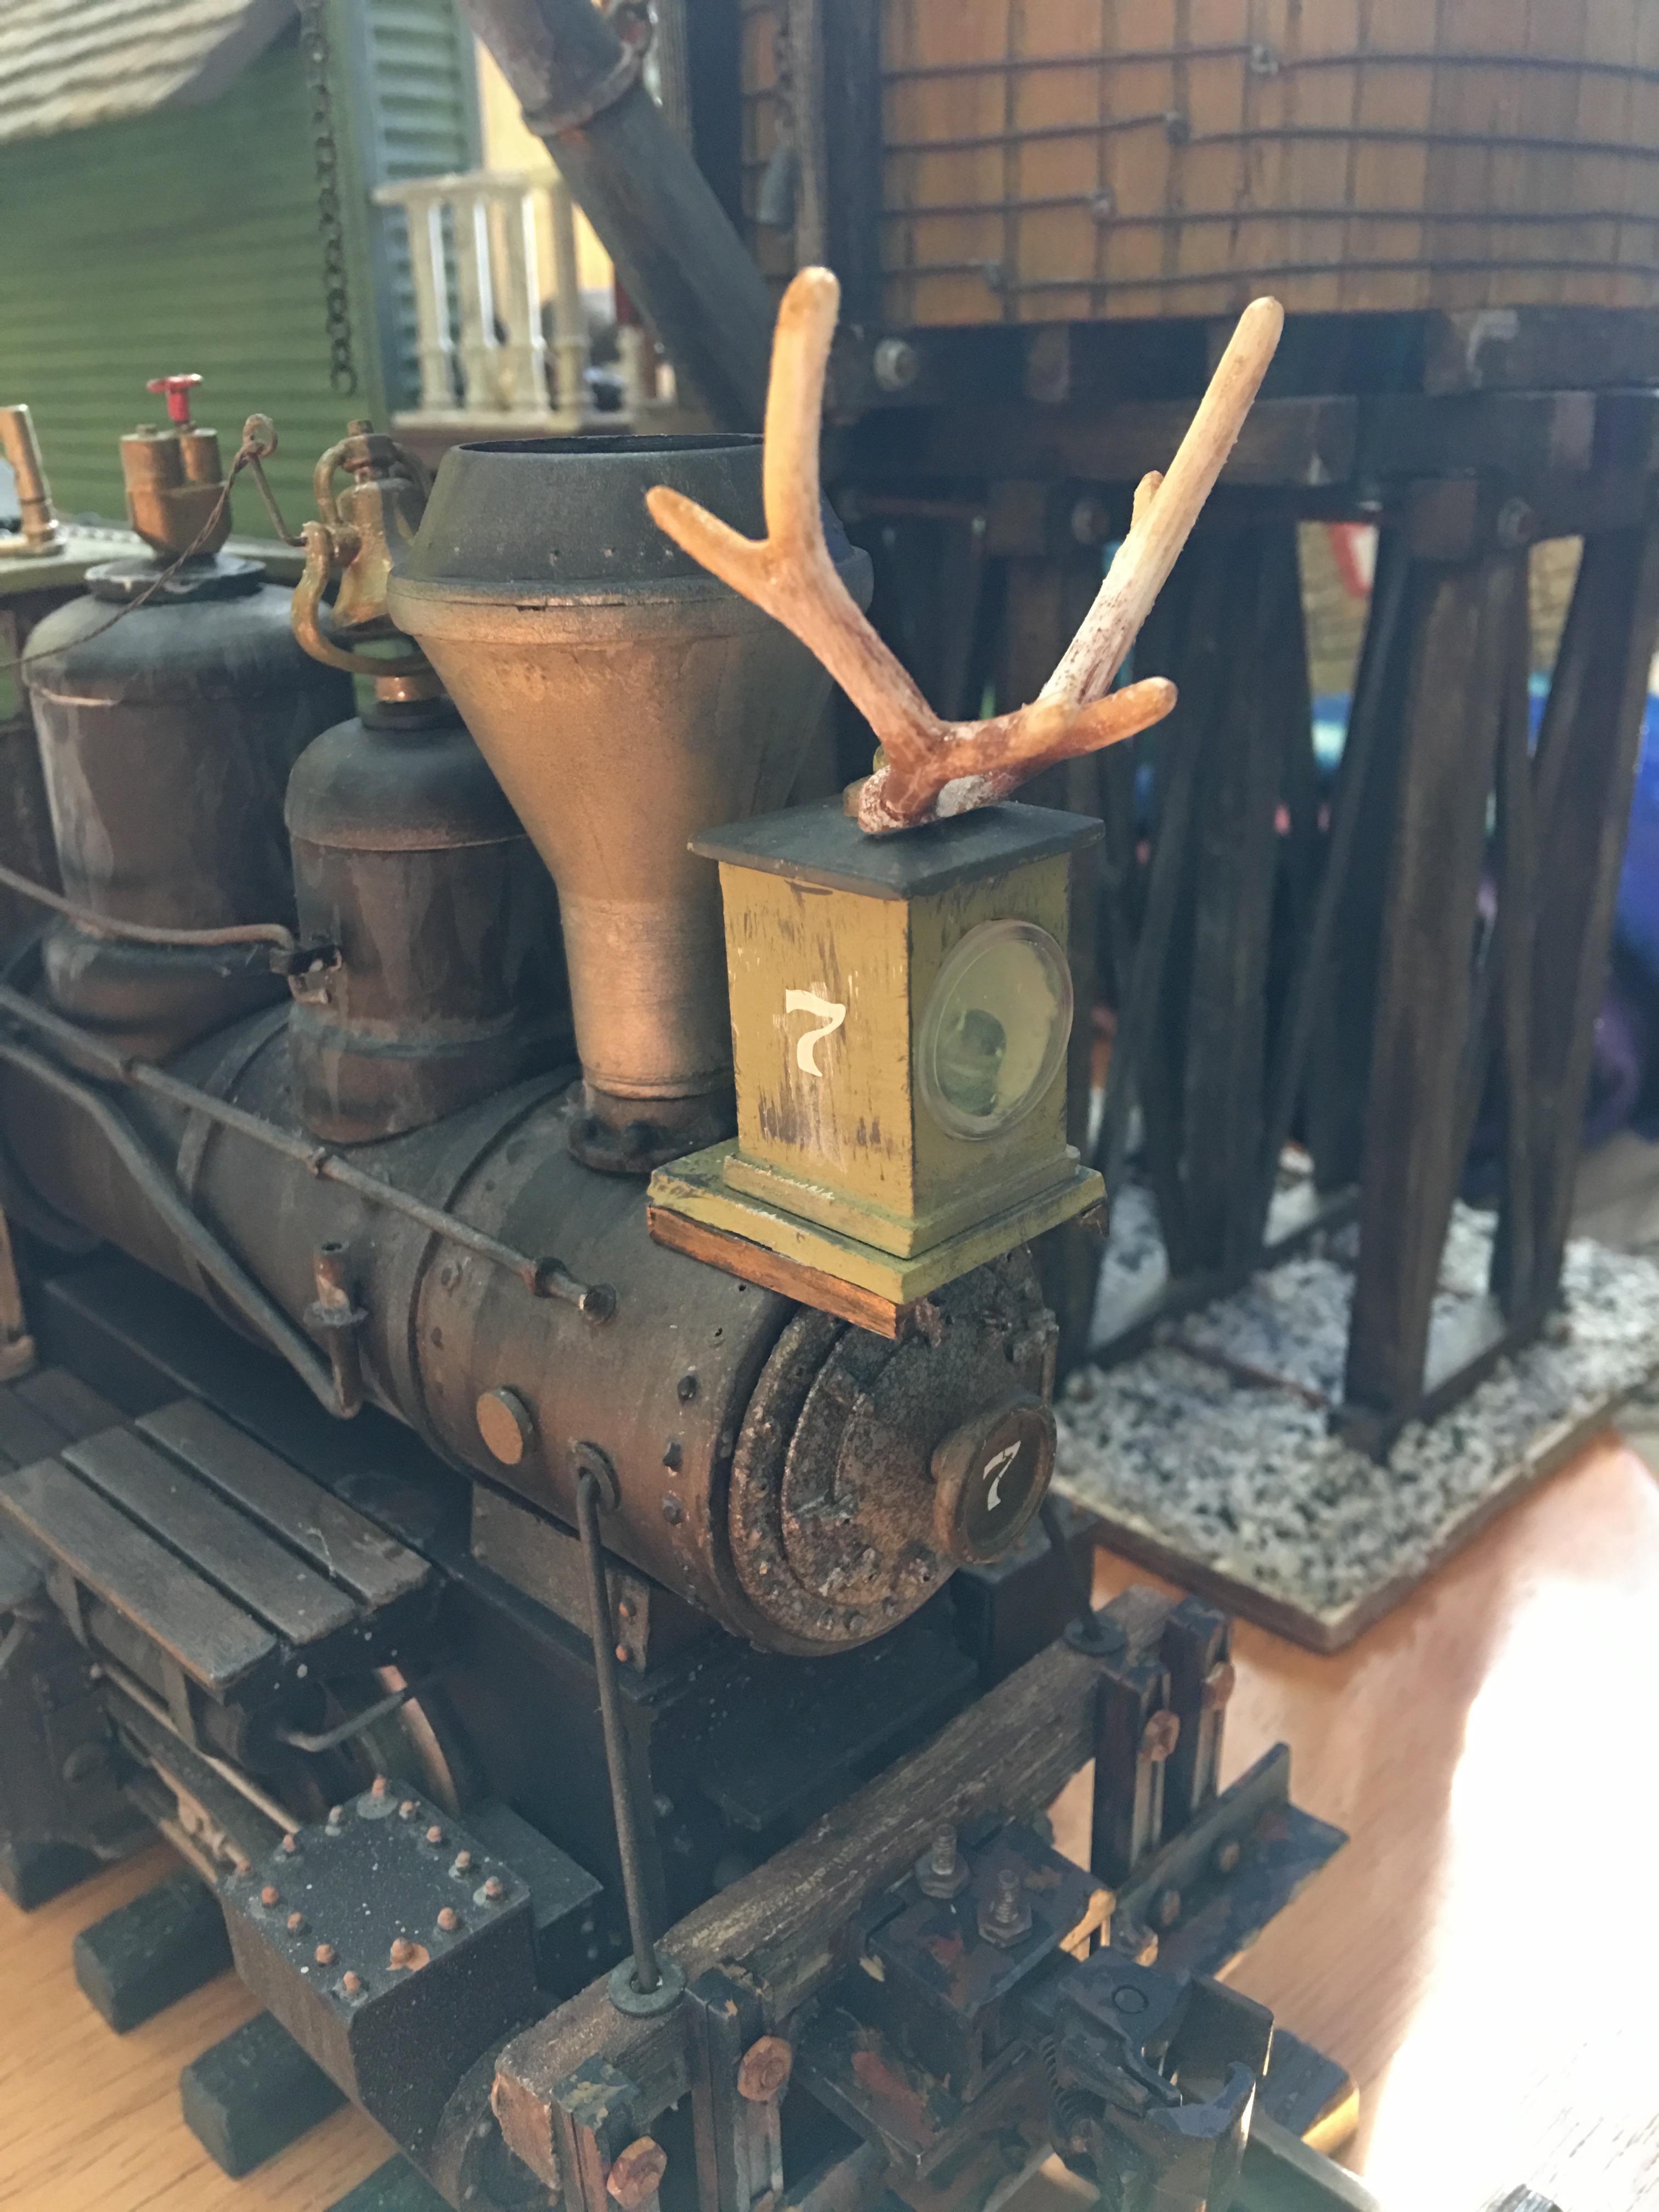
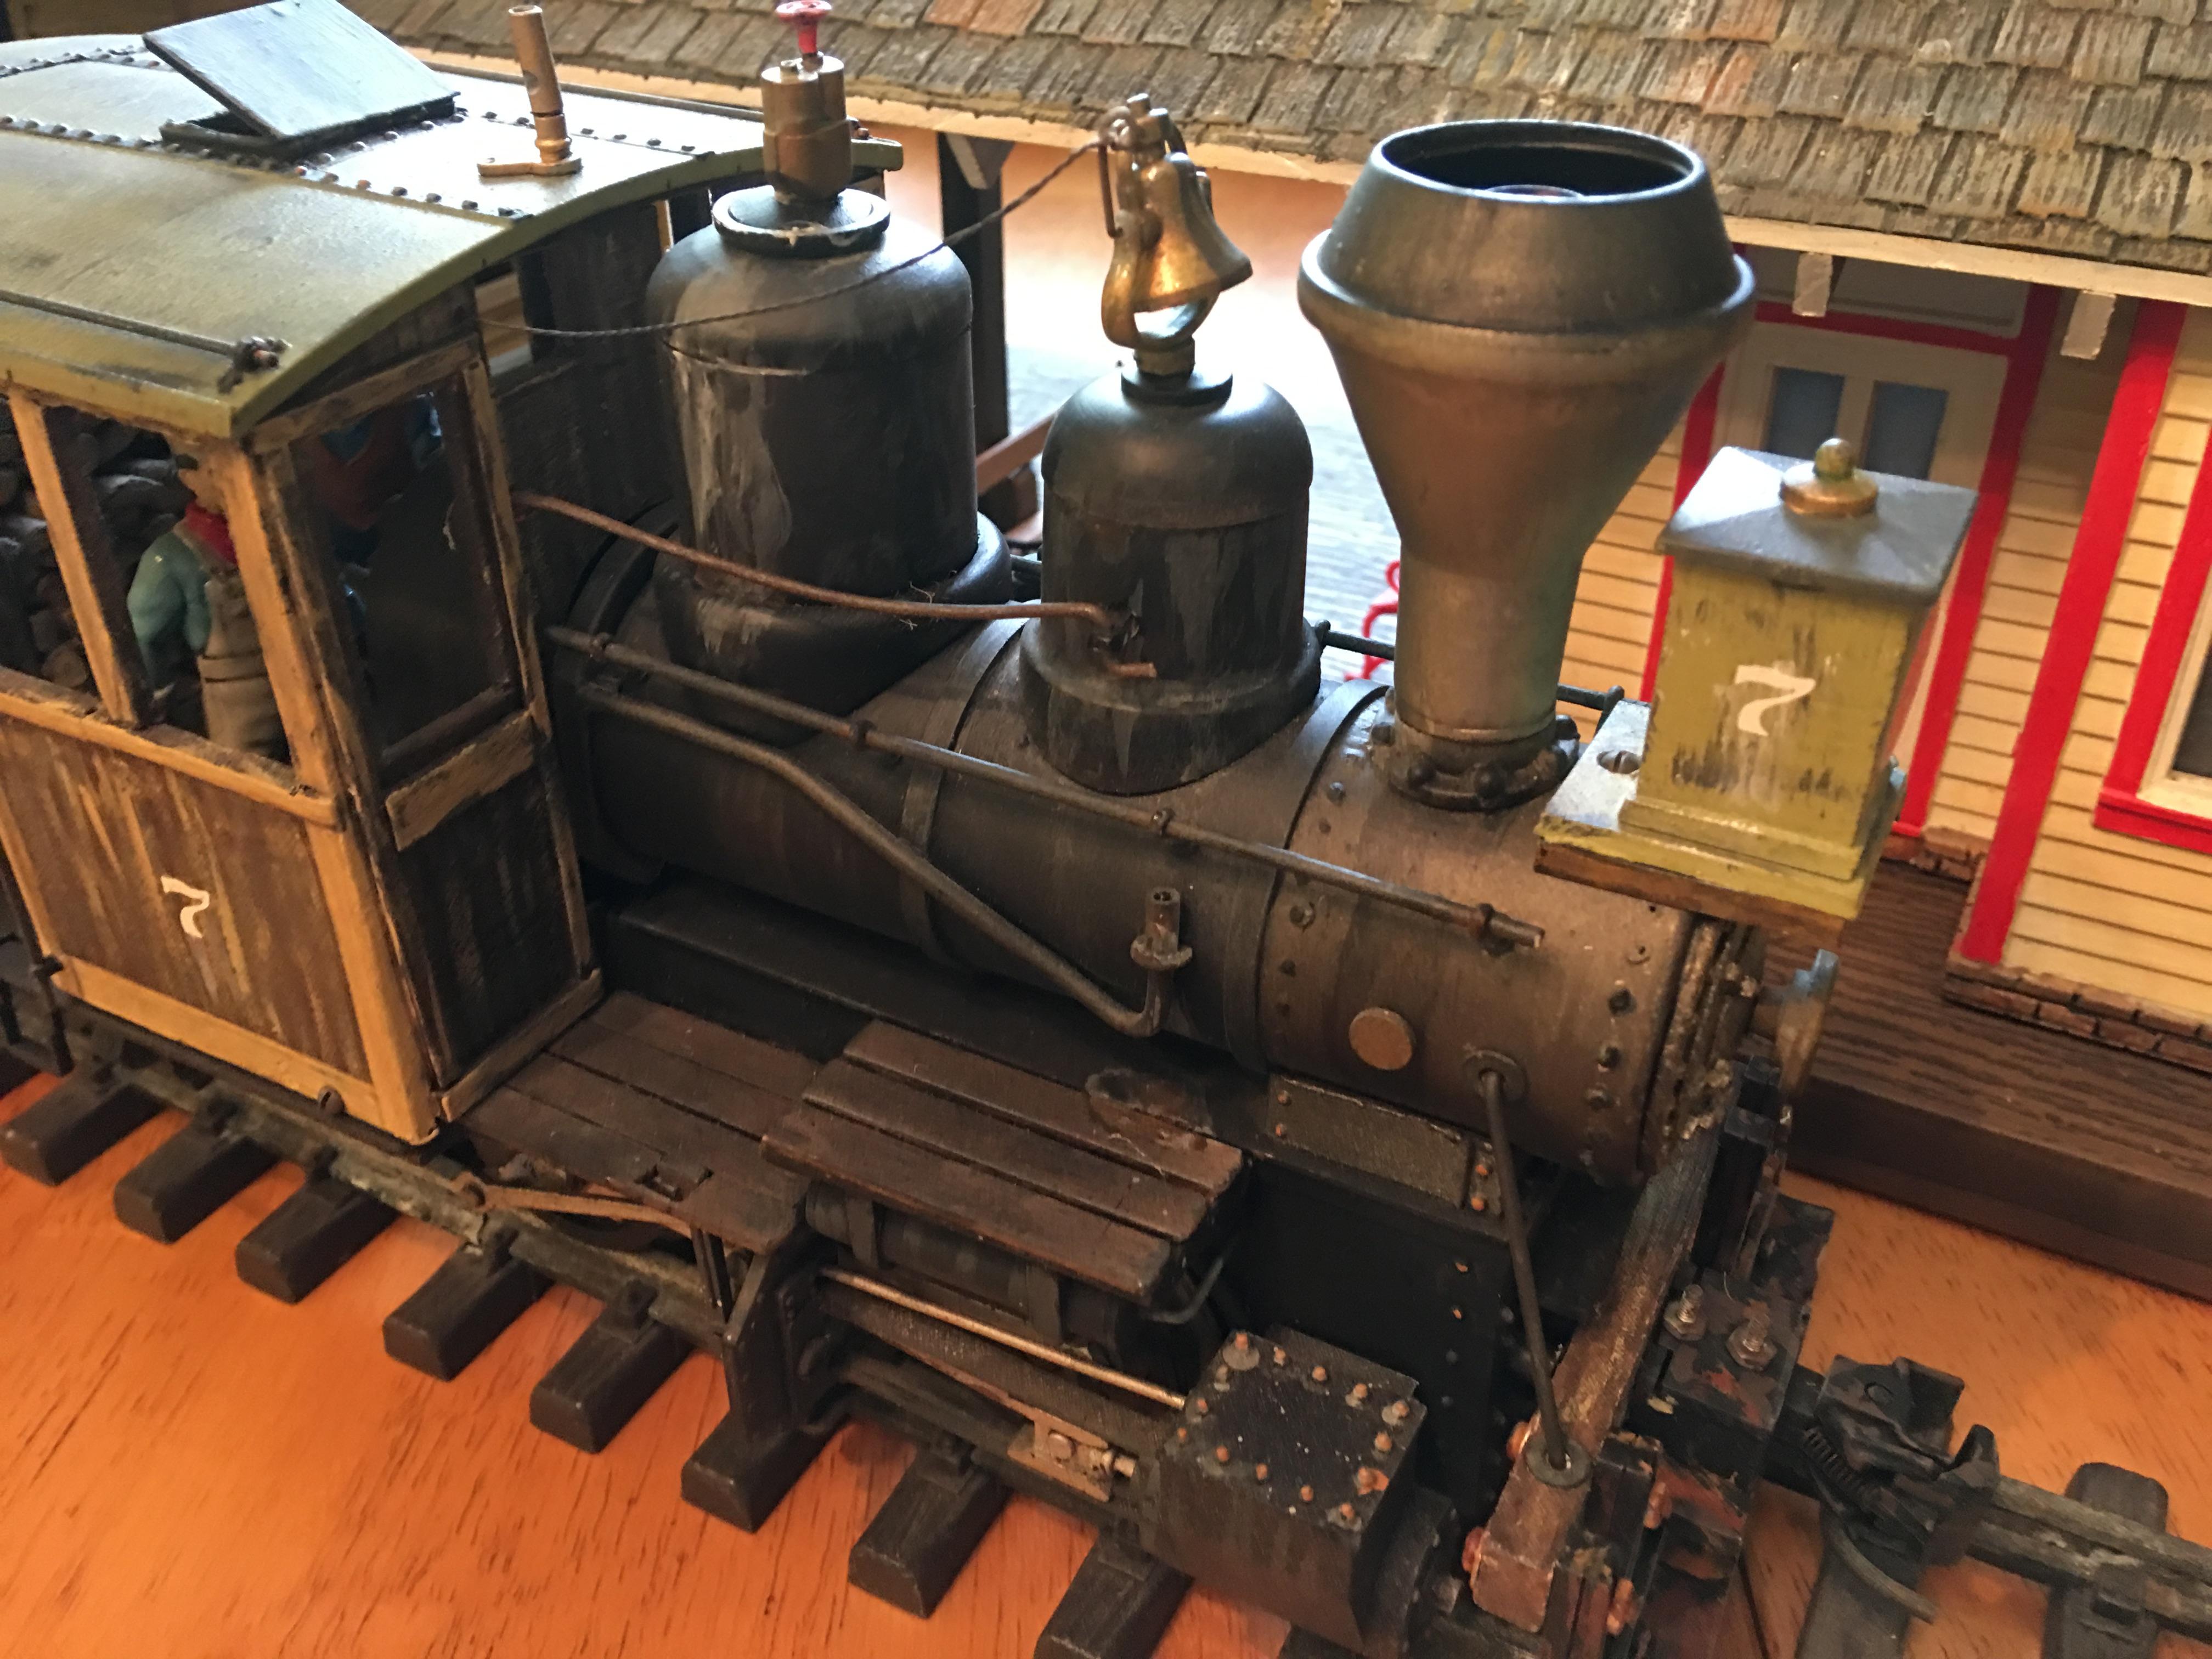
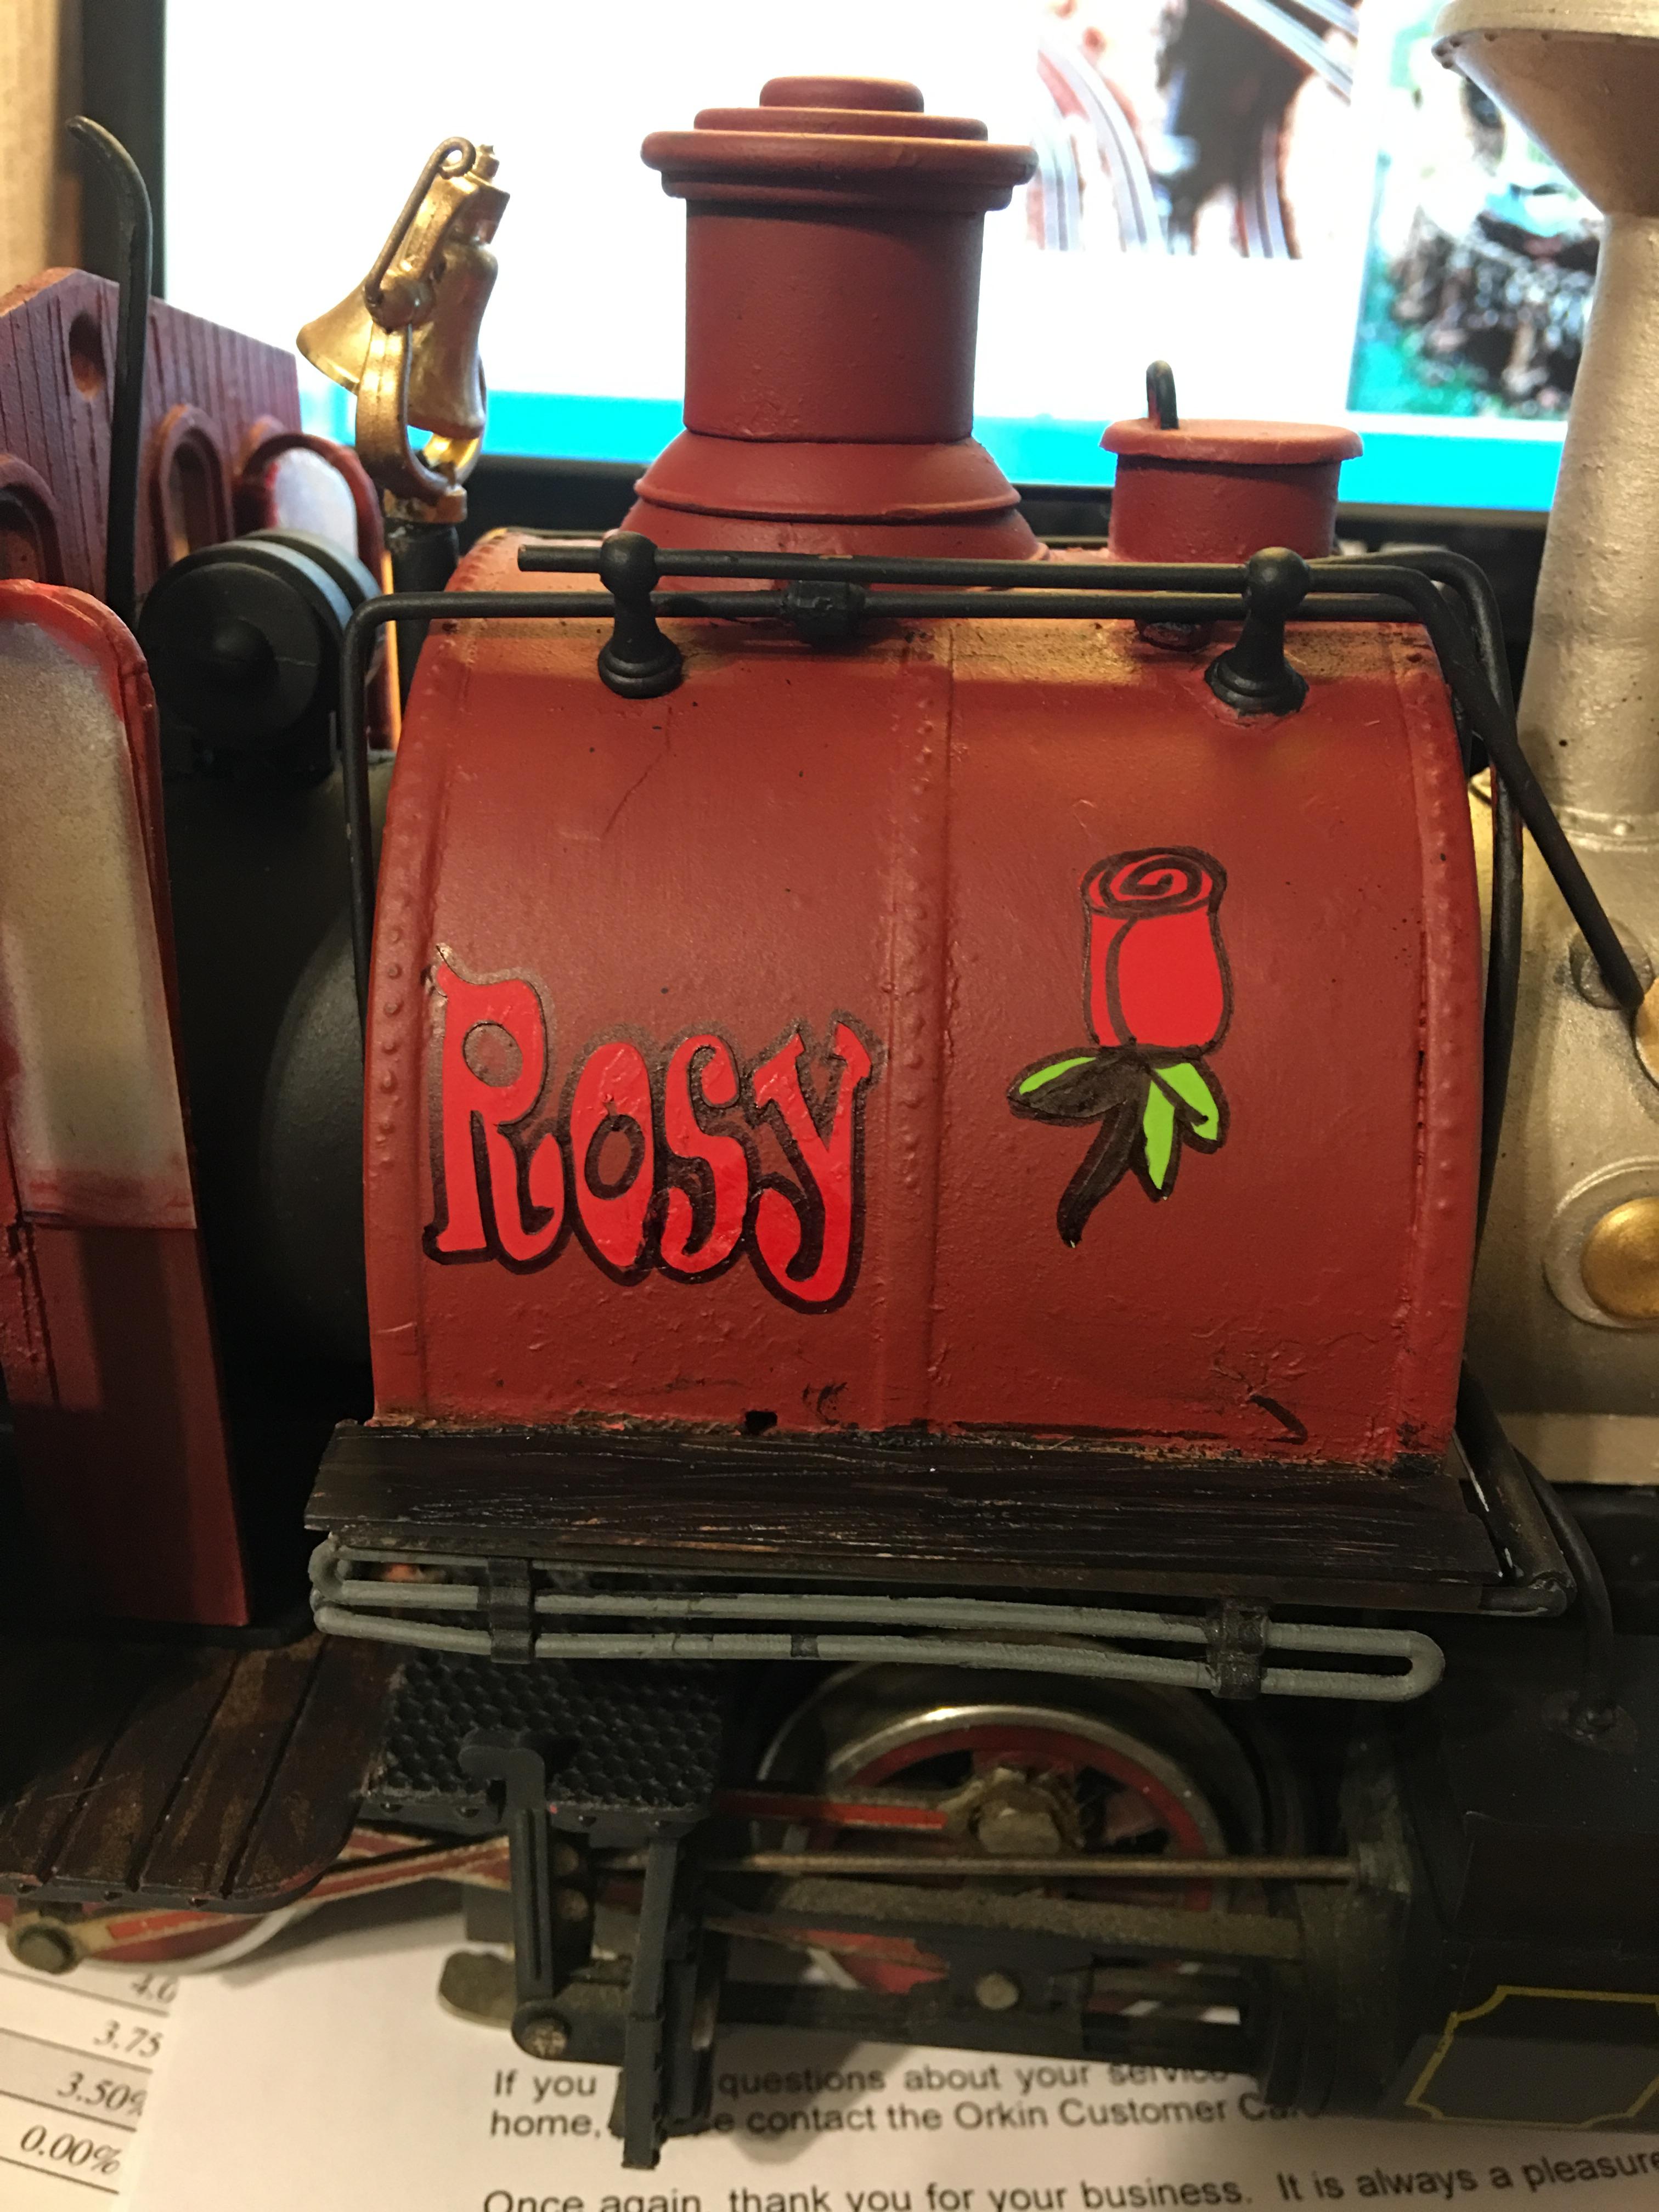
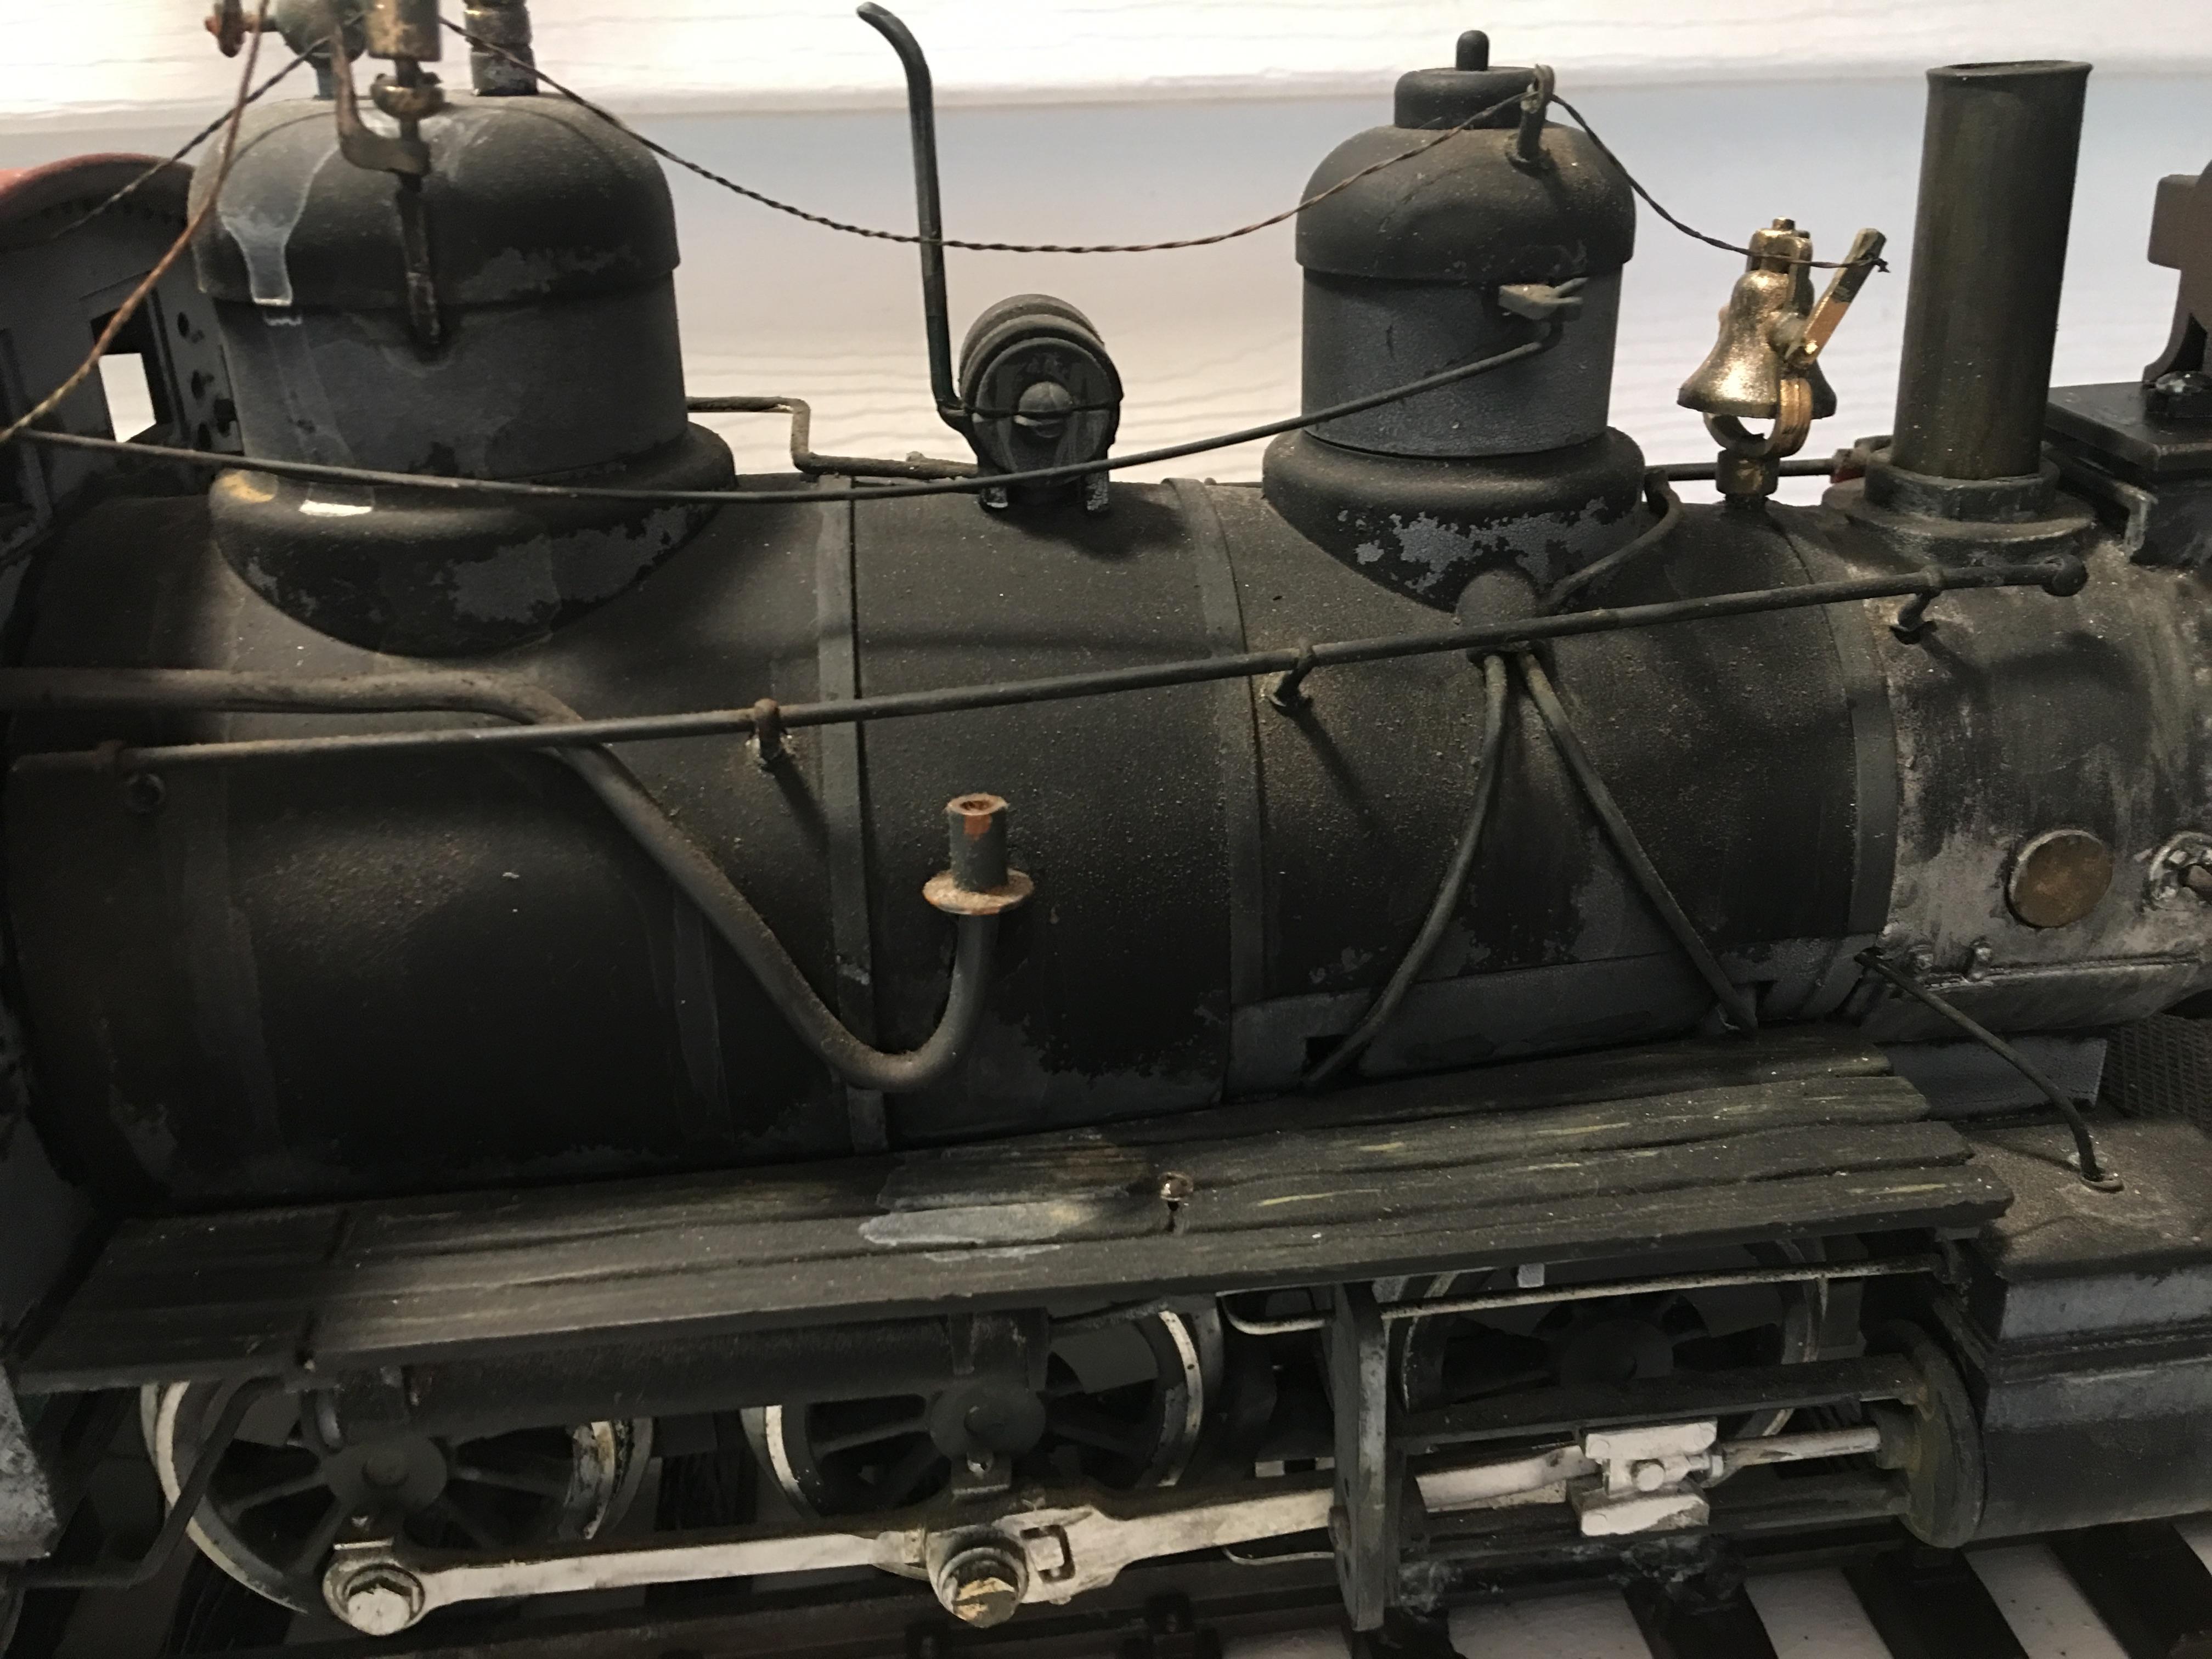
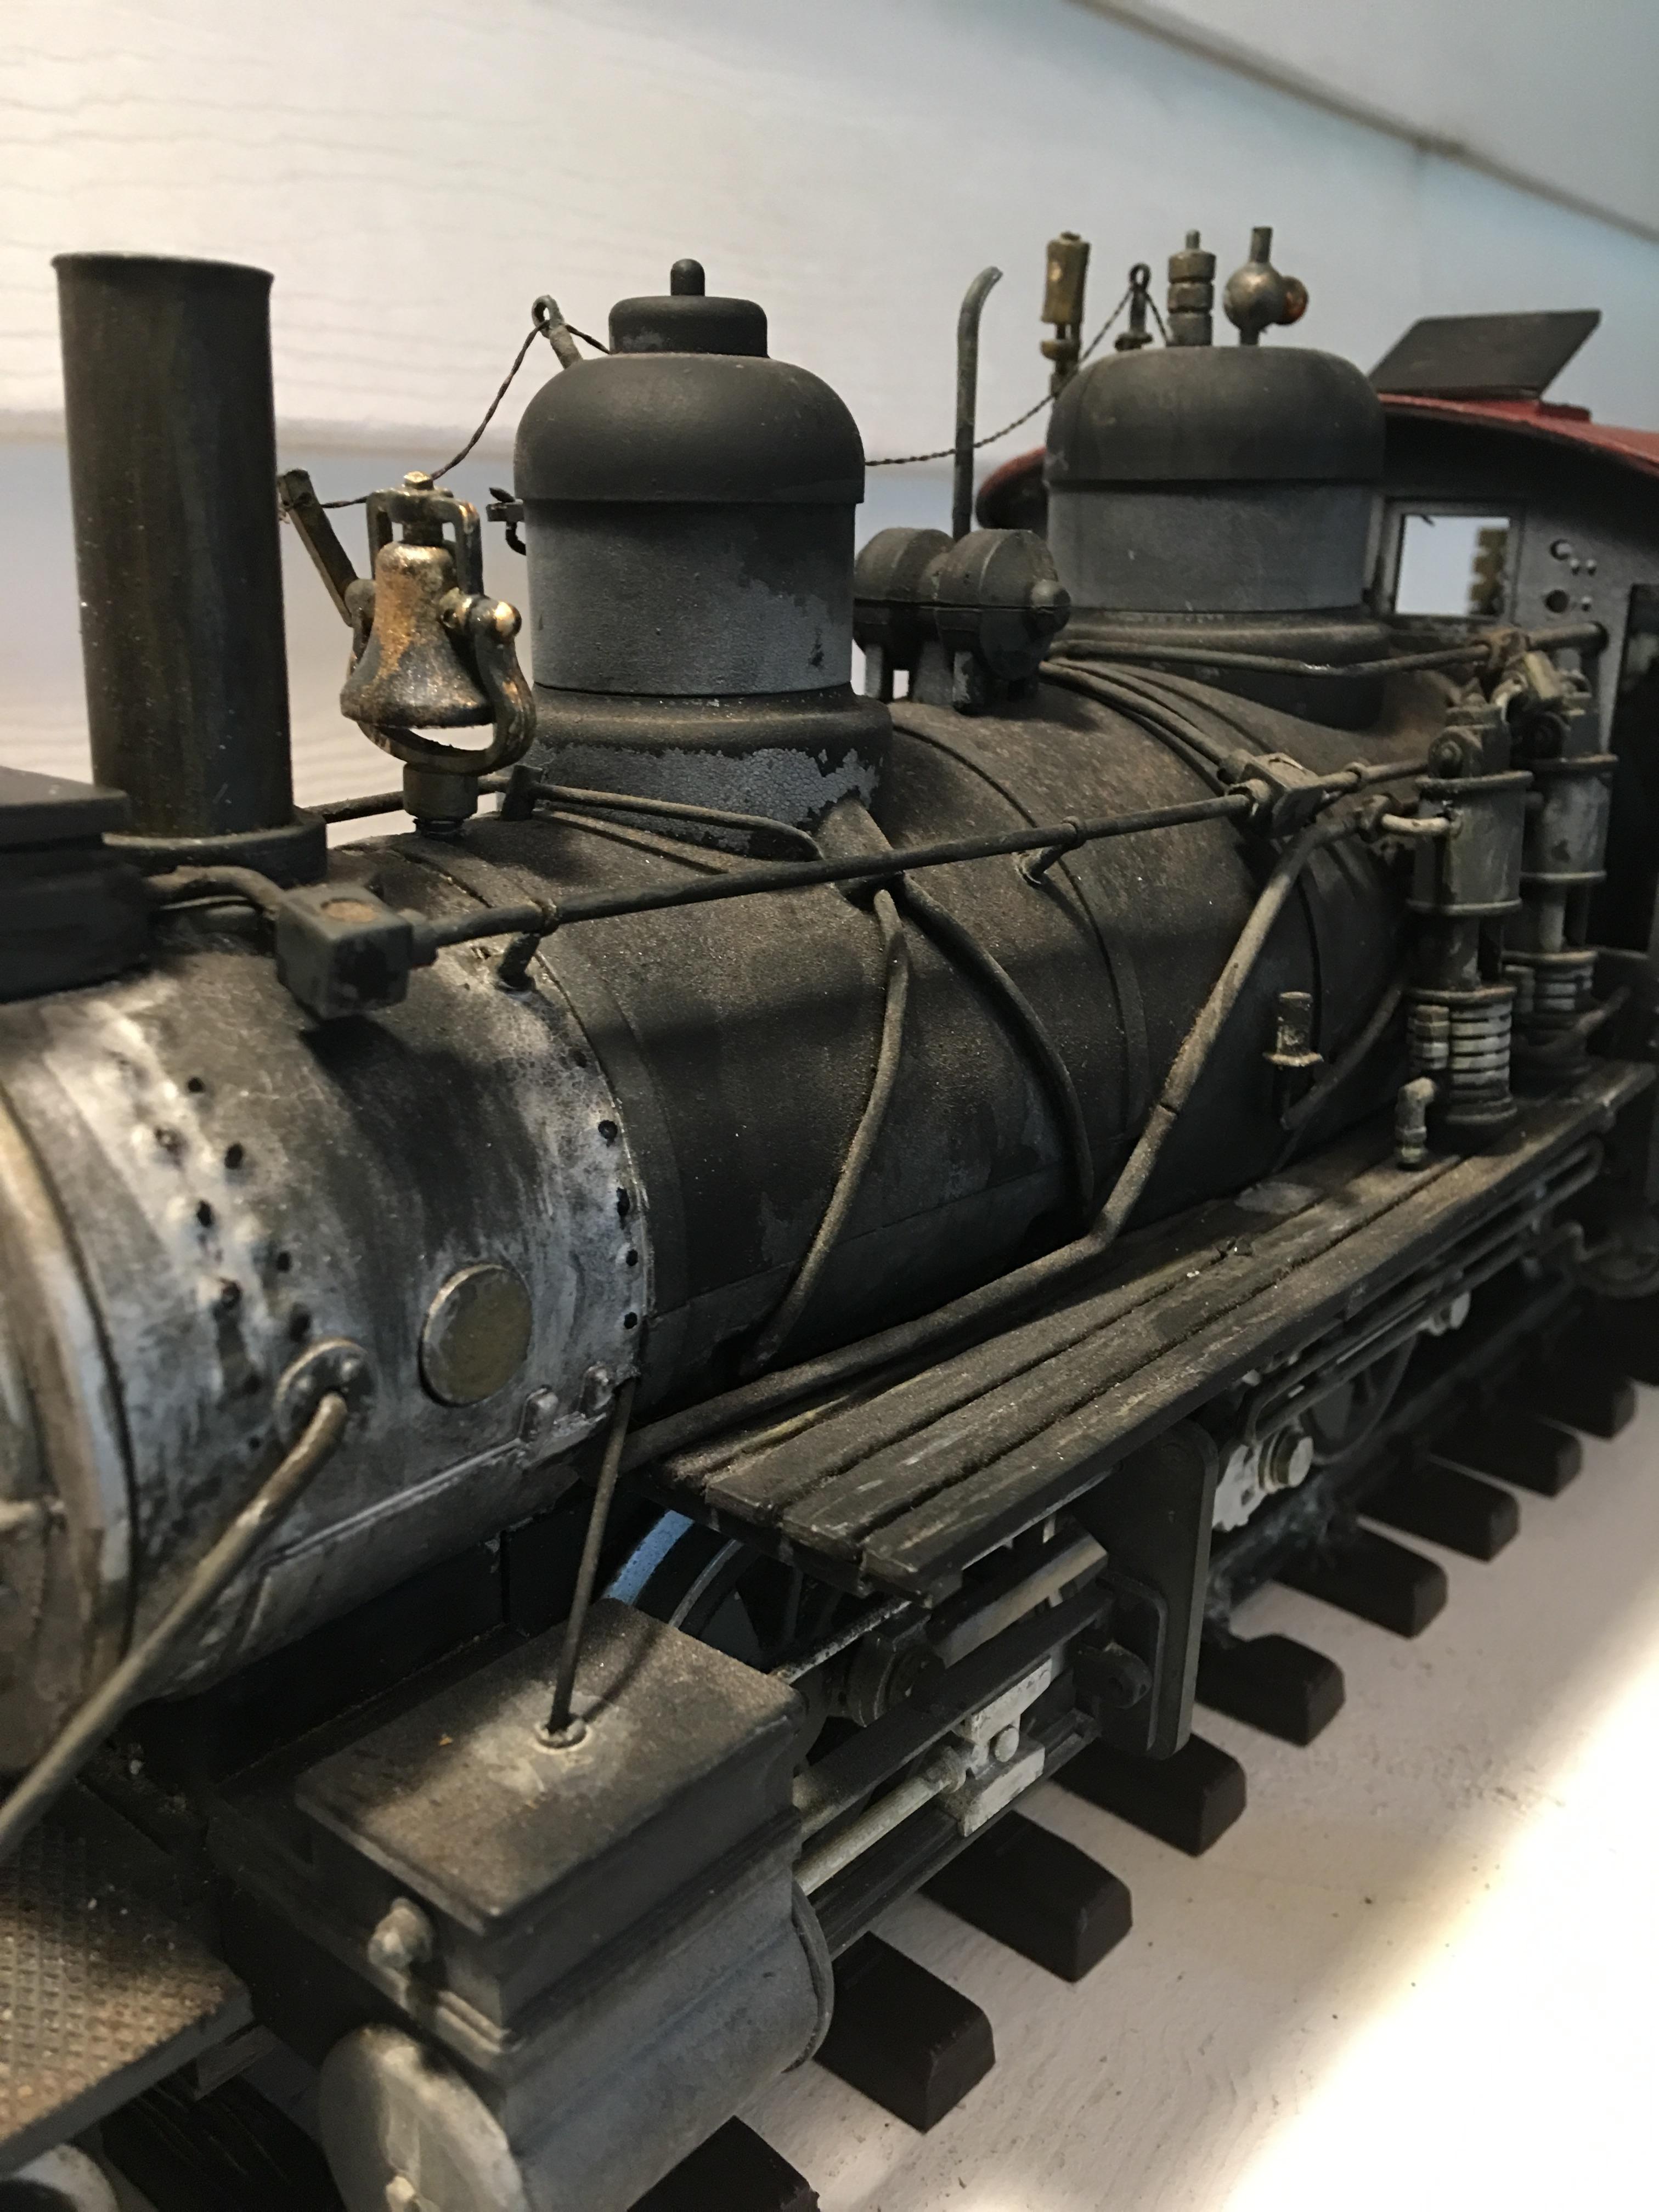
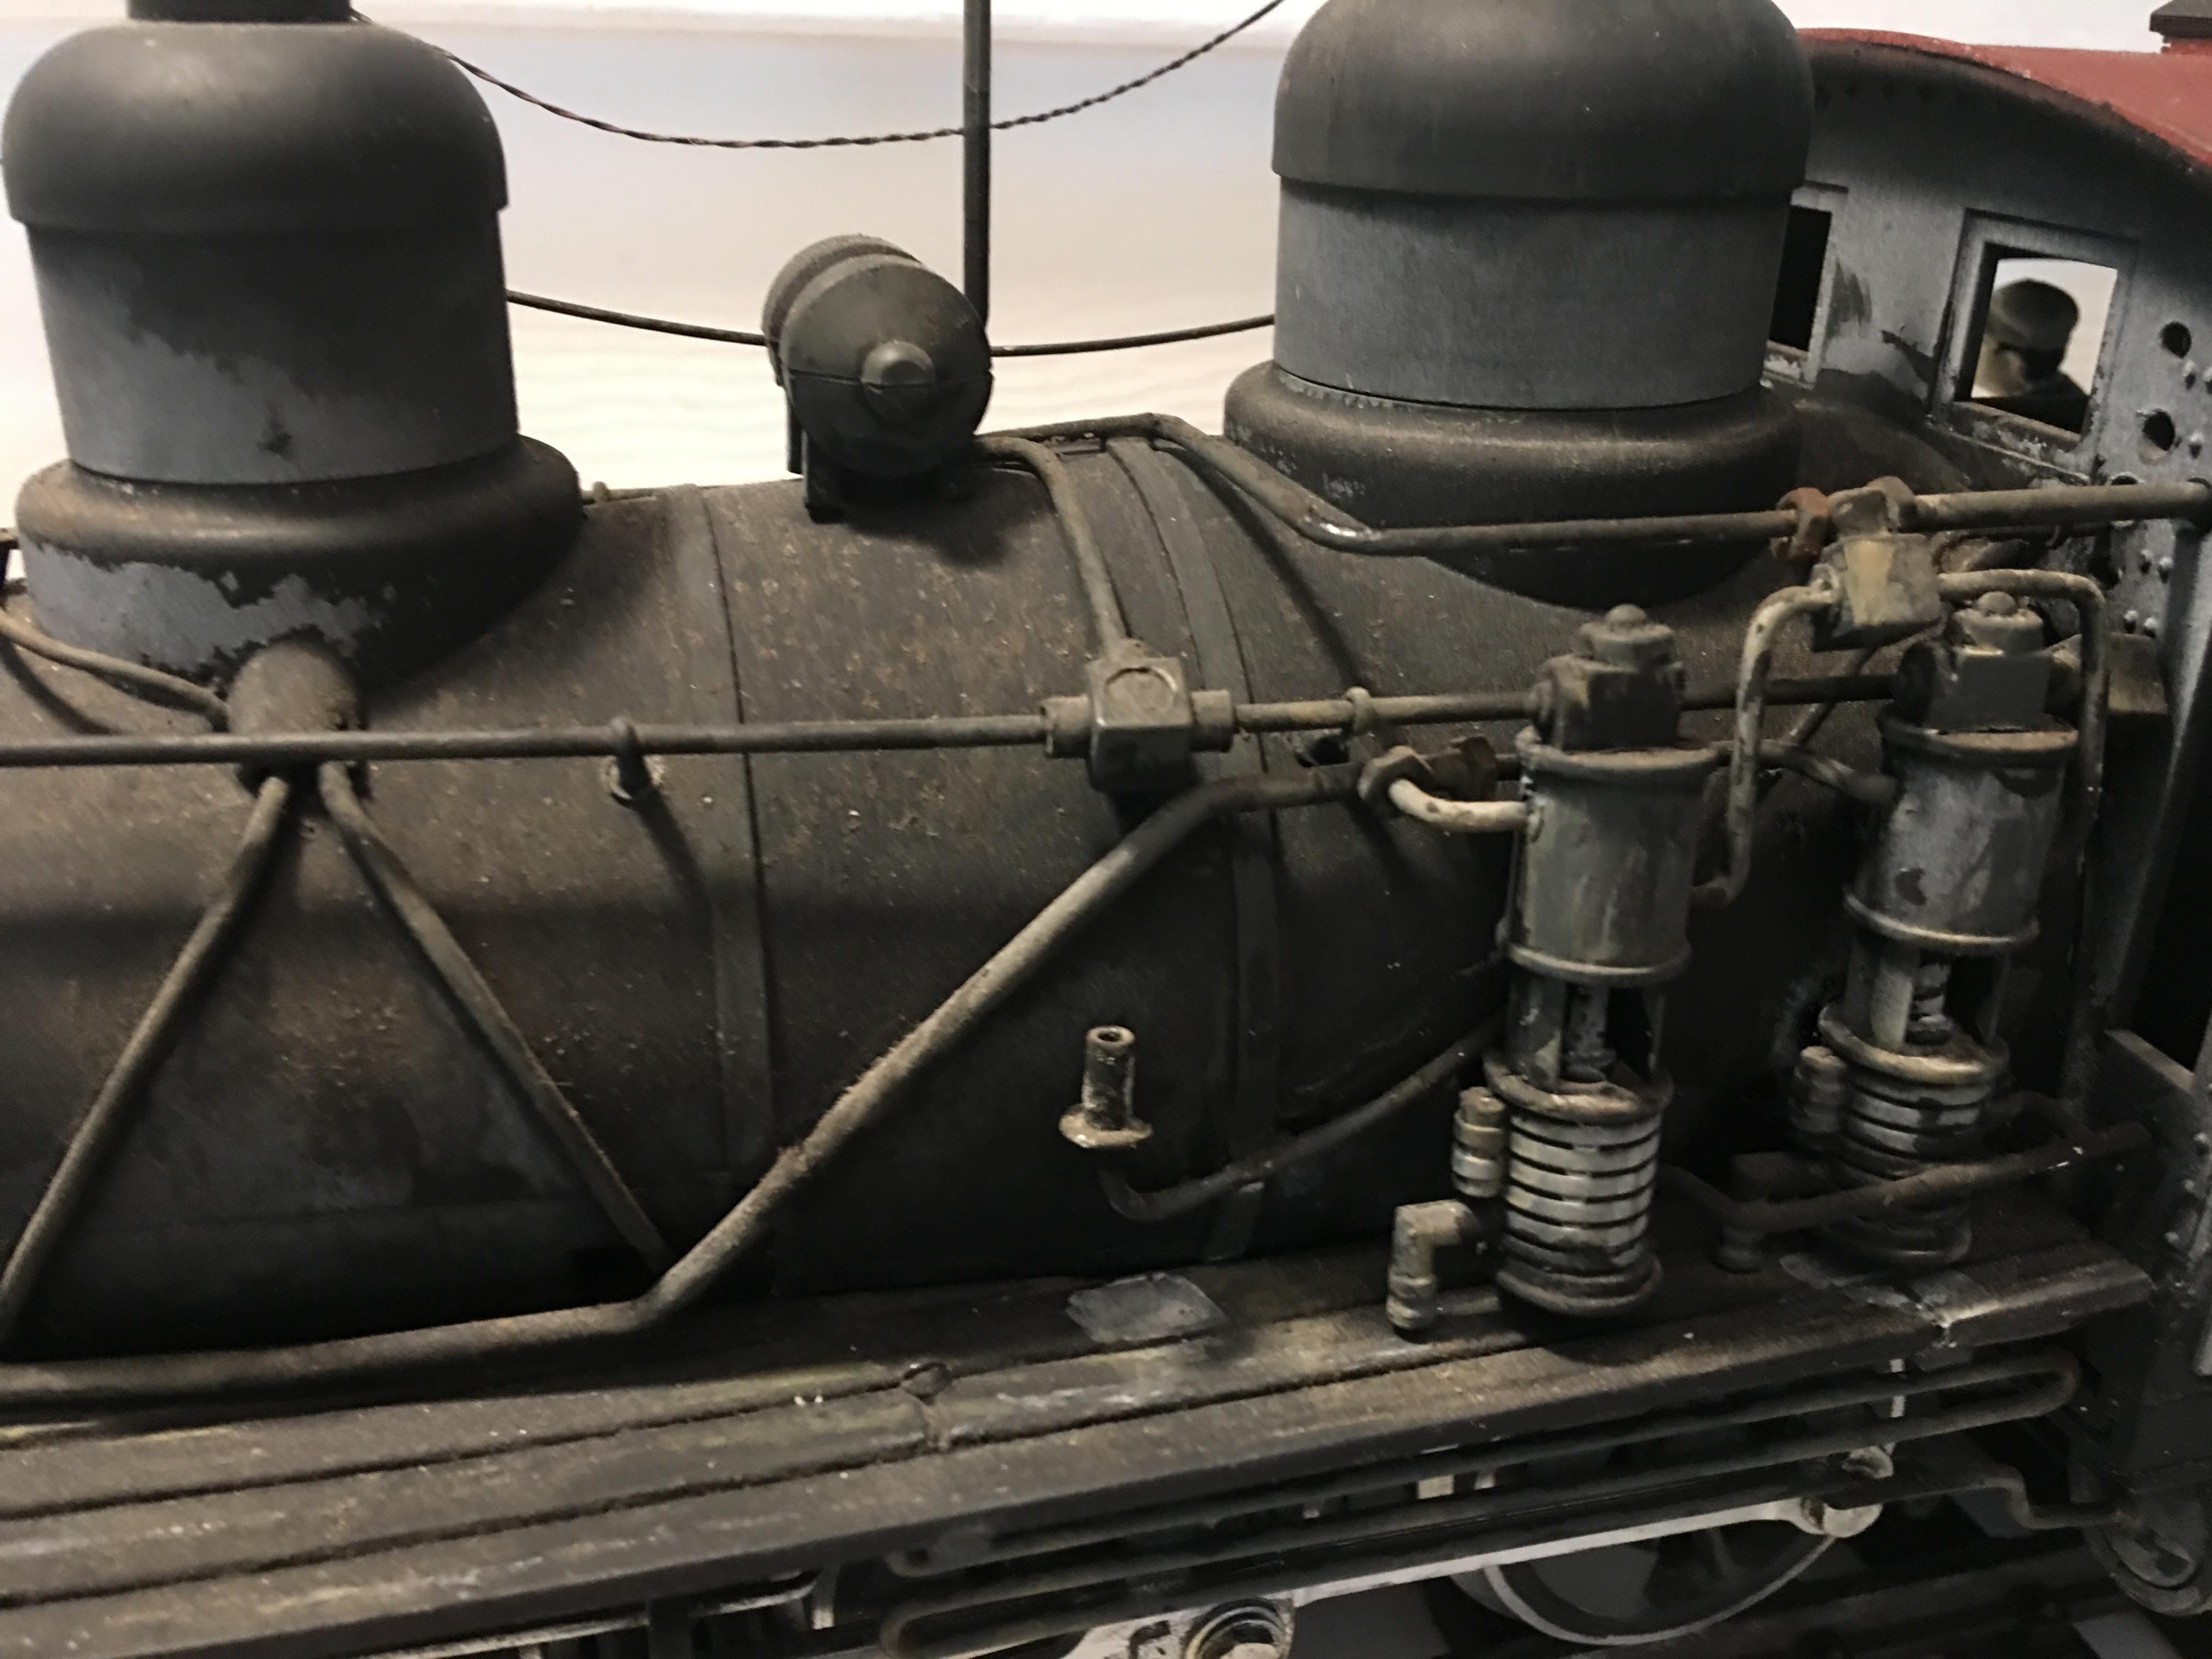
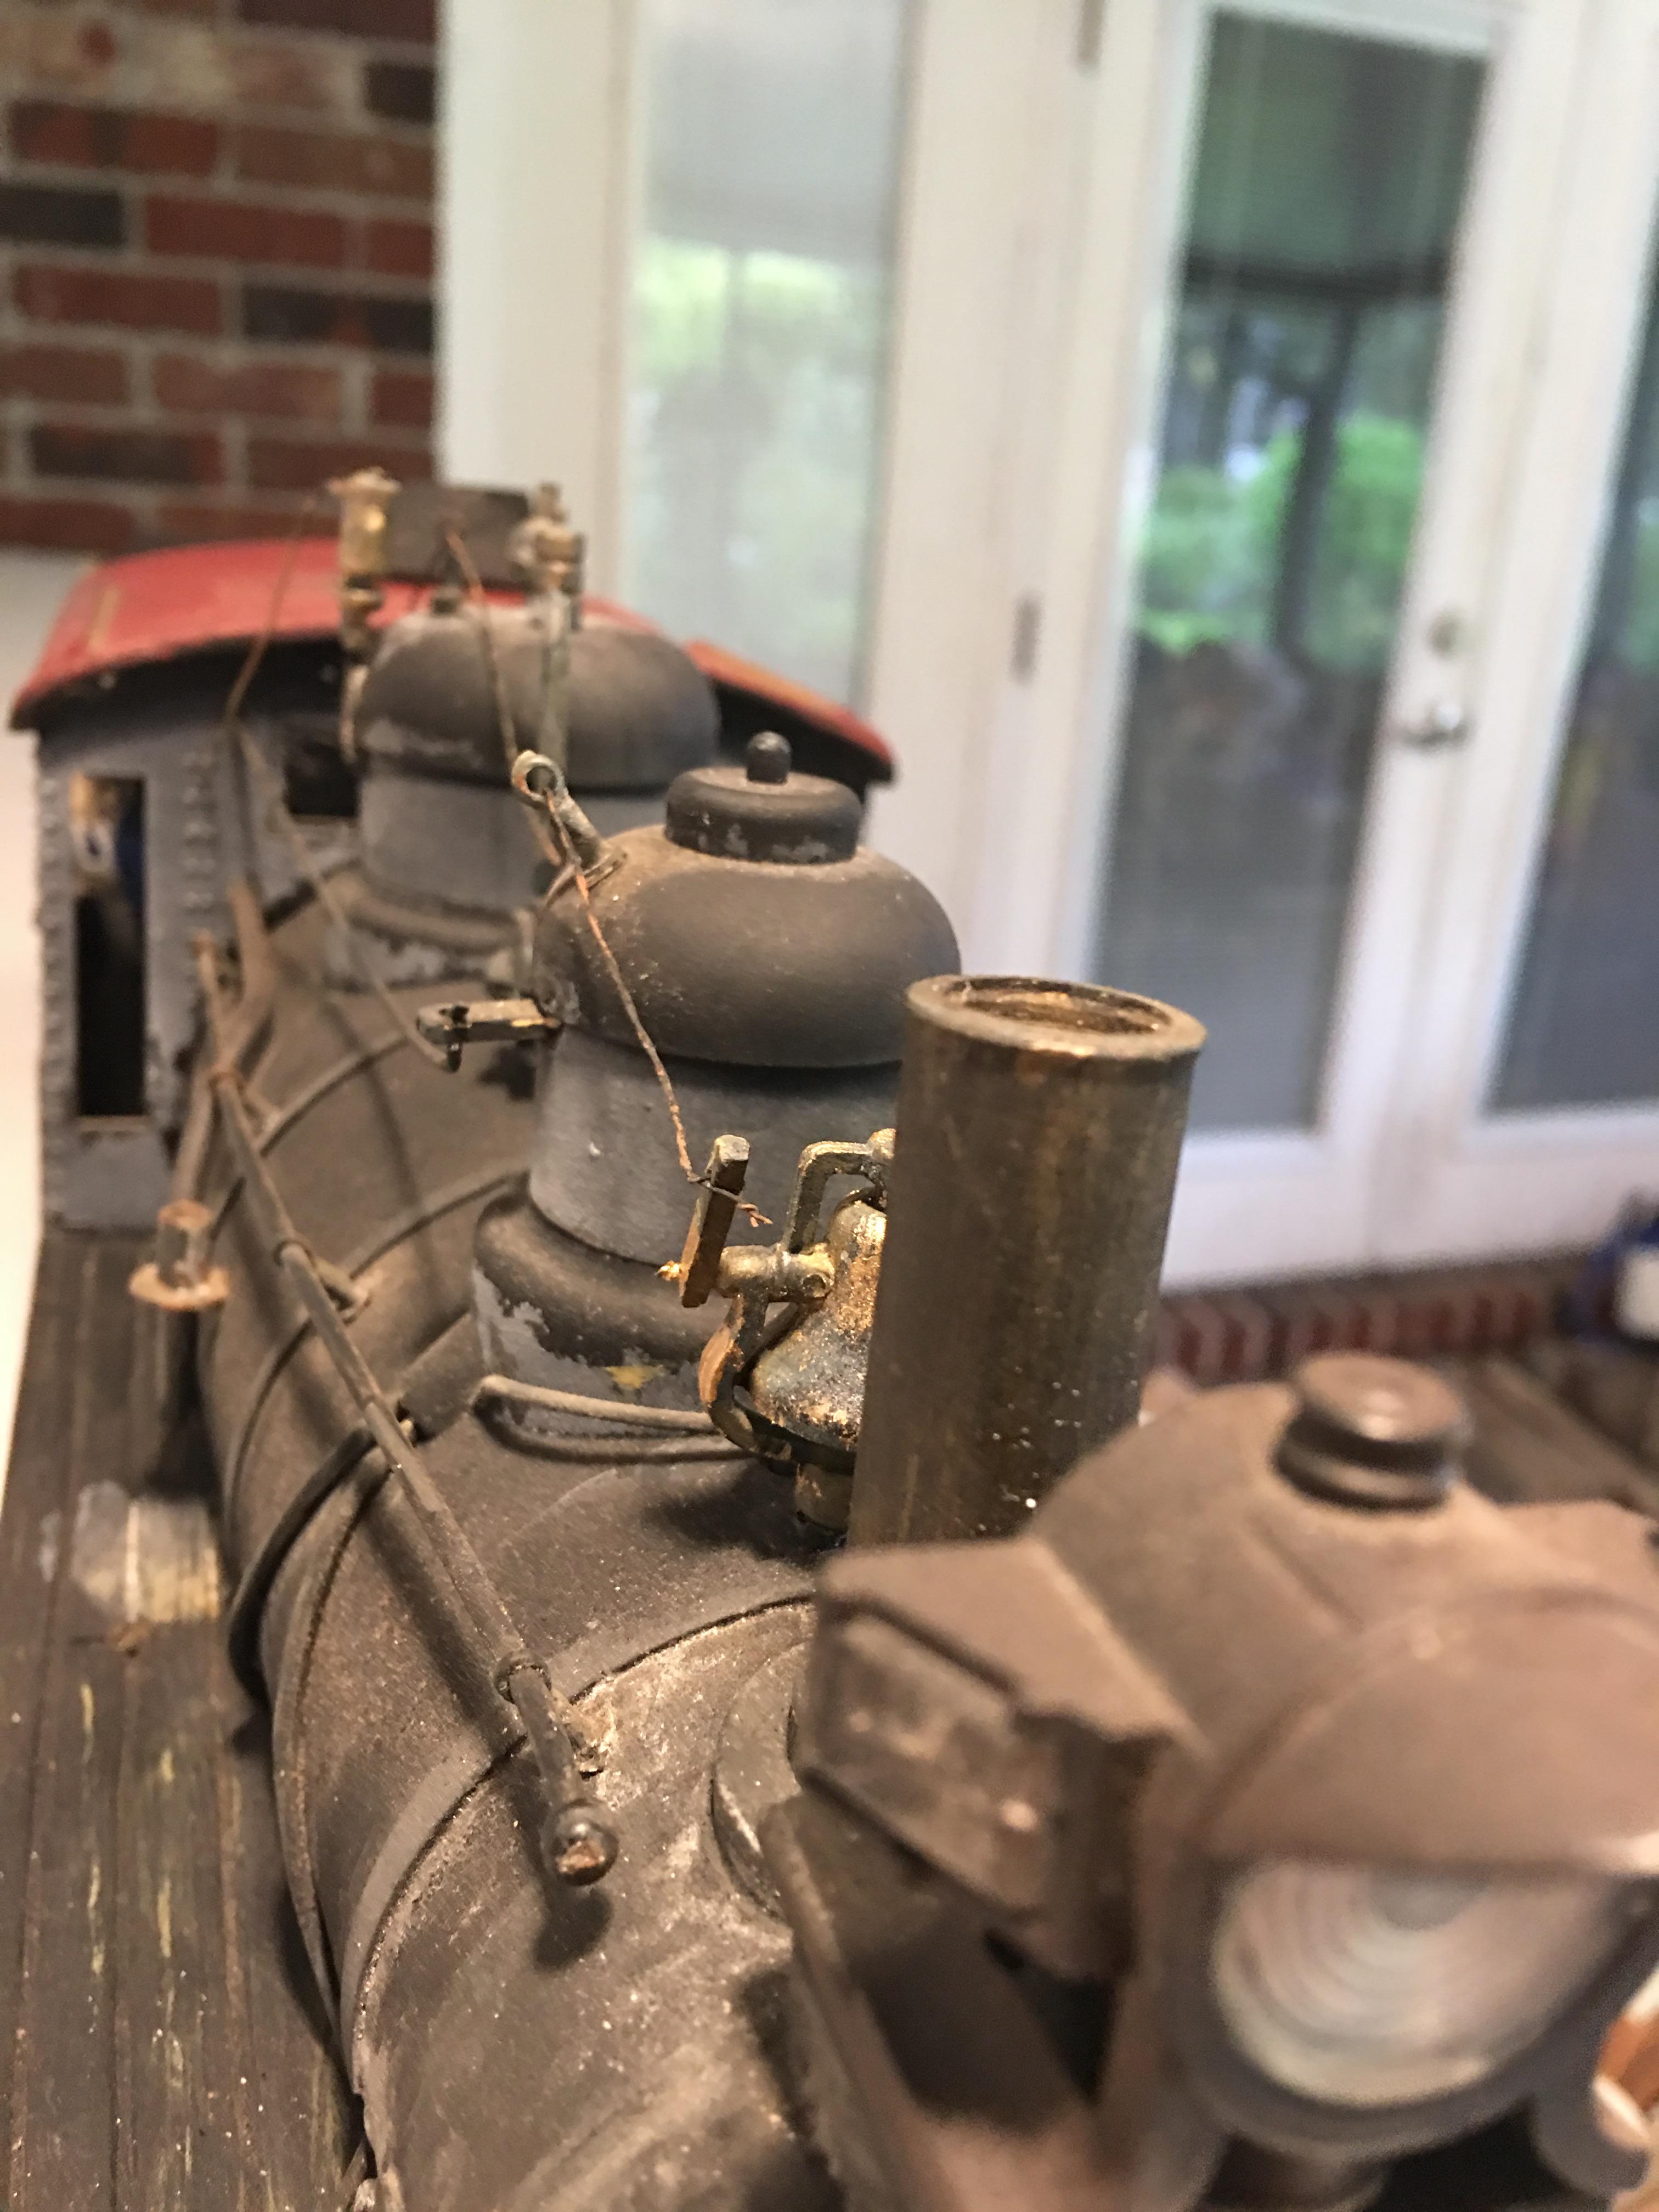
Always thought saddle tank engines were neat and with that in mind I uncovered an old Lionel 0-6-0 with outside drive gears that I had kit bashed several years ago. It wasn't a tank engine but it had a neat cab and unusual stack which was a little bent due to a smoke unit over heating. I had build a small tender to go with it to improve electrical pick up as the were no rail sliders . The drive system was so poor that I had to undo 1 of the driver wheels from the drive rod to get it to run as the gears were constantly getting out of sink. So I ditched the Lionel drive and substituted an LGB 0-4-0 engine # 2015, I reused the smoke box front the Lionel, making the body out of PVC tubing, added part of a Aristo-craft 2-4-2 Rogers tank buy cutting off 1 section of rivets and placing it on a piece of flat styrene that I sawed a slit in the piece of PVC tubing and inserted left to right into the slit leaving enough over hang or some side running boards. I cut the 2015 down on both sides and left the motor block housing. The Lionel cab had 2 tanks on it 1 left and 1 right on it's front and cut them off, made doors out of styrene and arched them like the windows before were done and cemented them in a open mode. The left side of the engine I suspended from the running board a scratch built ( out of styrene tube ) air tank adding piping with brass wire, on the right side I added some leftover cooling tubes from a Aristo-craft switcher. Put an air pump, I believe from an LGB engine, attaching it to the left side front of the tank also piping it with brass wire. Not quite sure where I got the sand dome but it fit the old time looking bill. After researching old saddle tank engines I discovered some of them had the steam dome inside the cab area hence I was able to shorten the engine by quite a bit. I reused the hand rail stations and added new brass wire, scratch built the front cow catcher and giving it a working engine look. The generator came off a big hauler along with the whistle which I had added wire to making stiffer. Had to make new covers for my cylinders as I was missing one of them from the 2015 but his gave the engine again and older look. The tender is just a styrene shell that I riveted using small brad nails, yes each one has it's own hole, sometimes I wonder where my mind goes when I'm not in charge. It is sitting on a passenger car truck for length and both wheels have power pick ups which are tied to the engine current. Color, well it was the color of the original cab and I liked it, sort of a rosy maroon, hence the name "Rosy". As most know I usually weather everything but for now just letting this one sit for a while looking pretty.
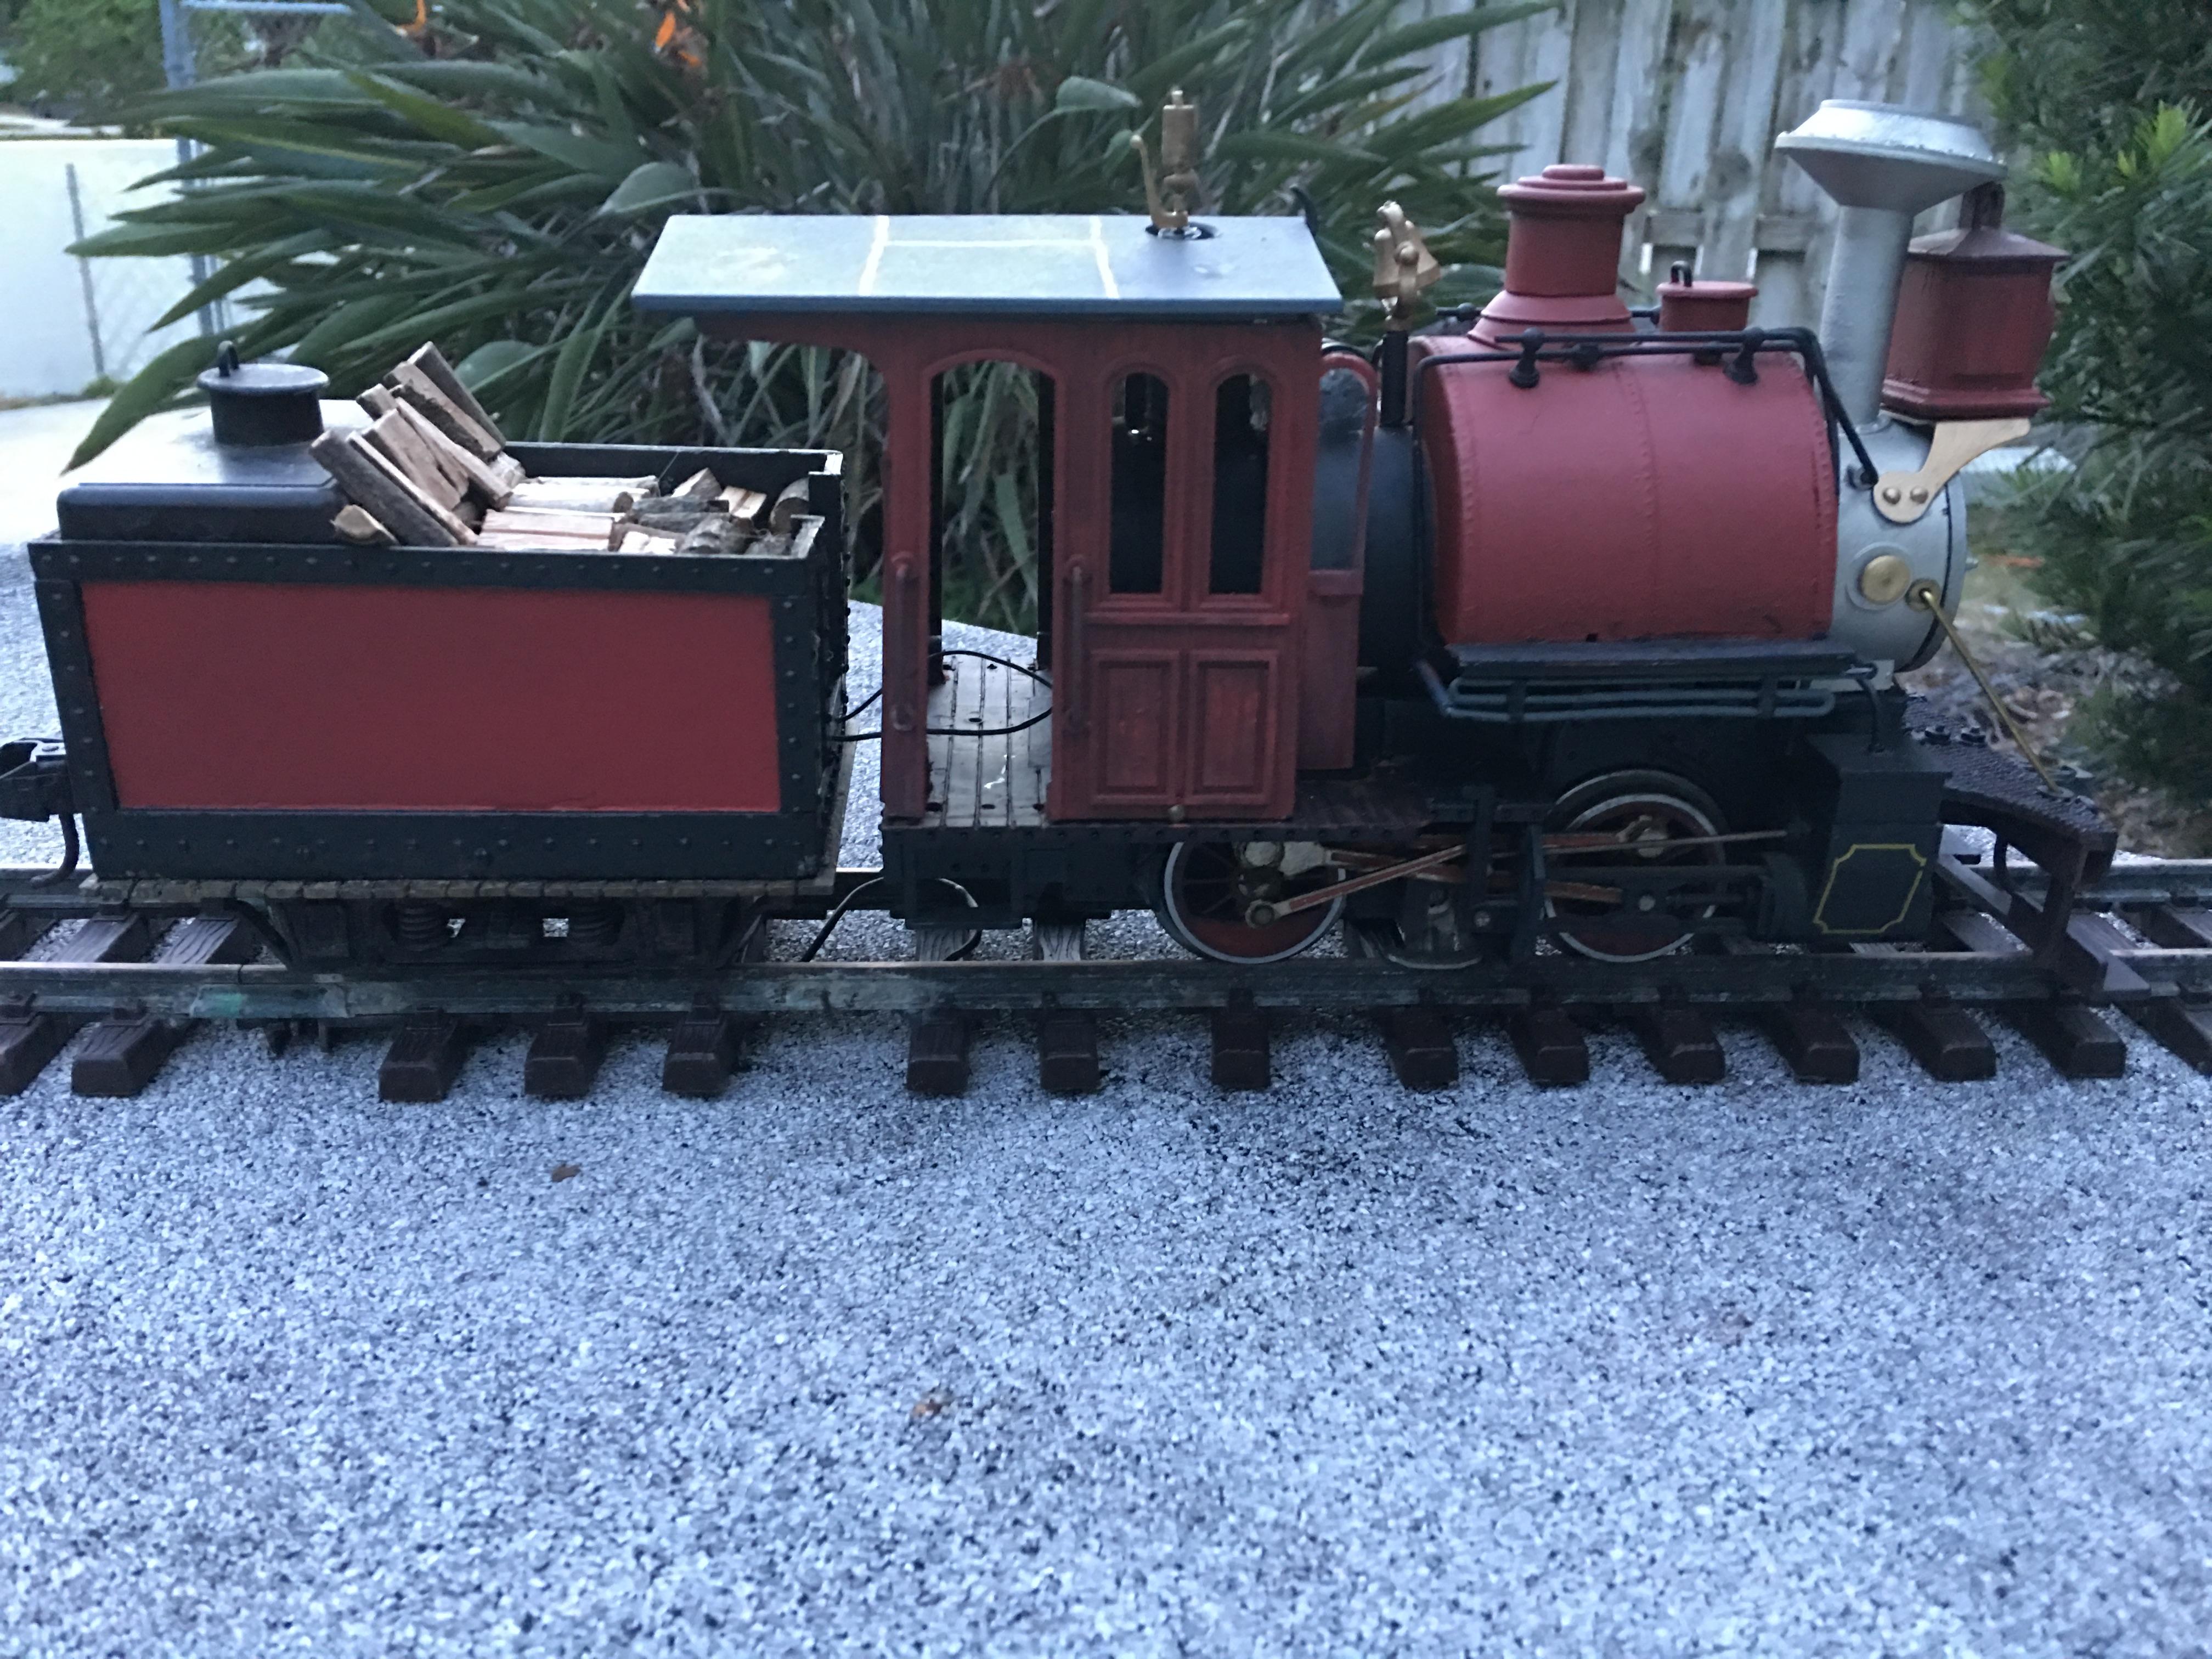
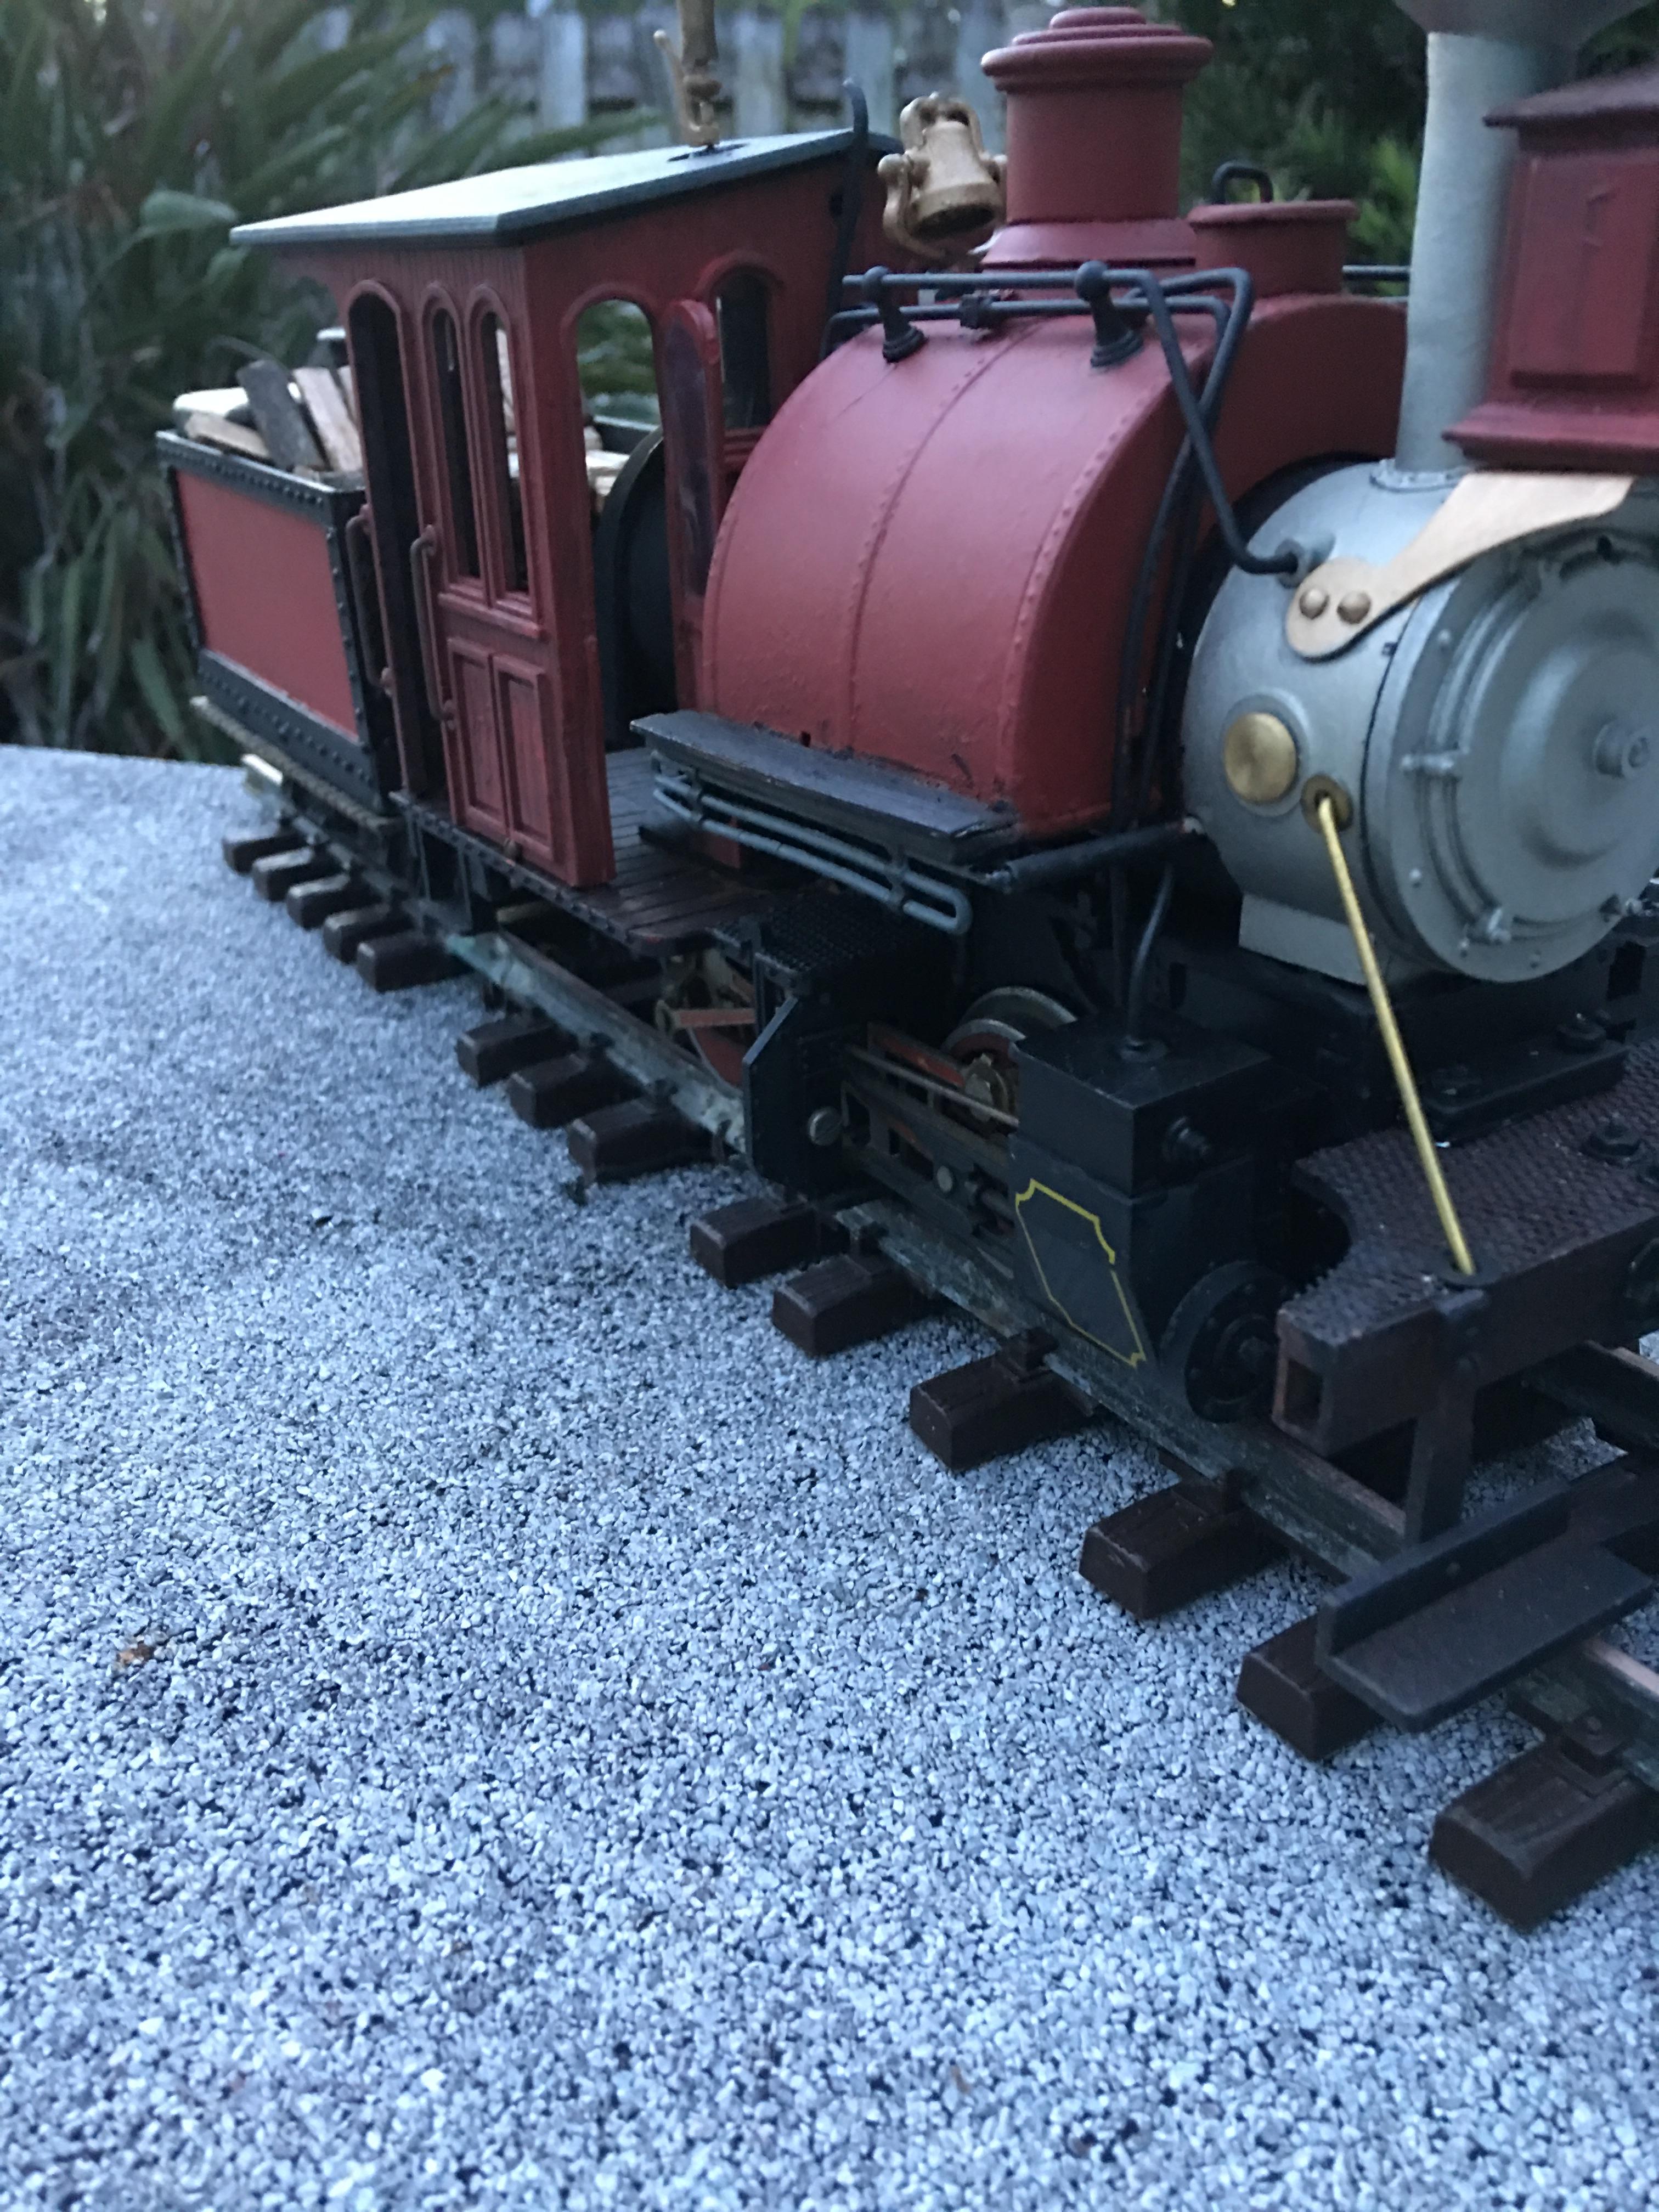
Made a Forney out of a LGB Stainz, has new boiler, steam dome, sand dome, smoke stack, all made from PVC fittings and pipe. Front where the original smoke stack screwed in now has a 1/4" 1/4 x 20 bolt going up into the boiler and secured to the lead weight. The smoke stack is screwed to the boiler via electric lamp fitting which is 1/8"MPT x 1/4"MPT and holds the unit together very well, and you can pick up the engine by it ,nice handle. The cab is held on with 2/56 machine screws one each side and 2 from underneath, although strong I still use the stack for pick up. The rear trailing trucks are from a Kalamazoo/HLW (tender) using them allowed to keep the low profile they have electrical pickups and extra fishing weights to help hold them down to the track. The cab is a cut down 2020 along with roof but extra extension to cover back to the tender part. Water tender part is a cut down Kalamazoo/HLW and houses small speaker with simple chuff system. Made the front pilot from evergreen styrene. Couplers are both Kadee G scale. Bell rope is twisted 20 gauge wire strands, and sand dome dump rod is from piano wire. Painted the cab to look like wood (orange wood of course). Lettering is from a silhouette cameo. The smoke stack uses a 5vdc seuthe unit, headlight is lit with a LED both powered of a very small voltage reducer I got from gfhappyboy on EBay, it also powers 2 flickering LED's in the rear of the firebox. Forney measures out at only 13 3/4" and works great on 4' radius curves. Fun build, Bill
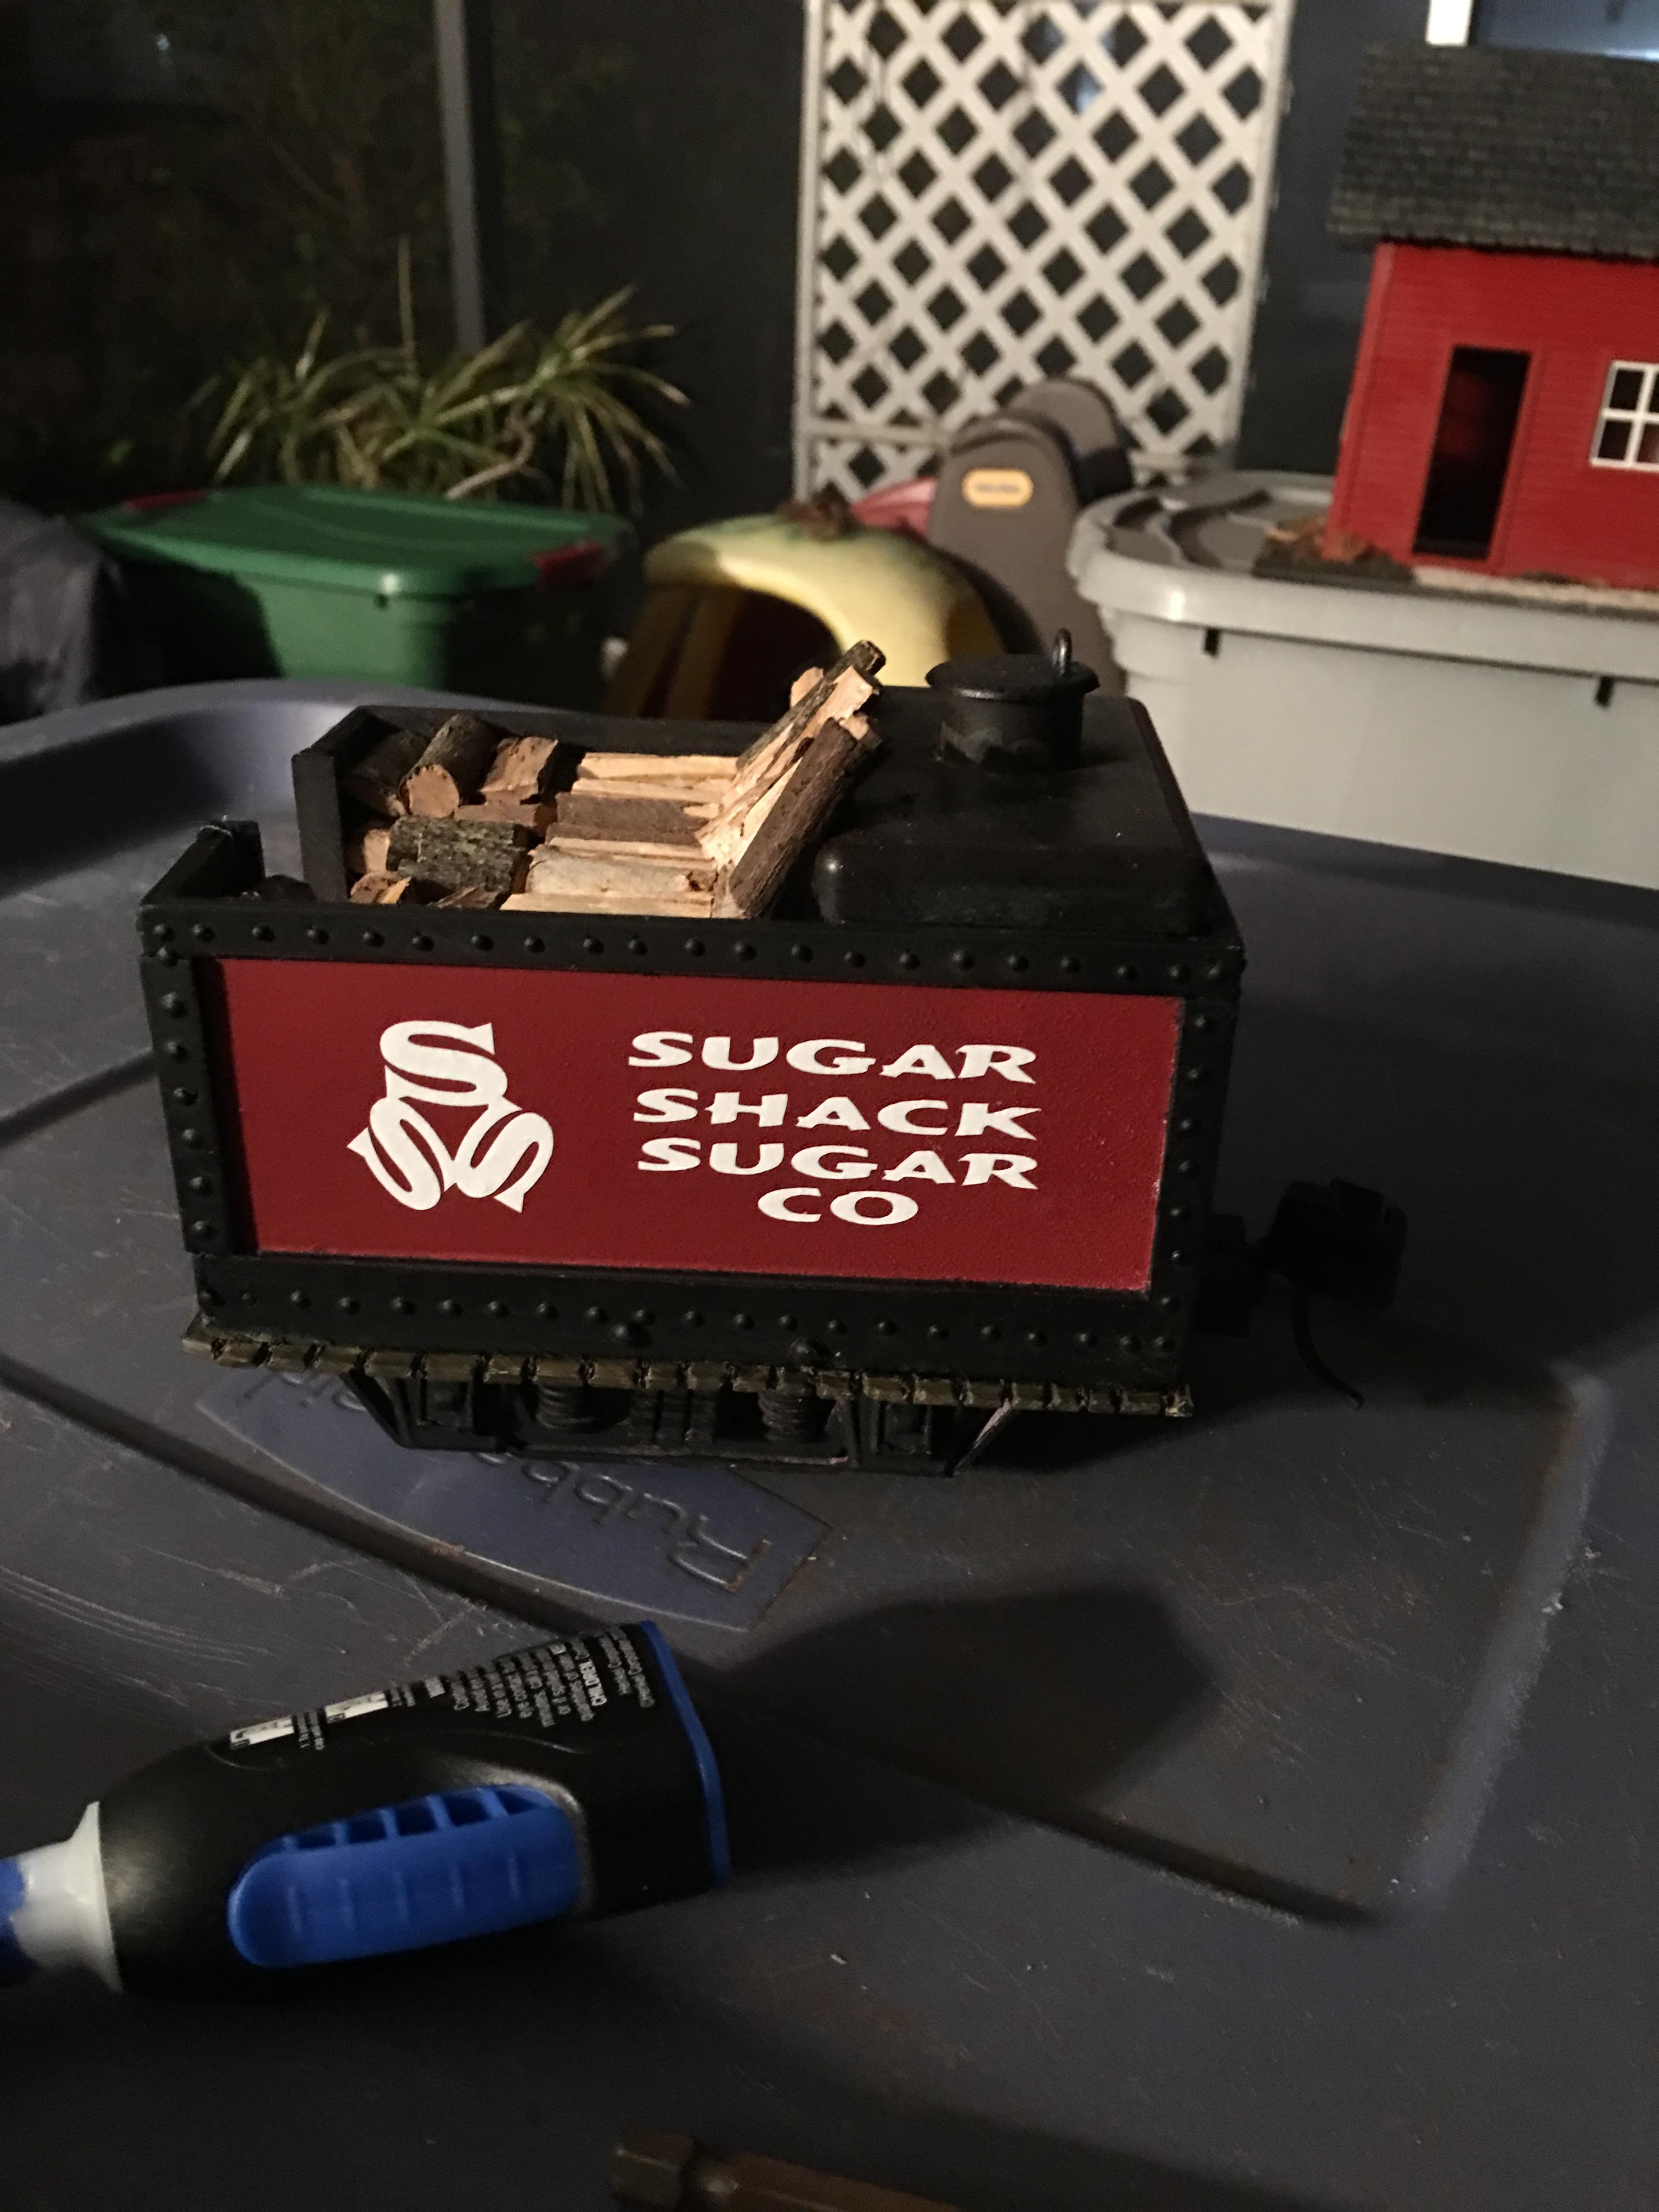
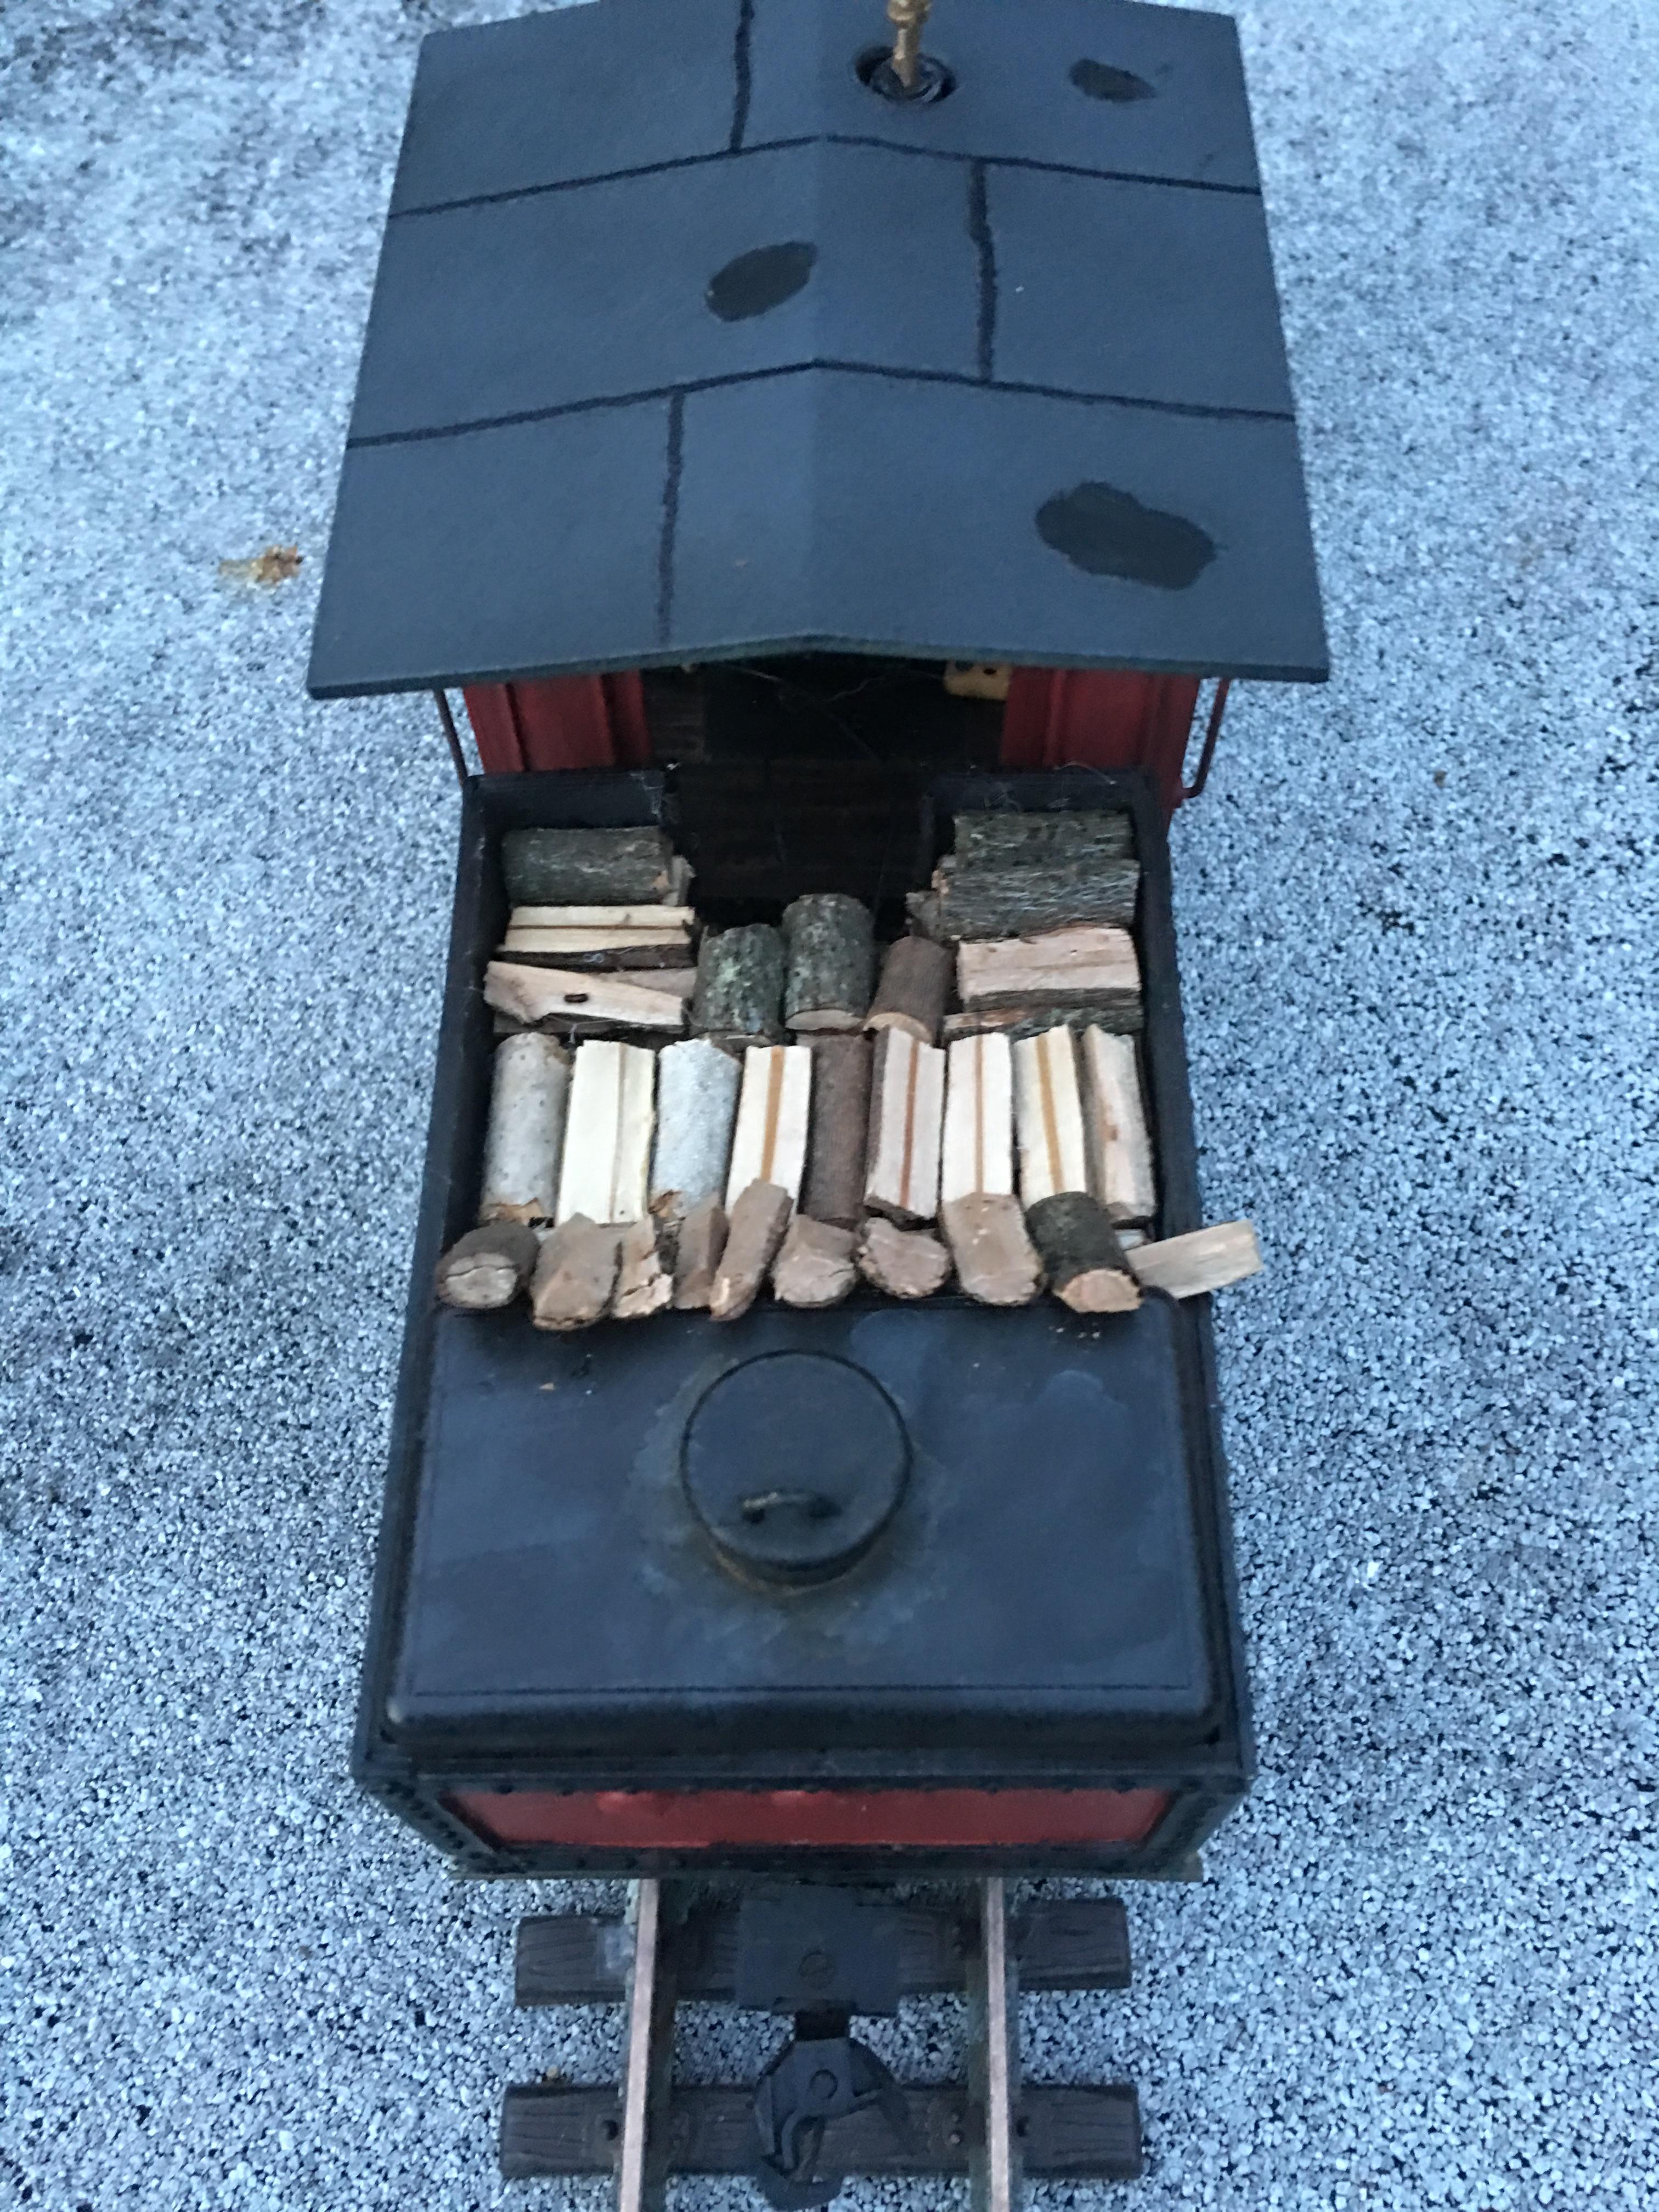
Always thought saddle tank engines were neat and with that in mind I uncovered an old Lionel 0-6-0 with outside drive gears that I had kit bashed several years ago. It wasn't a tank engine but it had a neat cab and unusual stack which was a little bent due to a smoke unit over heating. I had build a small tender to go with it to improve electrical pick up as the were no rail sliders . The drive system was so poor that I had to undo 1 of the driver wheels from the drive rod to get it to run as the gears were constantly getting out of sink. So I ditched the Lionel drive and substituted an LGB 0-4-0 engine # 2015, I reused the smoke box front the Lionel, making the body out of PVC tubing, added part of a Aristo-craft 2-4-2 Rogers tank buy cutting off 1 section of rivets and placing it on a piece of flat styrene that I sawed a slit in the piece of PVC tubing and inserted left to right into the slit leaving enough over hang or some side running boards. I cut the 2015 down on both sides and left the motor block housing. The Lionel cab had 2 tanks on it 1 left and 1 right on it's front and cut them off, made doors out of styrene and arched them like the windows before were done and cemented them in a open mode. The left side of the engine I suspended from the running board a scratch built ( out of styrene tube ) air tank adding piping with brass wire, on the right side I added some leftover cooling tubes from a Aristo-craft switcher. Put an air pump, I believe from an LGB engine, attaching it to the left side front of the tank also piping it with brass wire. Not quite sure where I got the sand dome but it fit the old time looking bill. After researching old saddle tank engines I discovered some of them had the steam dome inside the cab area hence I was able to shorten the engine by quite a bit and made it out off old passenger car stove. I reused the hand rail stations and added new brass wire, scratch built the front cow catcher and giving it a working engine look. The generator came off a big hauler along with the whistle which I had added wire to making stiffer. Had to make new covers for my cylinders as I was missing one of them from the 2015 but his gave the engine again and older look. Added LED lighting and 5 volt smoke unit along with red and orange flickering LEDs in the fire box, lights the cab up nice at night. The tender is just a styrene shell that I riveted using small brad nails, yes each one has it's own hole, sometimes I wonder where my mind goes when I'm not in charge. It is sitting on a passenger car truck for length and both wheels have power pick ups which are tied to the engine current. Added rear wood from twigs for the tender load. Color, well it was the color of the original cab and I liked it, sort of a rosy maroon, hence the name "Rosy". I usually weather everything but for now just letting this one sit for a while looking pretty. After conversing with friend Eric in Hawaii I've decided to make me a sugar cane train, as there were several in Florida and when I do I'll show the cars and new caboose.
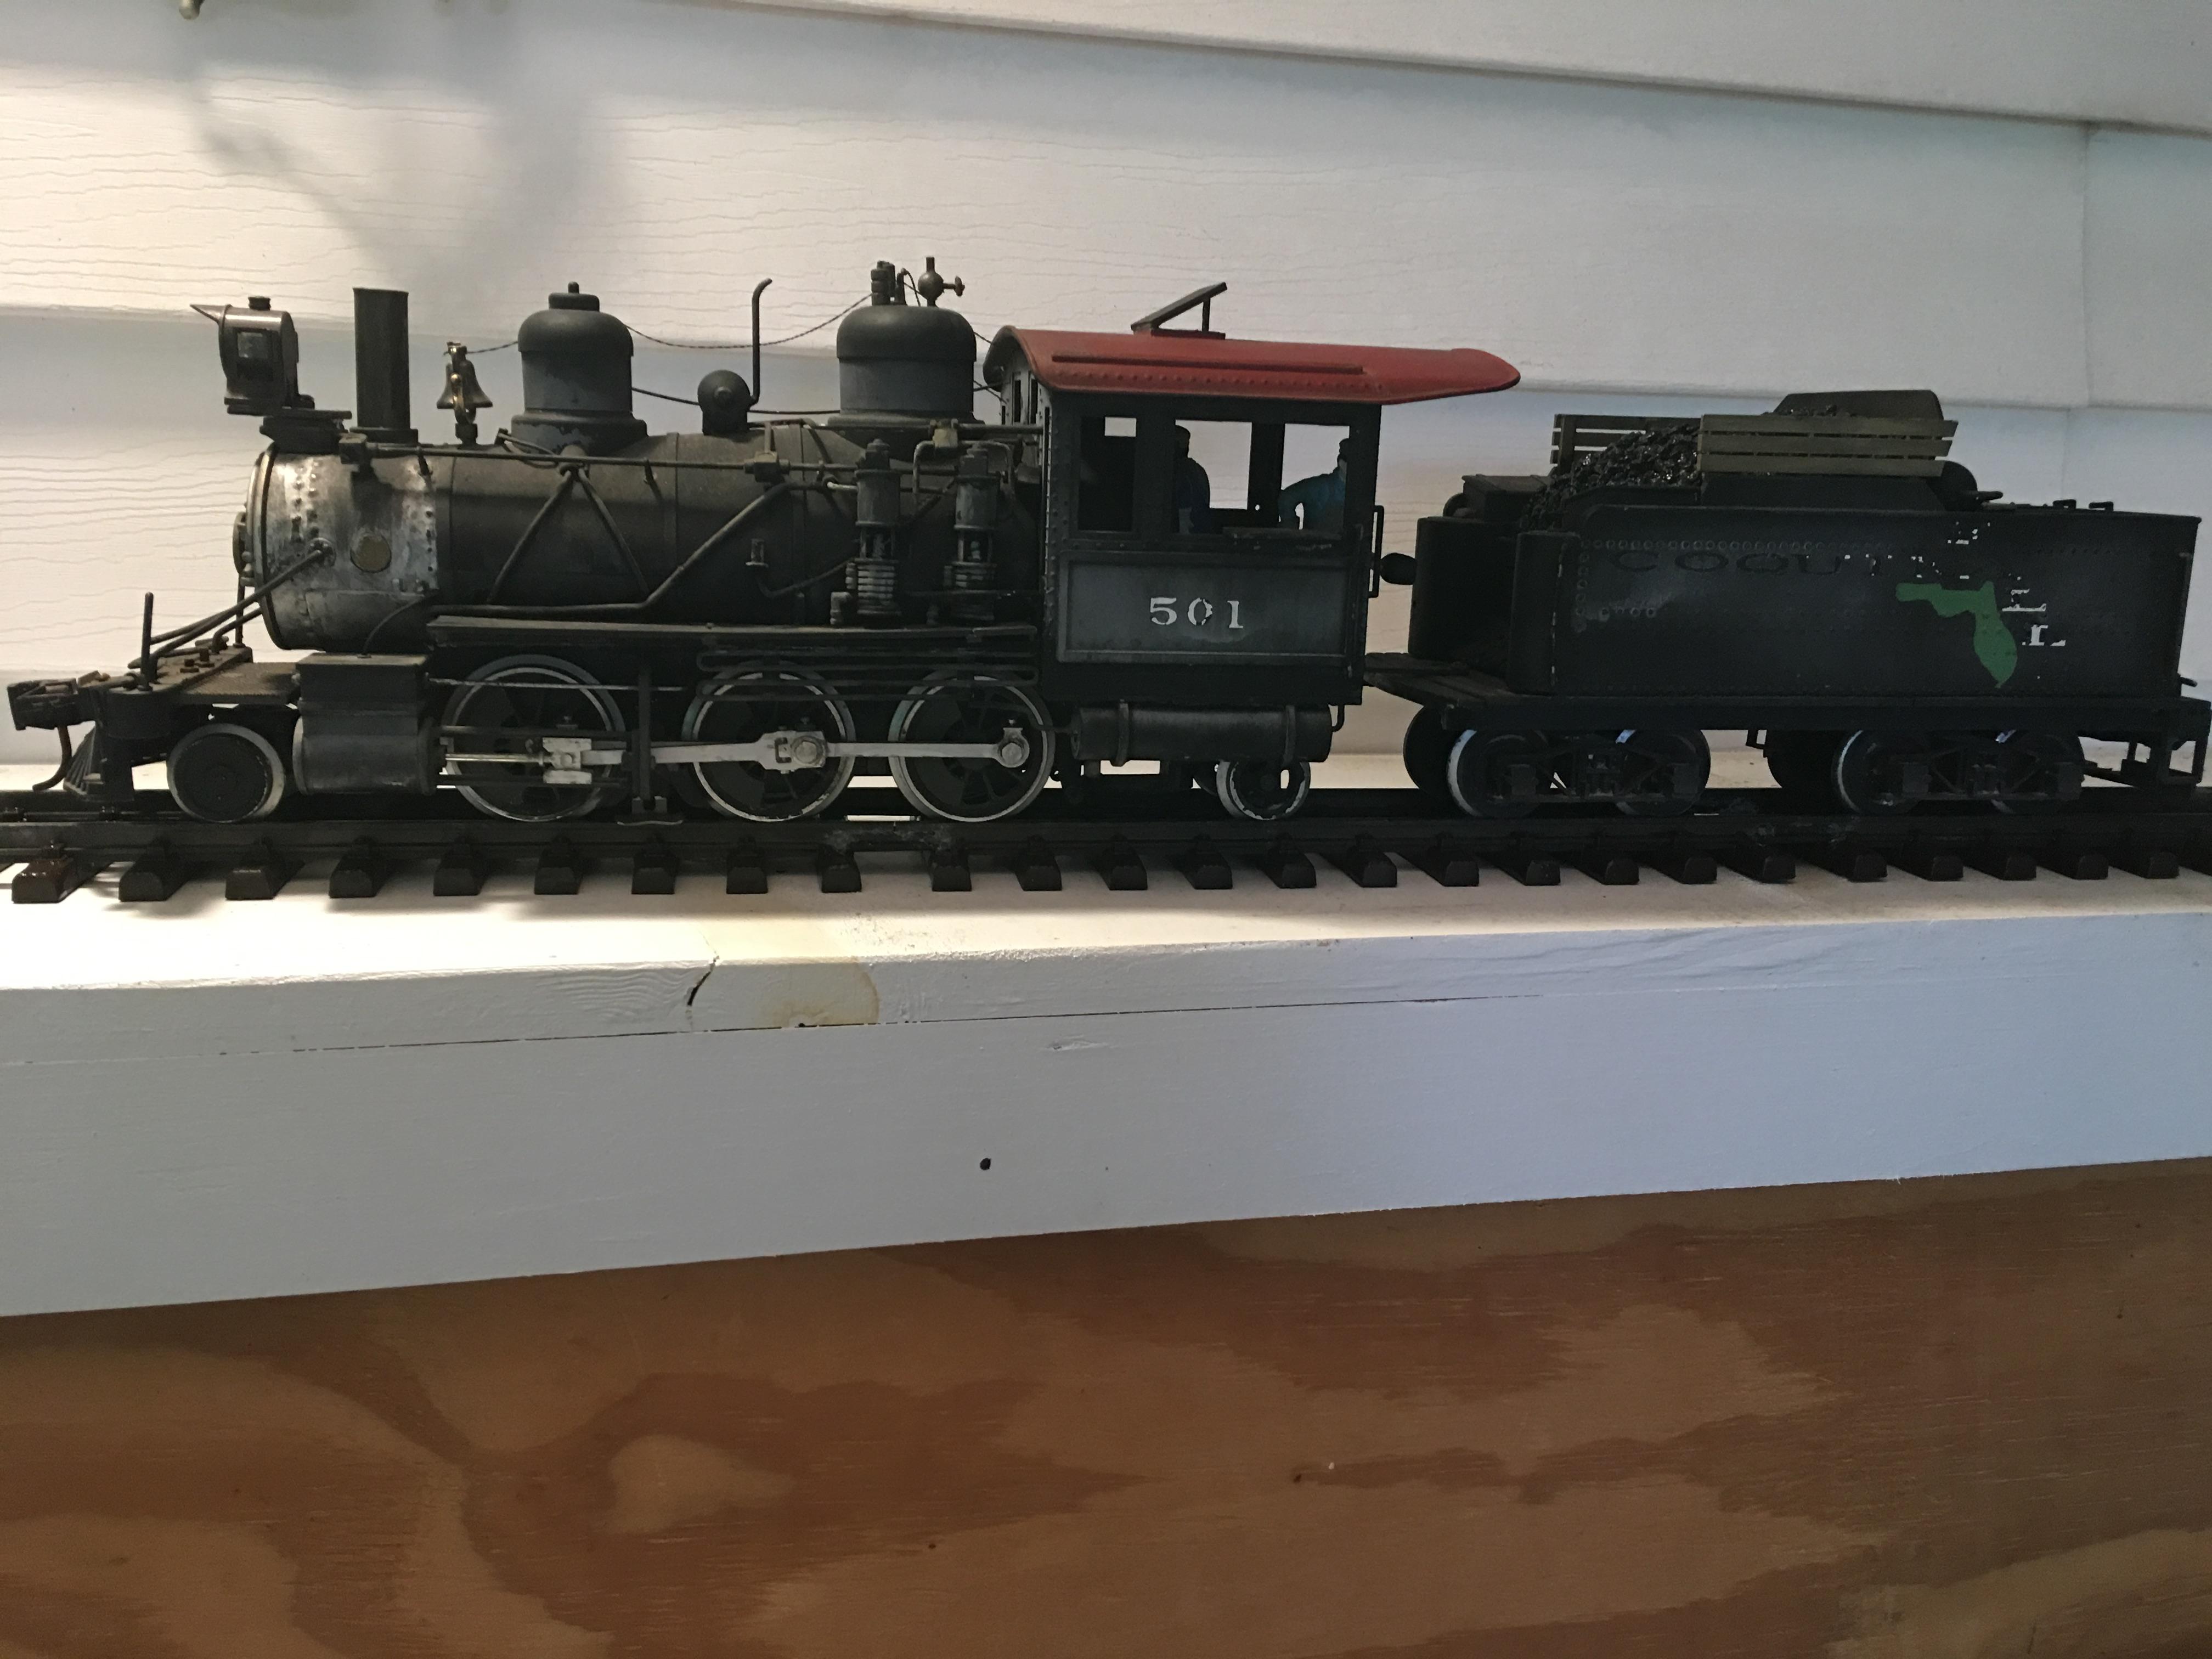
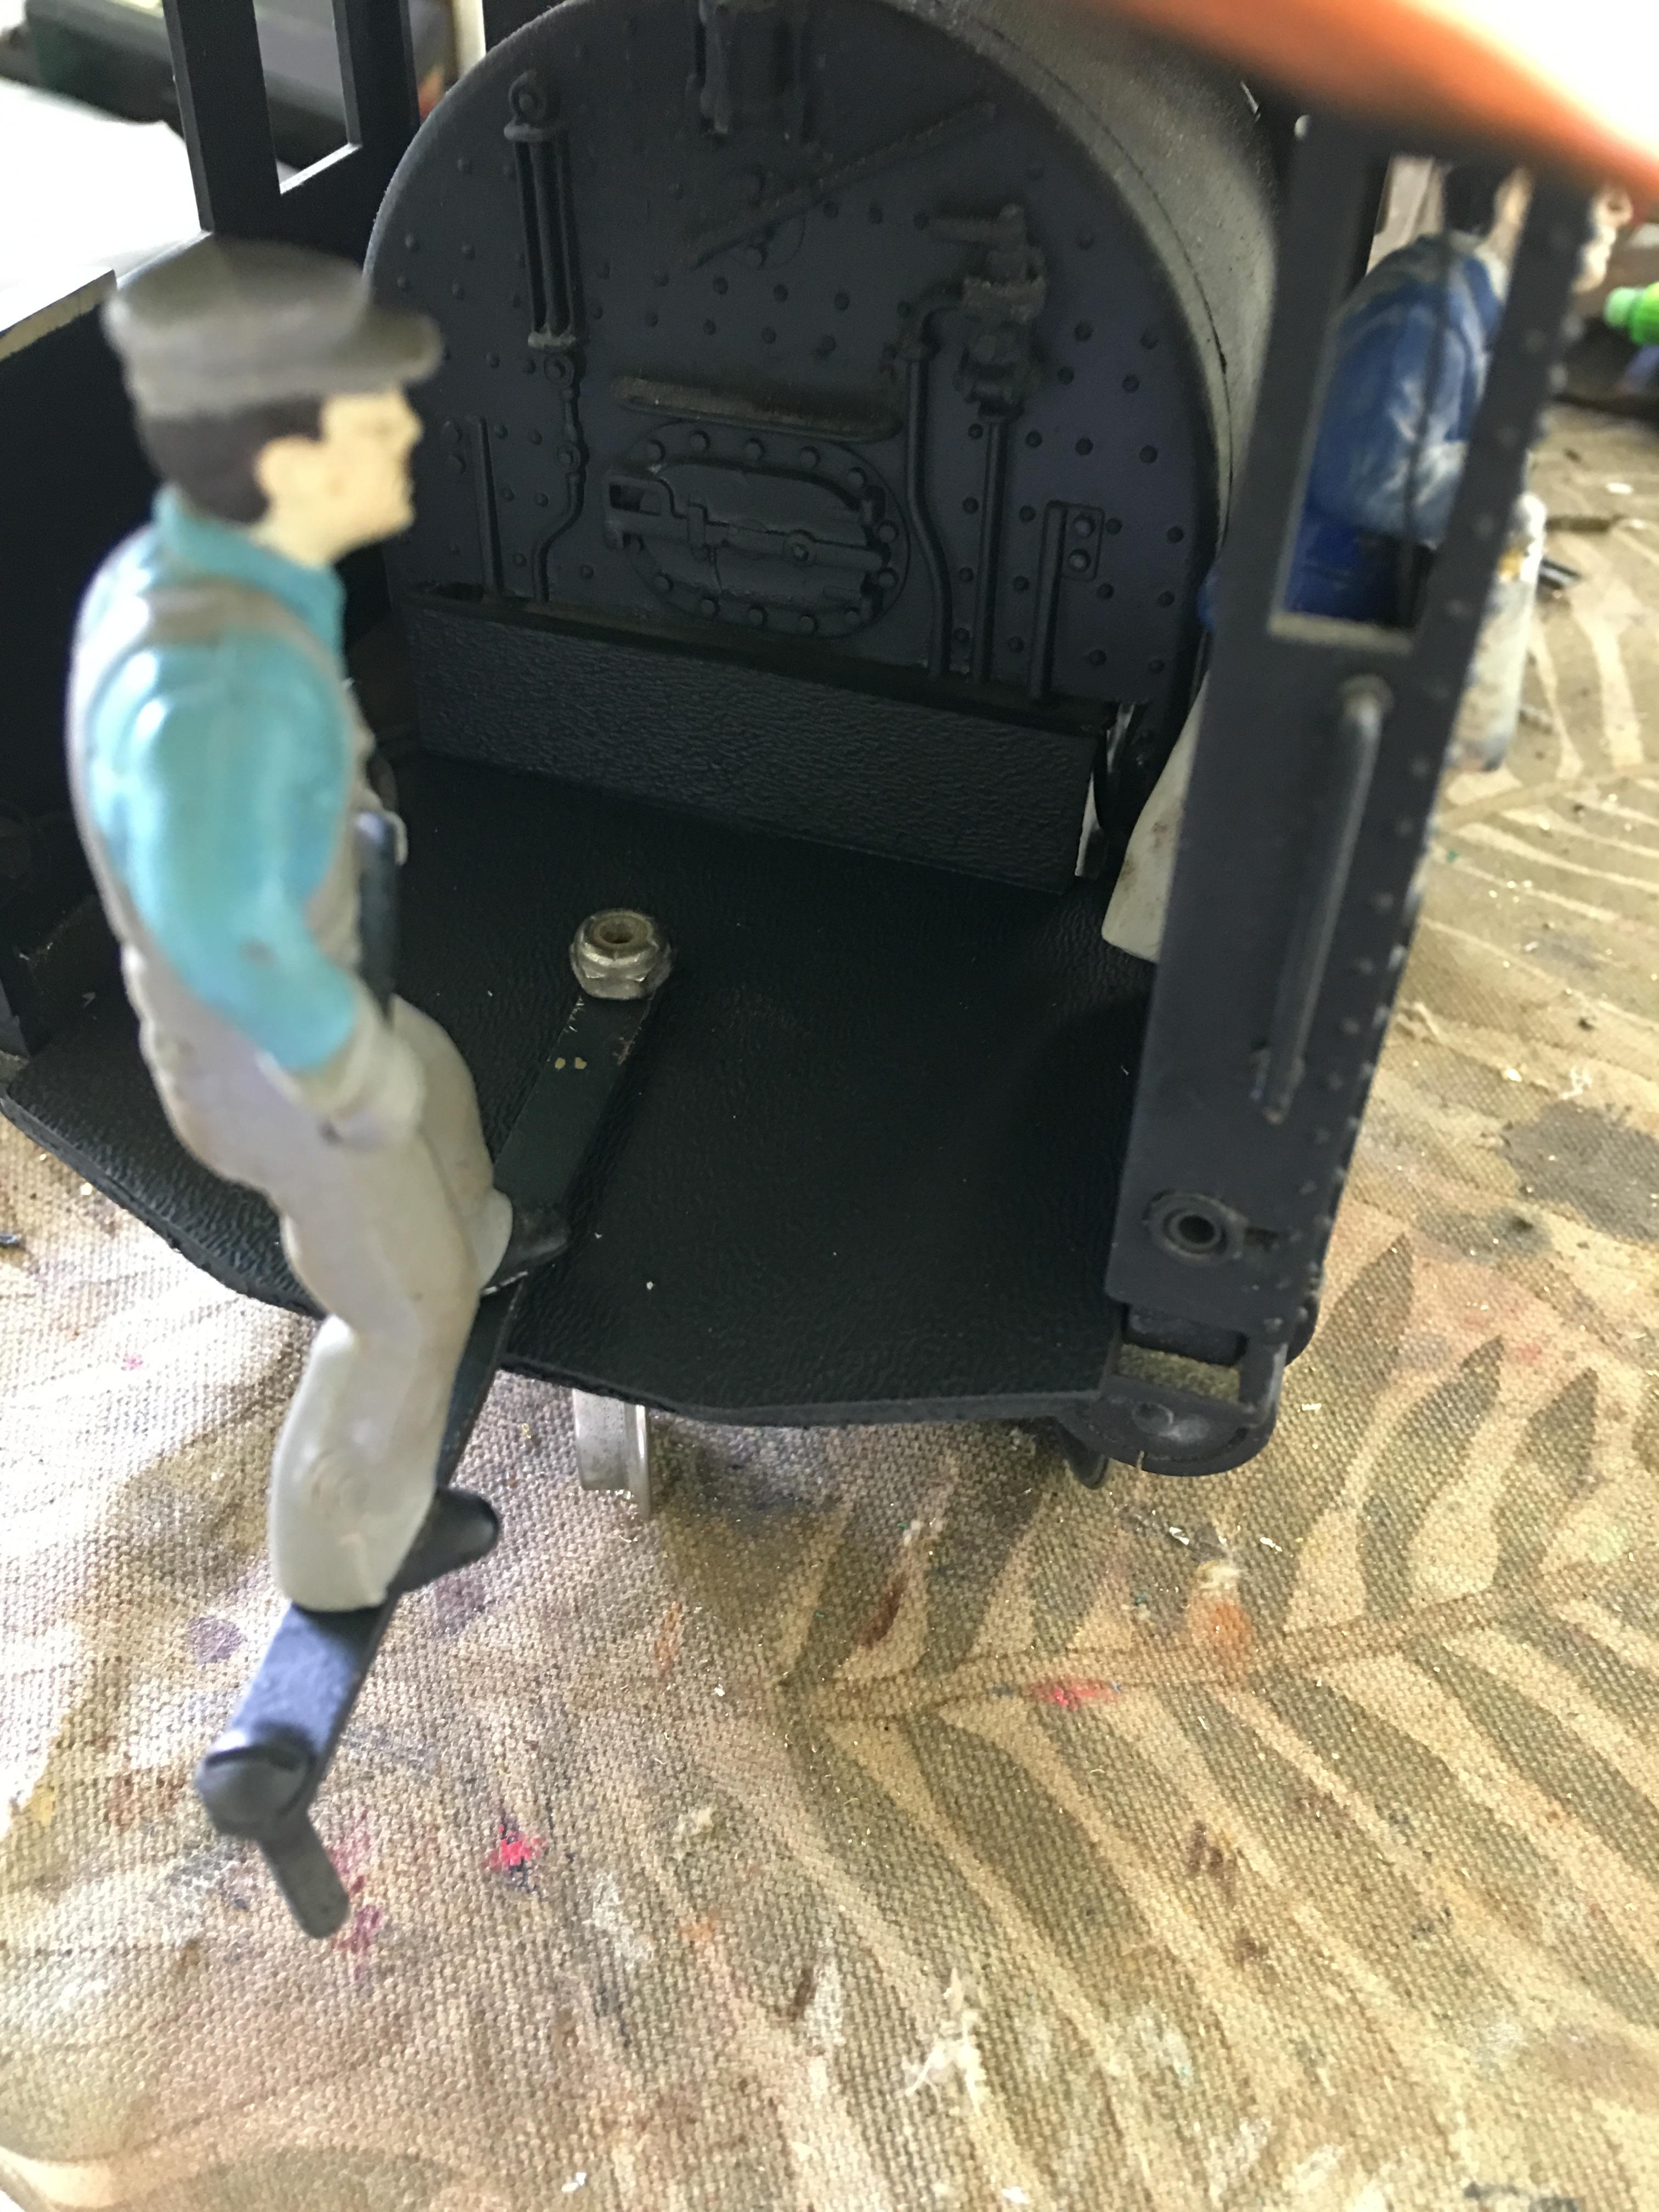
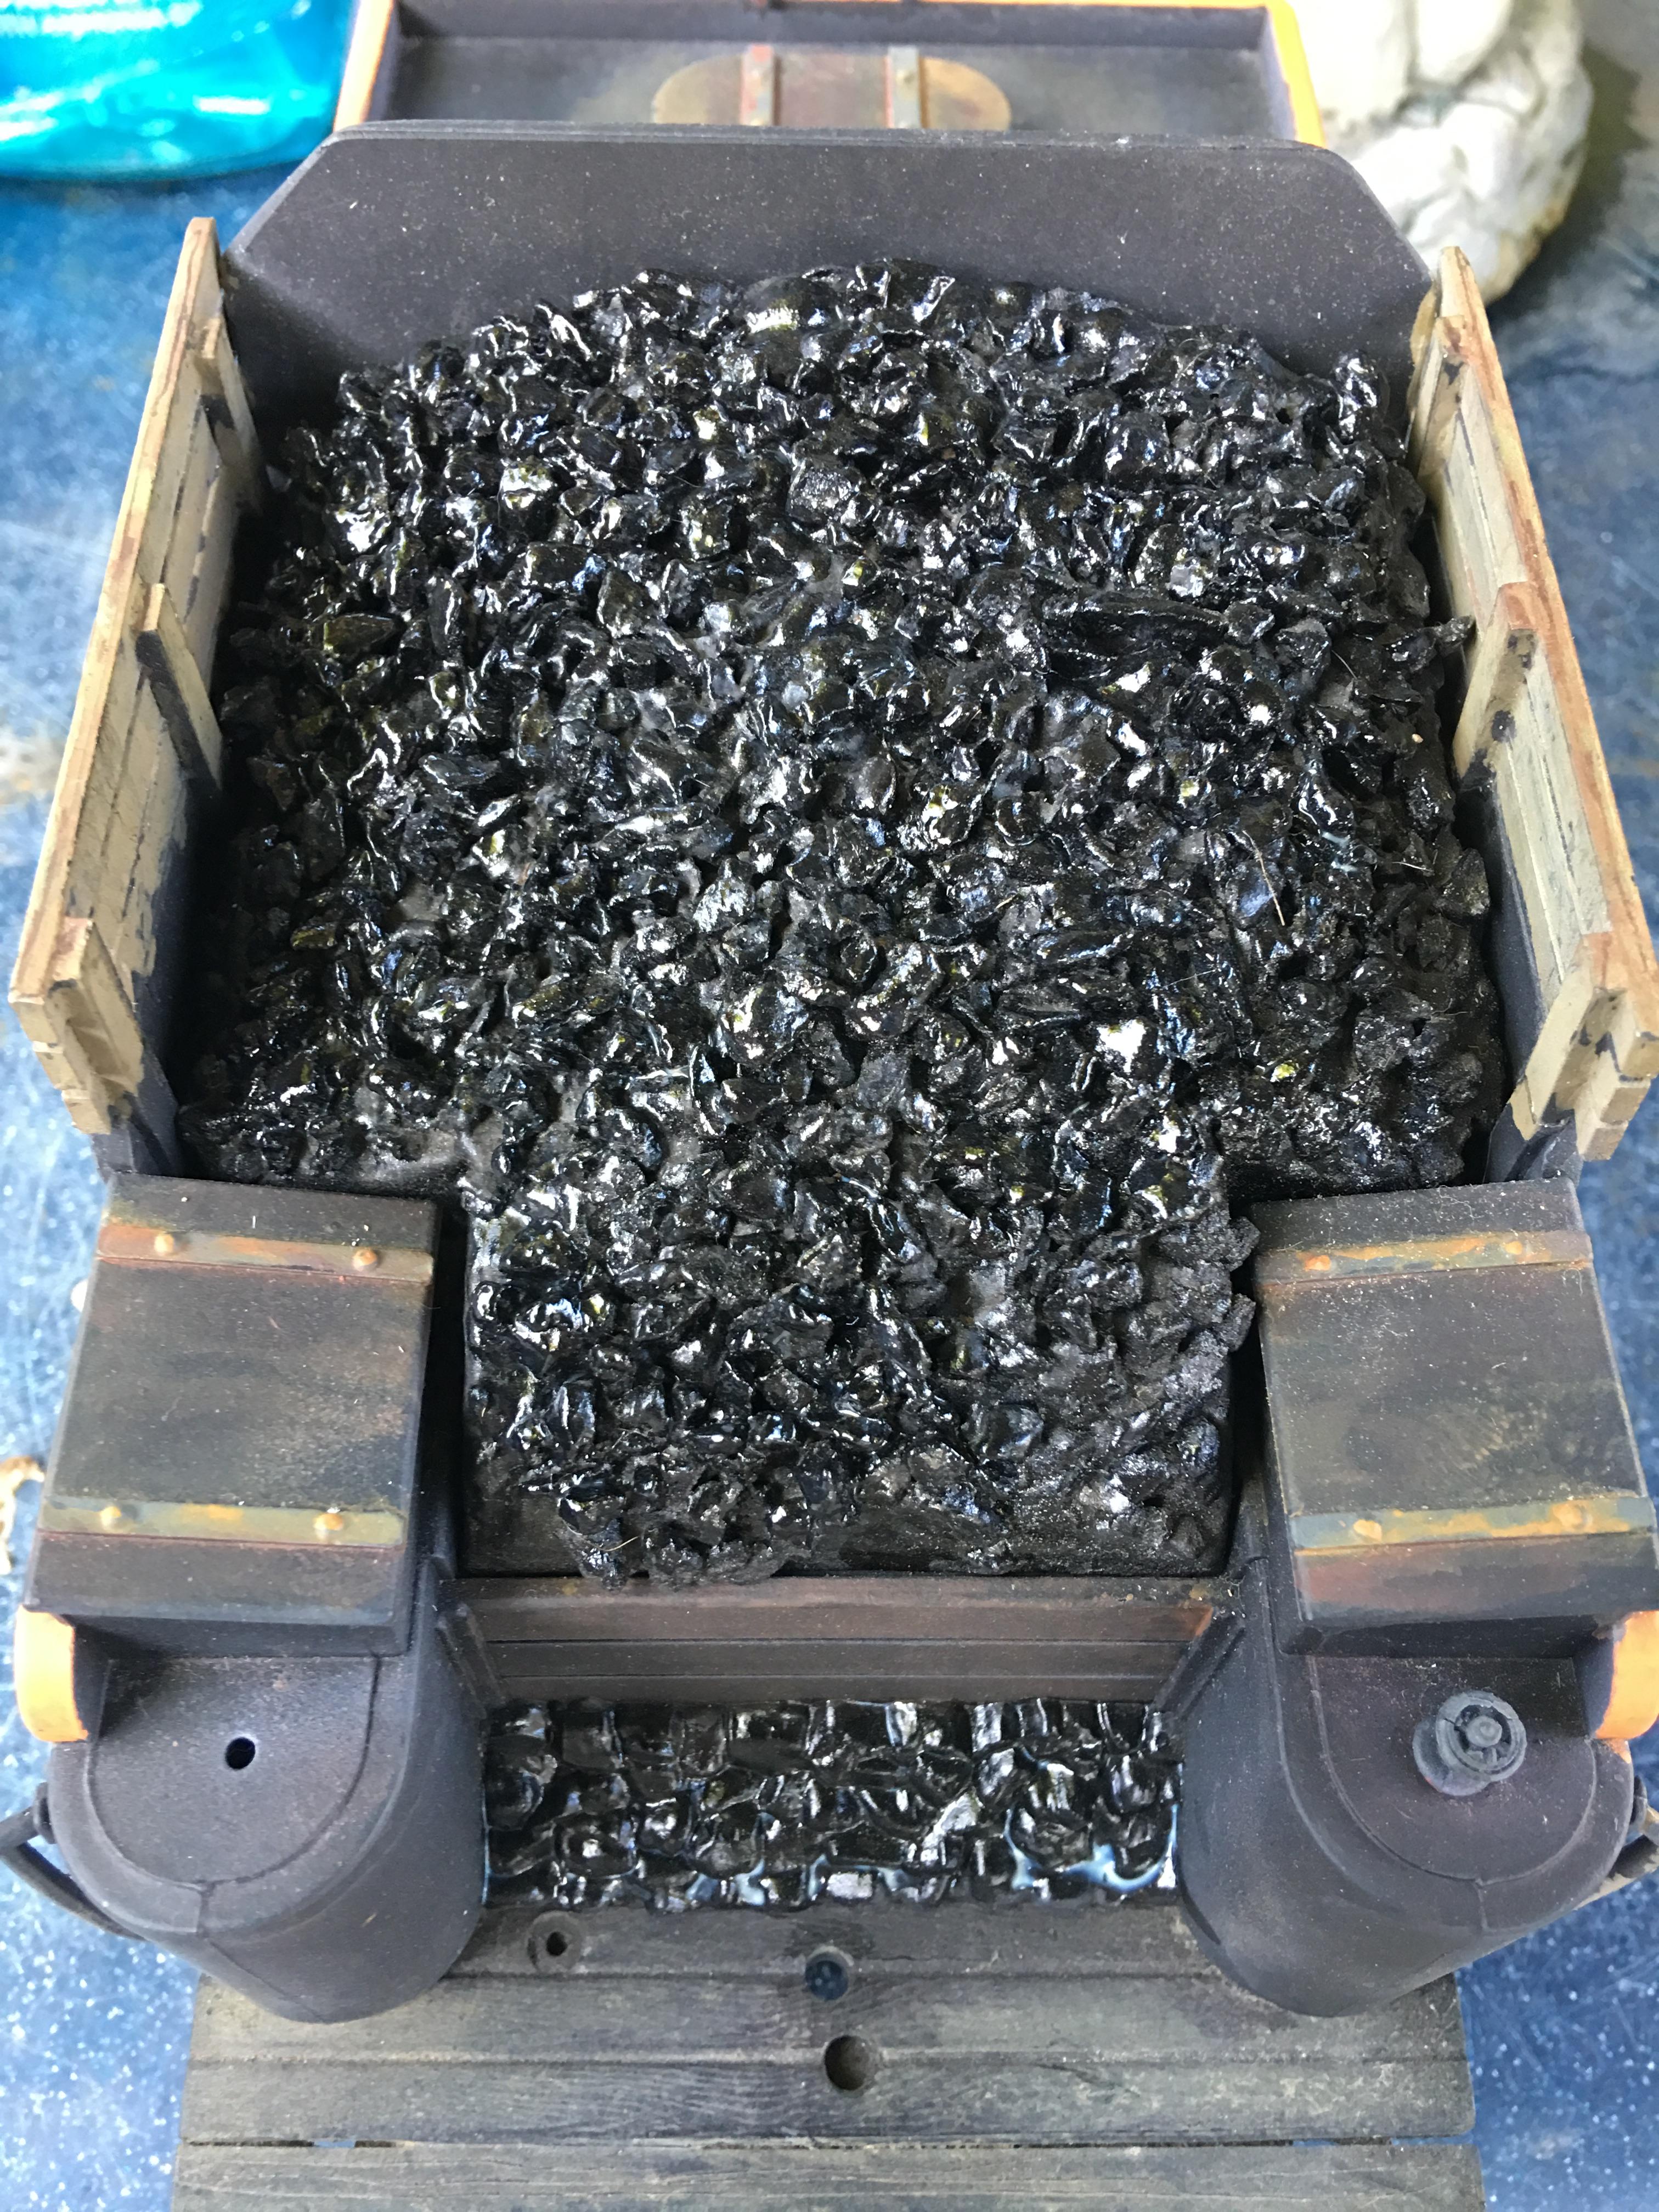
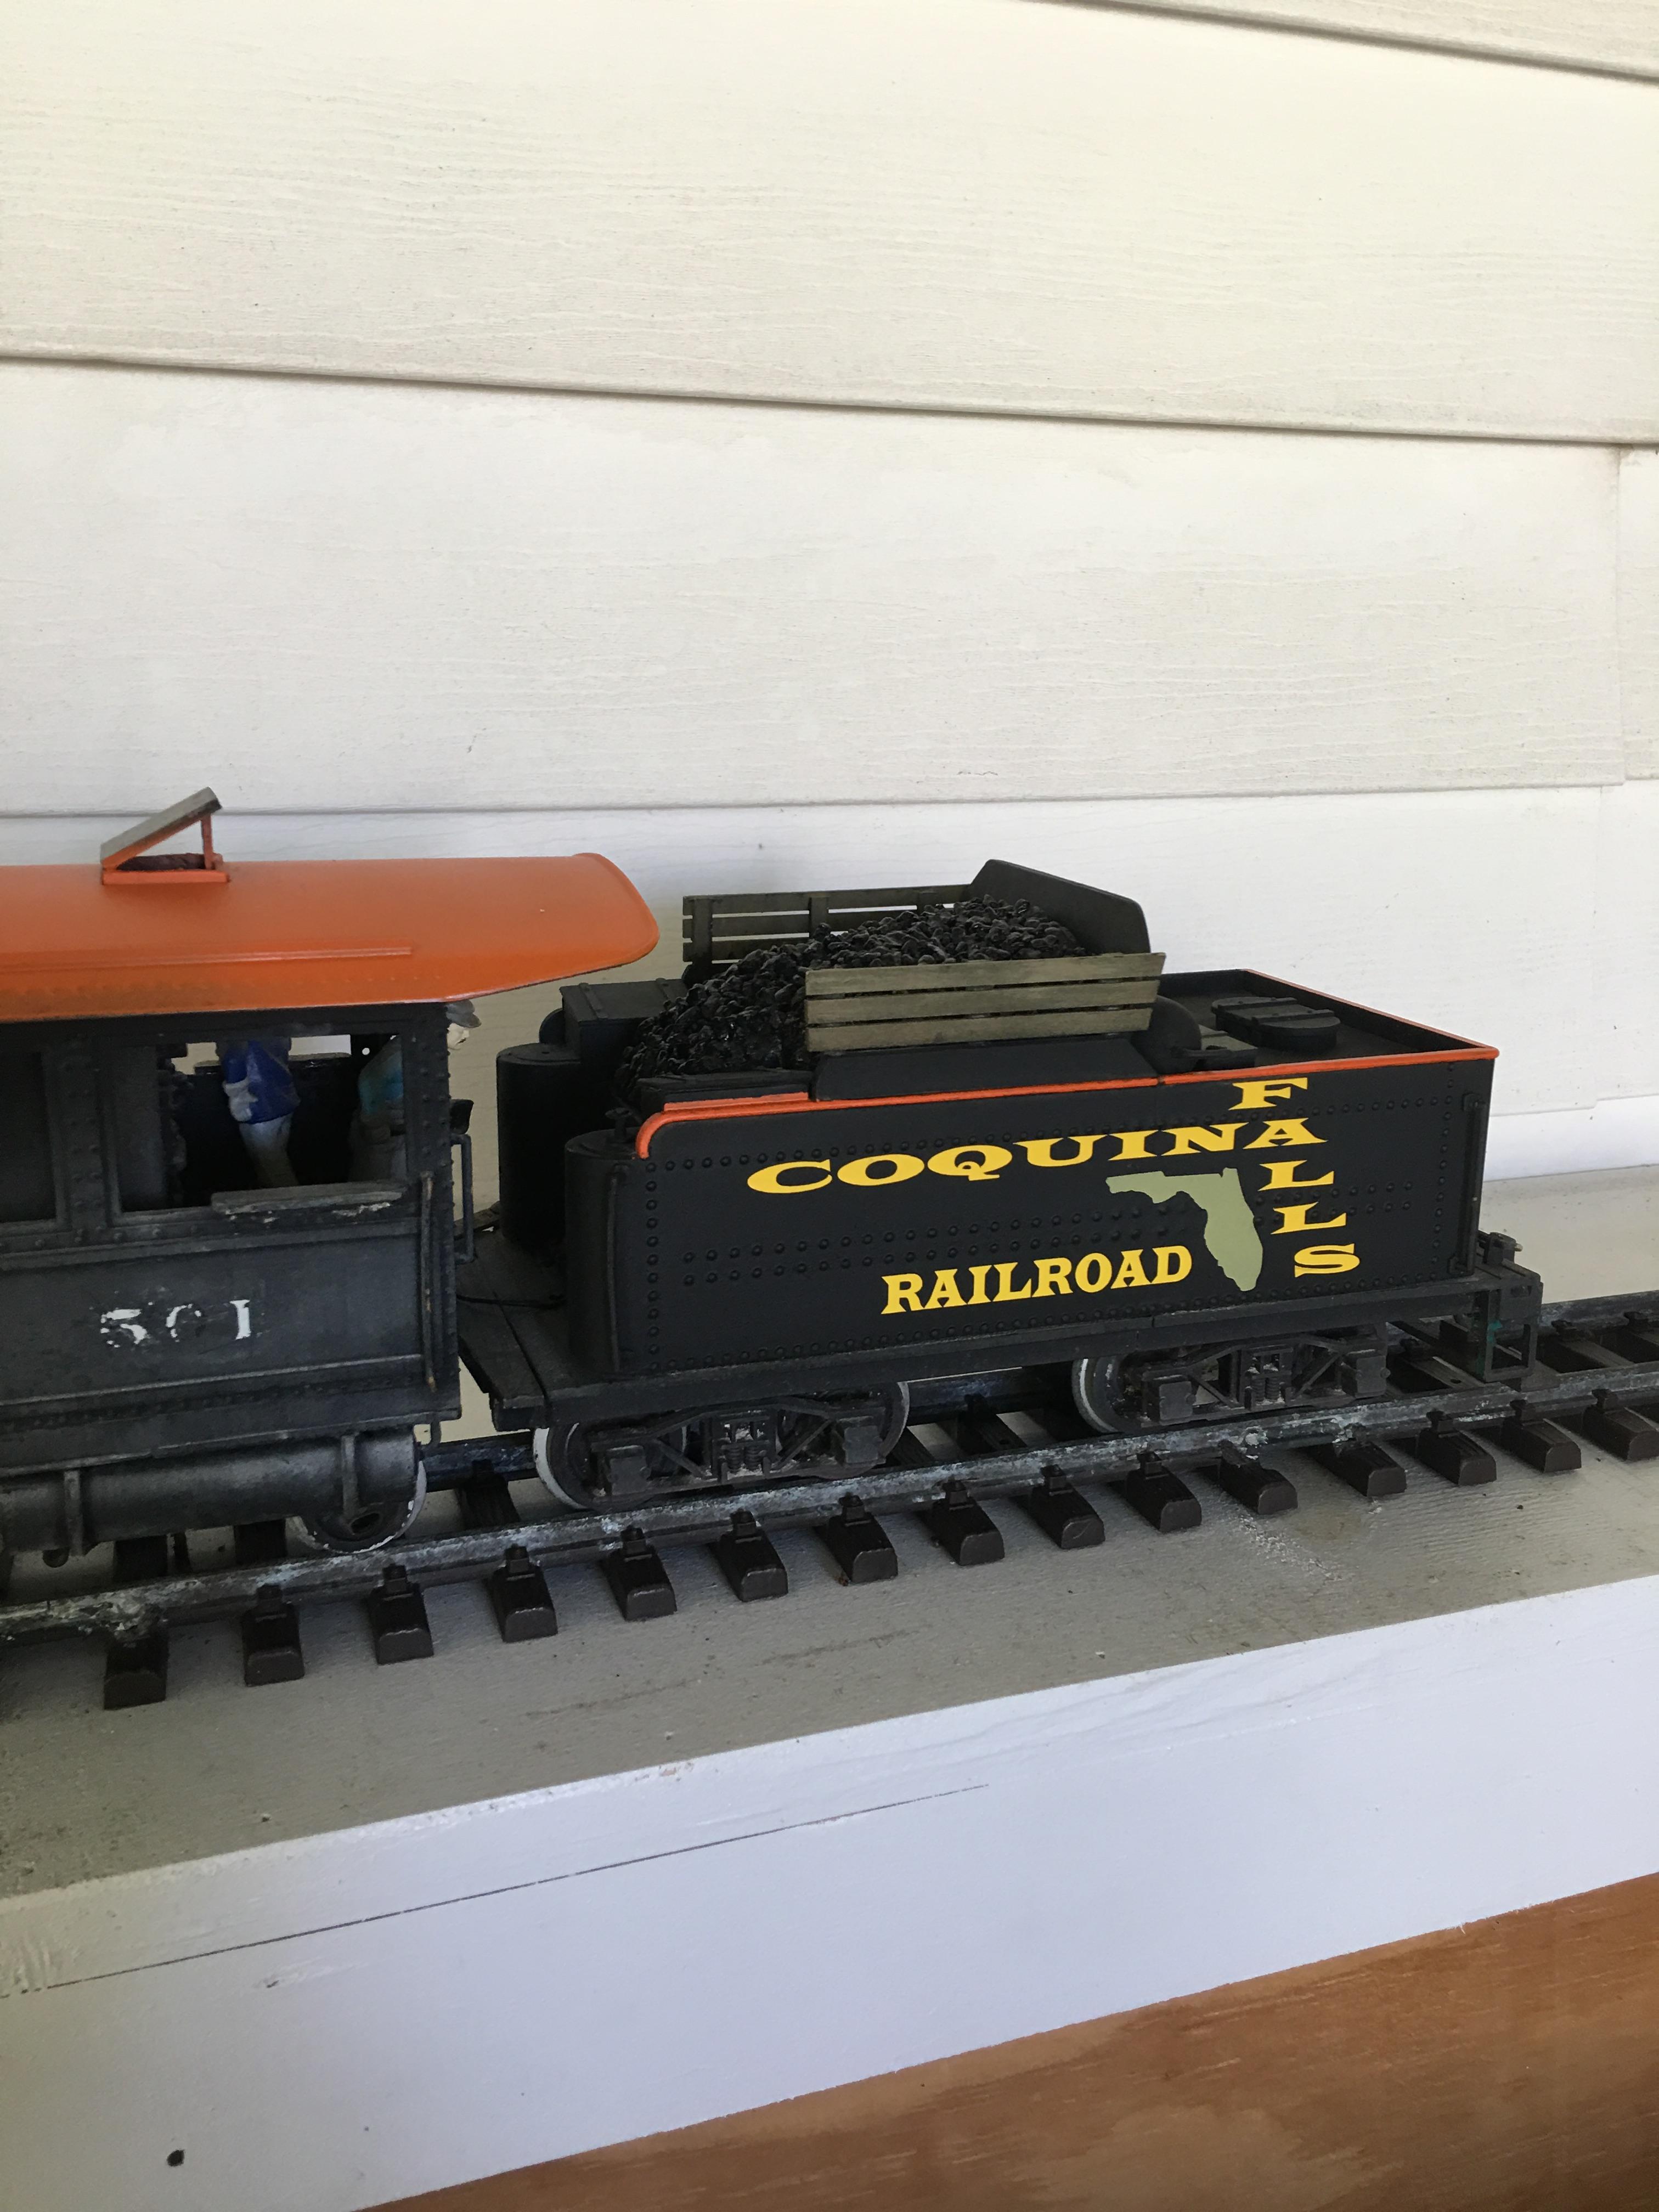
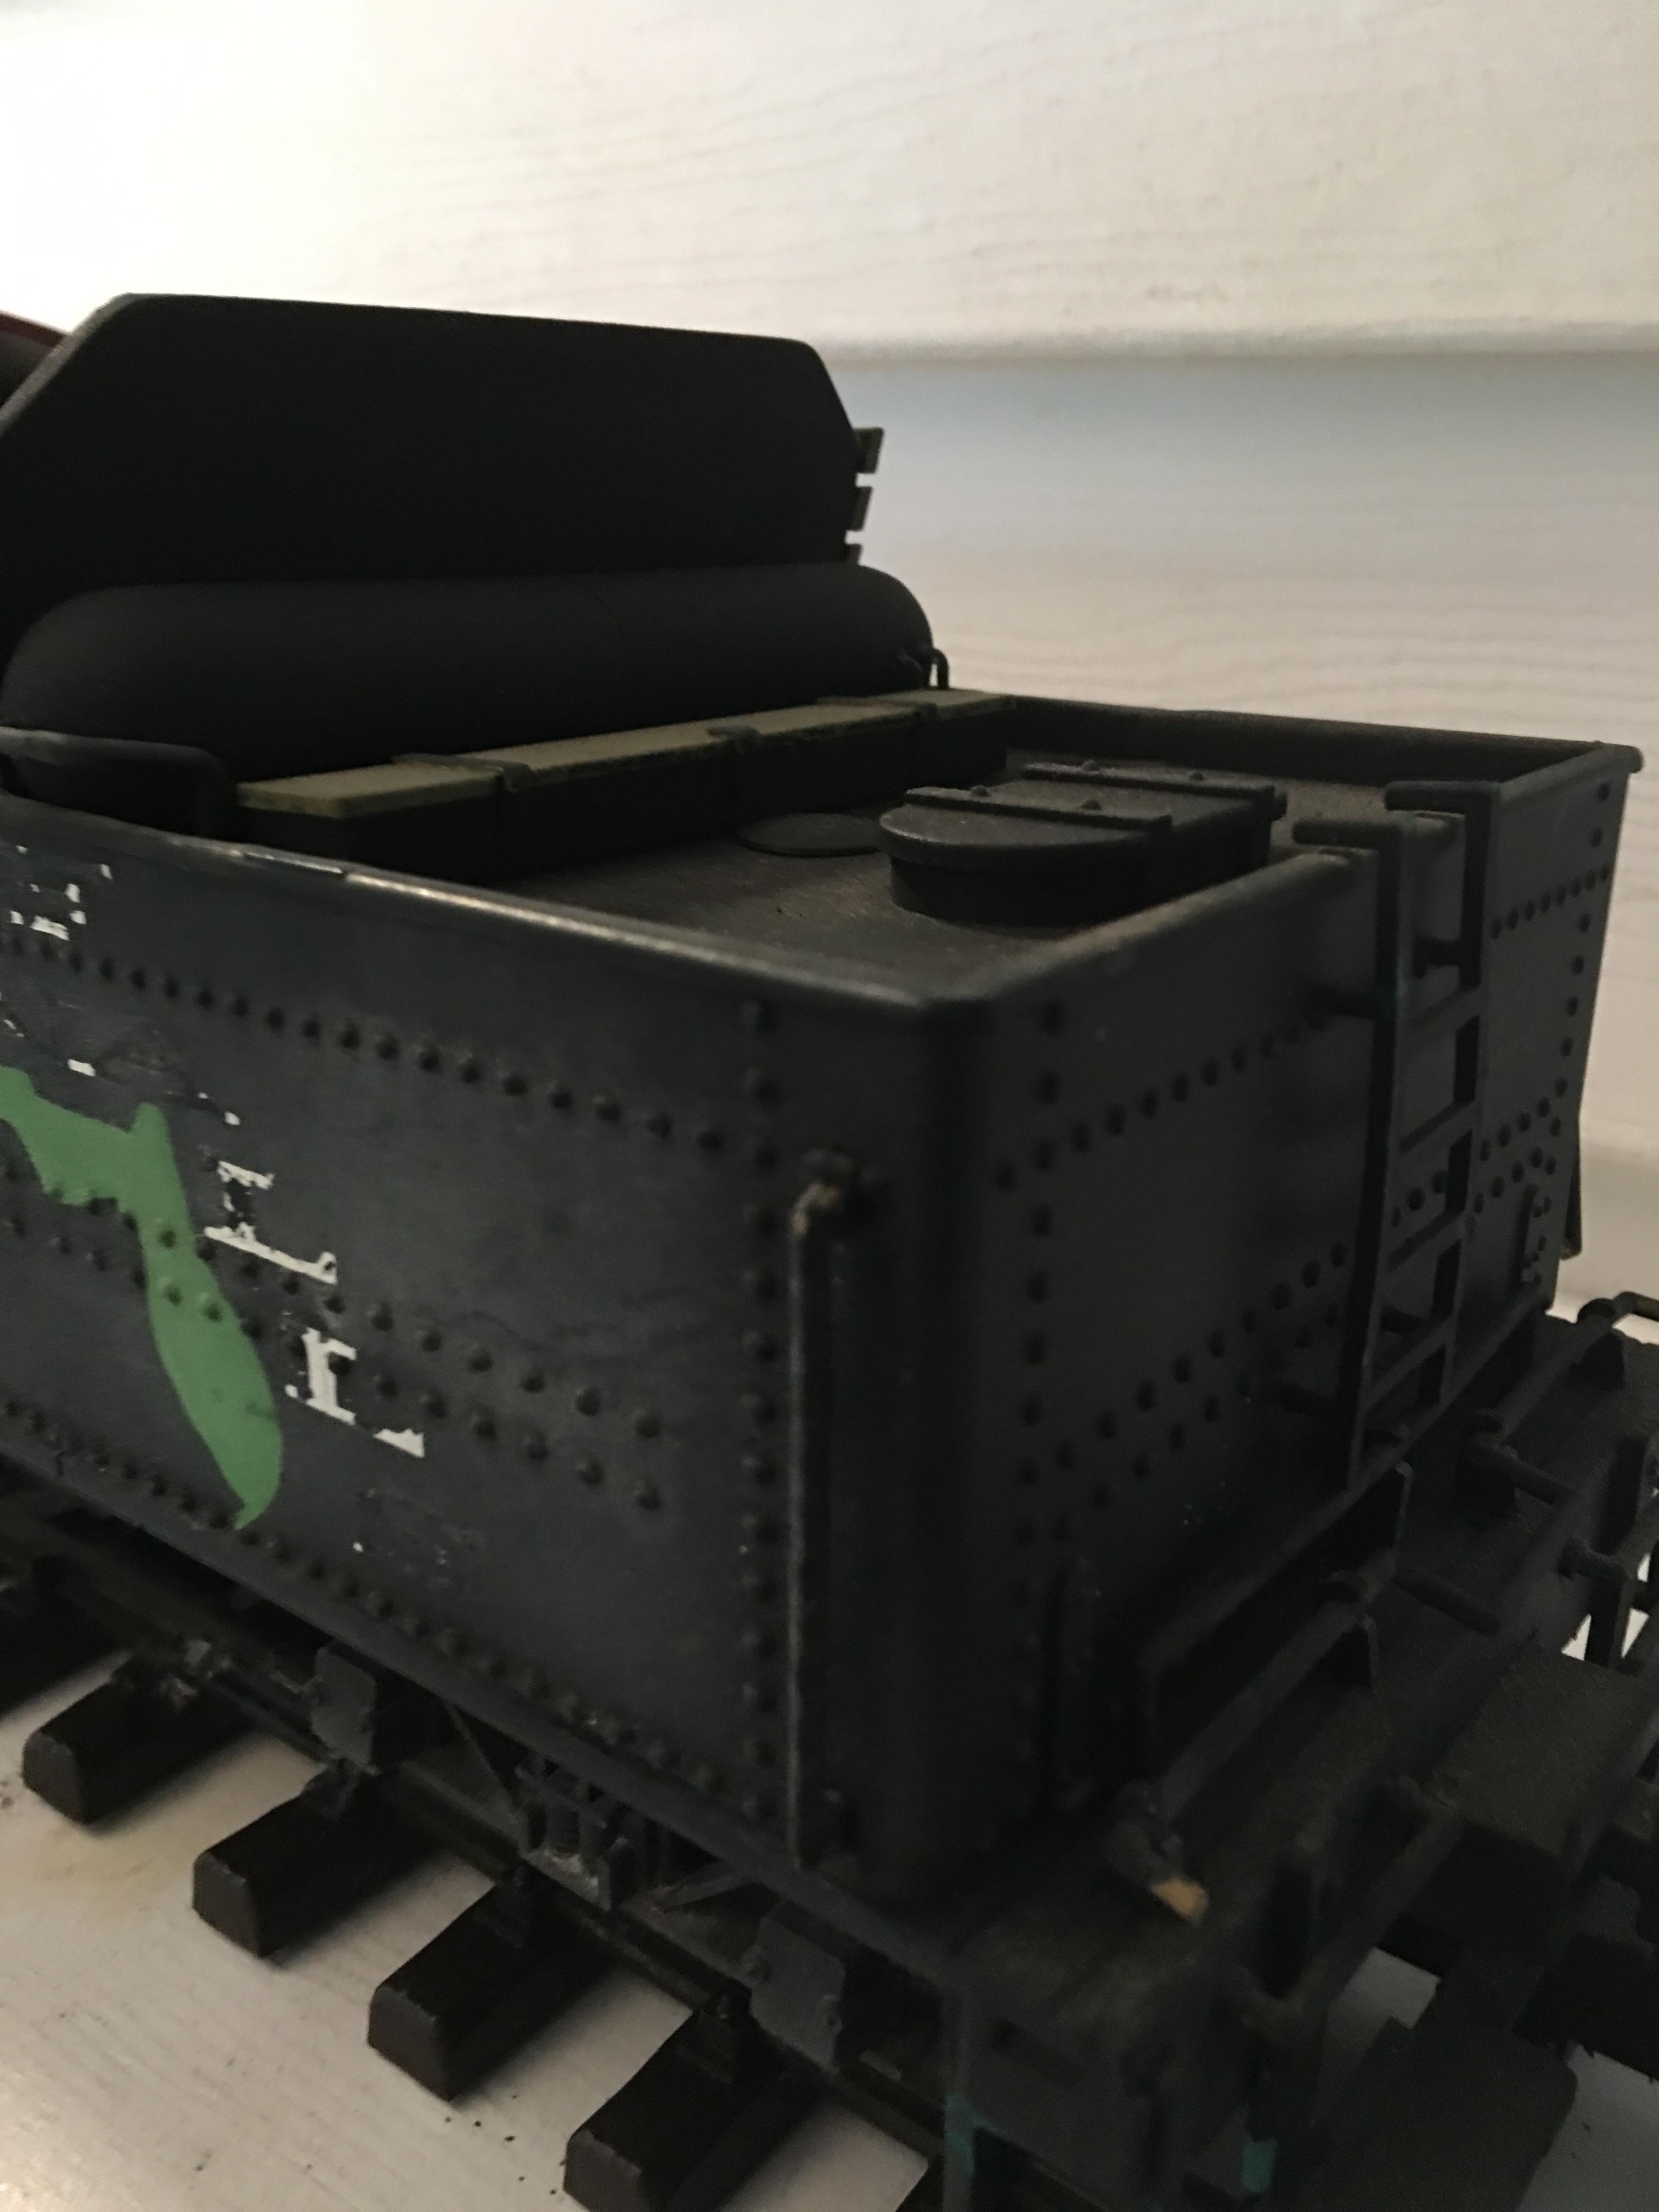
Just now getting around to making it hole again and finishing details I left off years ago. Built in 1995 hence the engine # 501. Lettering has disappeared and sound system has failed but all in all engine is still in good shape, I shortened the smoke box by 1 set of rivets and shortened the boiler up to the last boiler band and added piping and an extra air compressor. Moved the steam generator to the center, again as before I used cotter pins with pop rivets bases to make railing stanchions. Use to drive by an old Prairie up in Leesburg, Fl. when I covered that area, took pictures and did research on the engine. Unusual to see electrical wires run through the boiler grab rails but that was the way it was built, Shortened the tender by about an inch, trying to keep the engine /tender as short as possible. Mounted the boiler on a LGB Mogul motor block and added trailing truck from a LGB 2080. New smoke stack is 1/8" brass pipe that is threaded into to smoke box and I use it like a handle to pick the engine up. Rope is copper wire strands twisted. If you notice the air tank on the back of the tender it is a cigar tube that my dad had. The fireman is screwed to the draw bar between the engine and tender and when the train is moving, he moves all around. Originally had a flat plate under him which is now open and can't find the part so made a new one. Finally cleaned the tender back up, adding new lettering and paint using a Cameo silhouette for lettering.
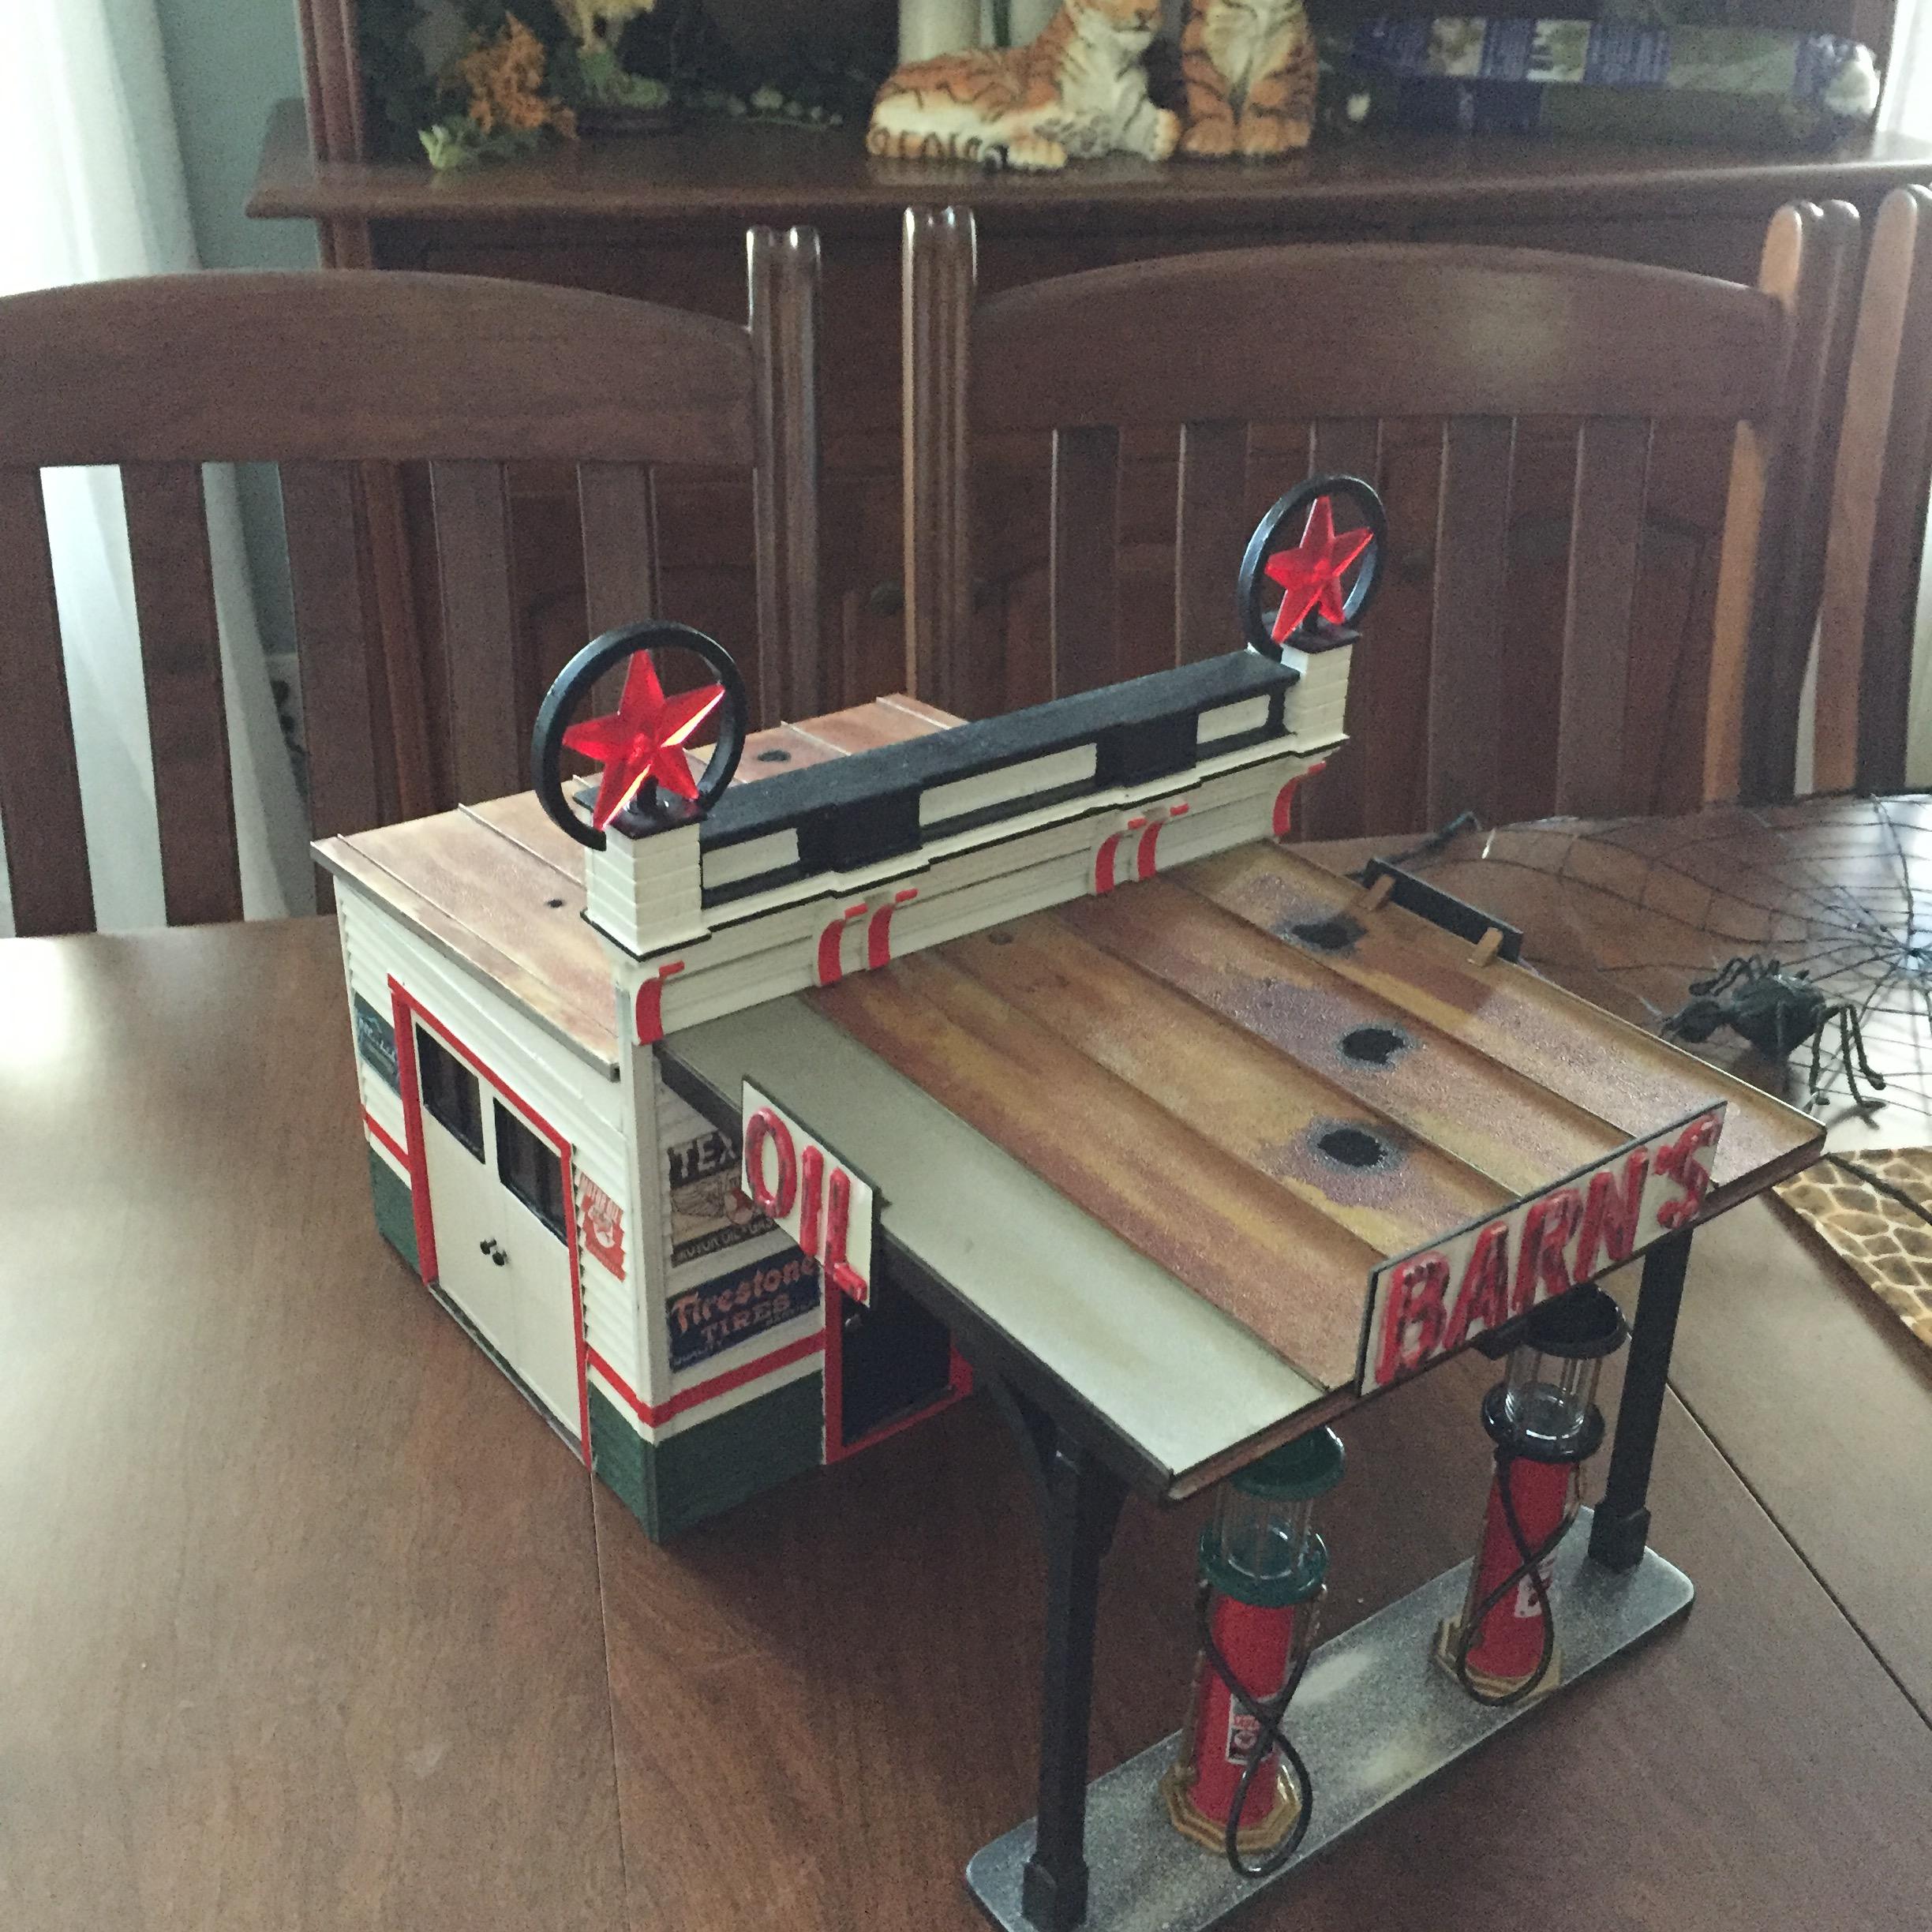
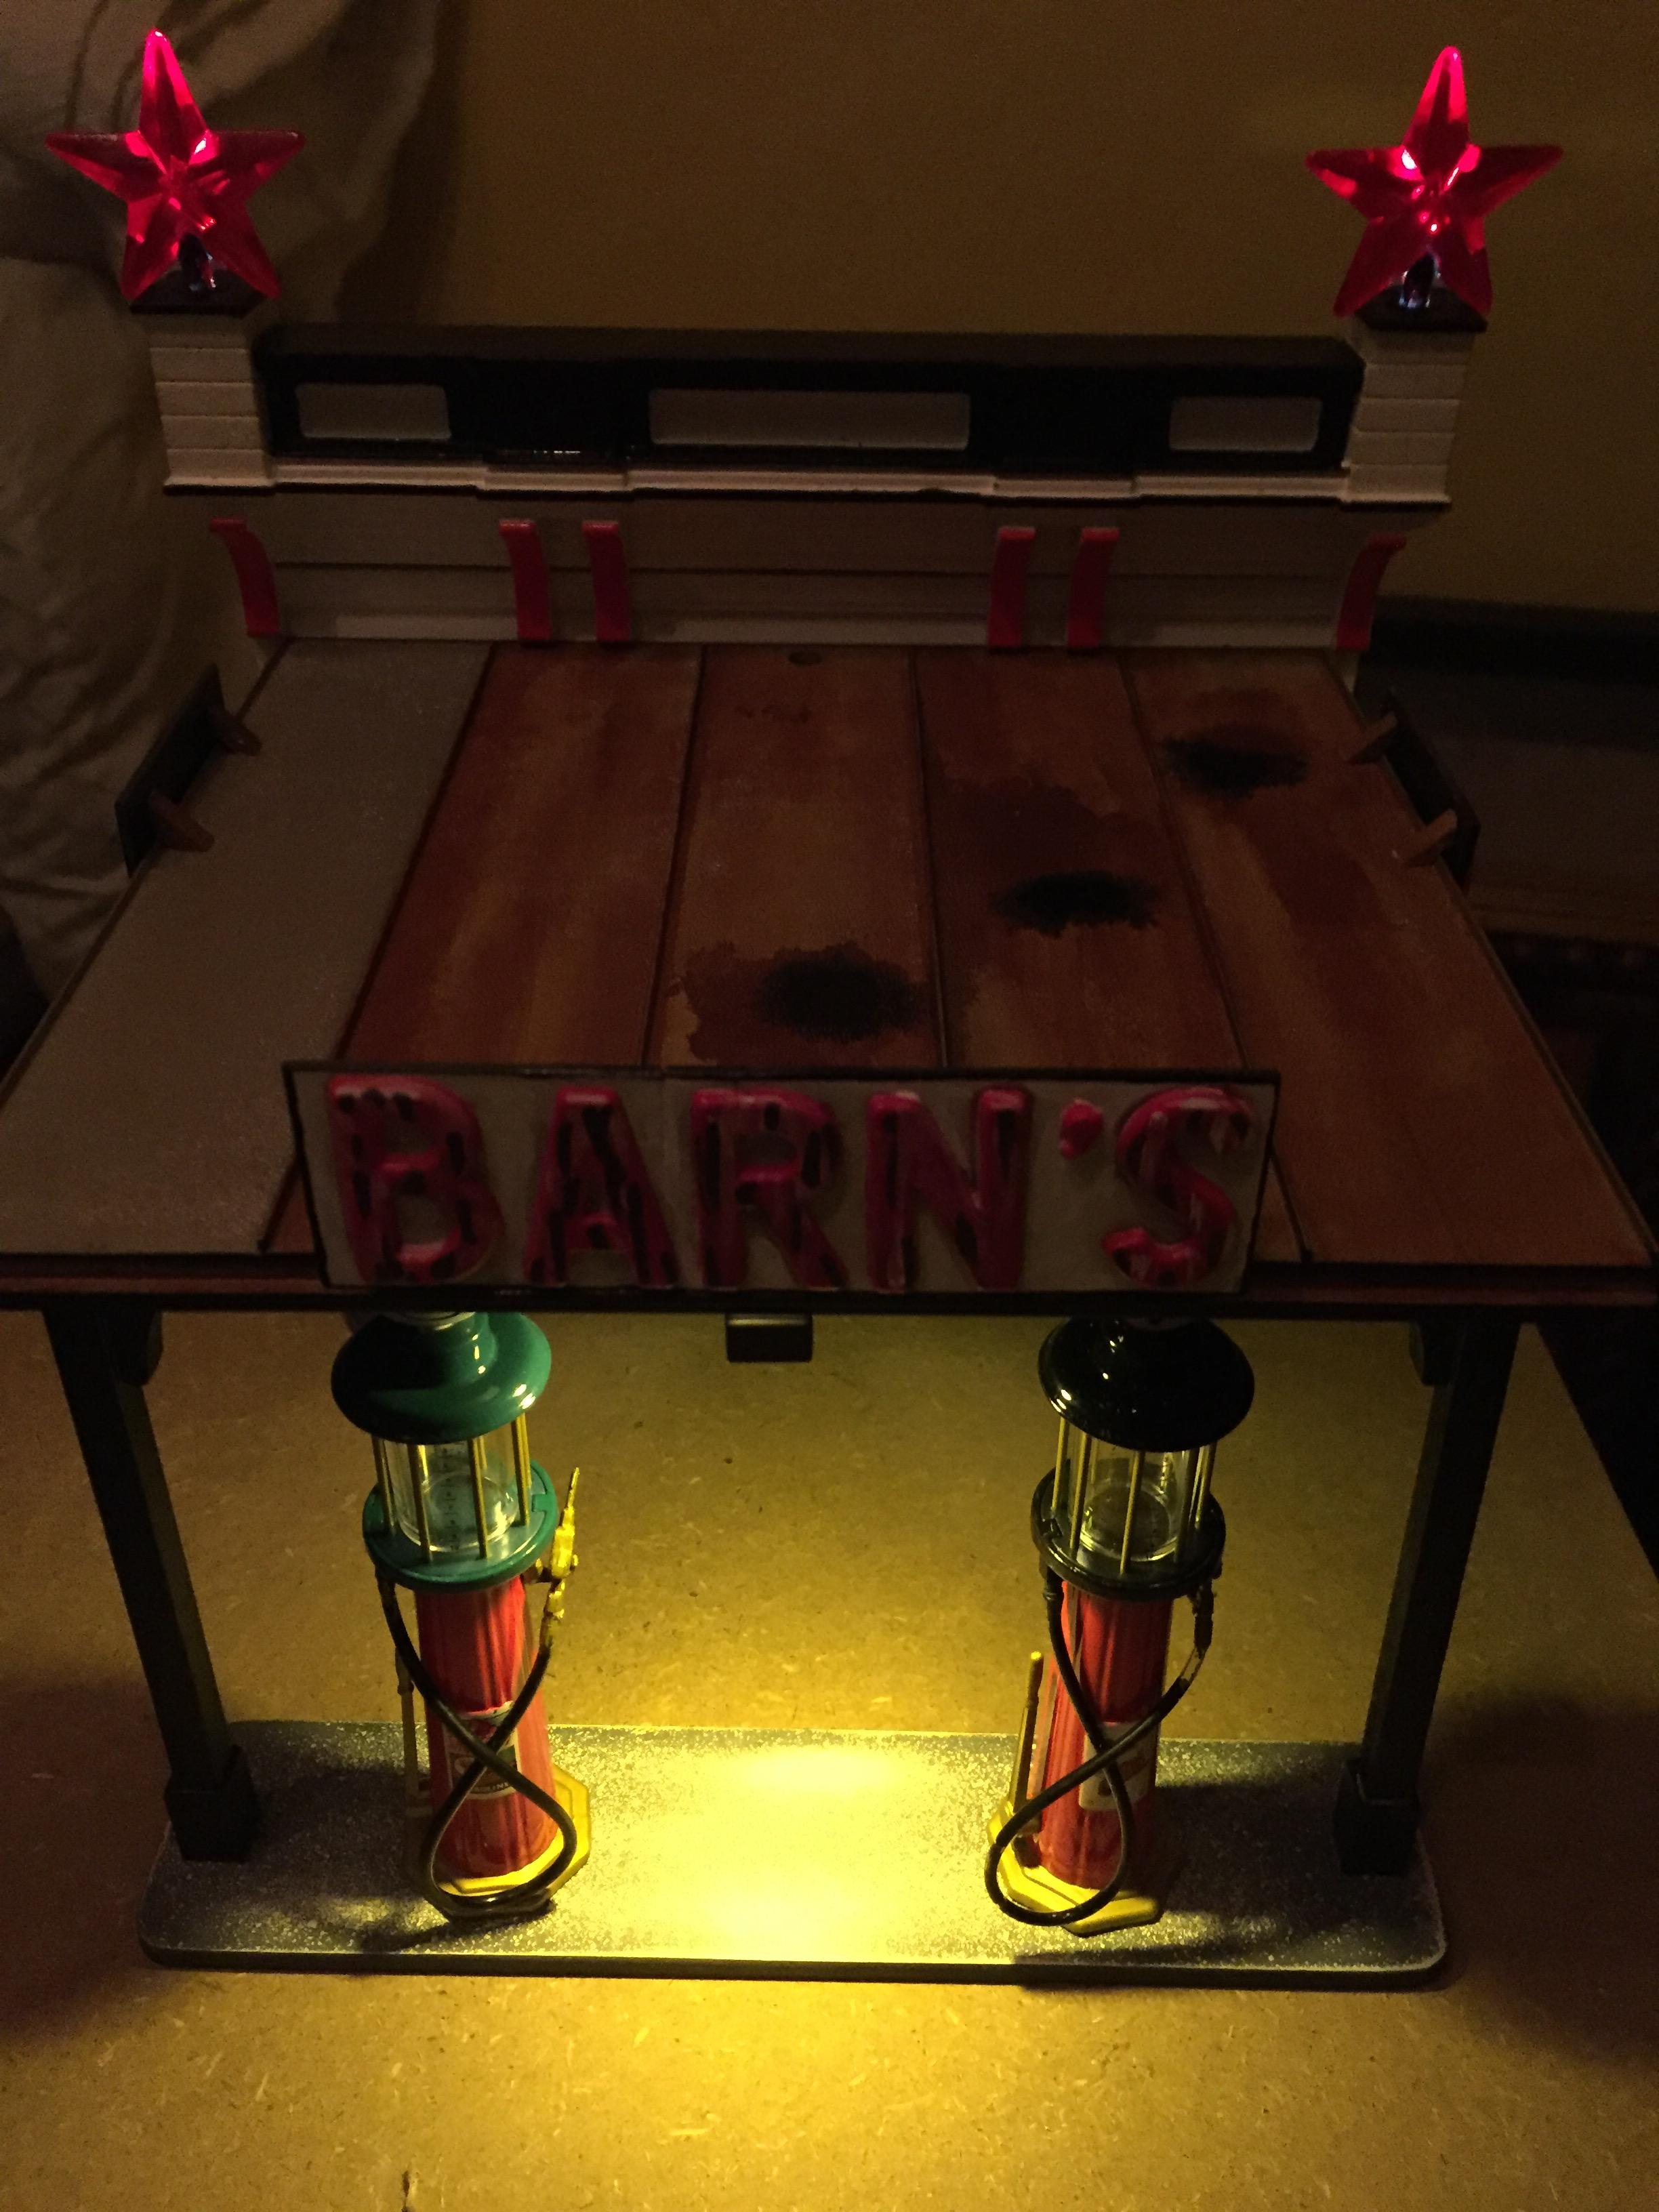
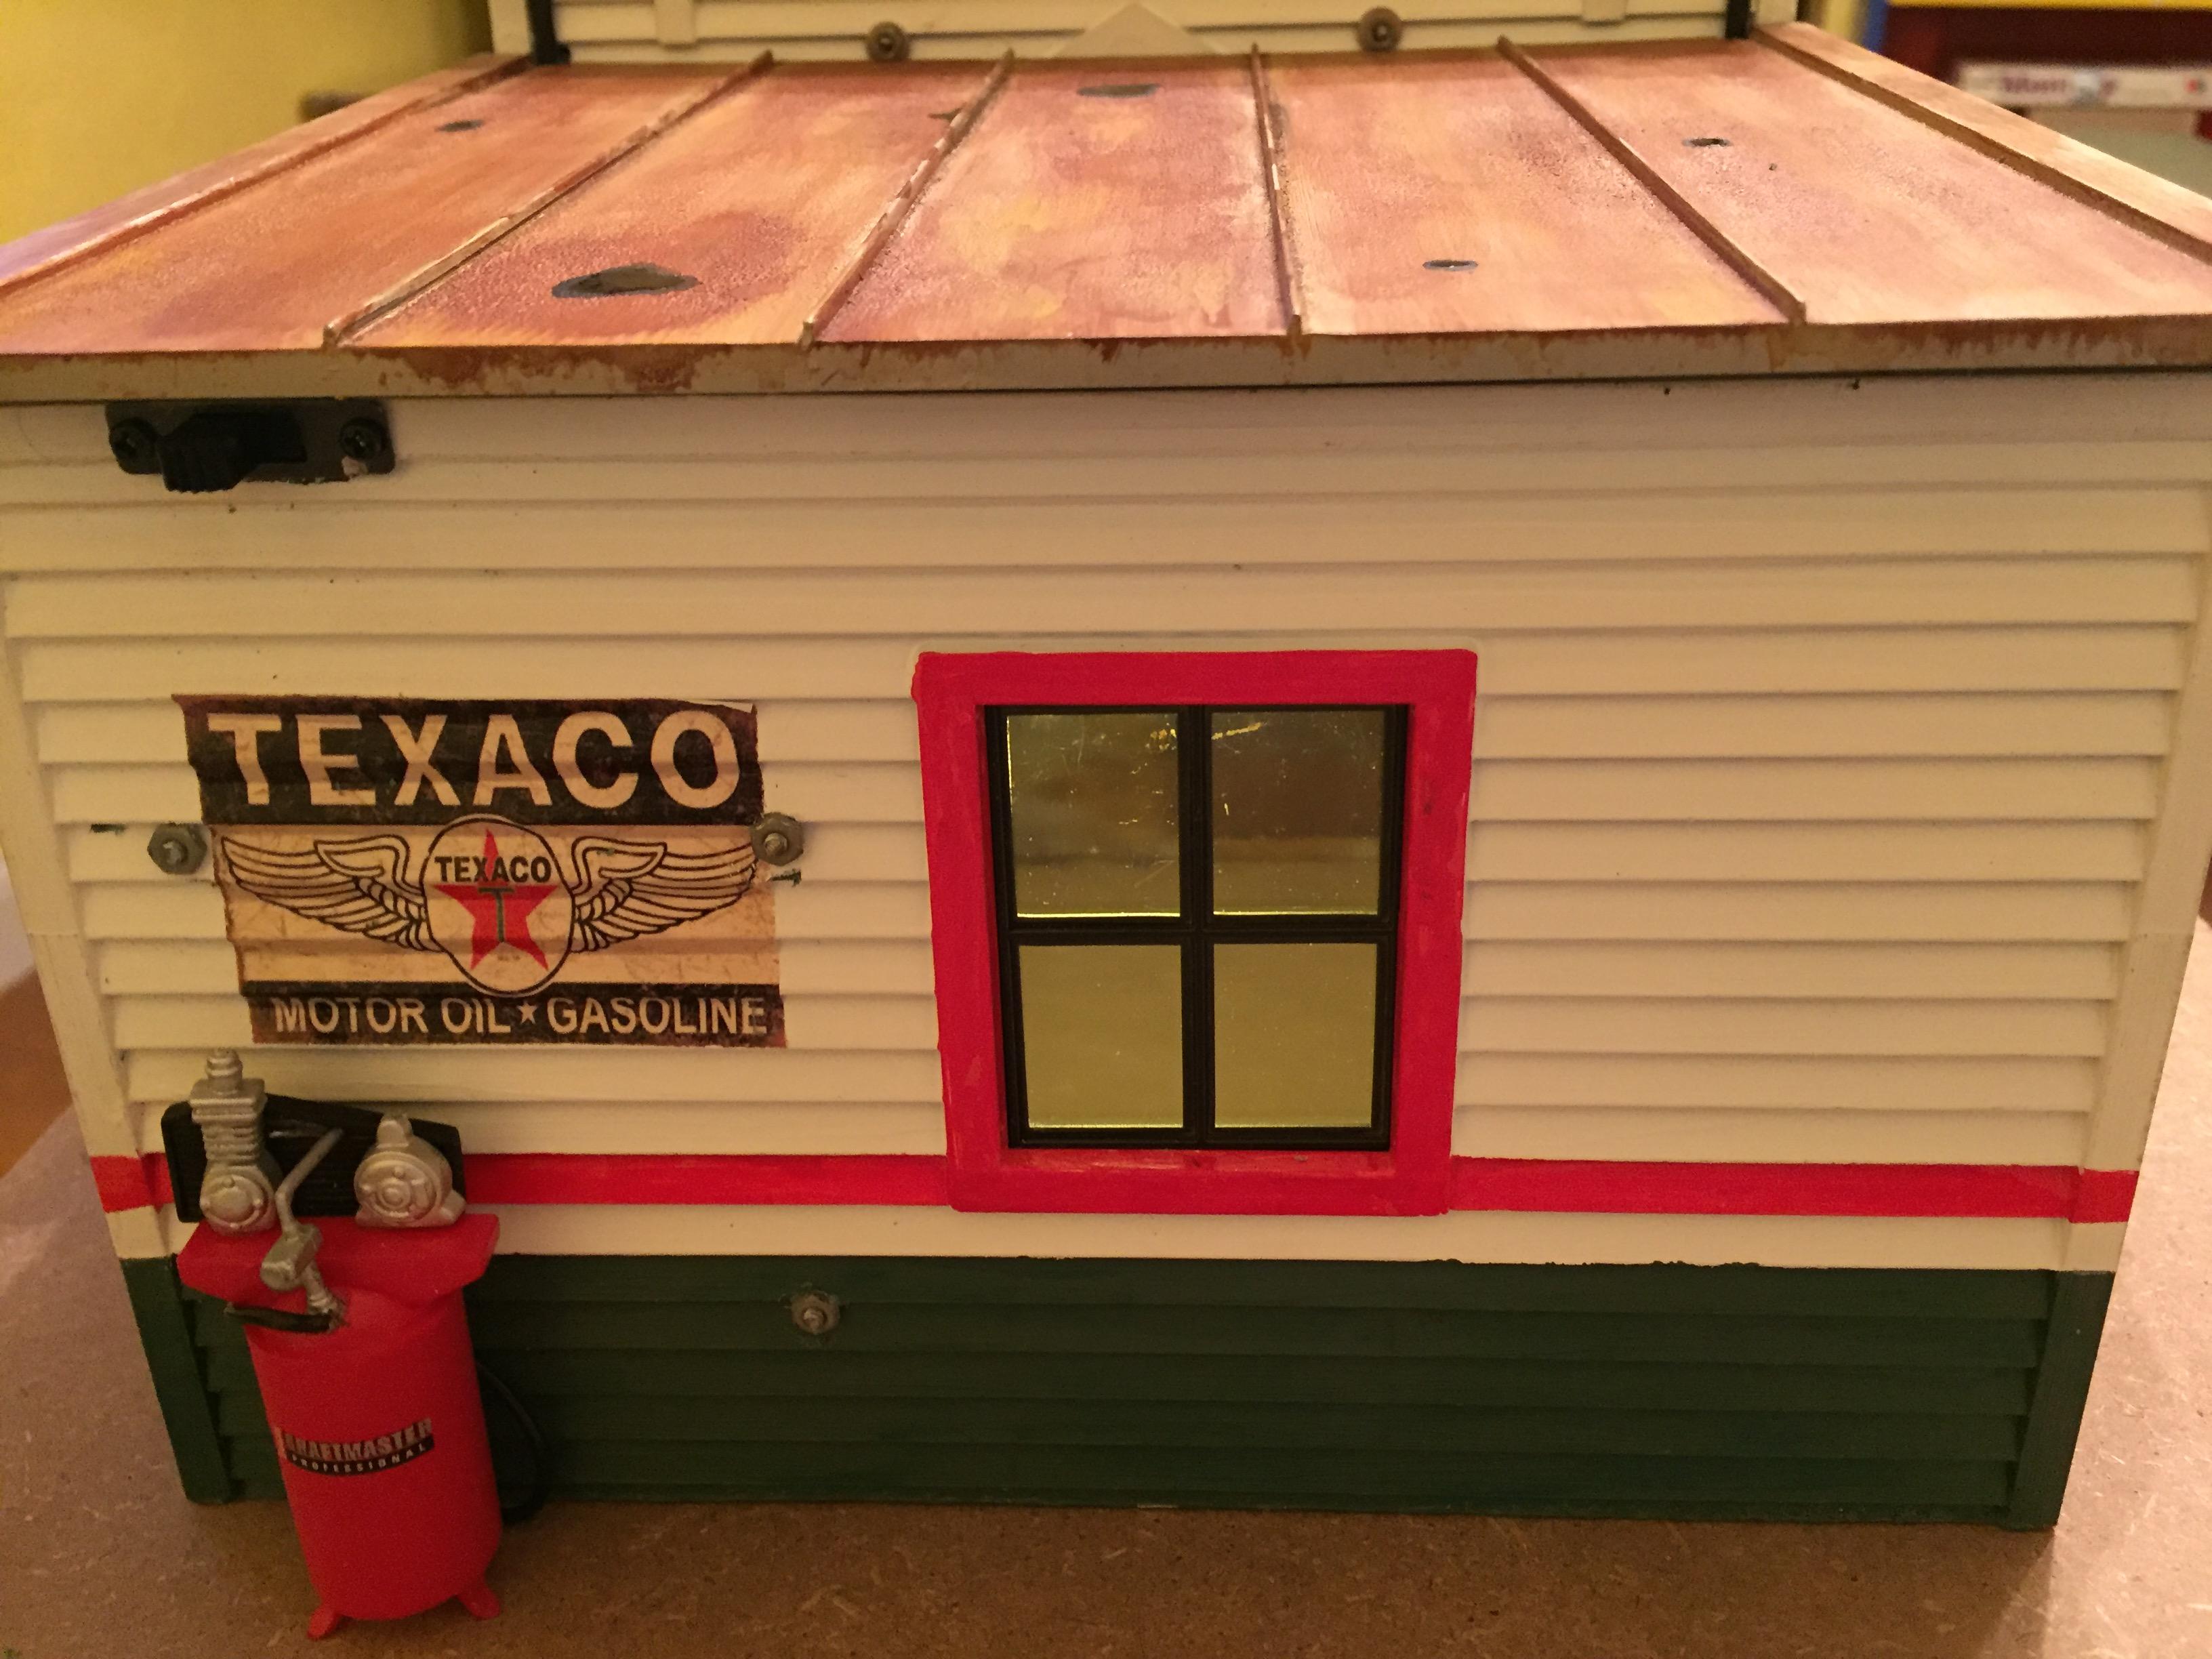
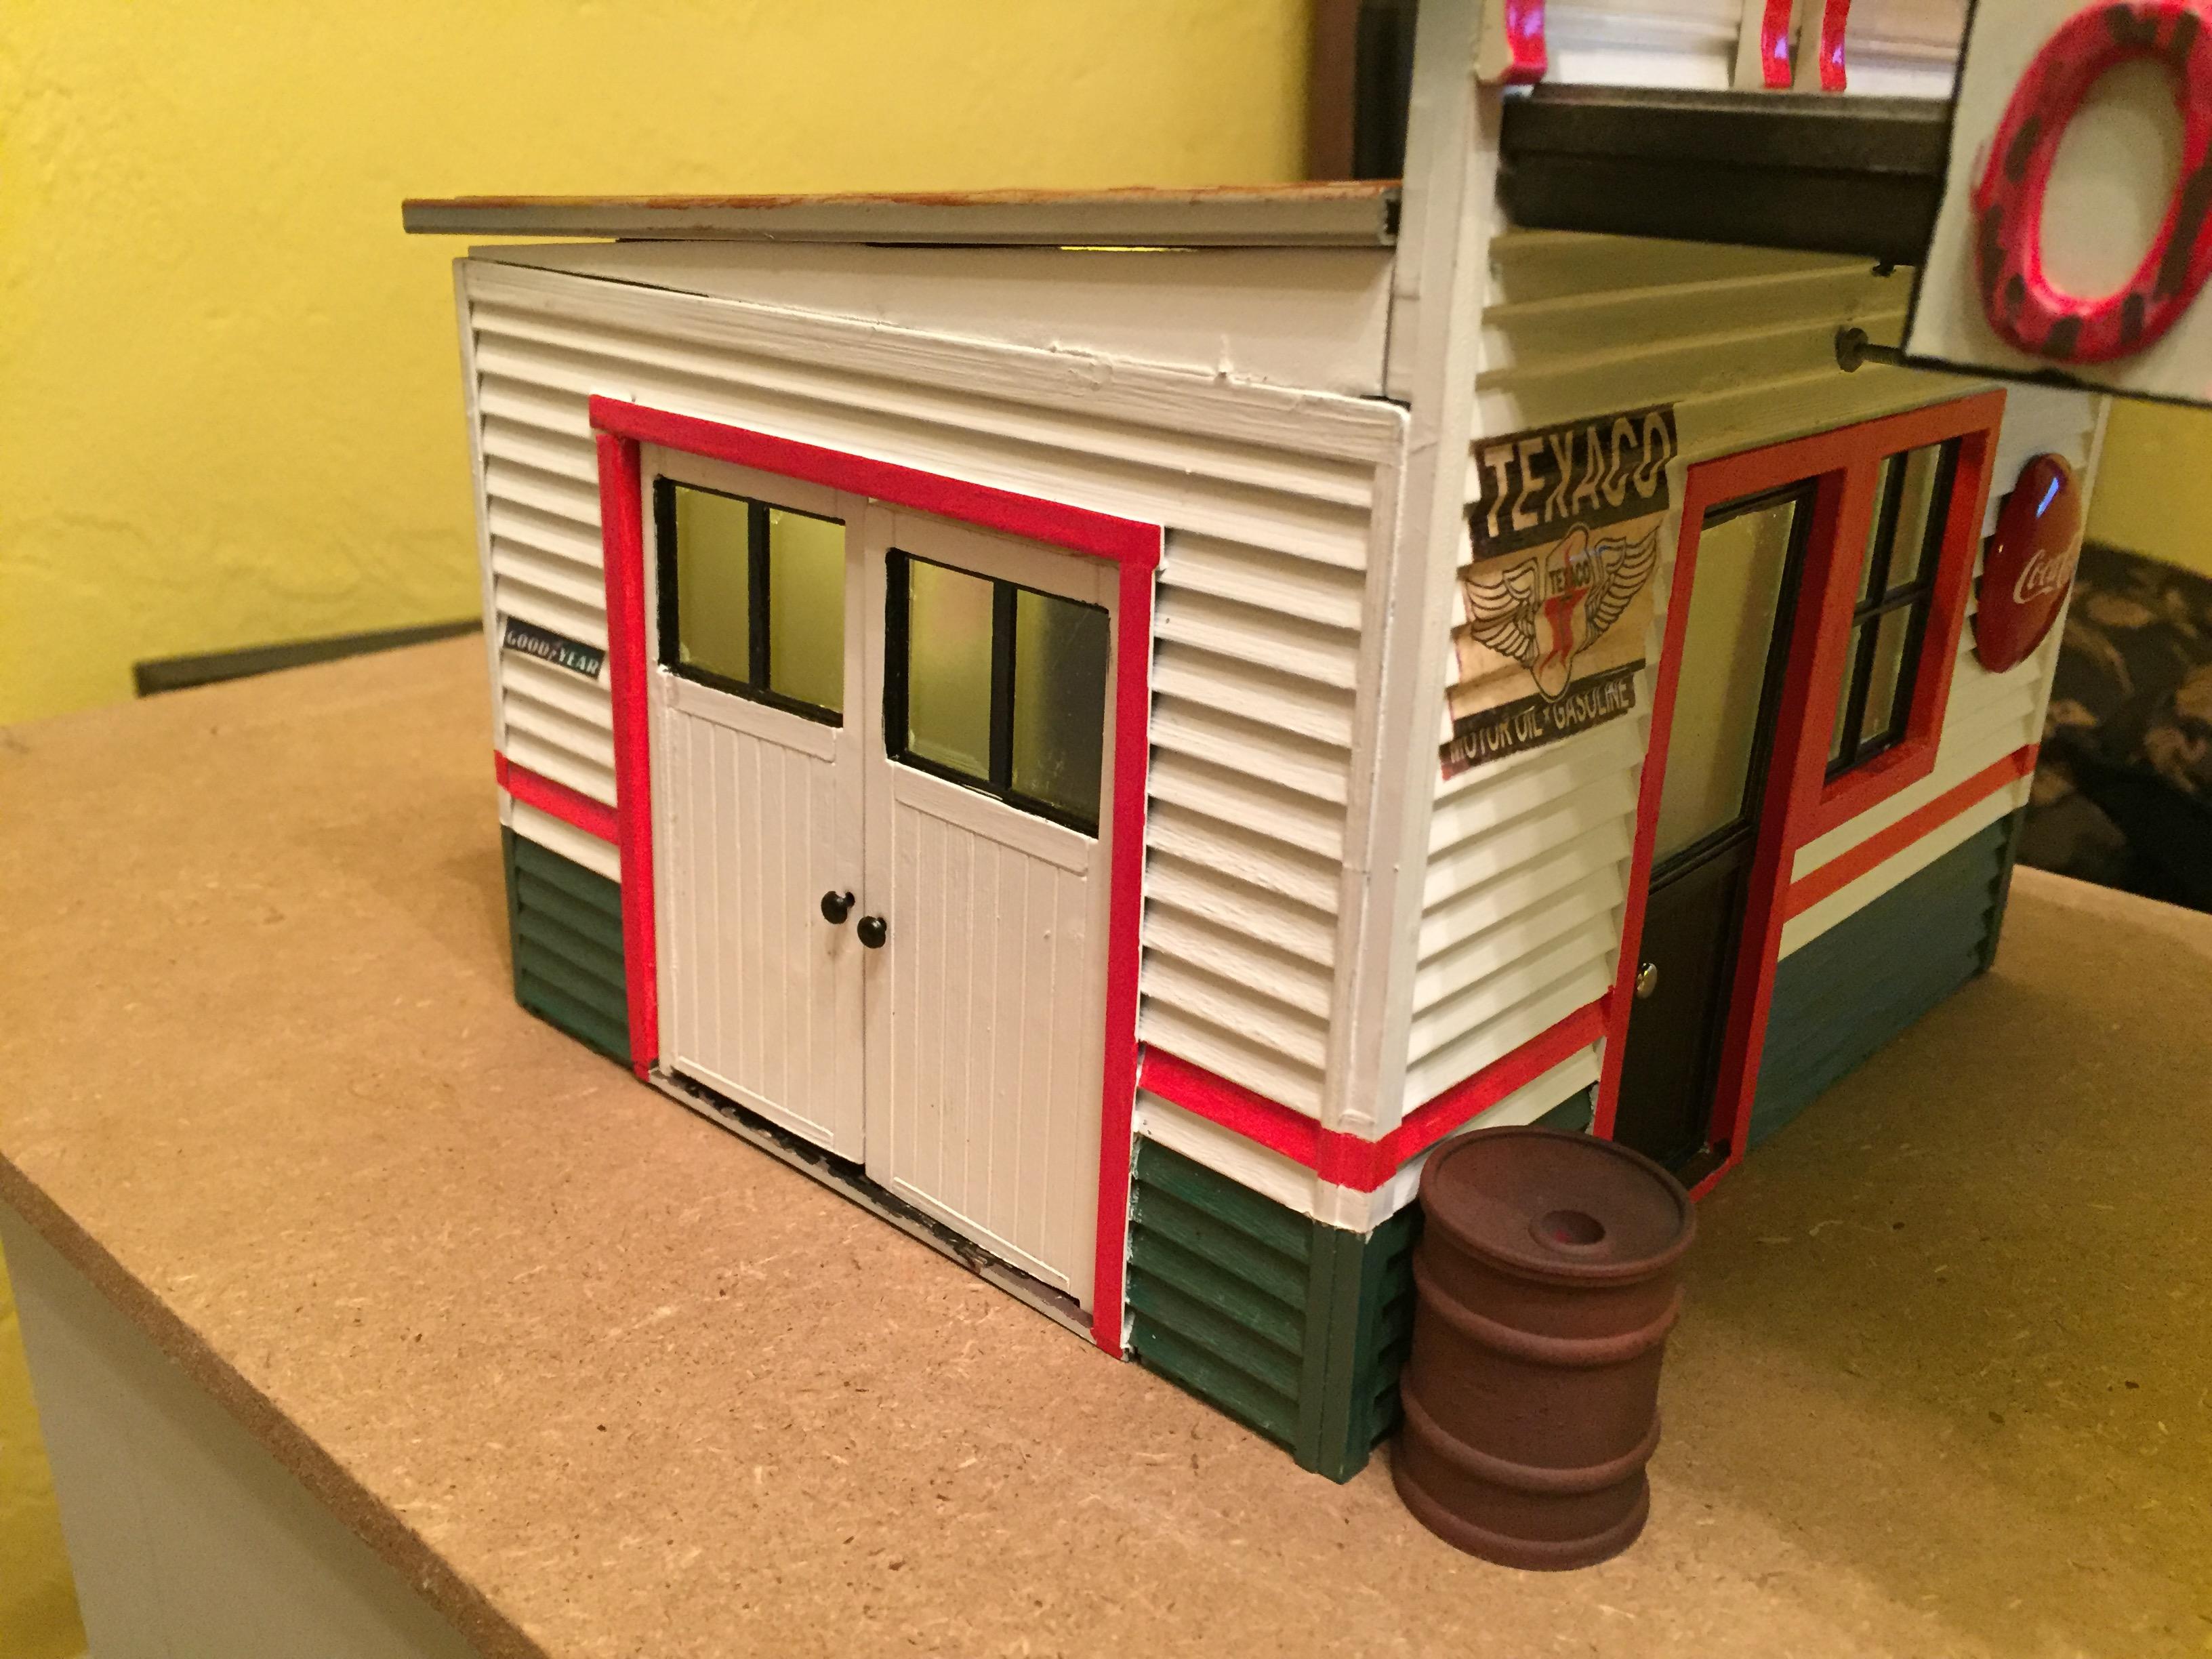
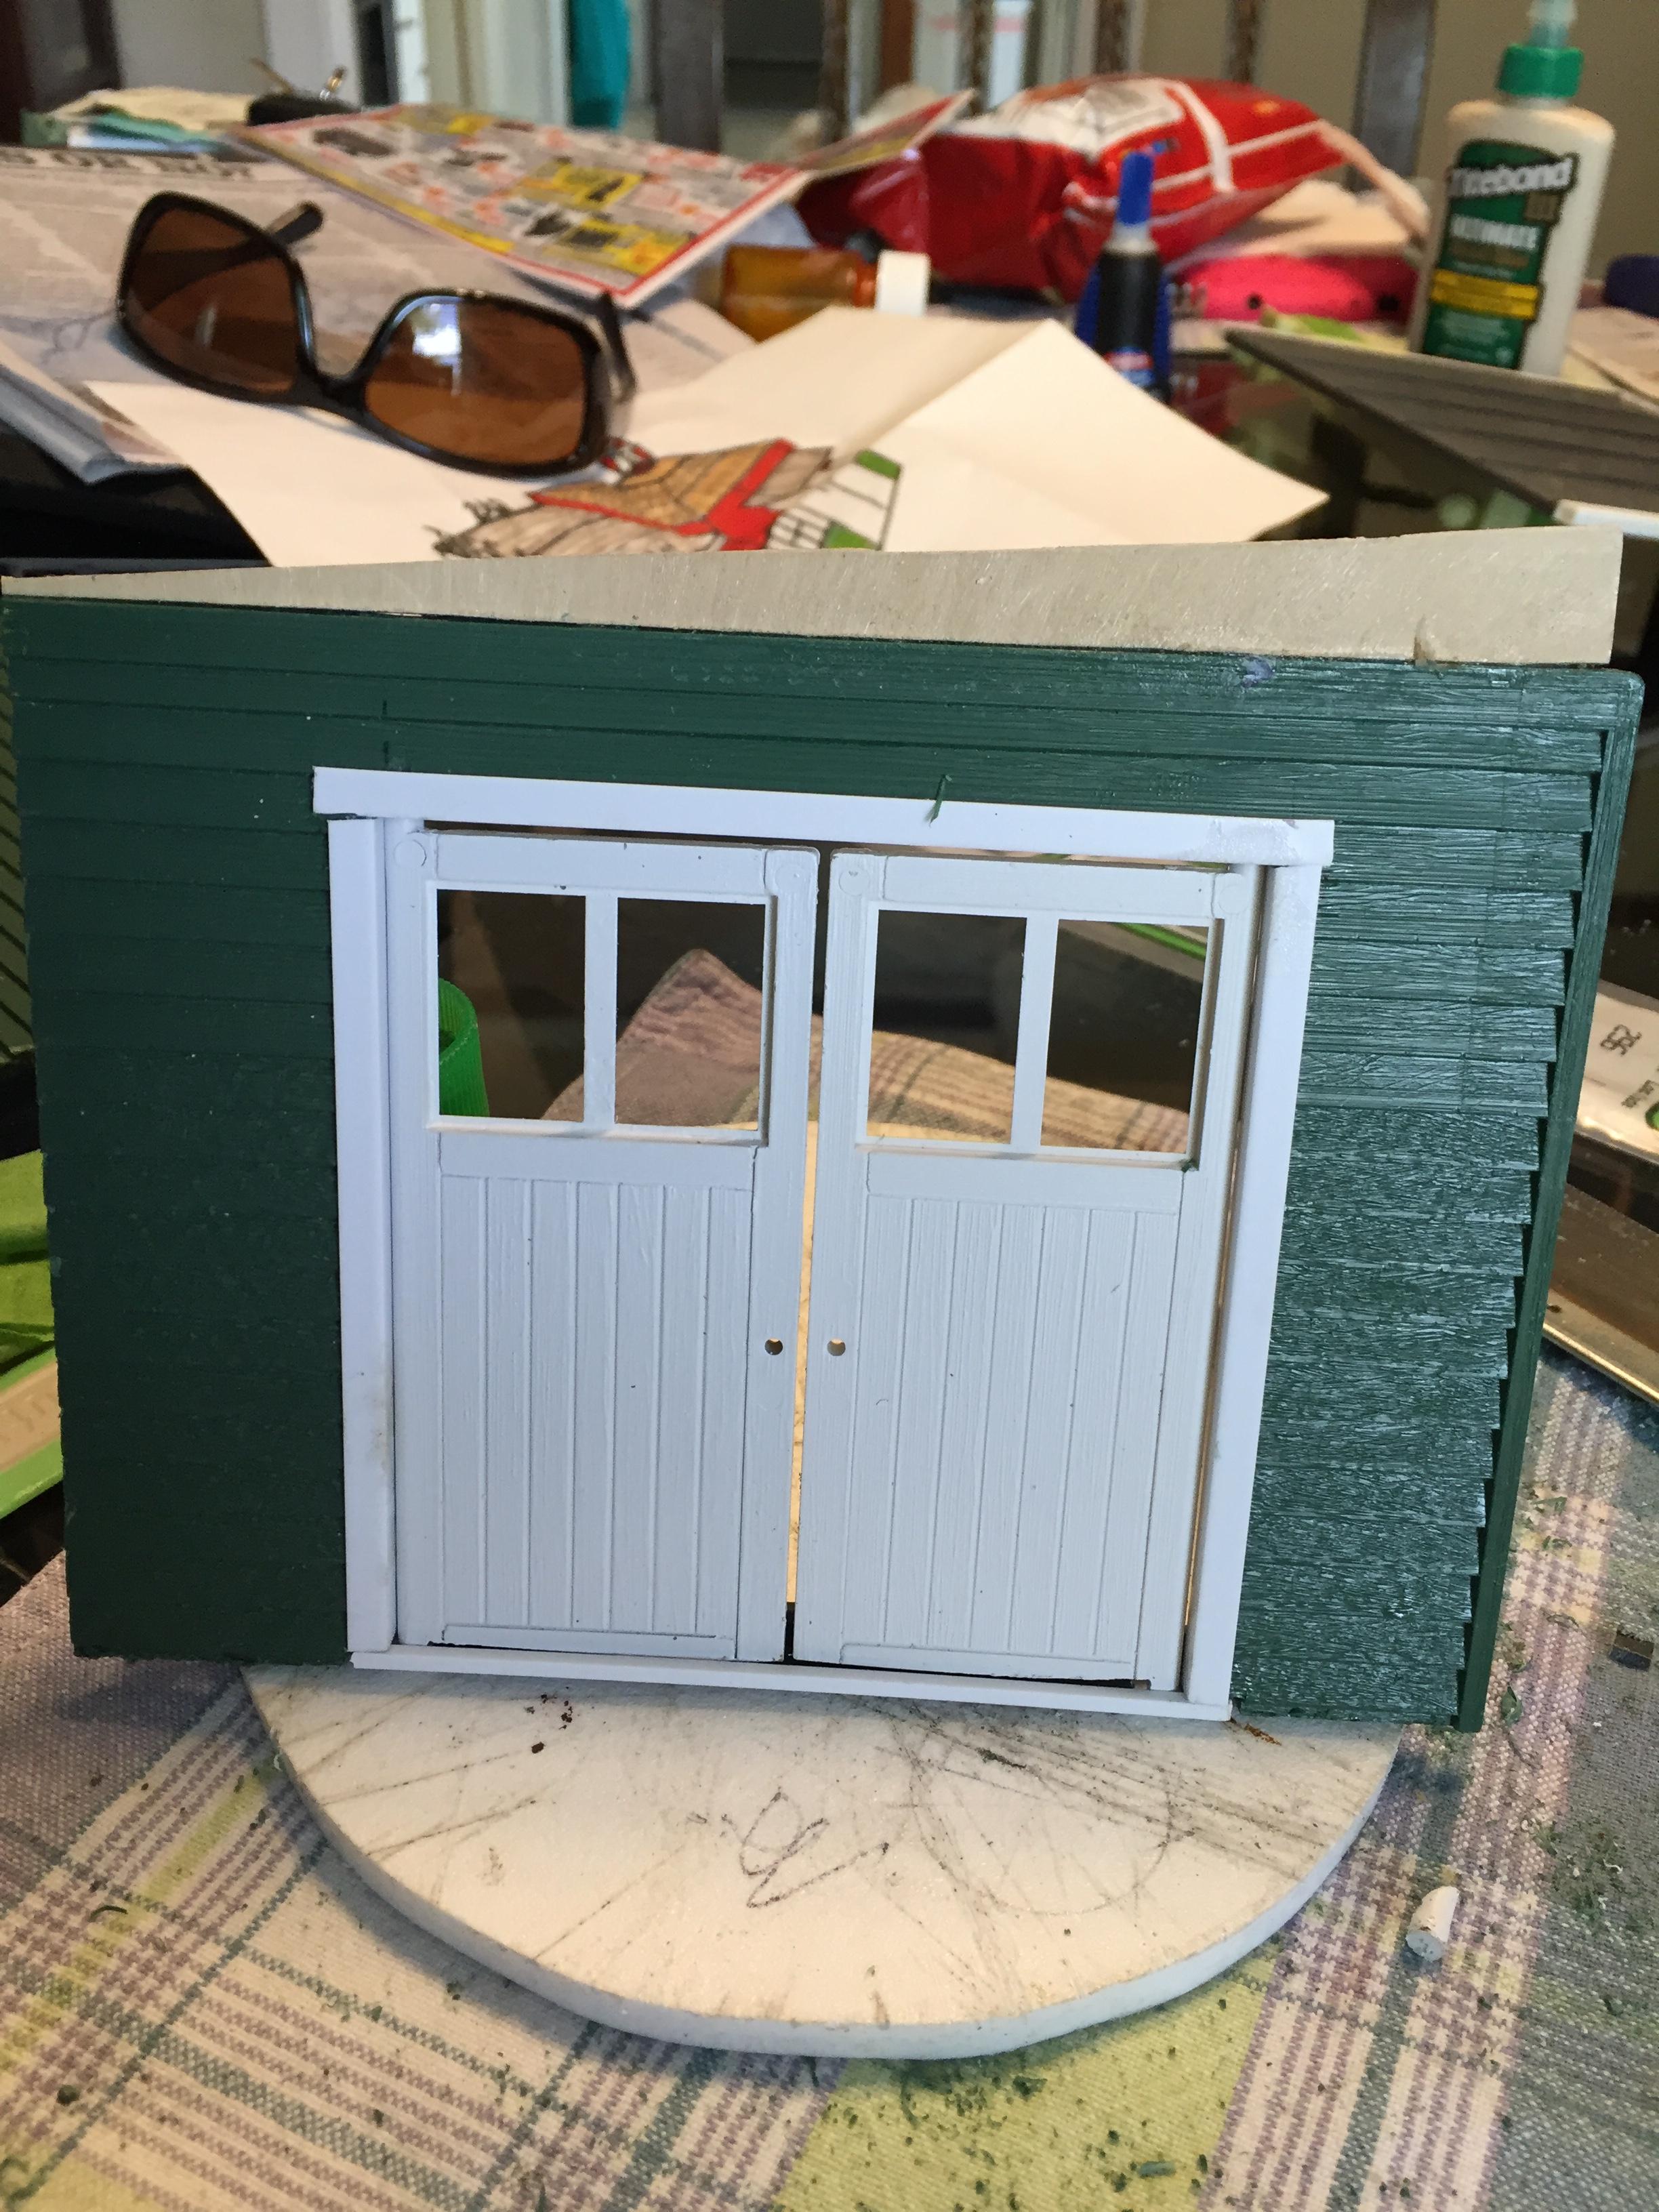
Building was made using parts of a Wells Fargo Pola build that had been damaged in a storm. The building actually supplied enough material to build this and 2 others. This is one of my first buildings that kit bashed, and at that time I had just gotten into LED's so this one is Battery powered. It has lights inside the building, 1 under the canopy where the pumps are and 1 each in the Texaco stars on the top of the building, which are red clear plastic type used on ceramic Christmas trees and switch for same is just under the eve of the rear of the building which you can see just above the Texaco sign on rear of building. I changed the hoses on the pumps to a finer more realistic tubing. Funny thing that you can't see in the pictures but the 1920ish pumps have a EPA lead warranting. The roof I weathered like an old station that I remember that the owner had replace 1 rusted out roof panel( I get a lot of ? about why I didn't paint that panel, too funny., Side doors do open and station now has an old time coke cooler out in front and added old time decals. This build was for 1 of my sons that friends call Barn, fun build
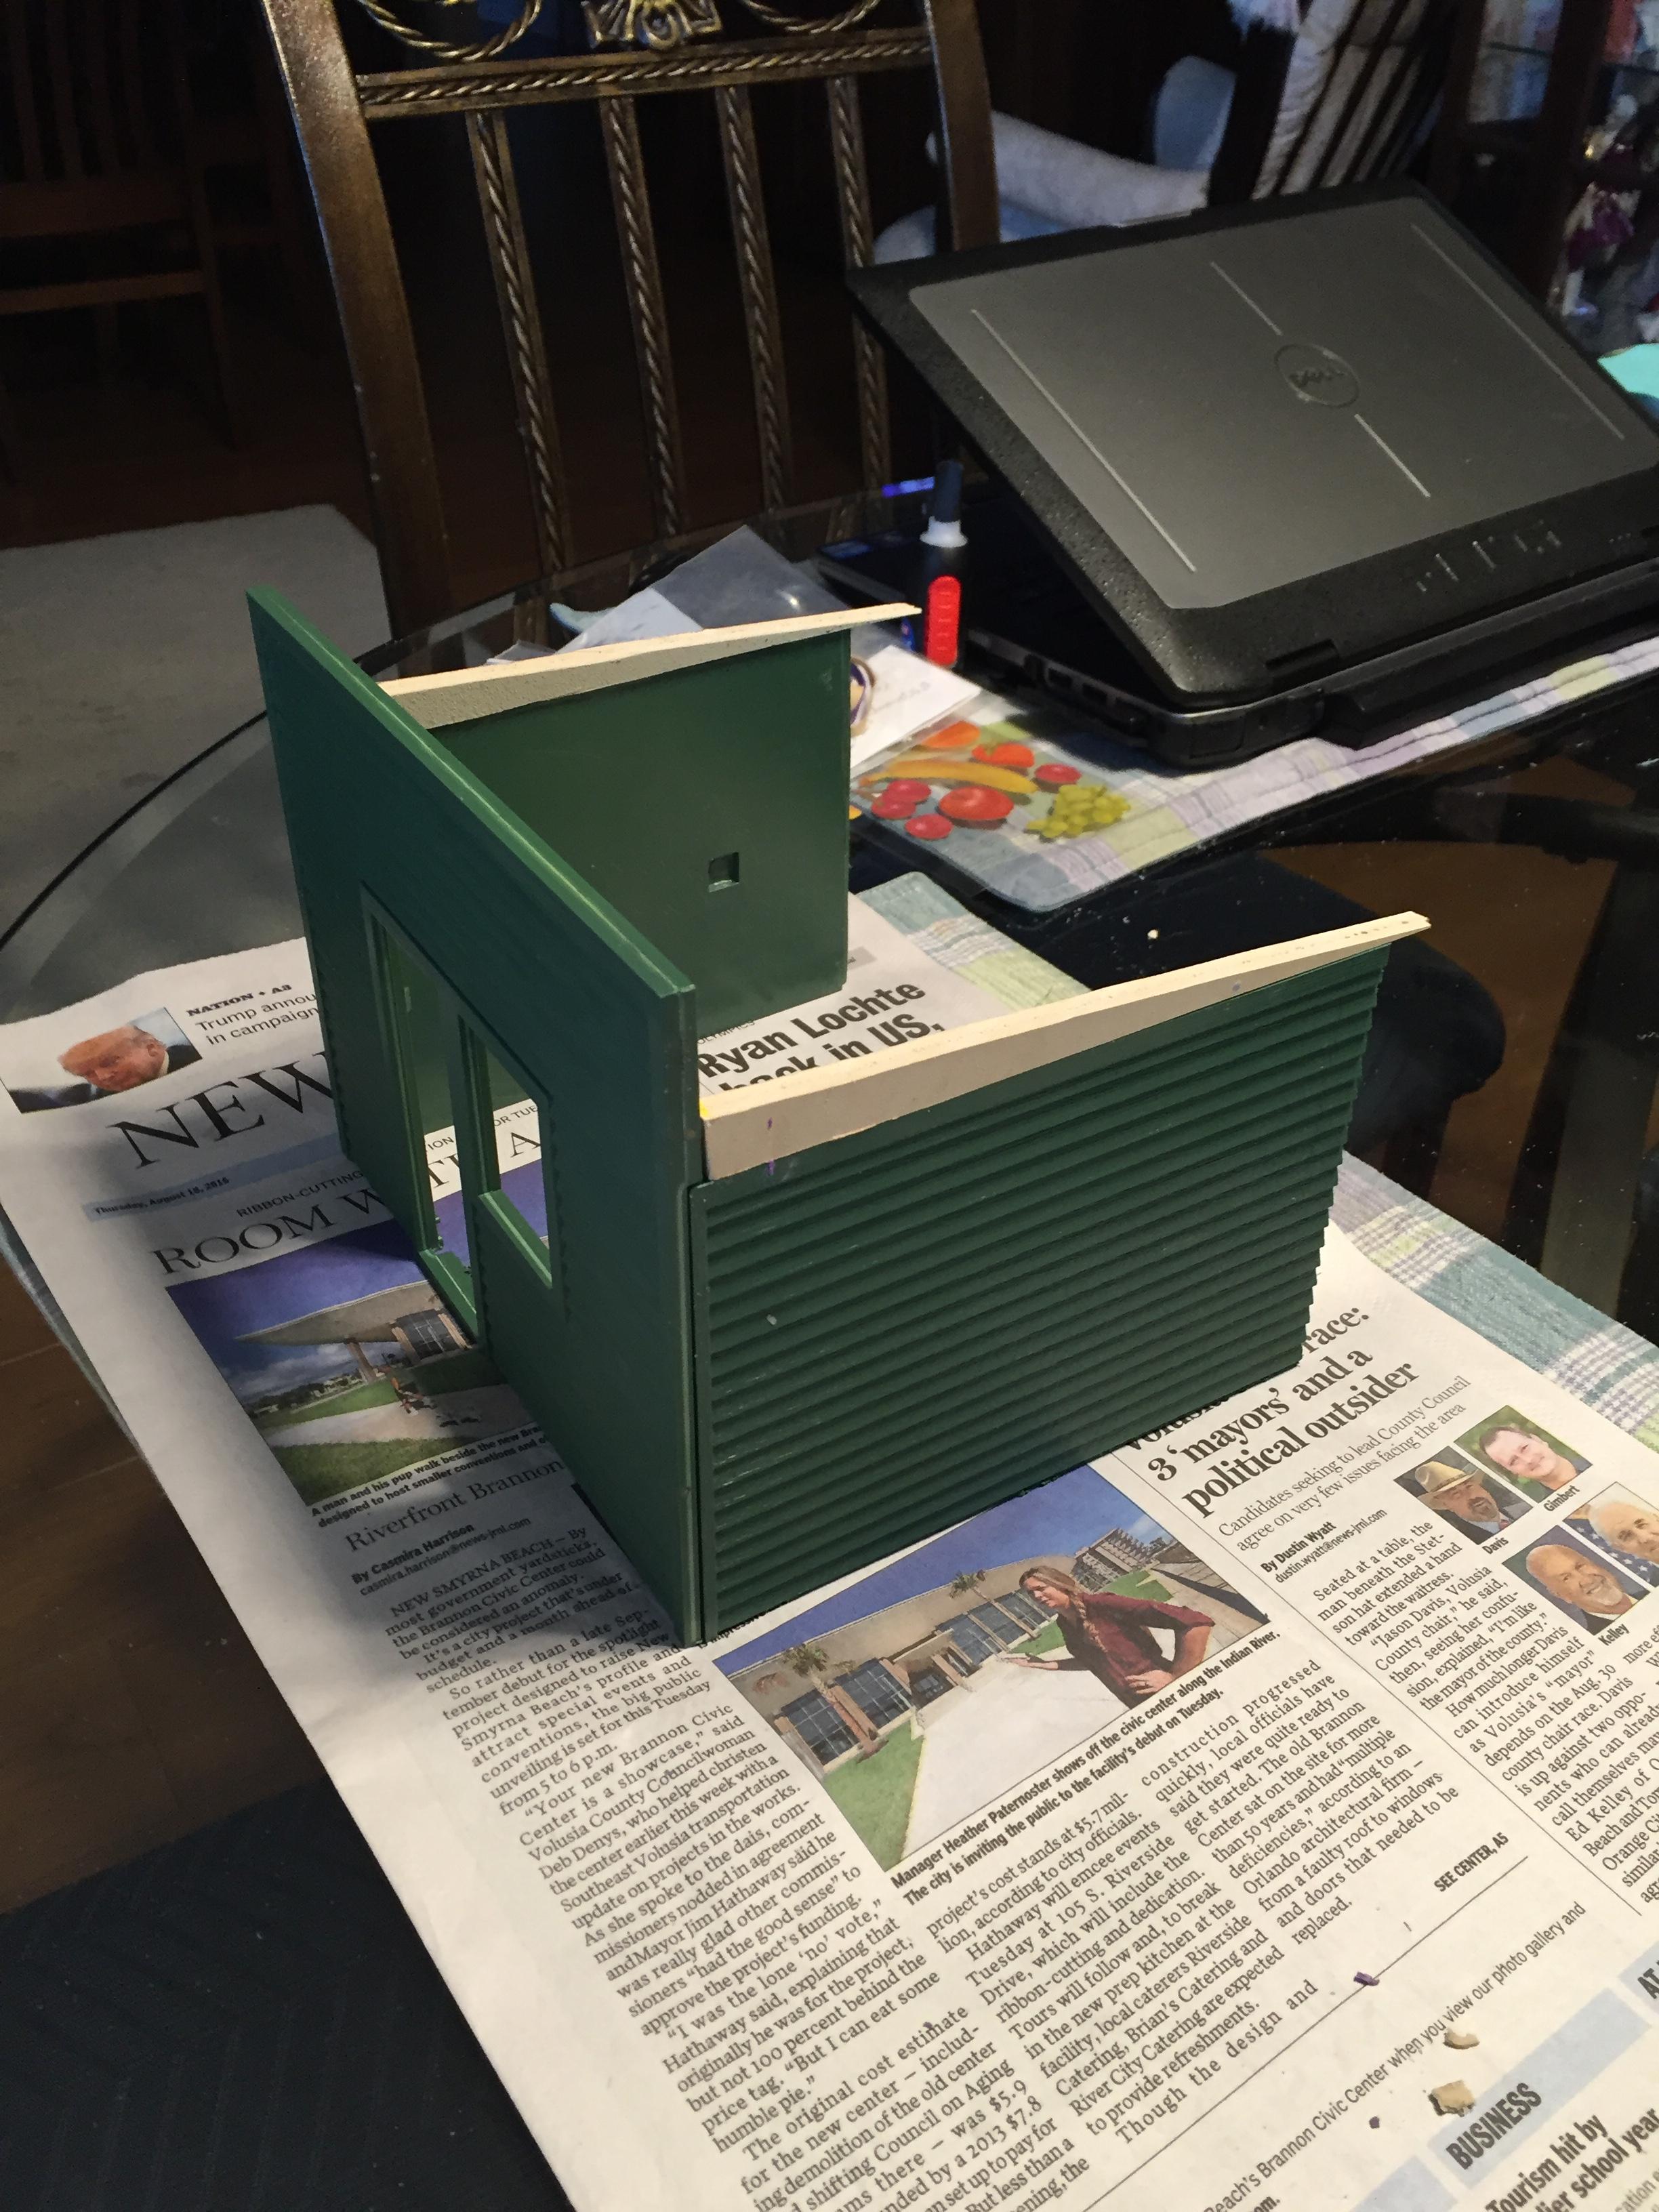
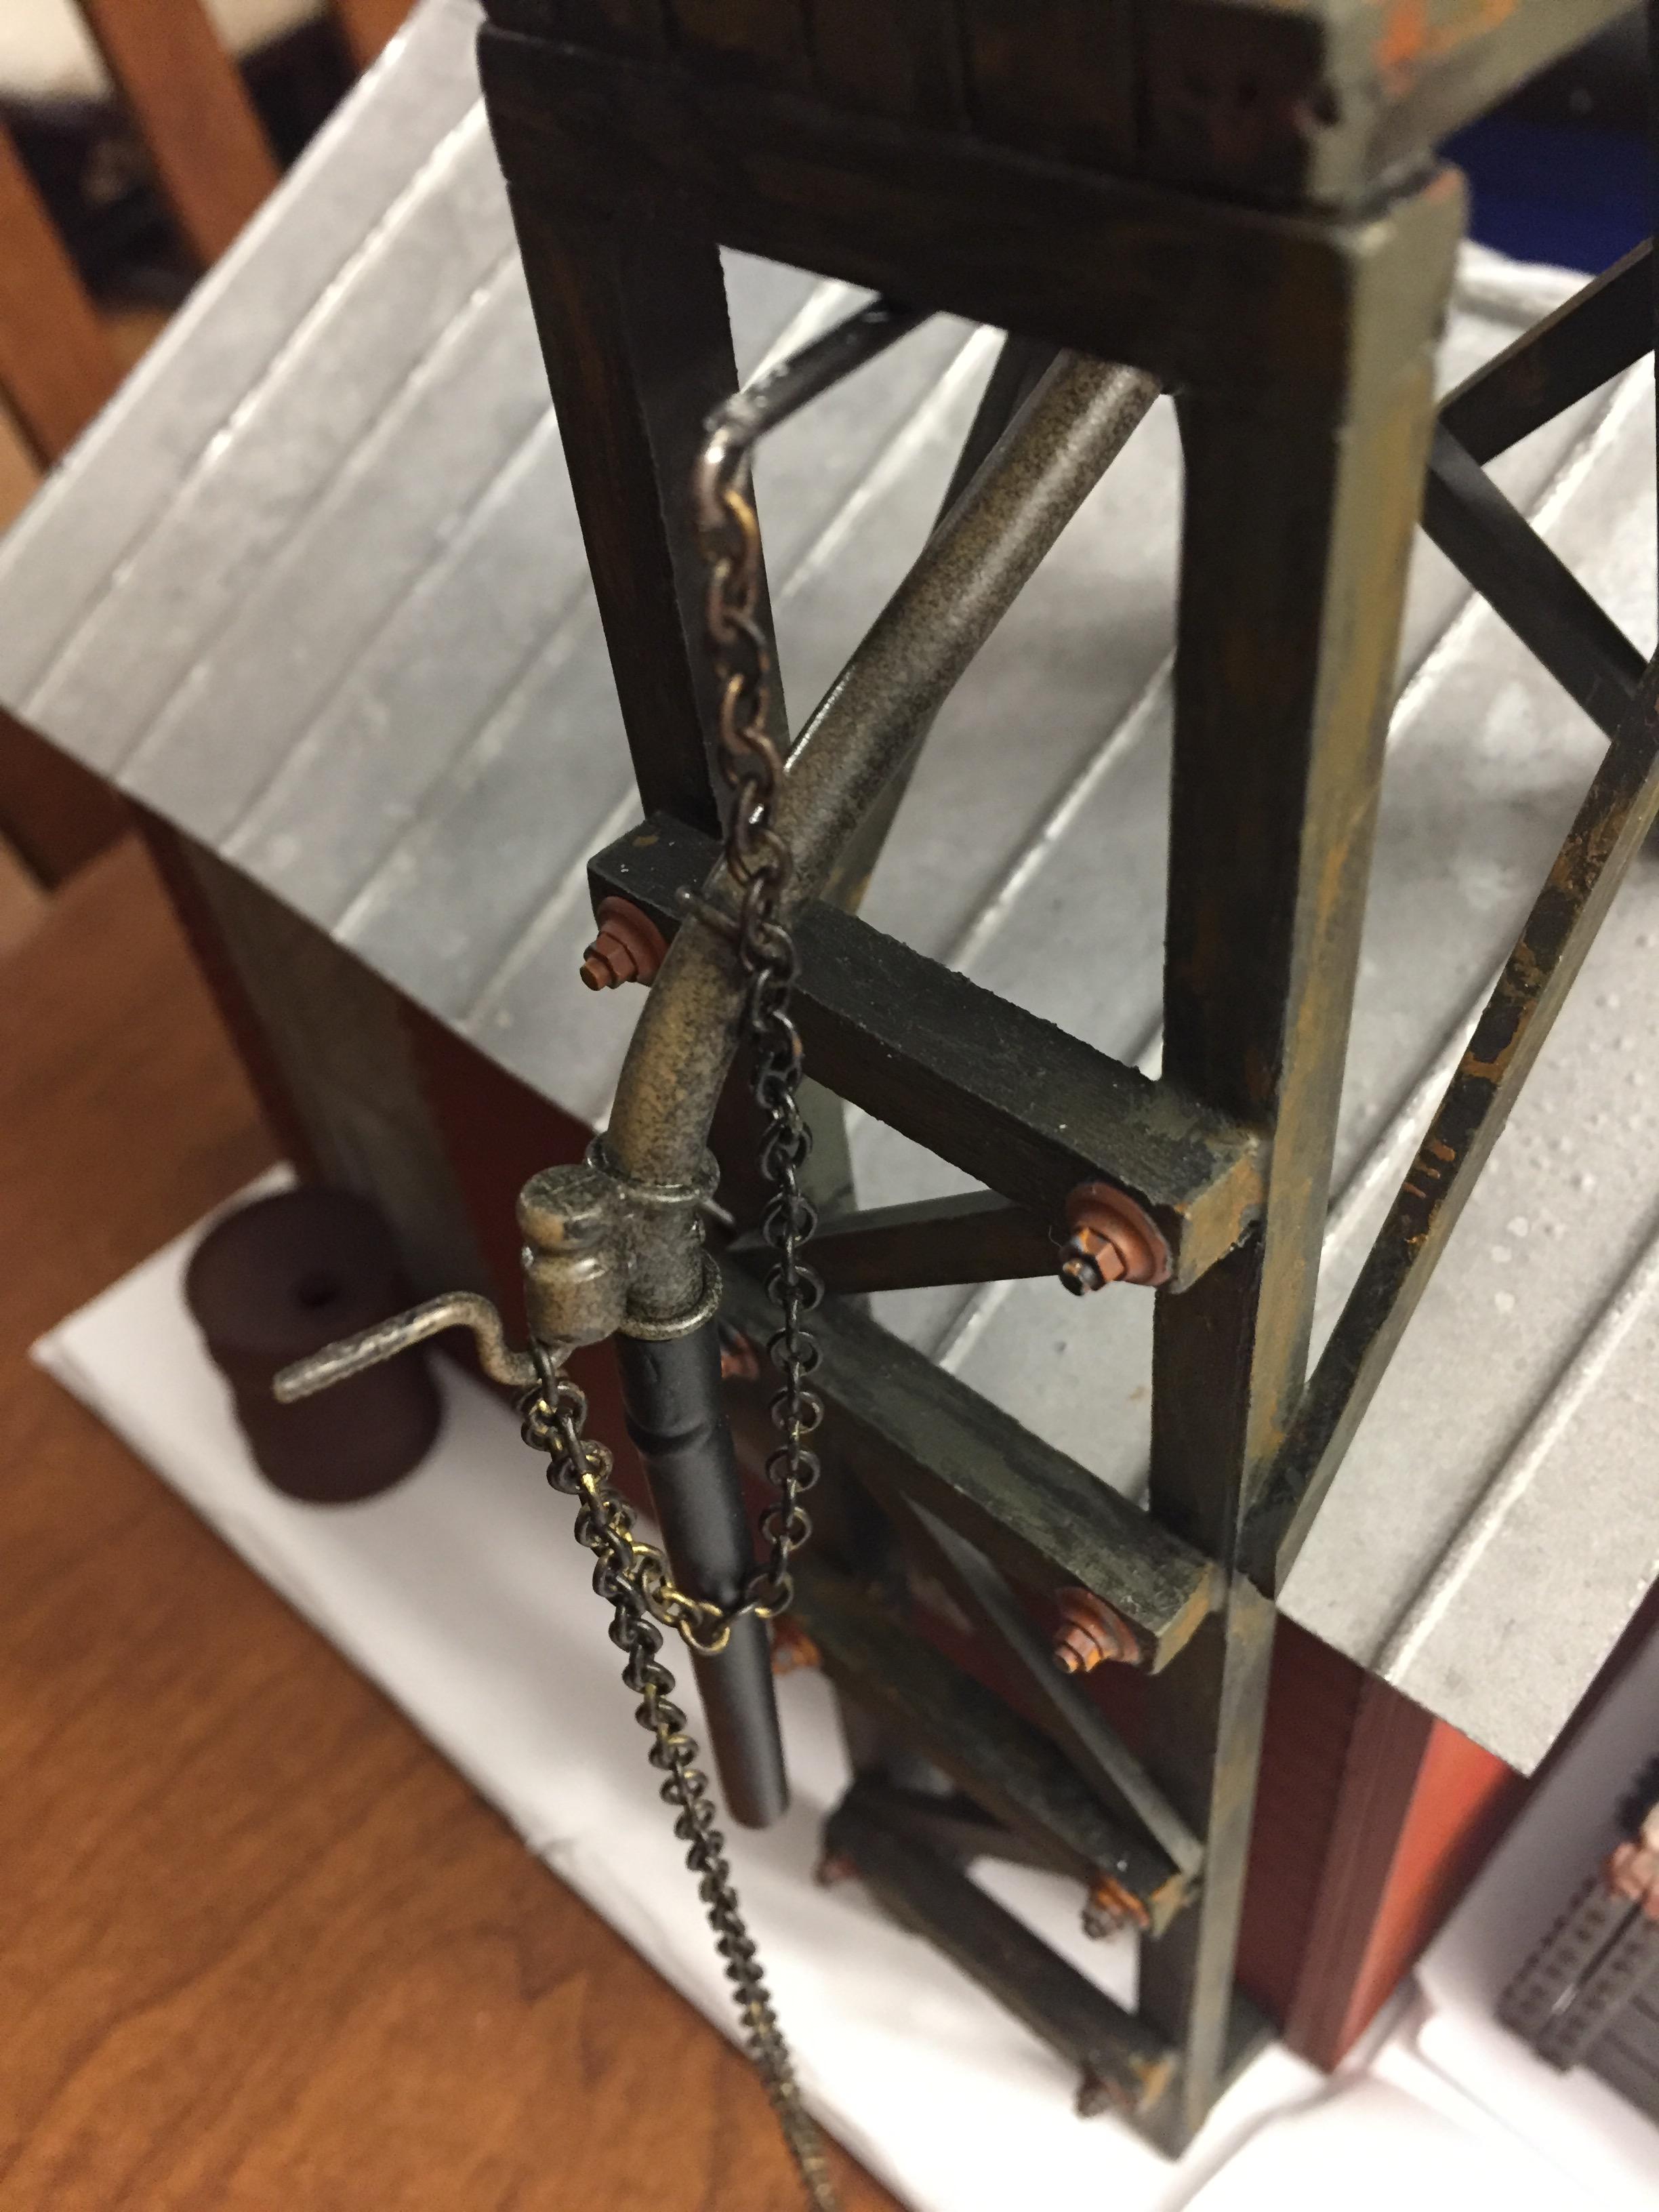
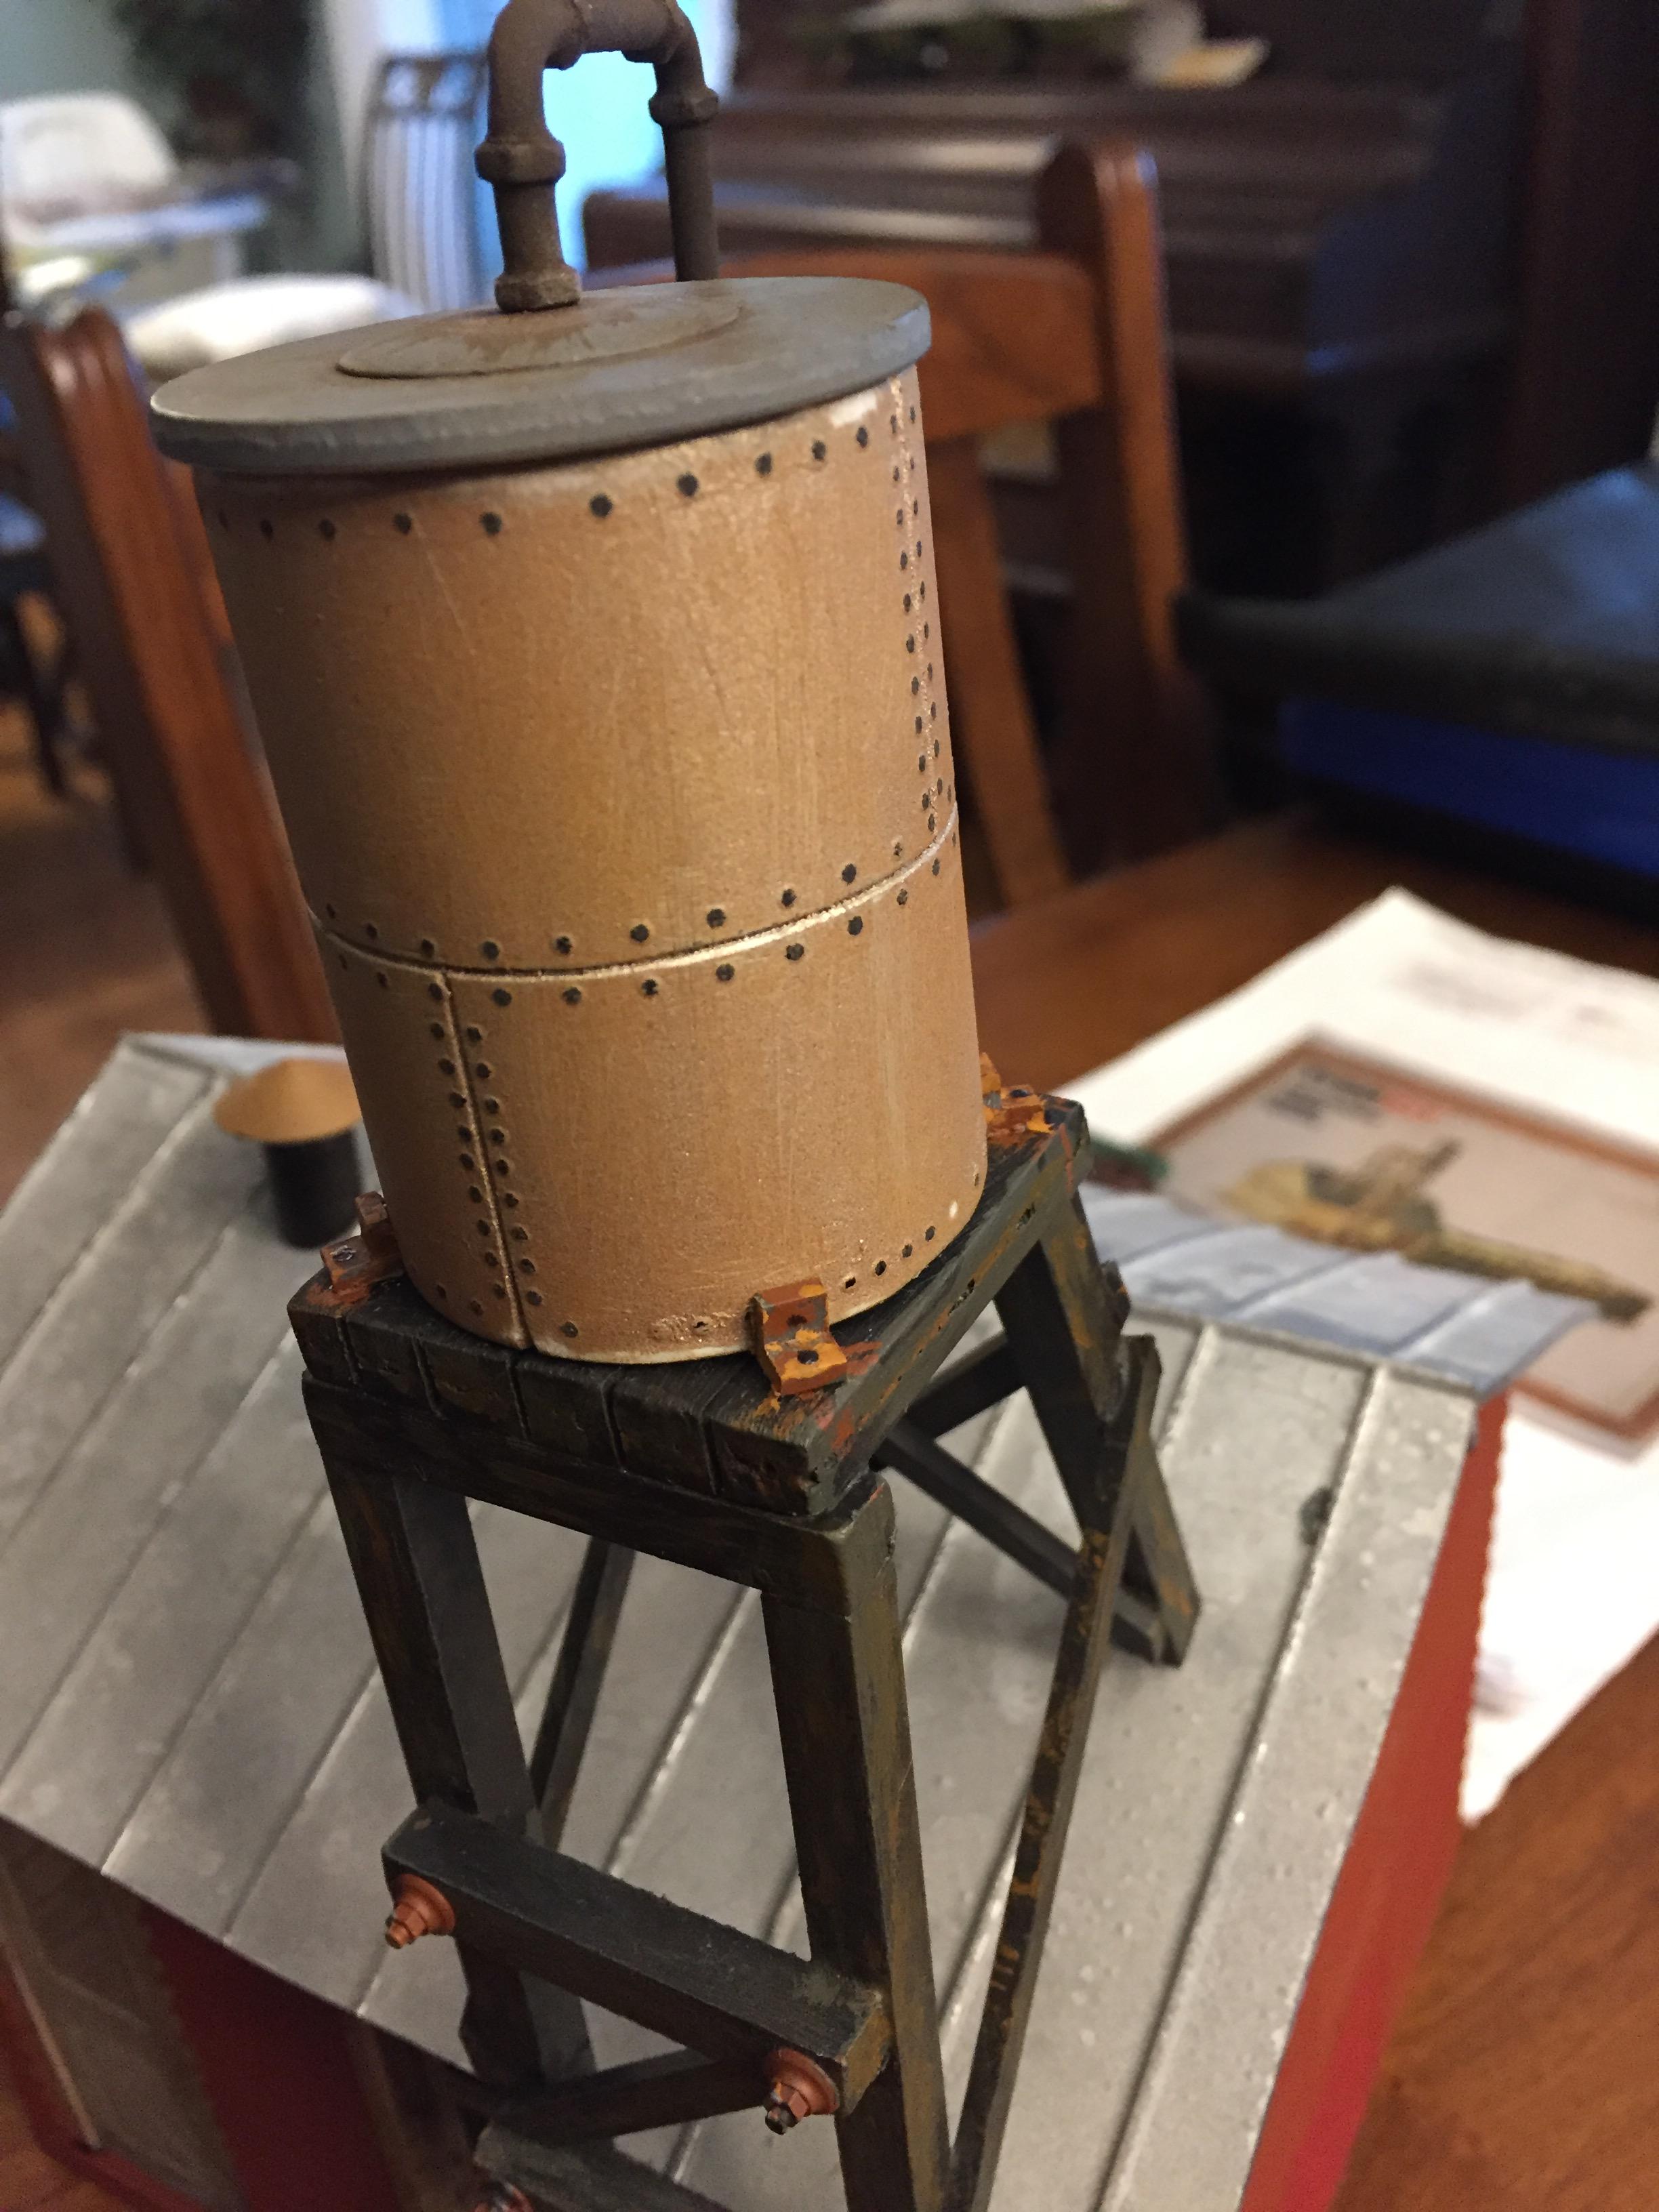
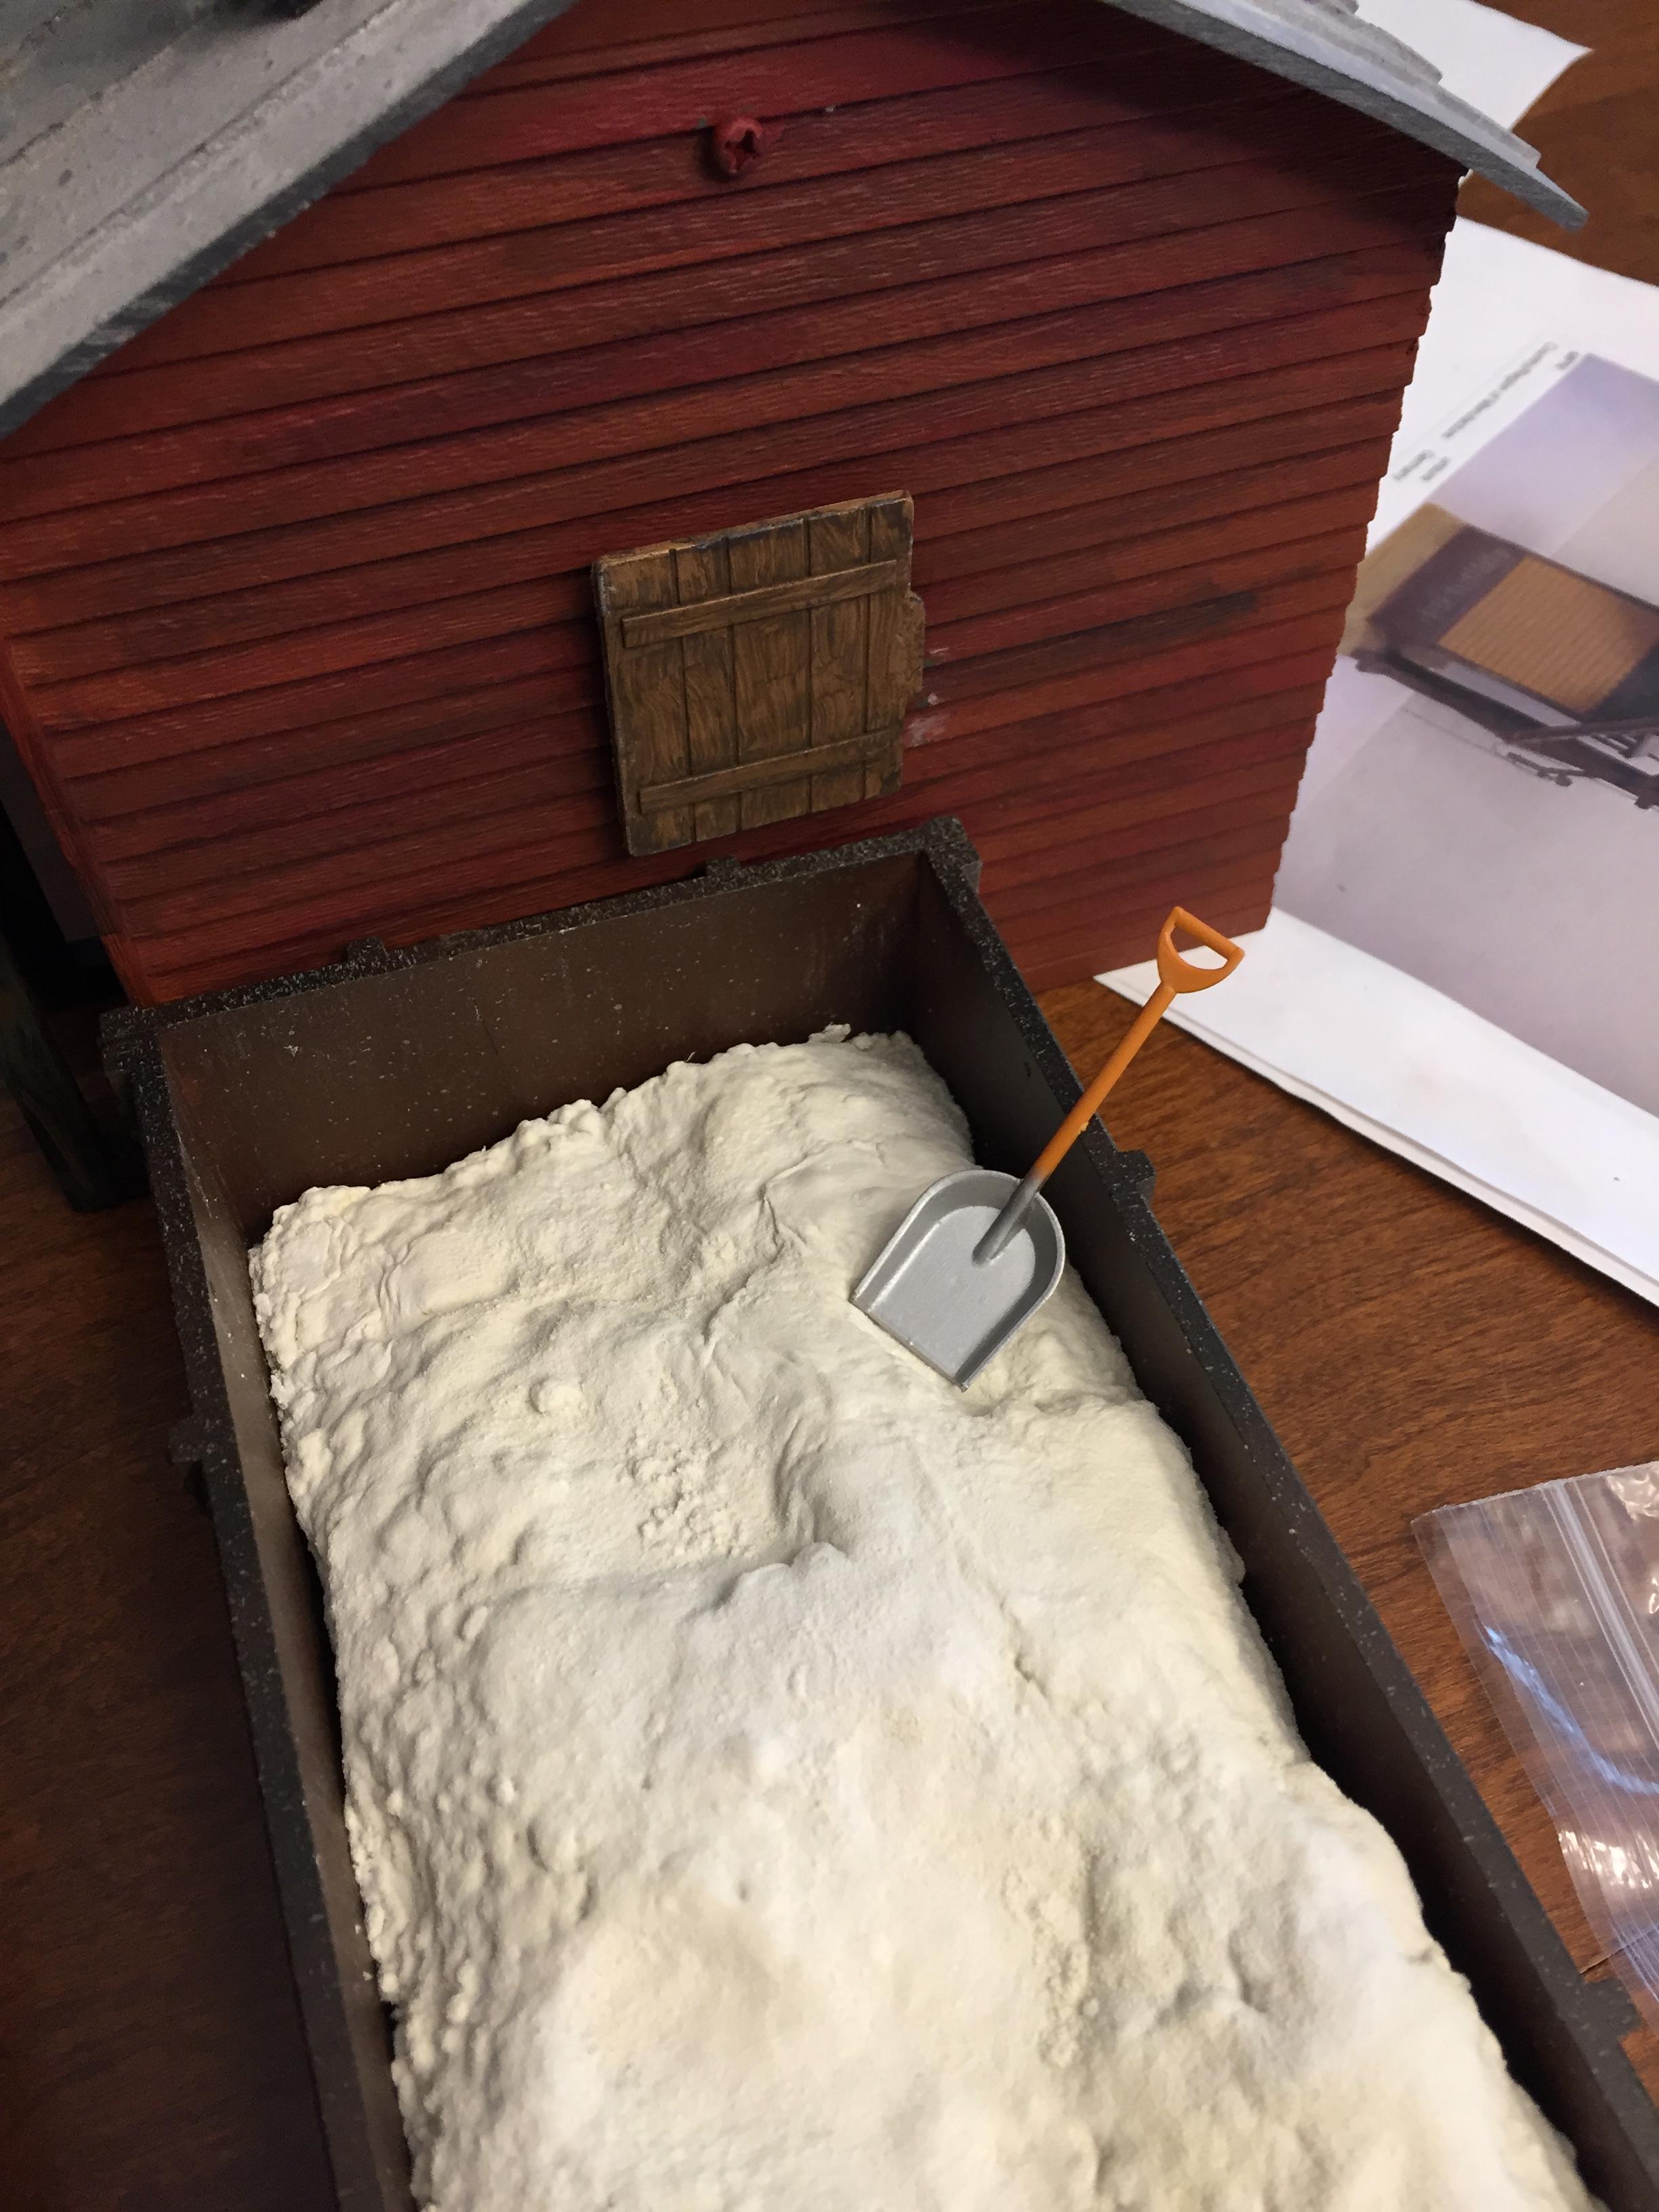
Scratch built this house and tower using ideas from both Tyco and pola buildings, building is part of and old pola Wells Fargo 2 story building. The Wells Fargo building was damaged in a hurricane and it became 3 building 1 was barn's Texaco, 2 was under shed of Bachmann coaling tower and third was the sanding house. Tower is made from evergreen styrene with bolt castings from Grant Line, roof is from old scant line engine house, sand pit is a sized down wood gondola car top from Lionel "G", sand was foam painted and coated with powder cement then painted. Think I still have enough to do 1 more building with careful planning, Bill
I have attempted putting pictures in the gallery under a heading and when I add pictures they appear and then I select, submitt all images and it blinks but does not save the pictures, question is, what am I doing wrong or missing?
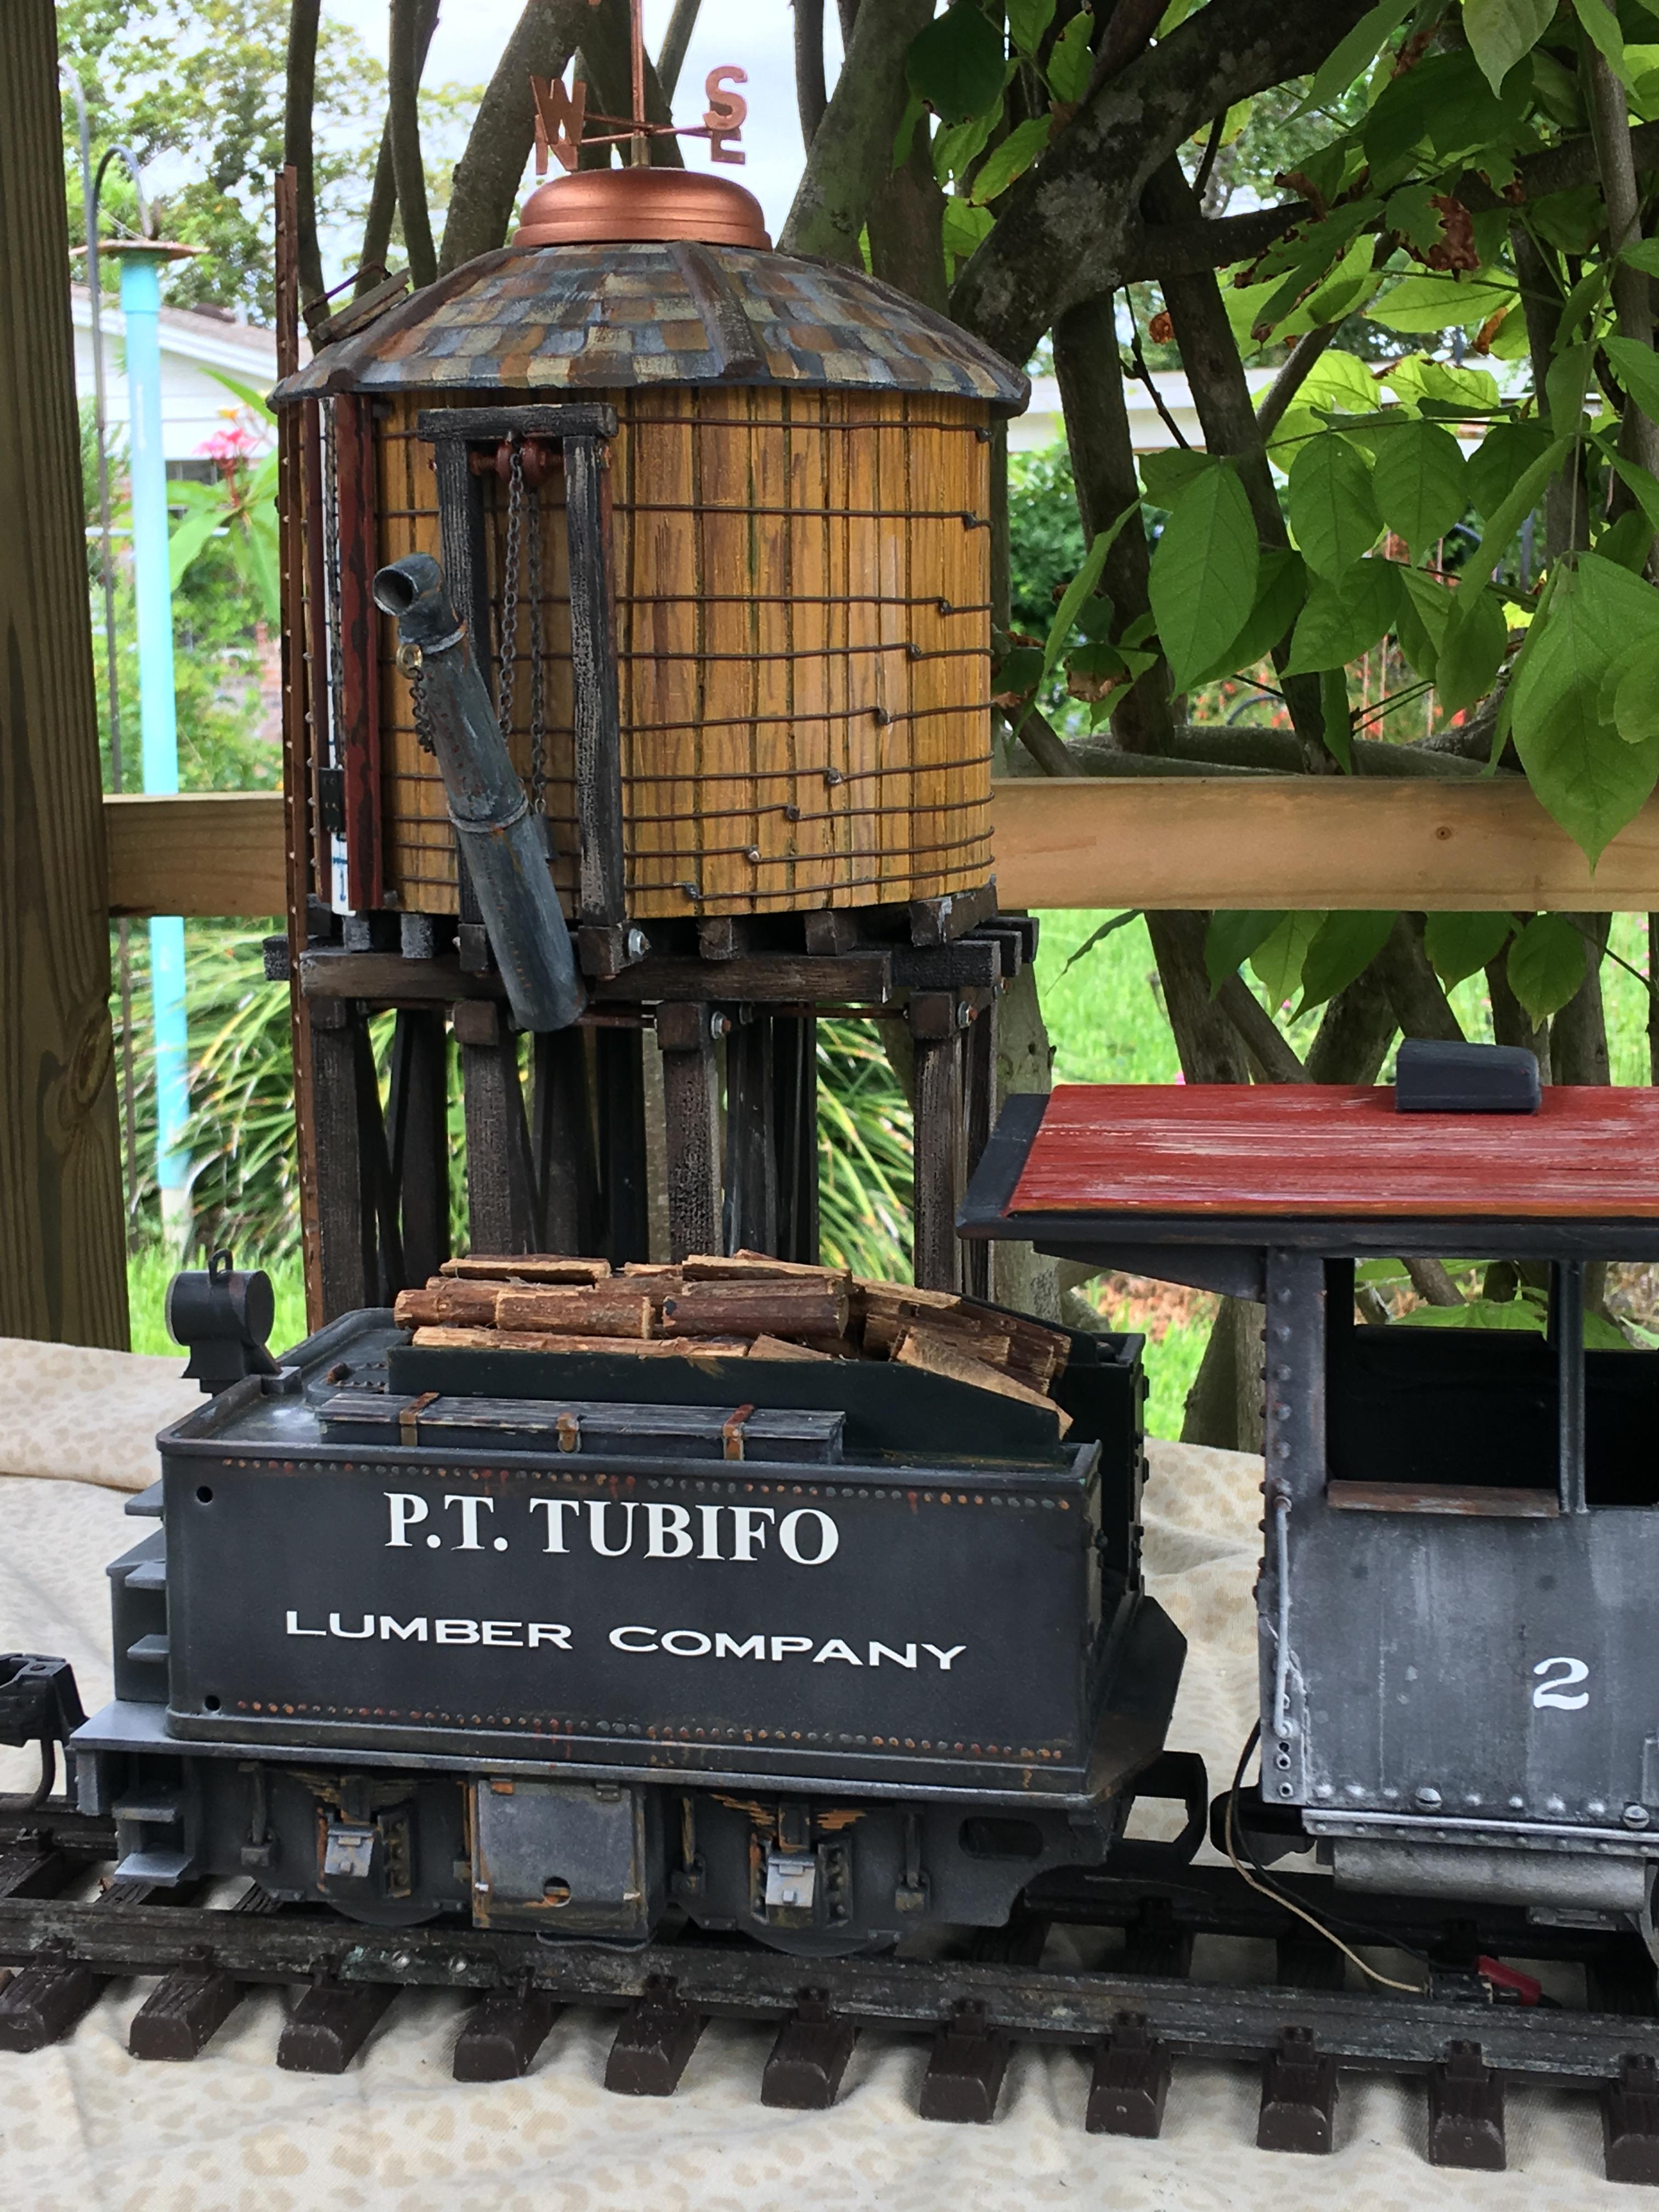
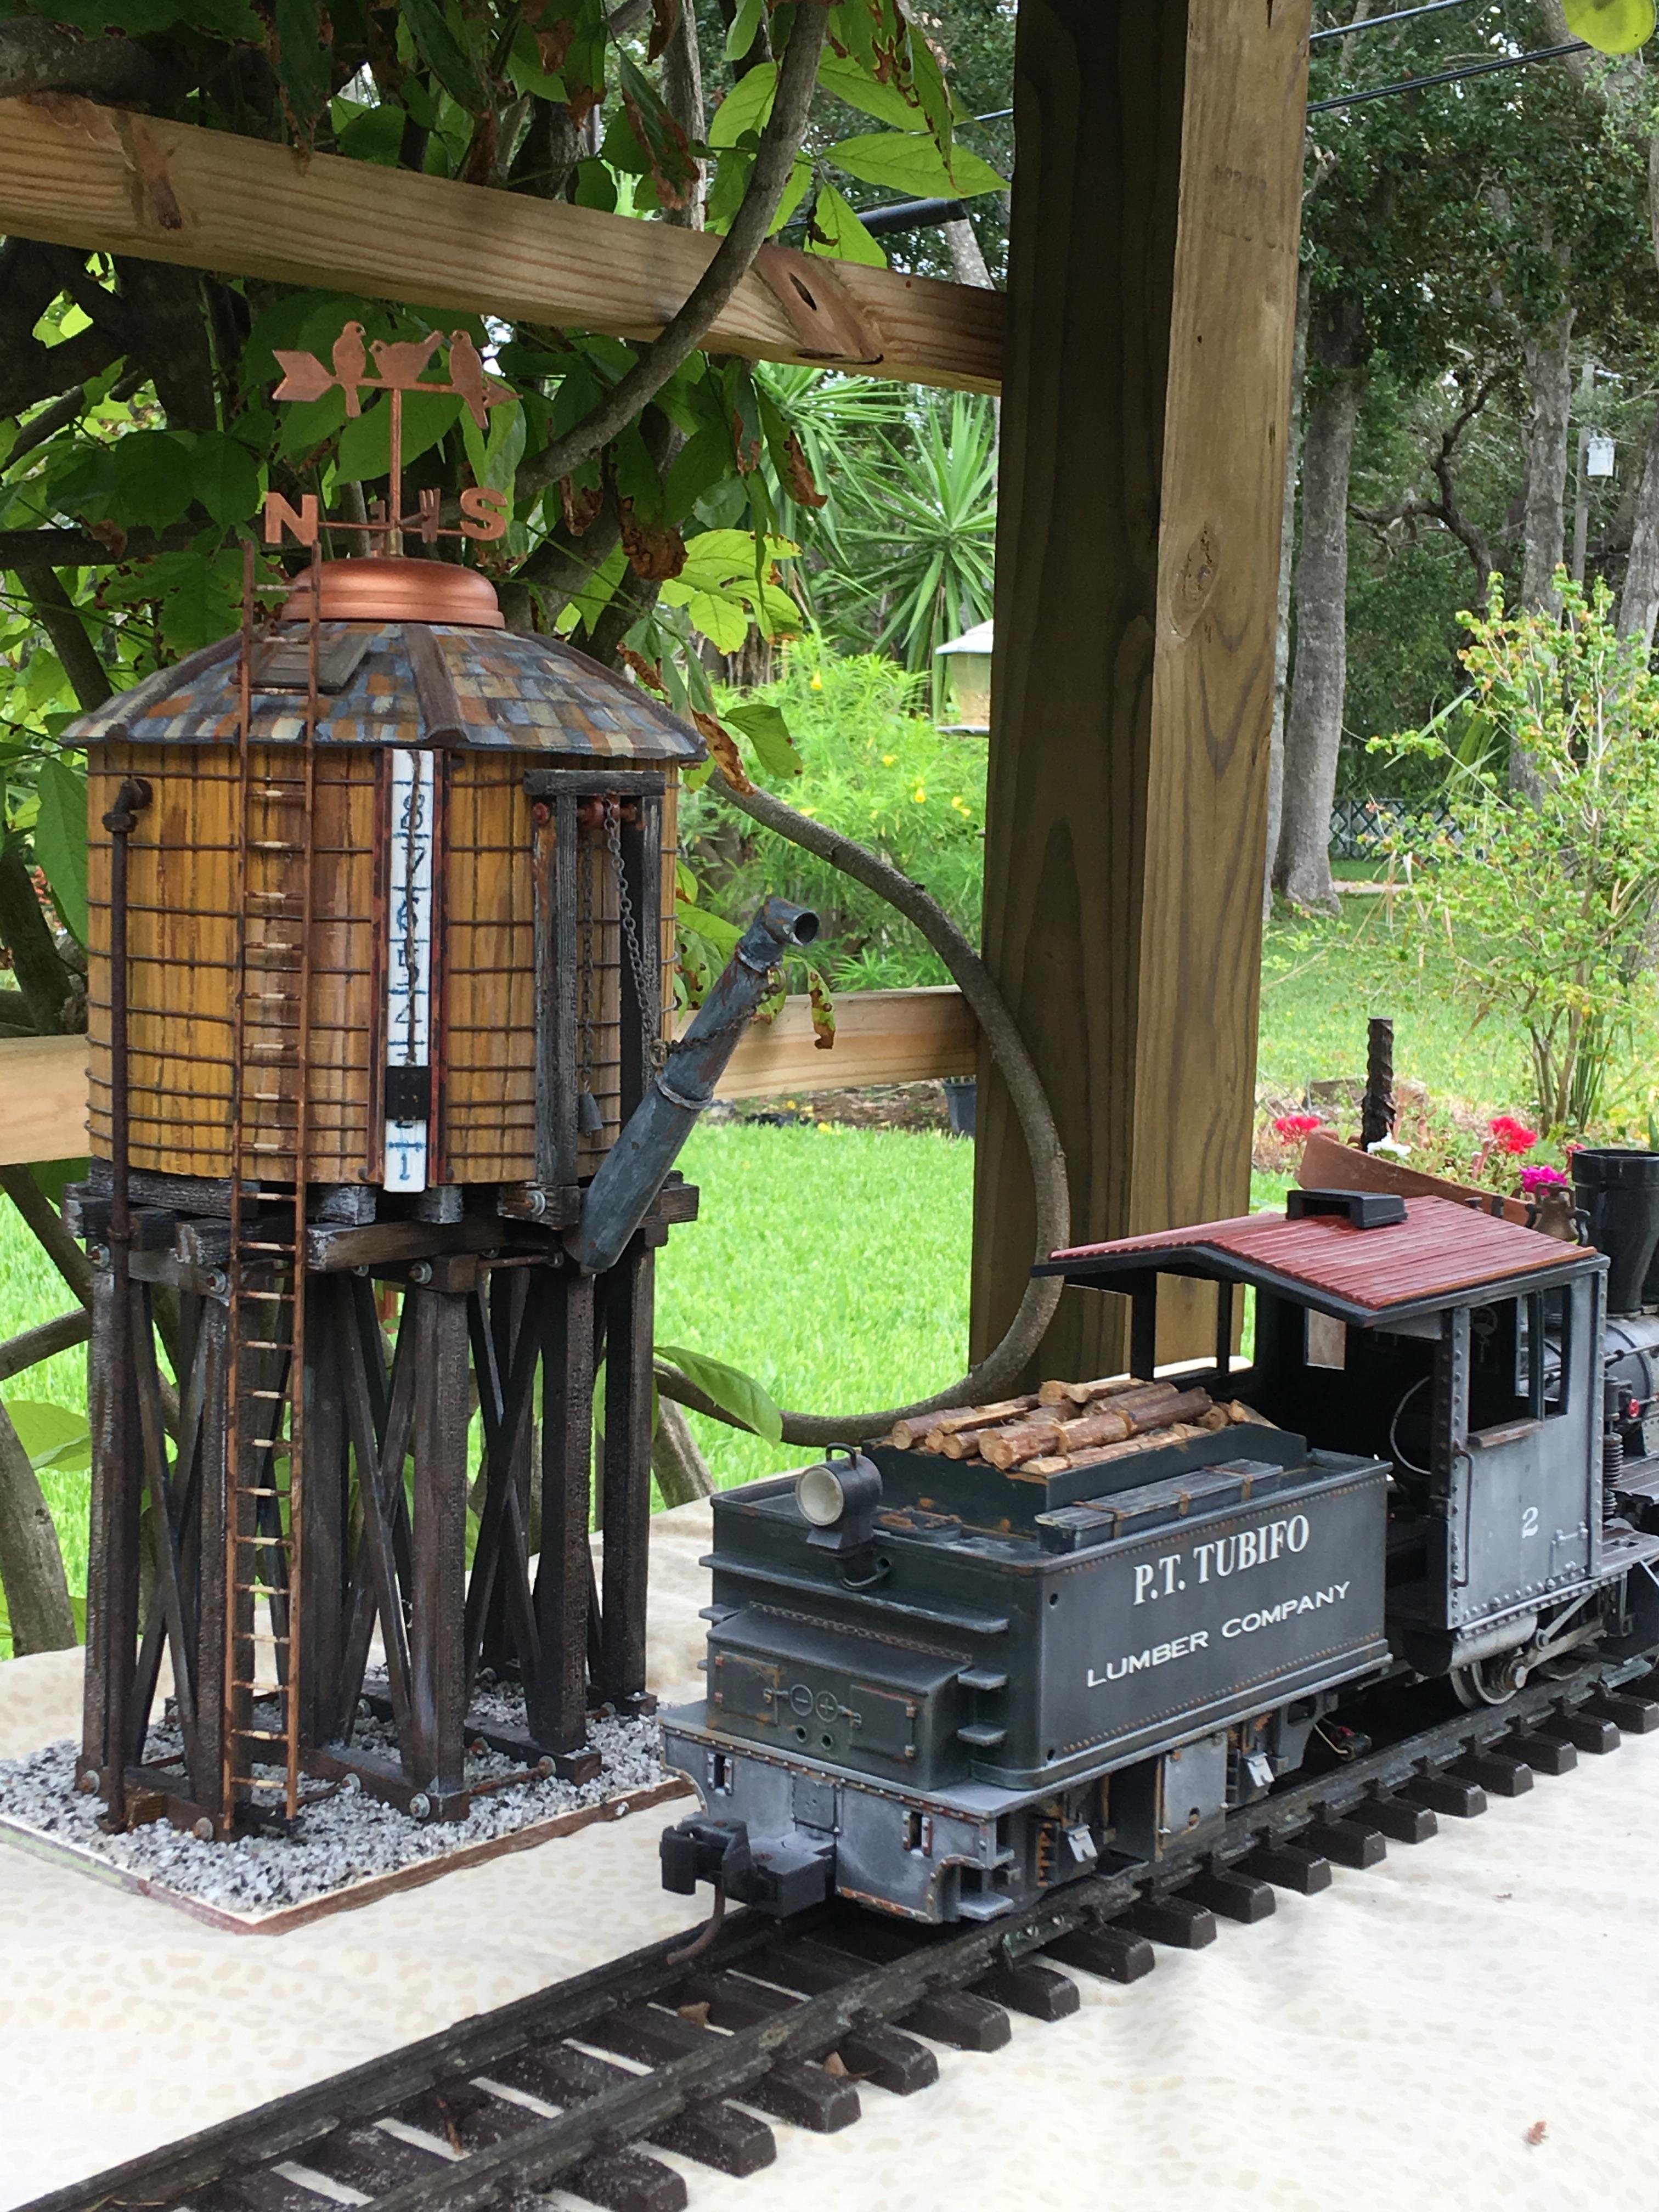
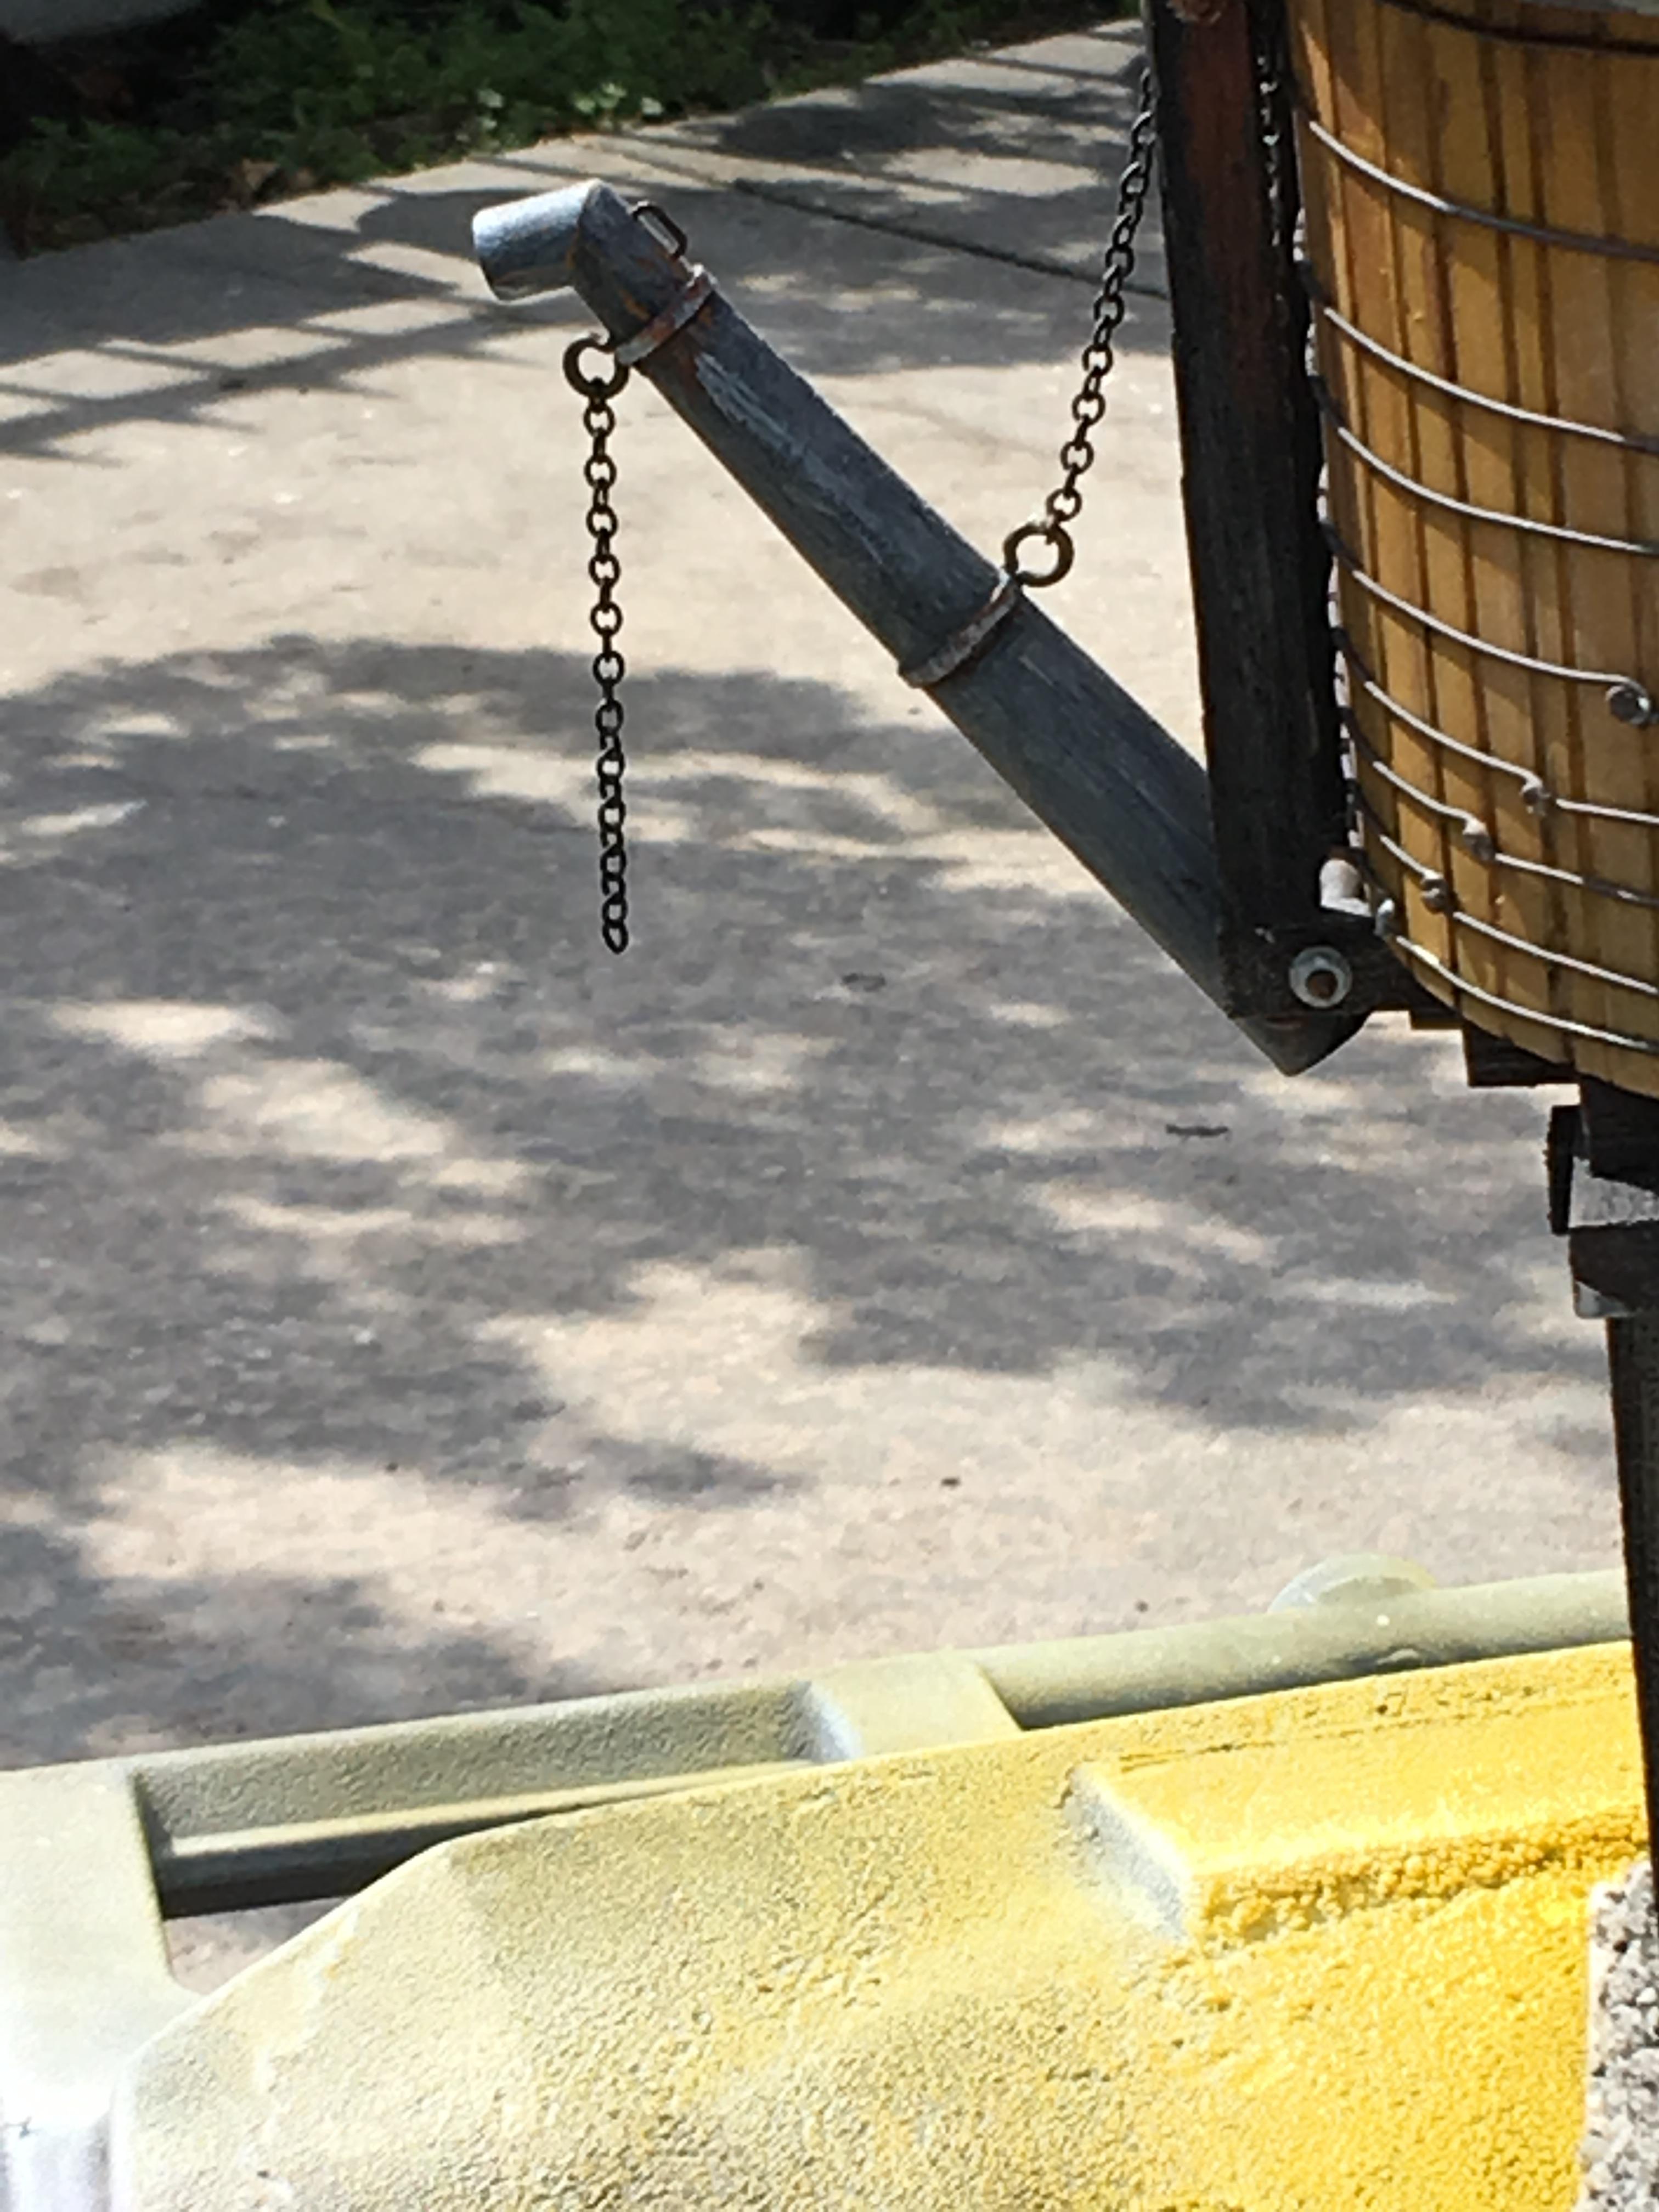
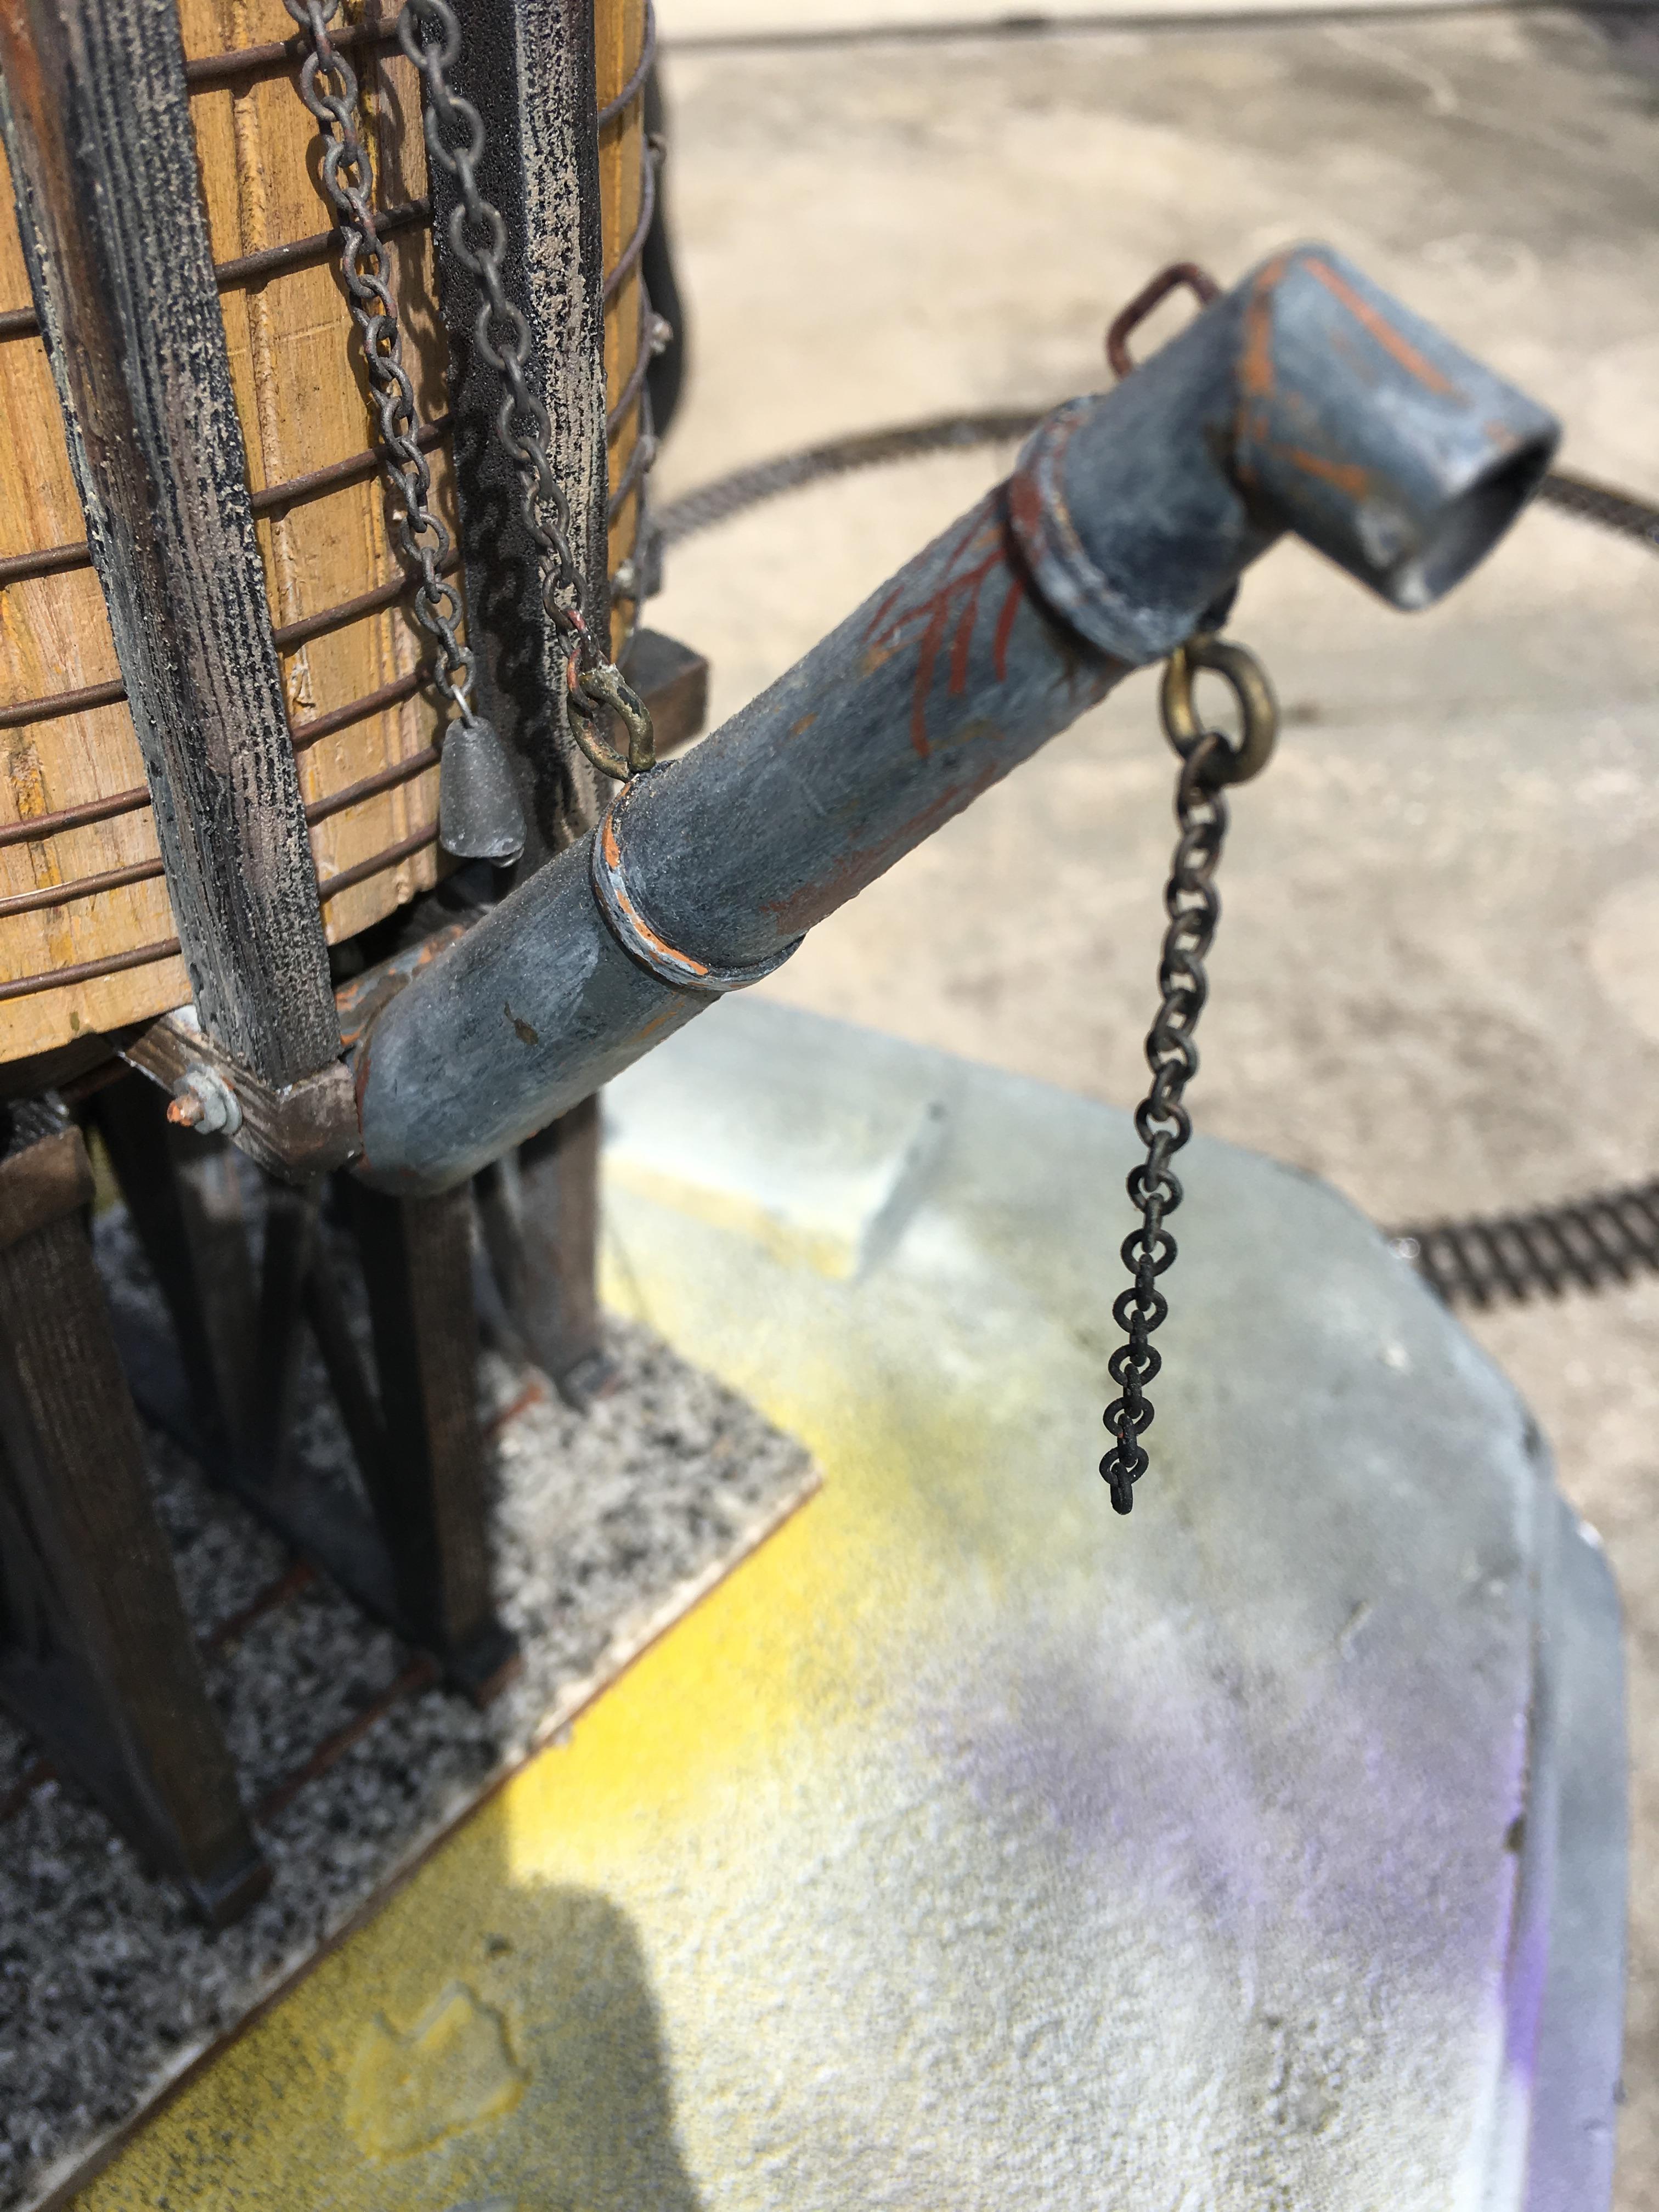
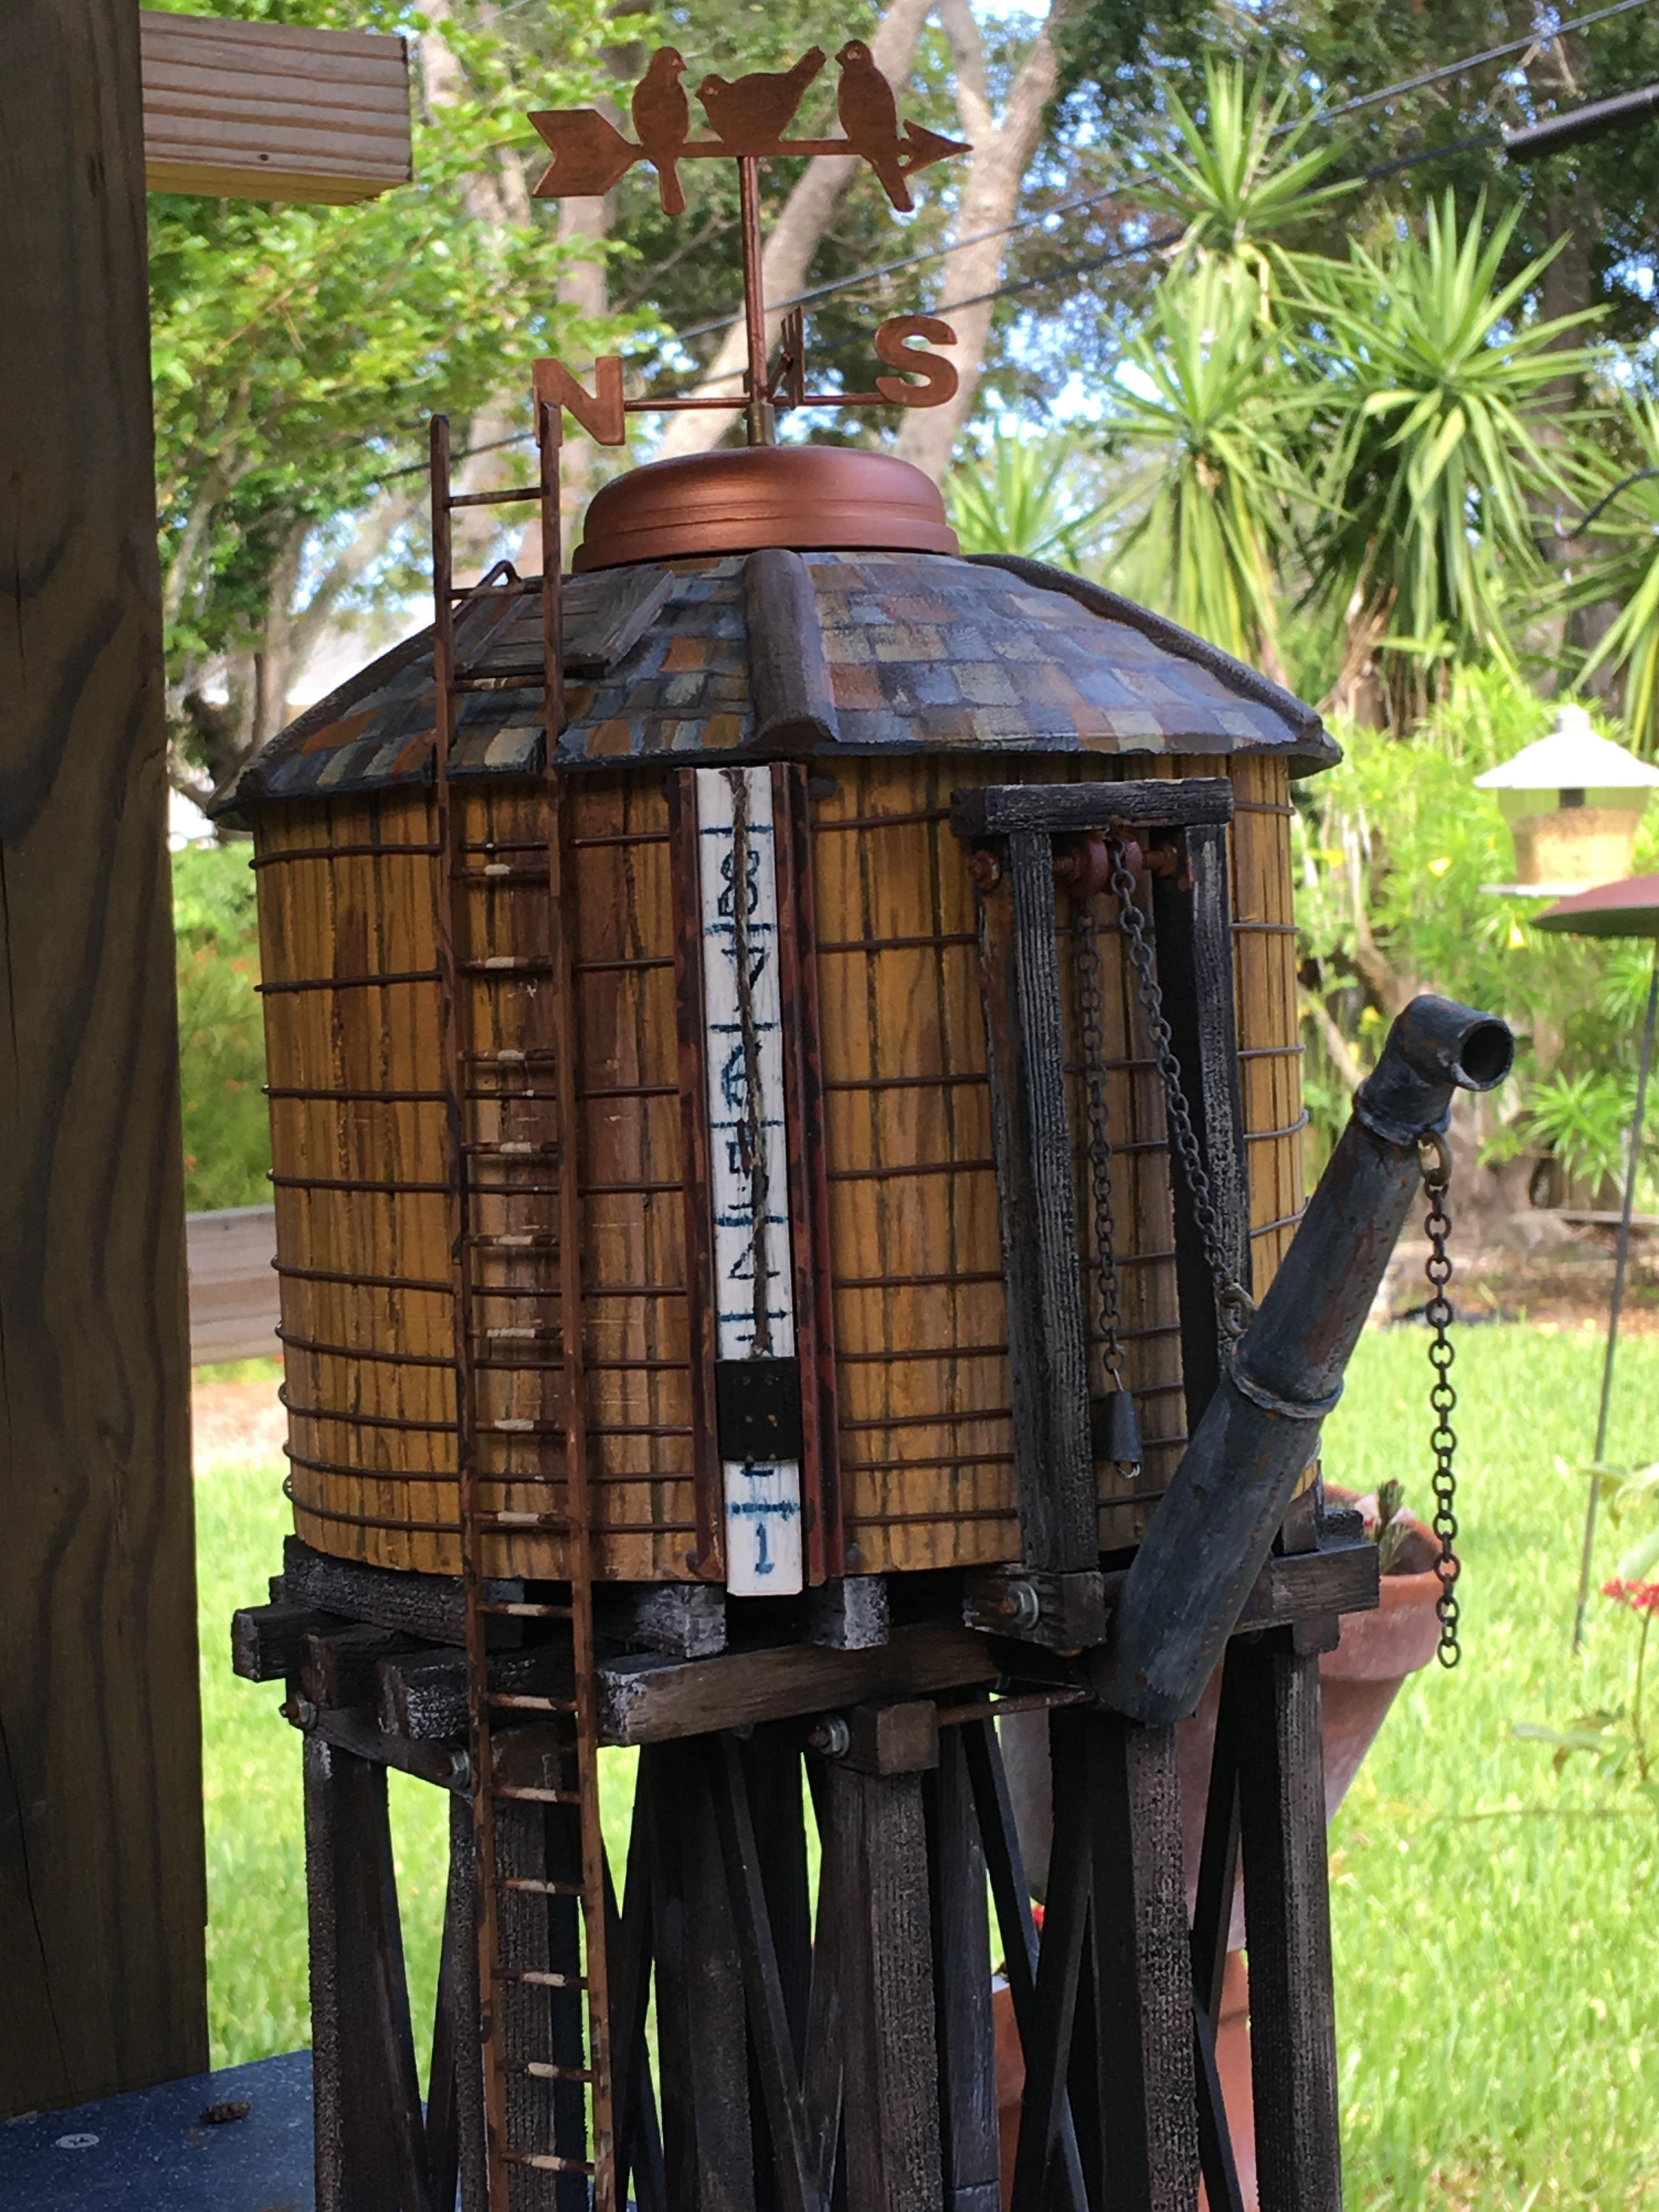
Built the tank out of PVC lumber for the support legs, 6" PVC pipe for the tank, made the spout from stretched CVPC pipe, bands for copper wire, support cables are coat hanger with nuts glued on, and top is from a old bird feeder top cut down. The weather vane is from Hobby Lobby and holds it all together. Fun project, Bill
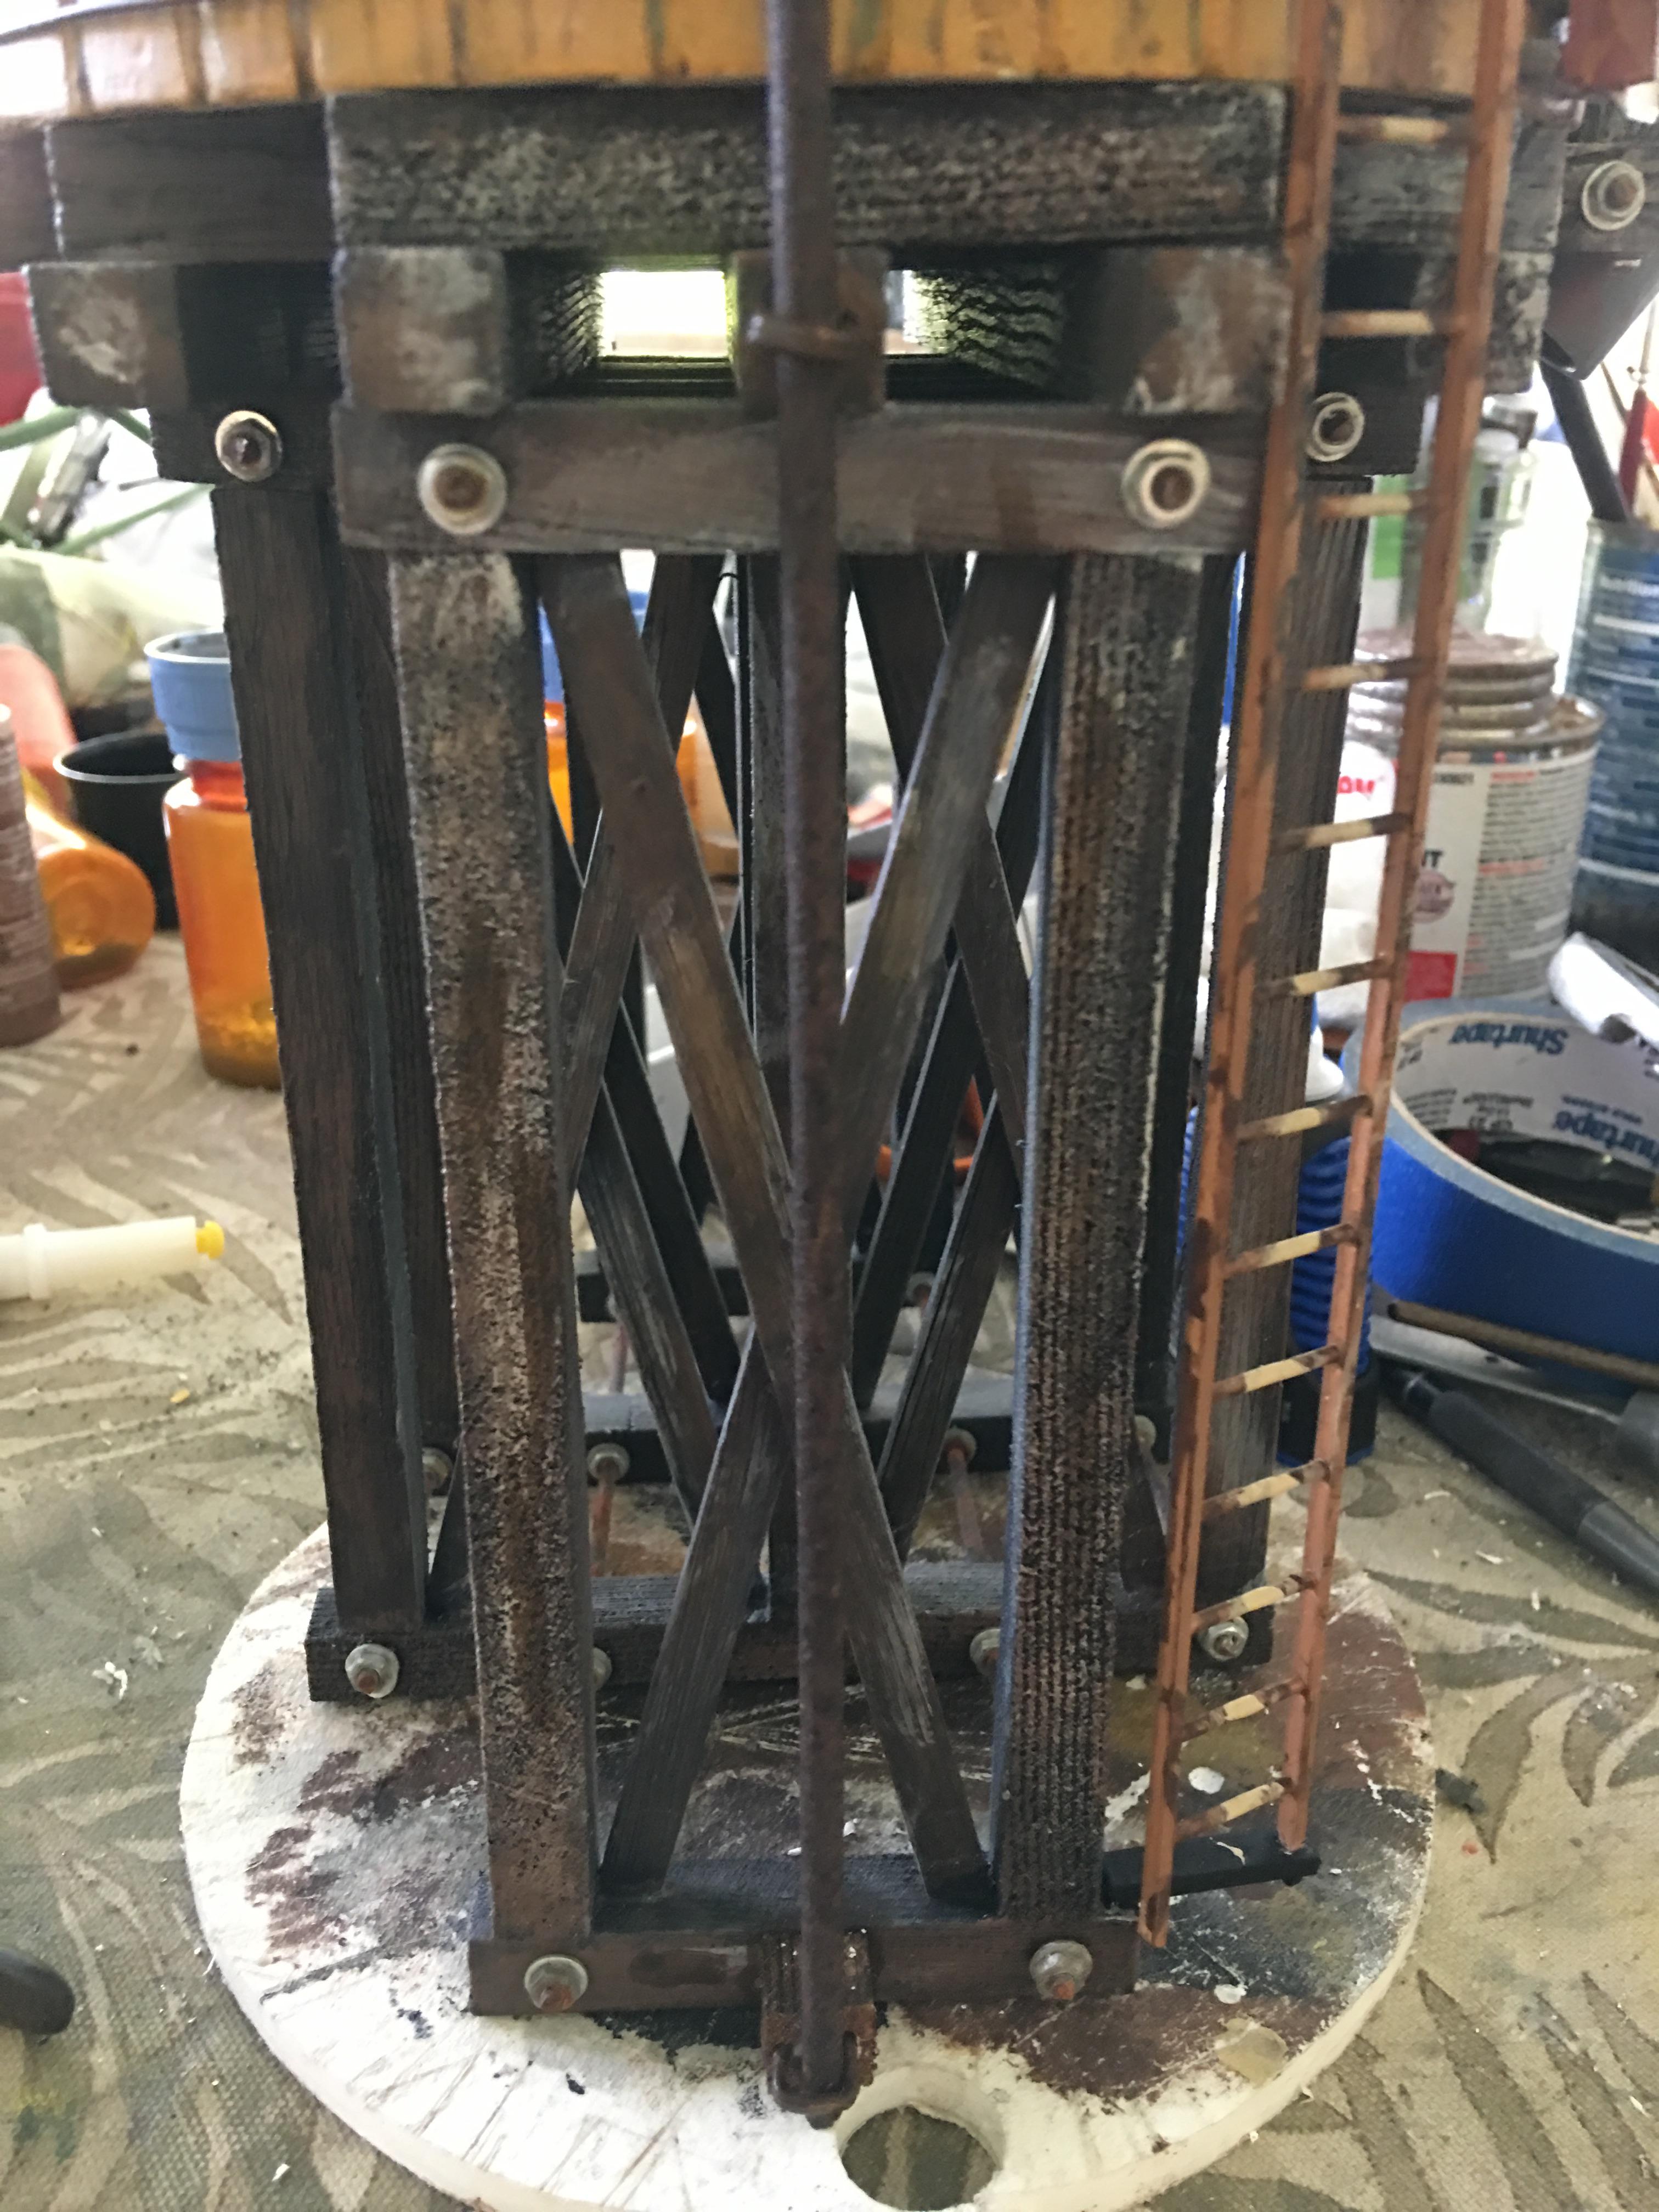
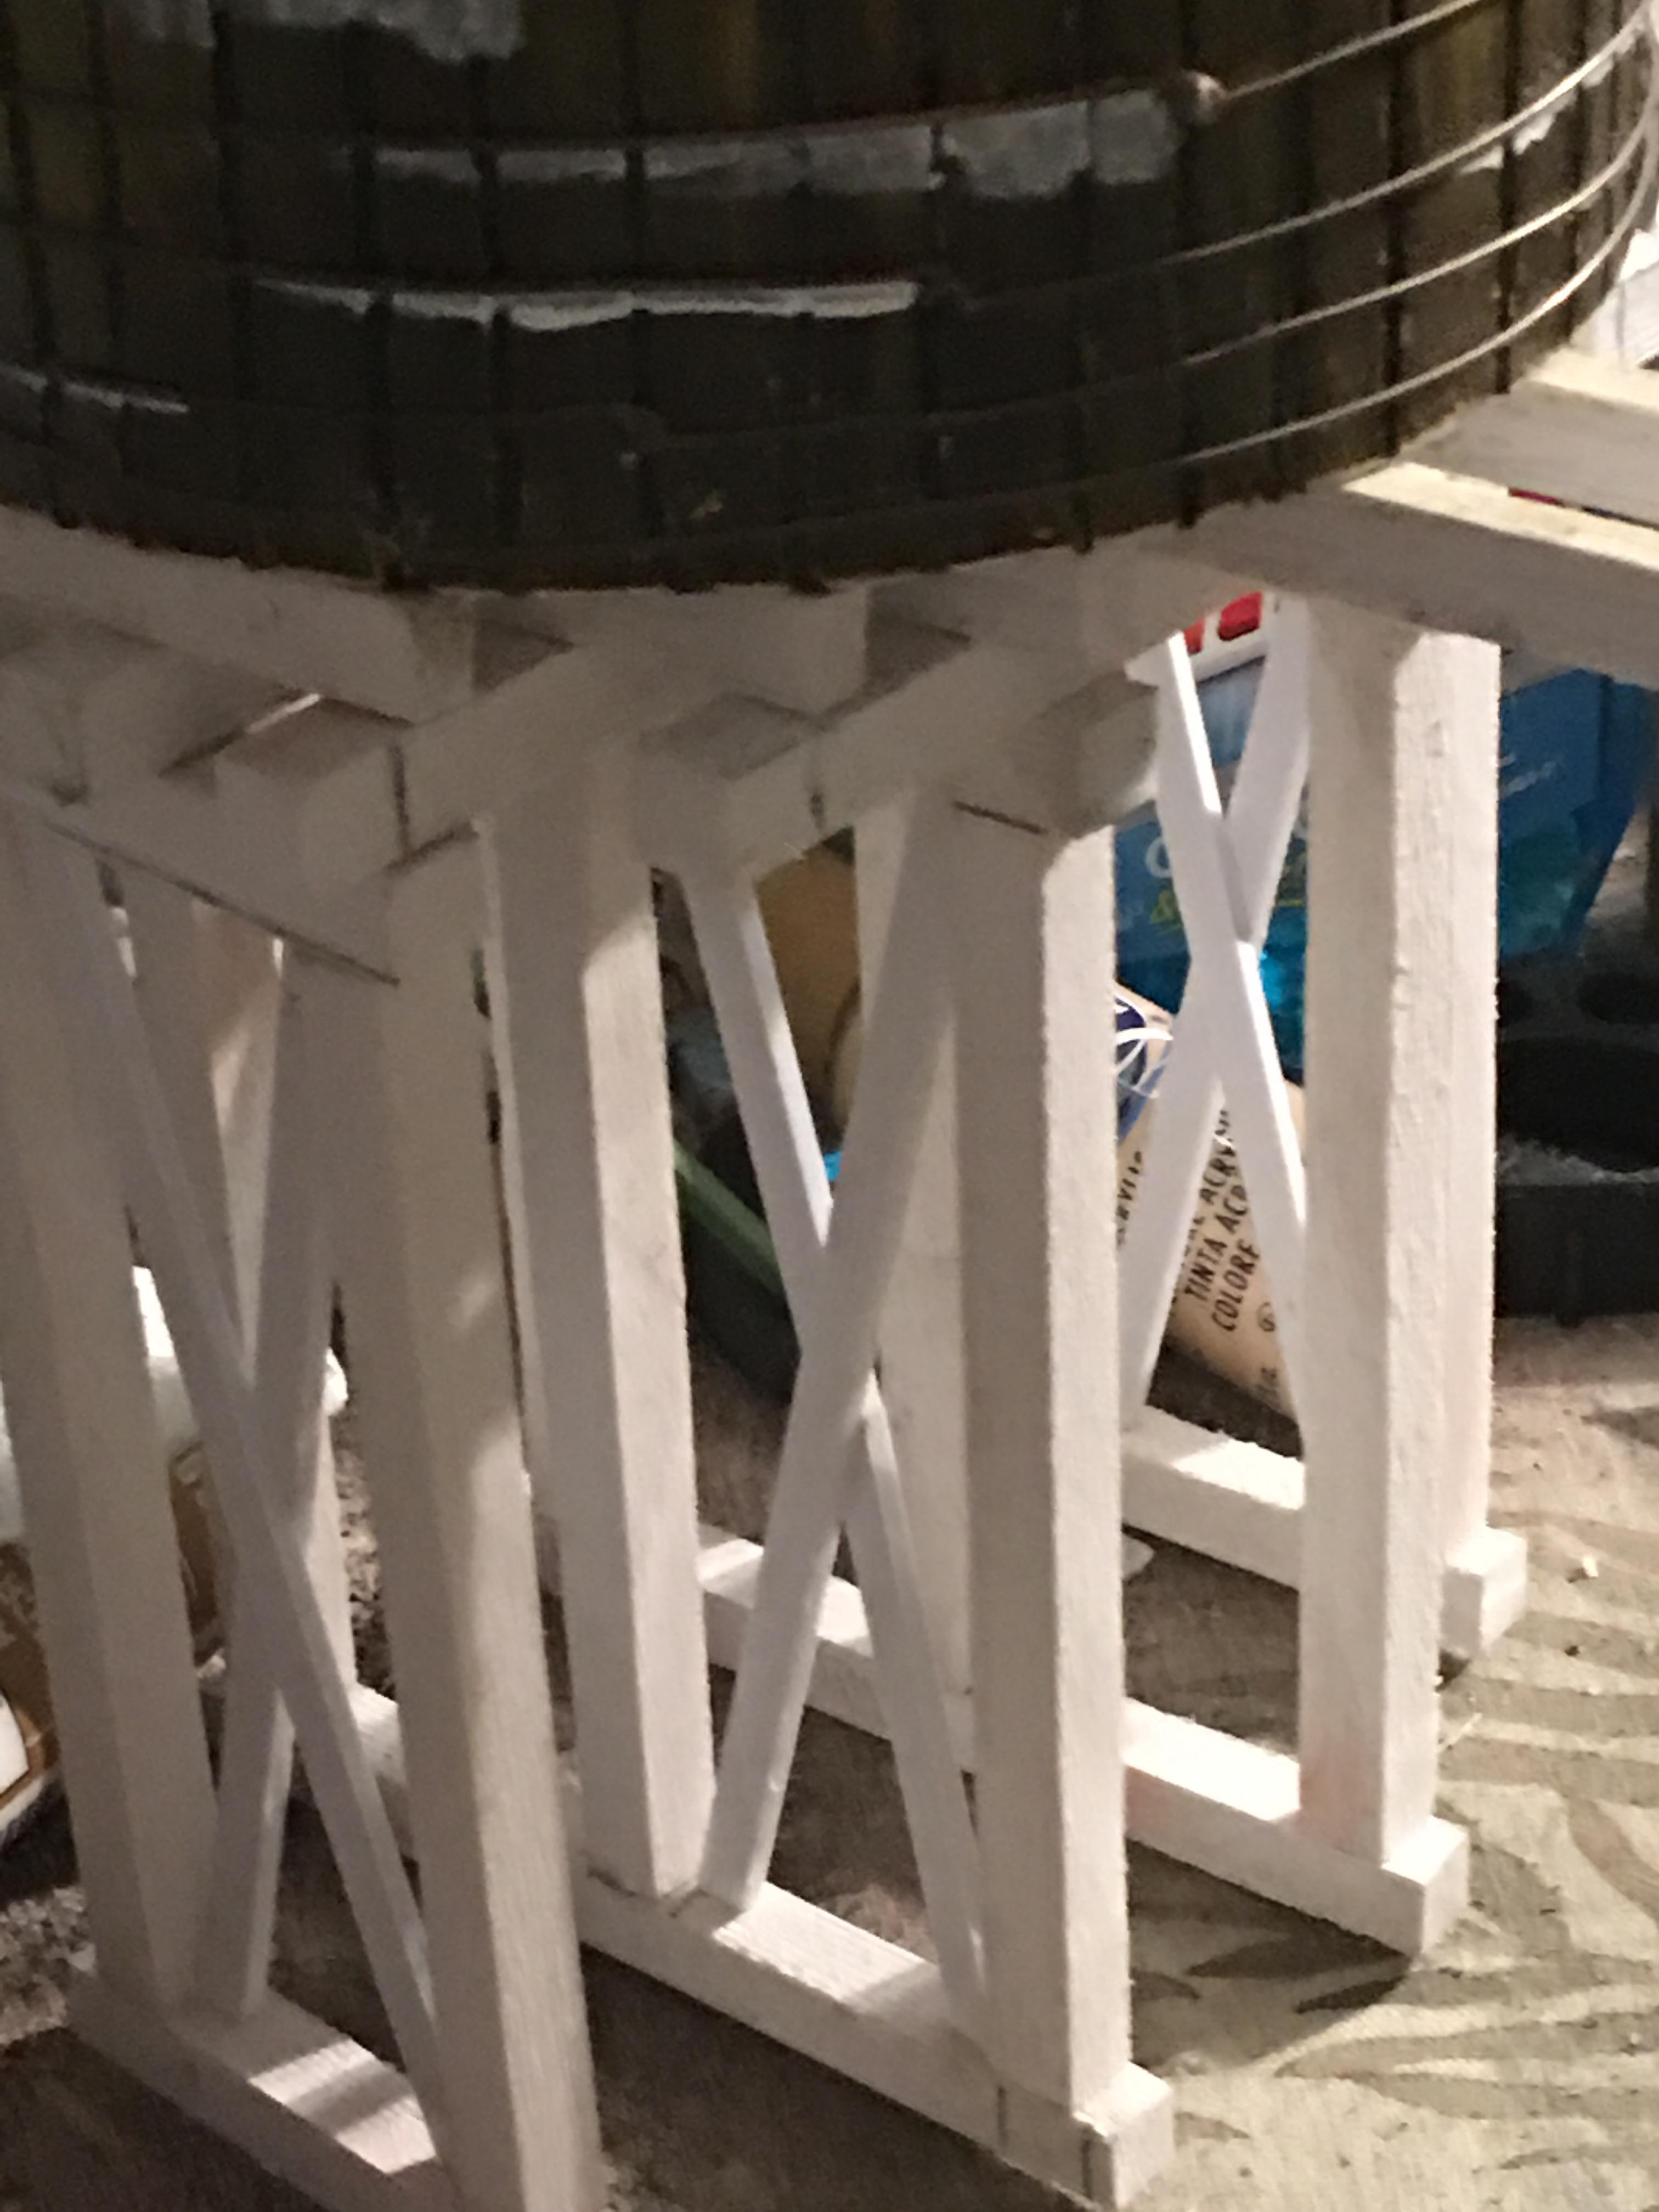
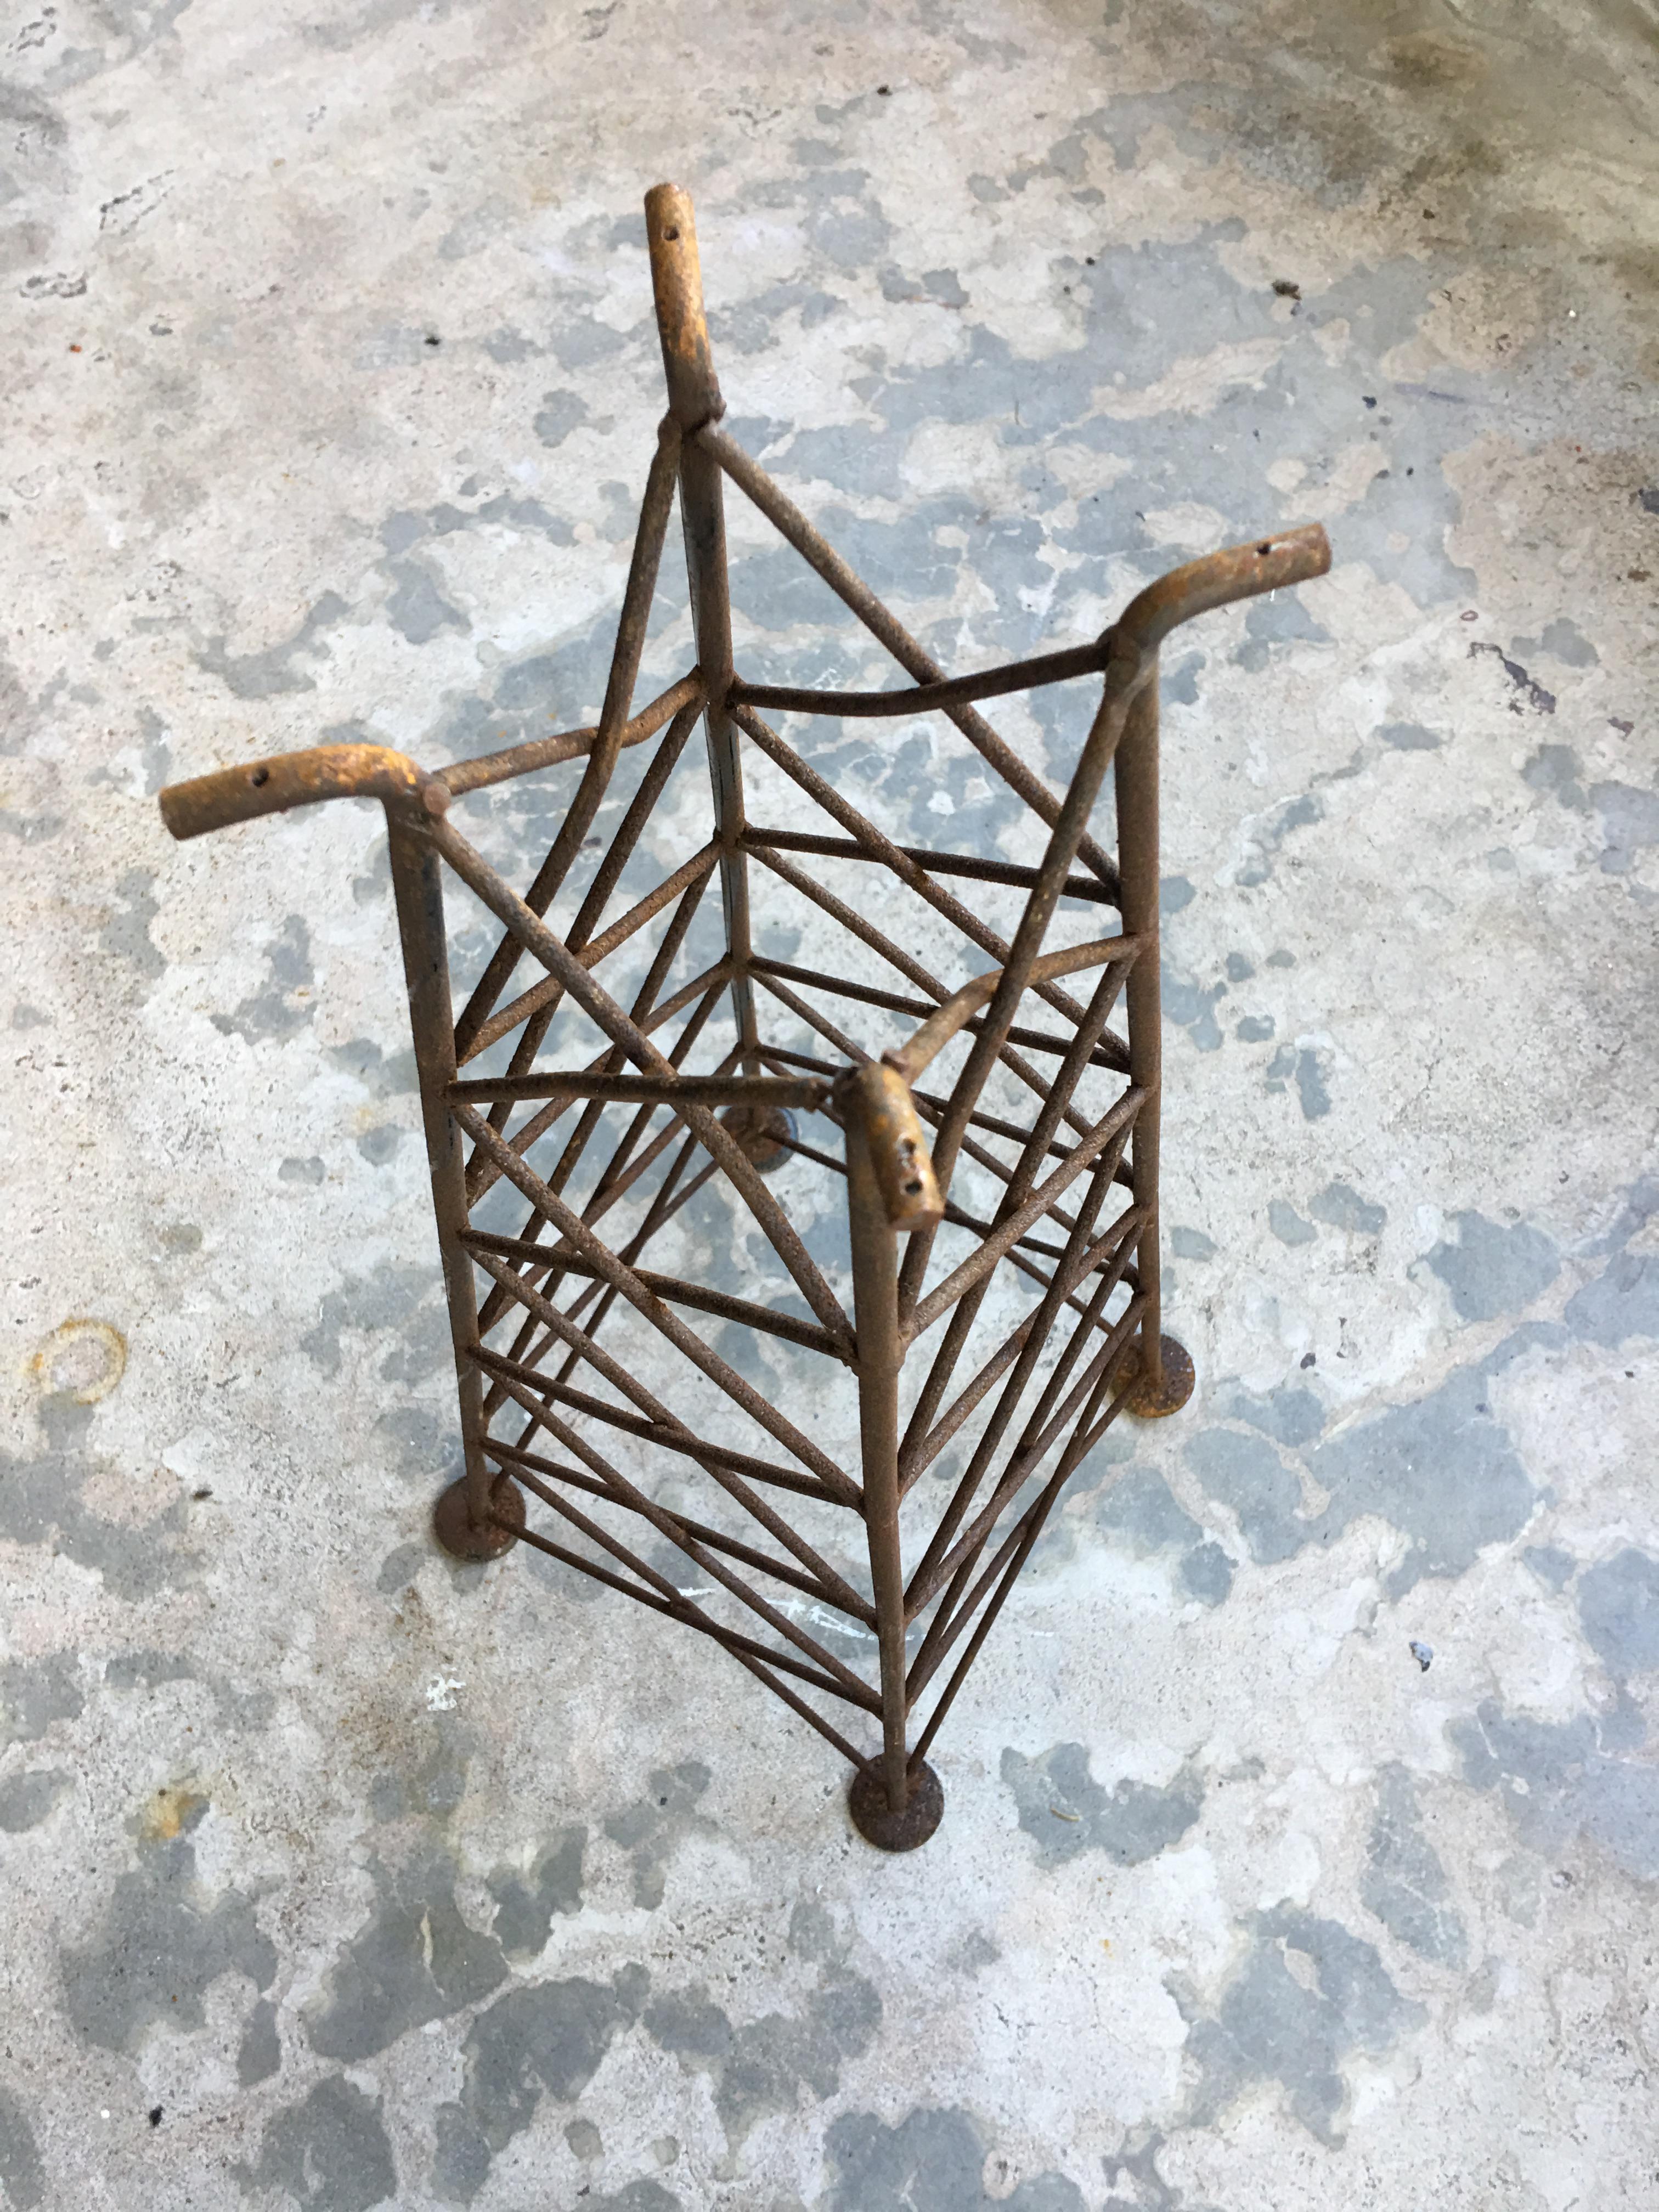
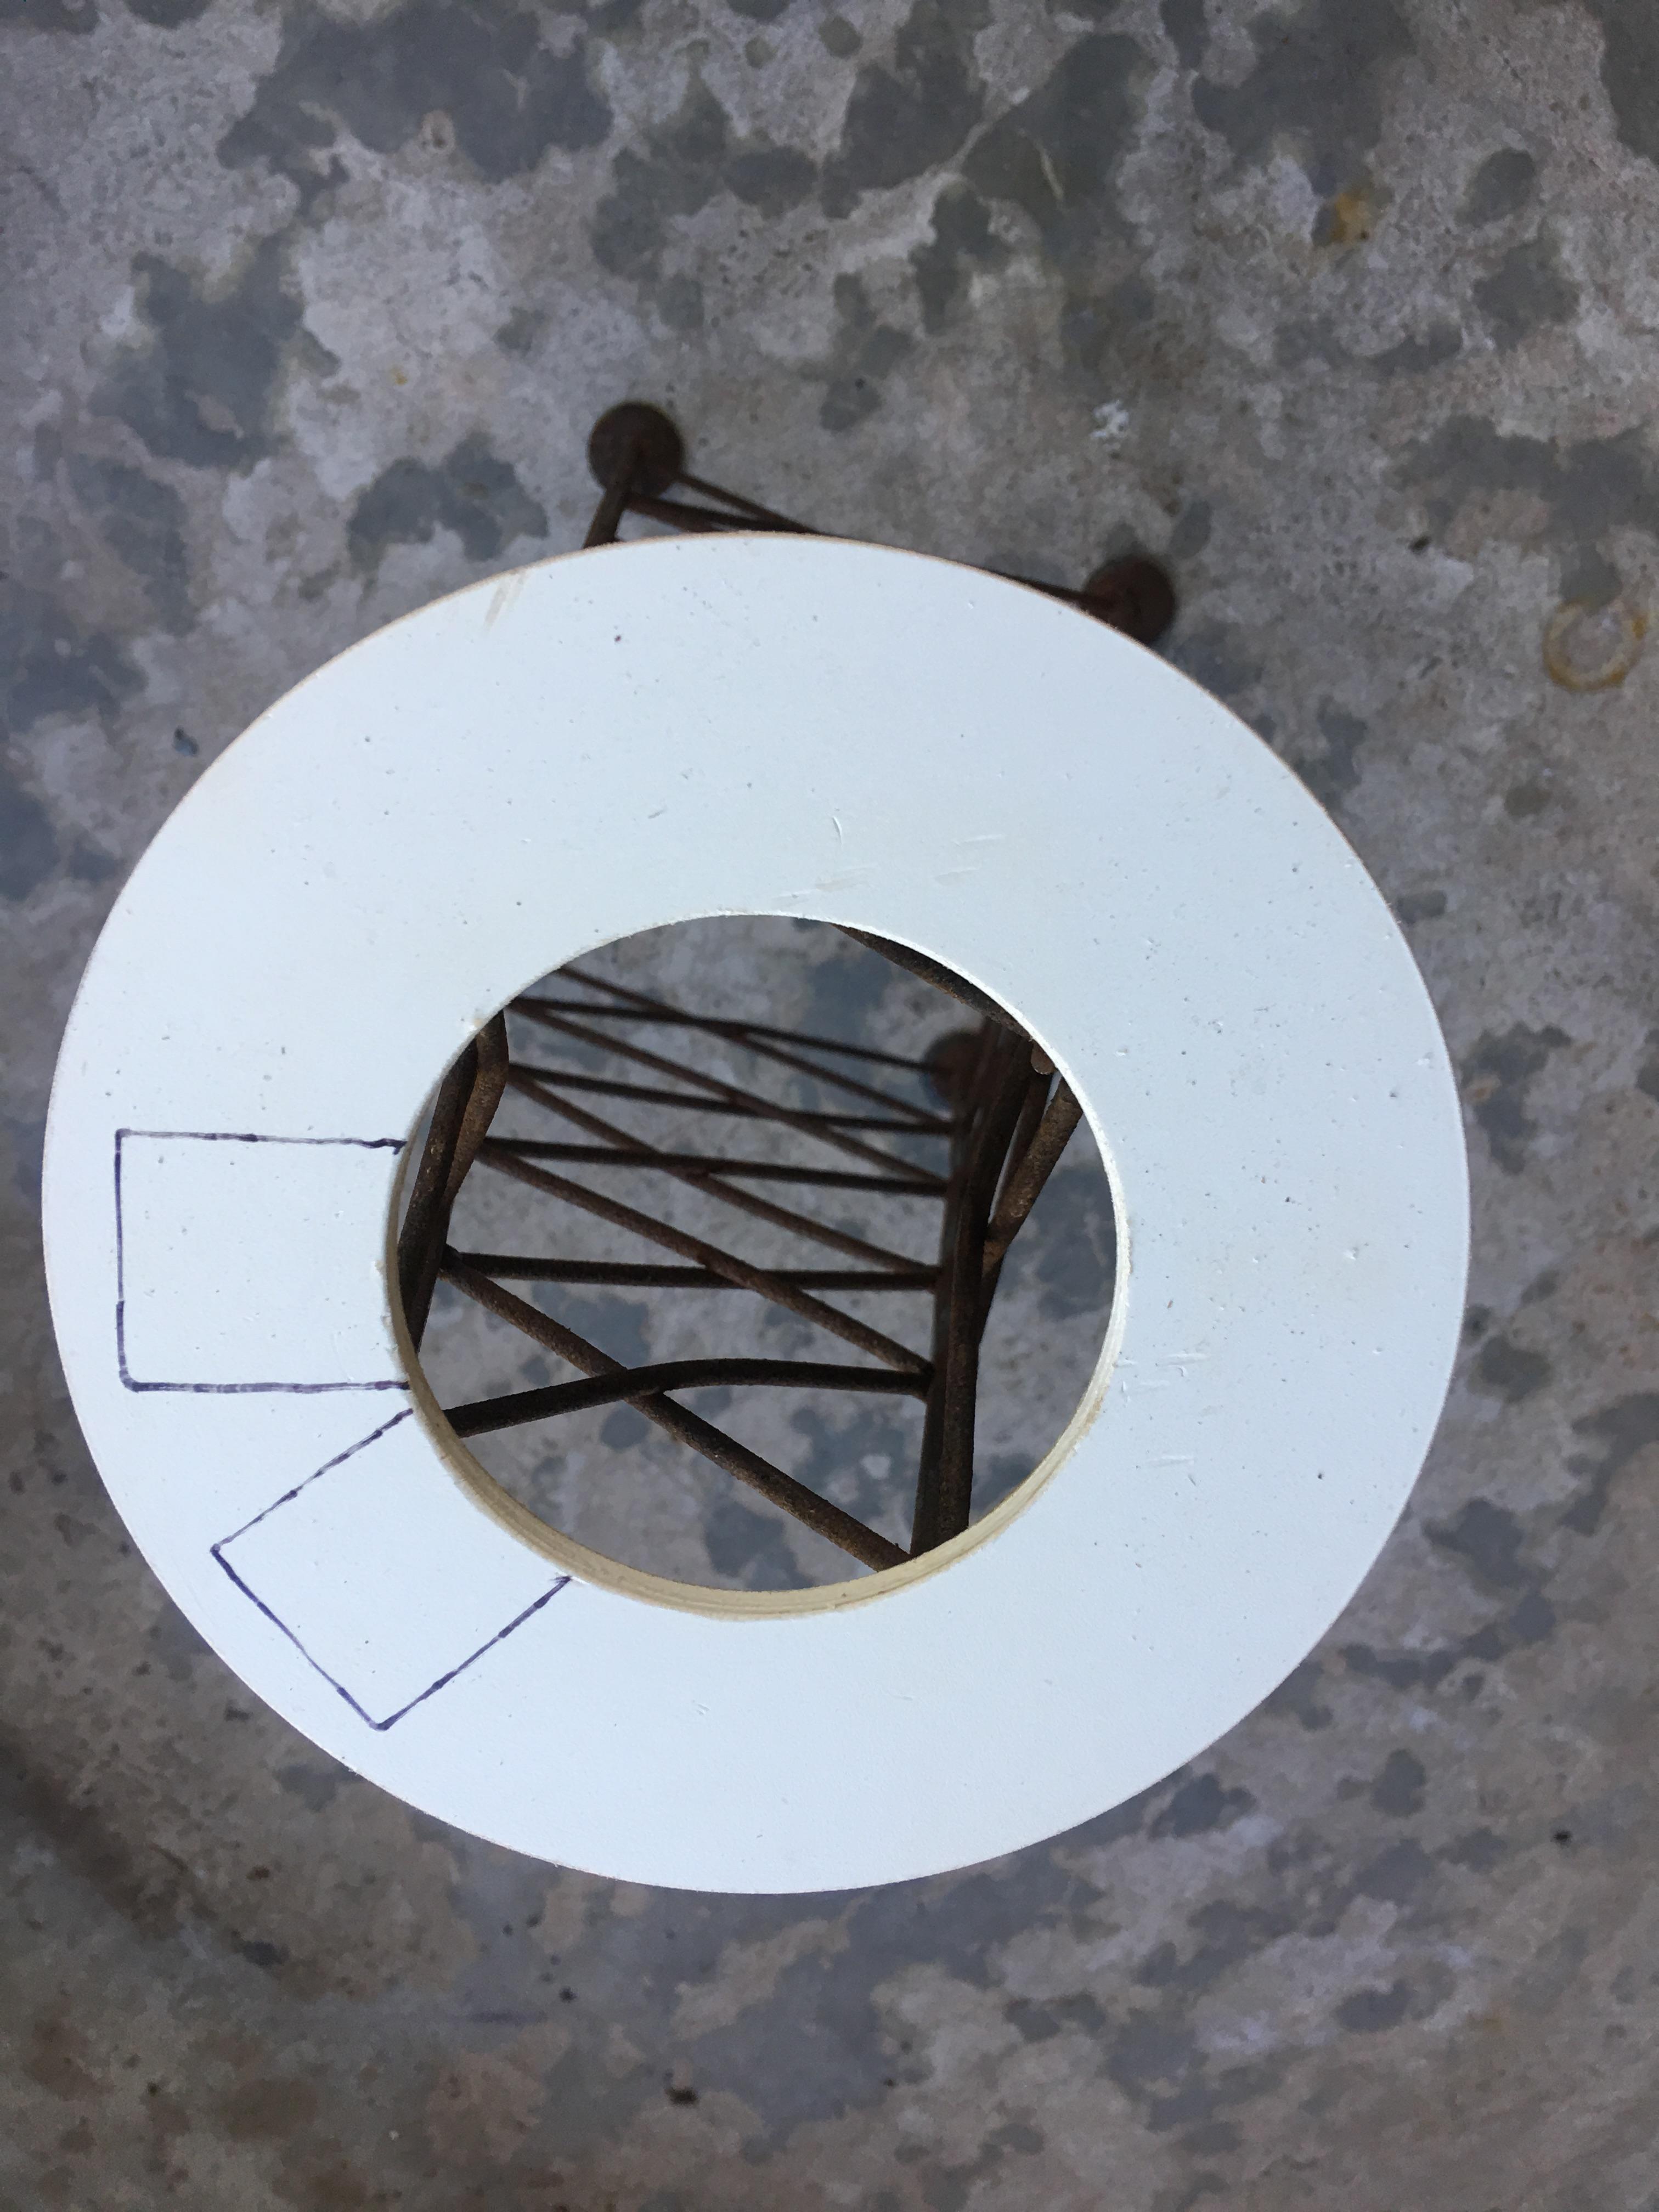
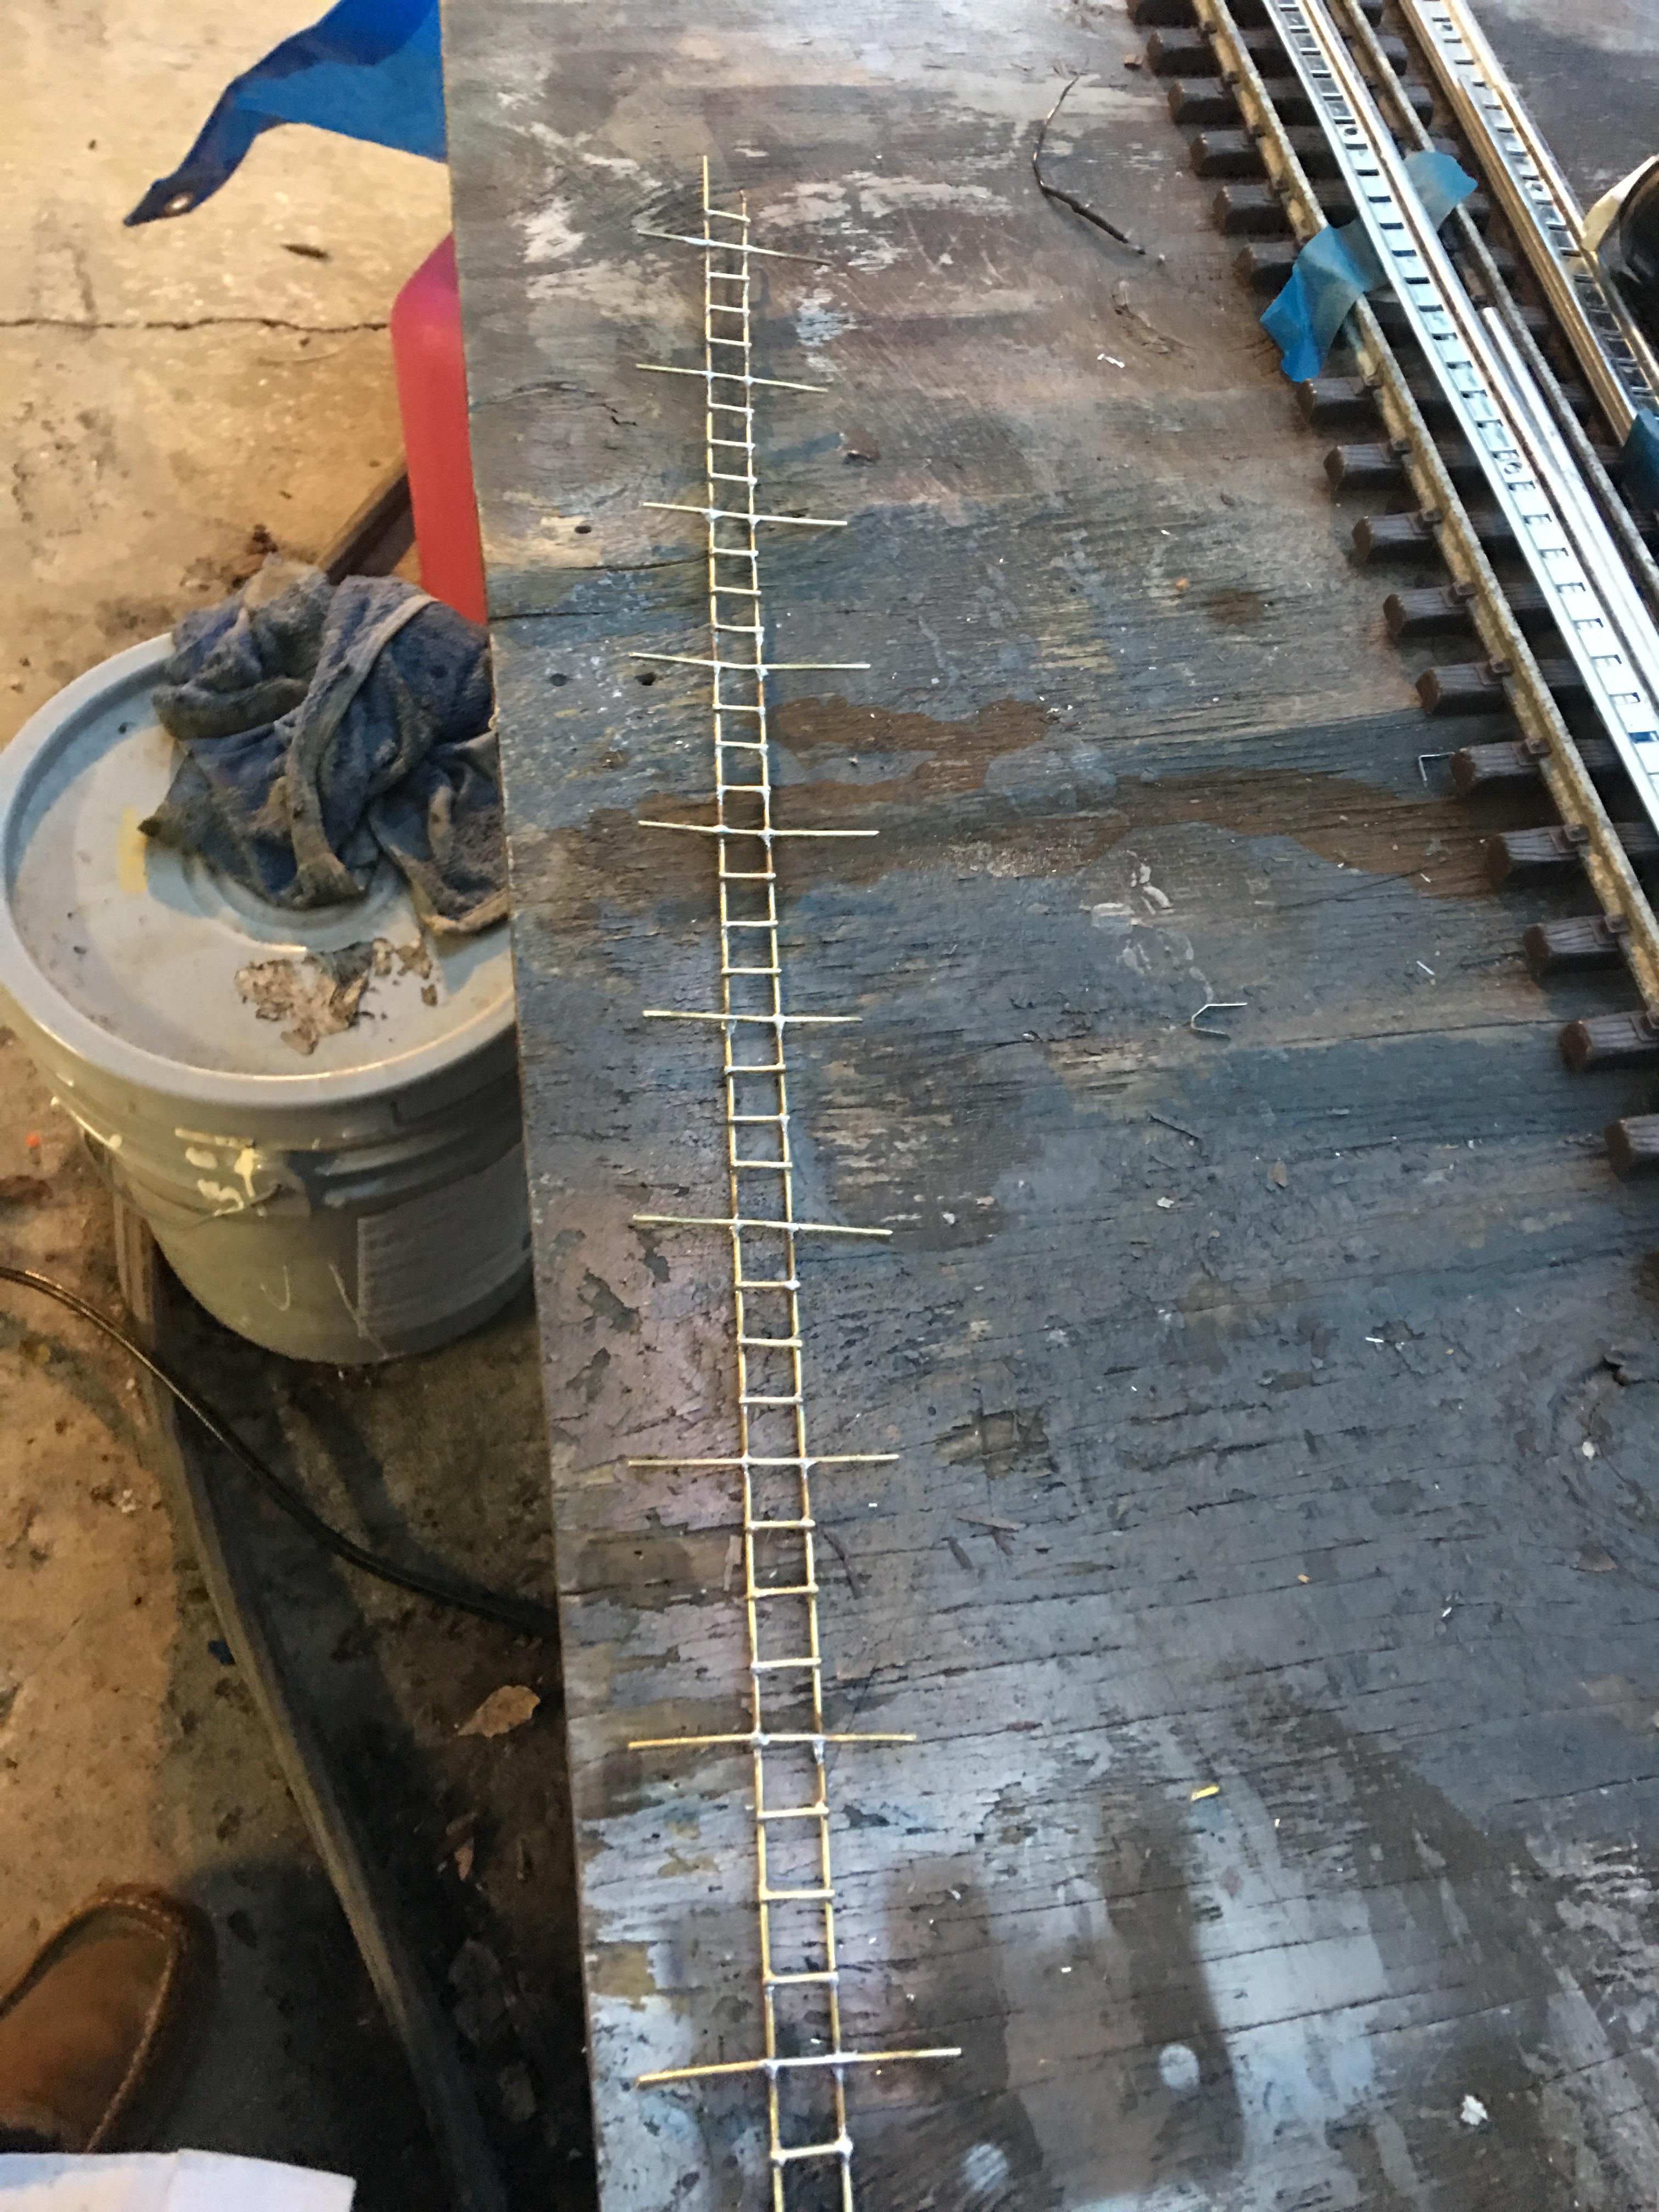
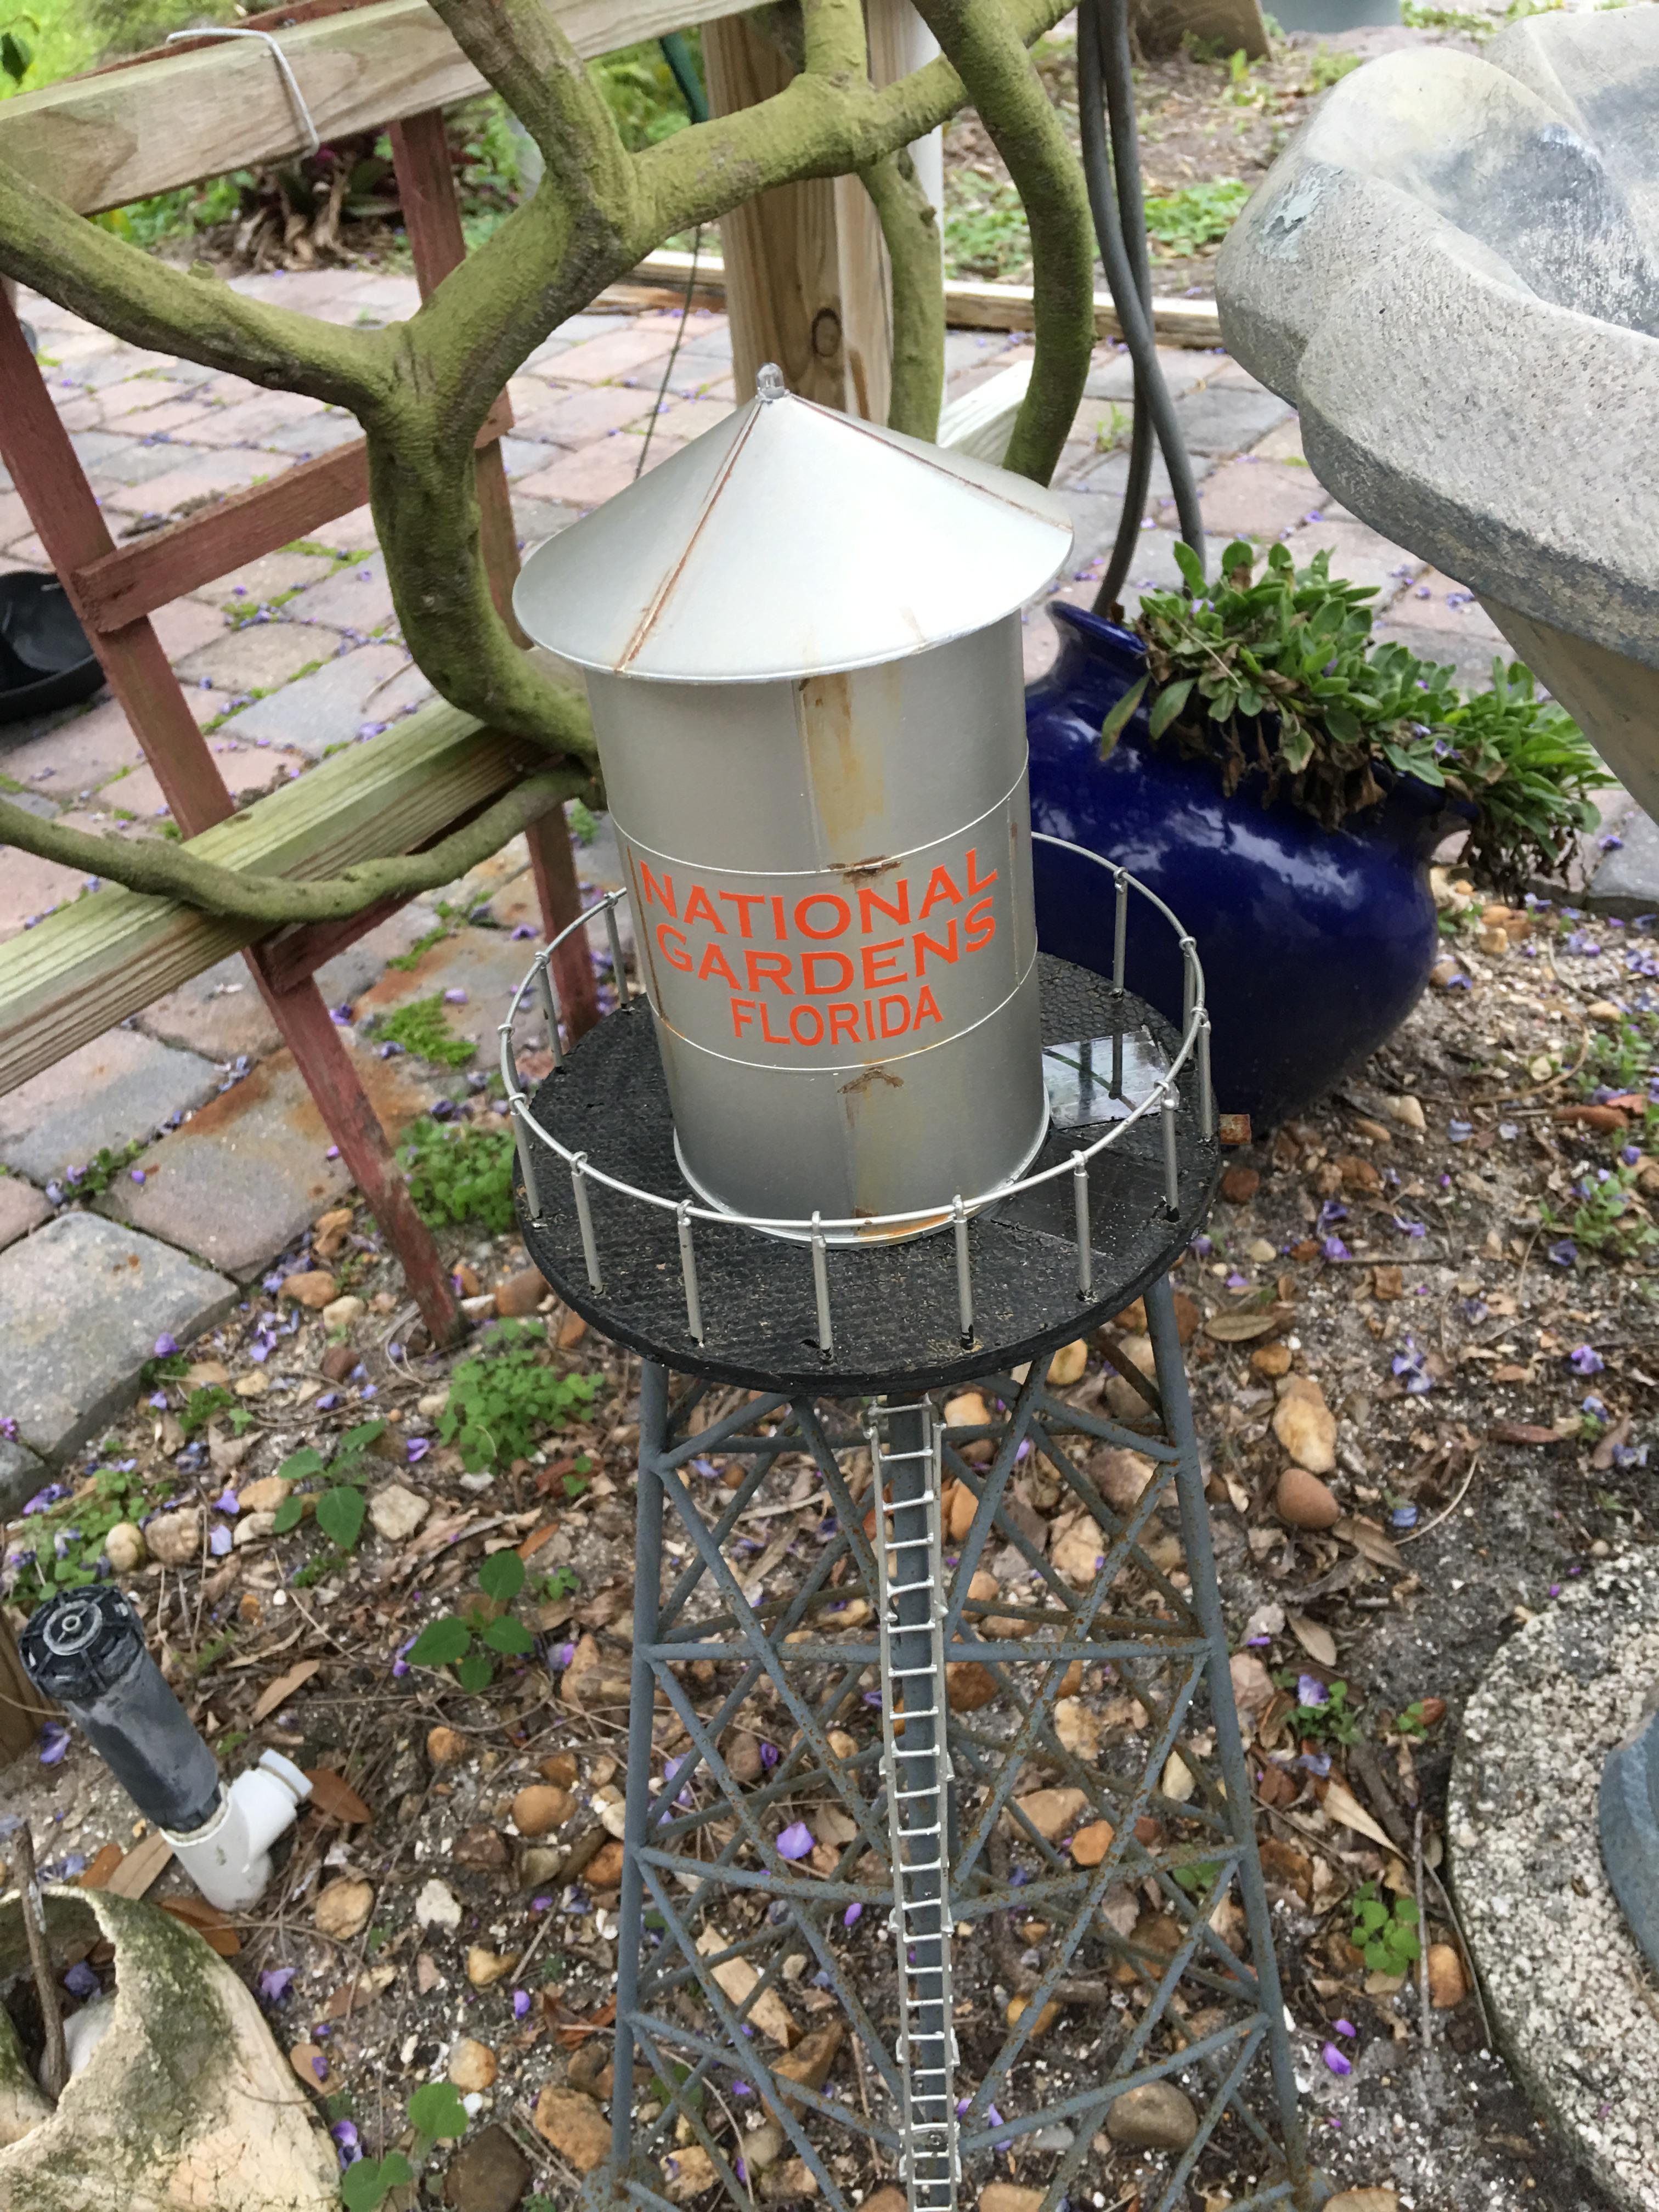
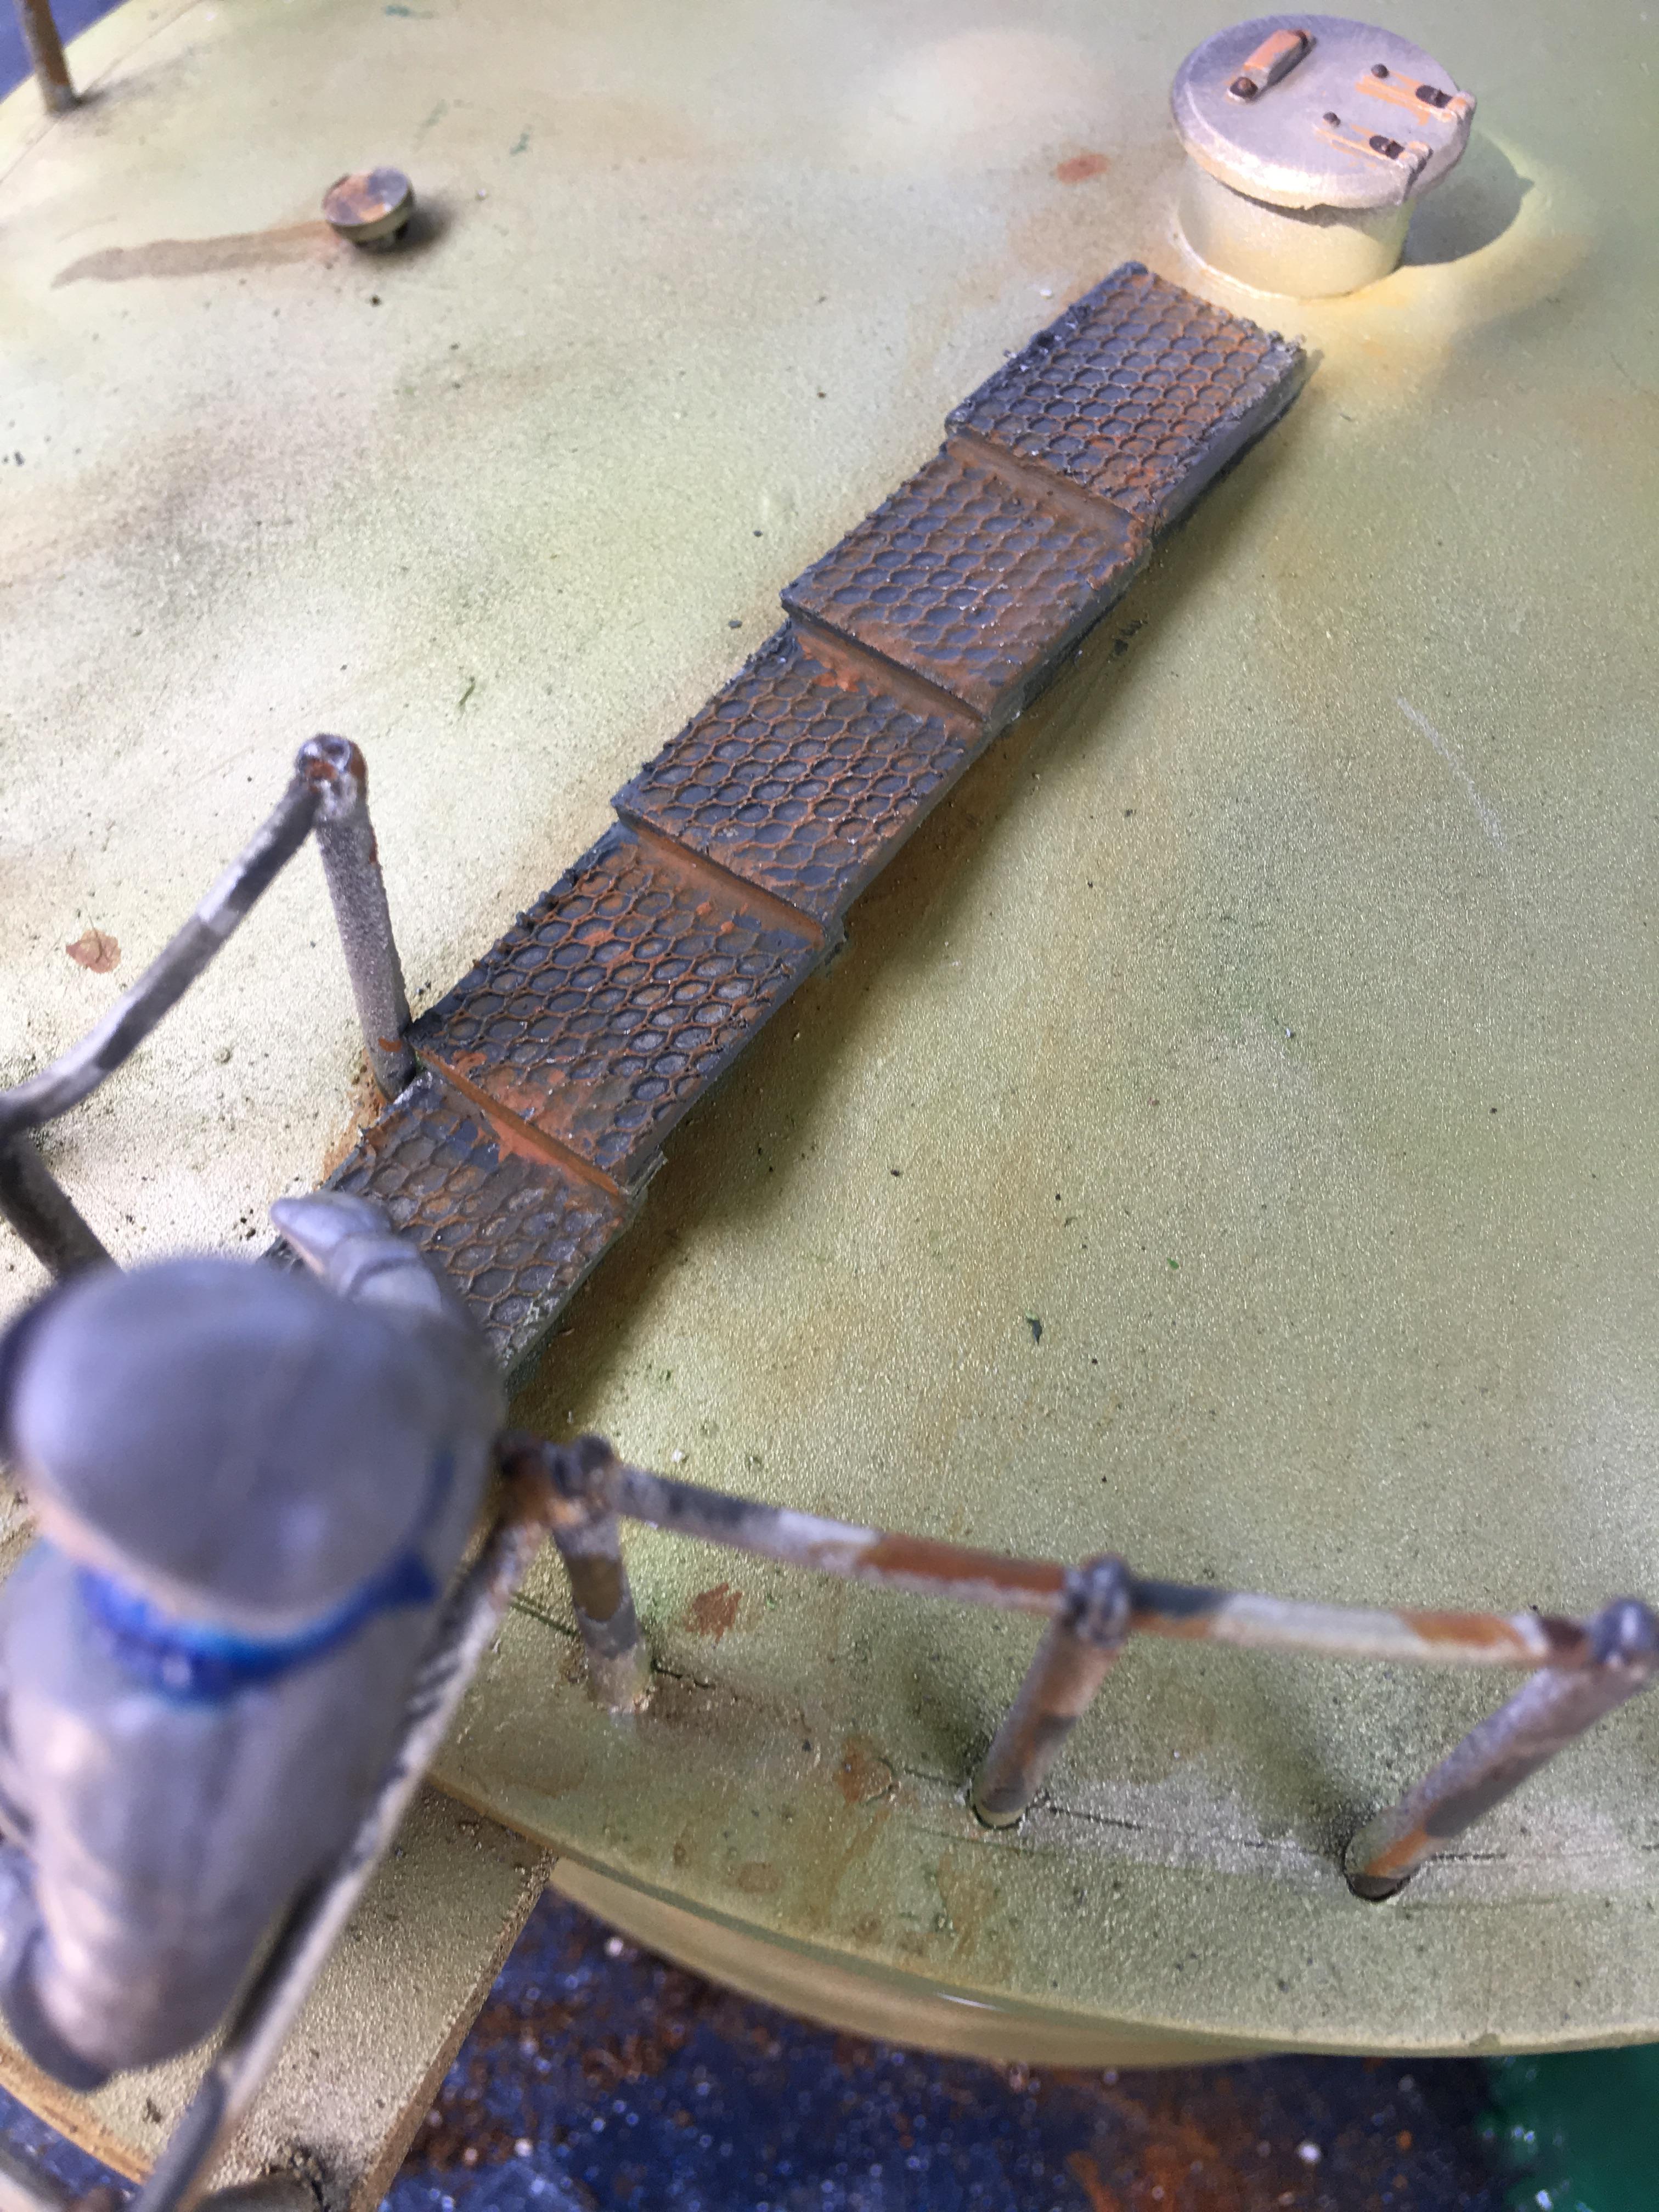
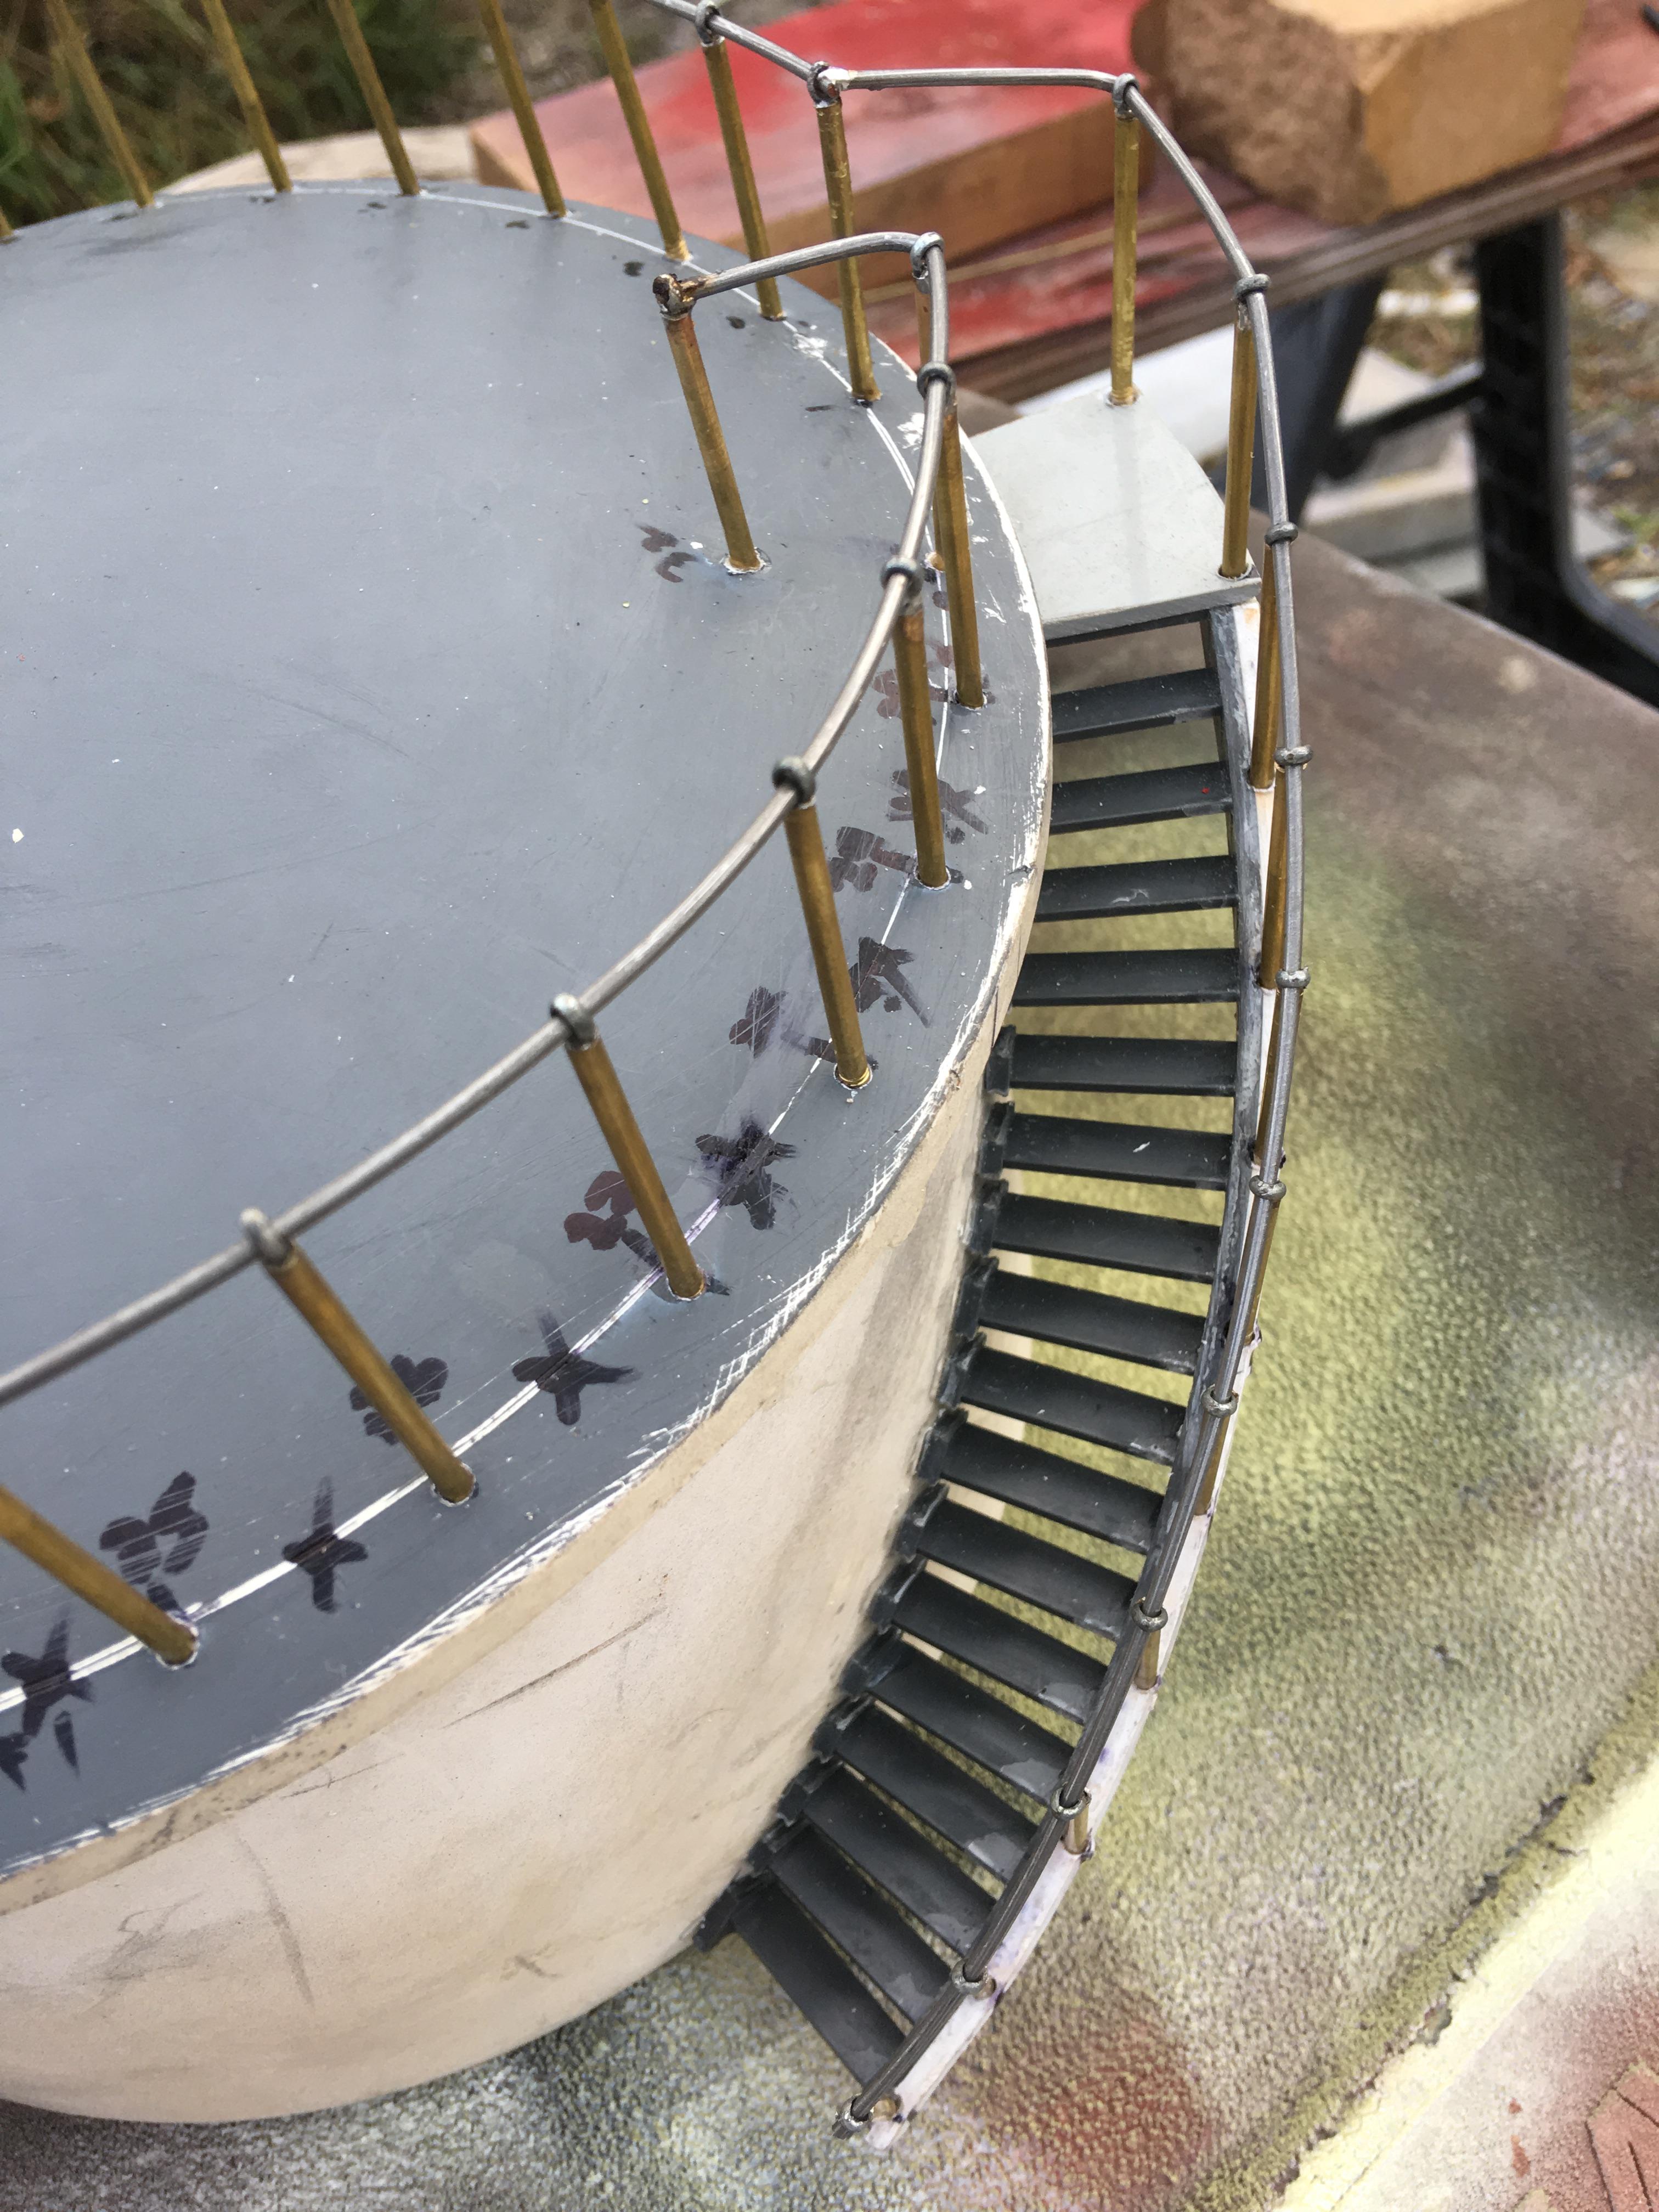
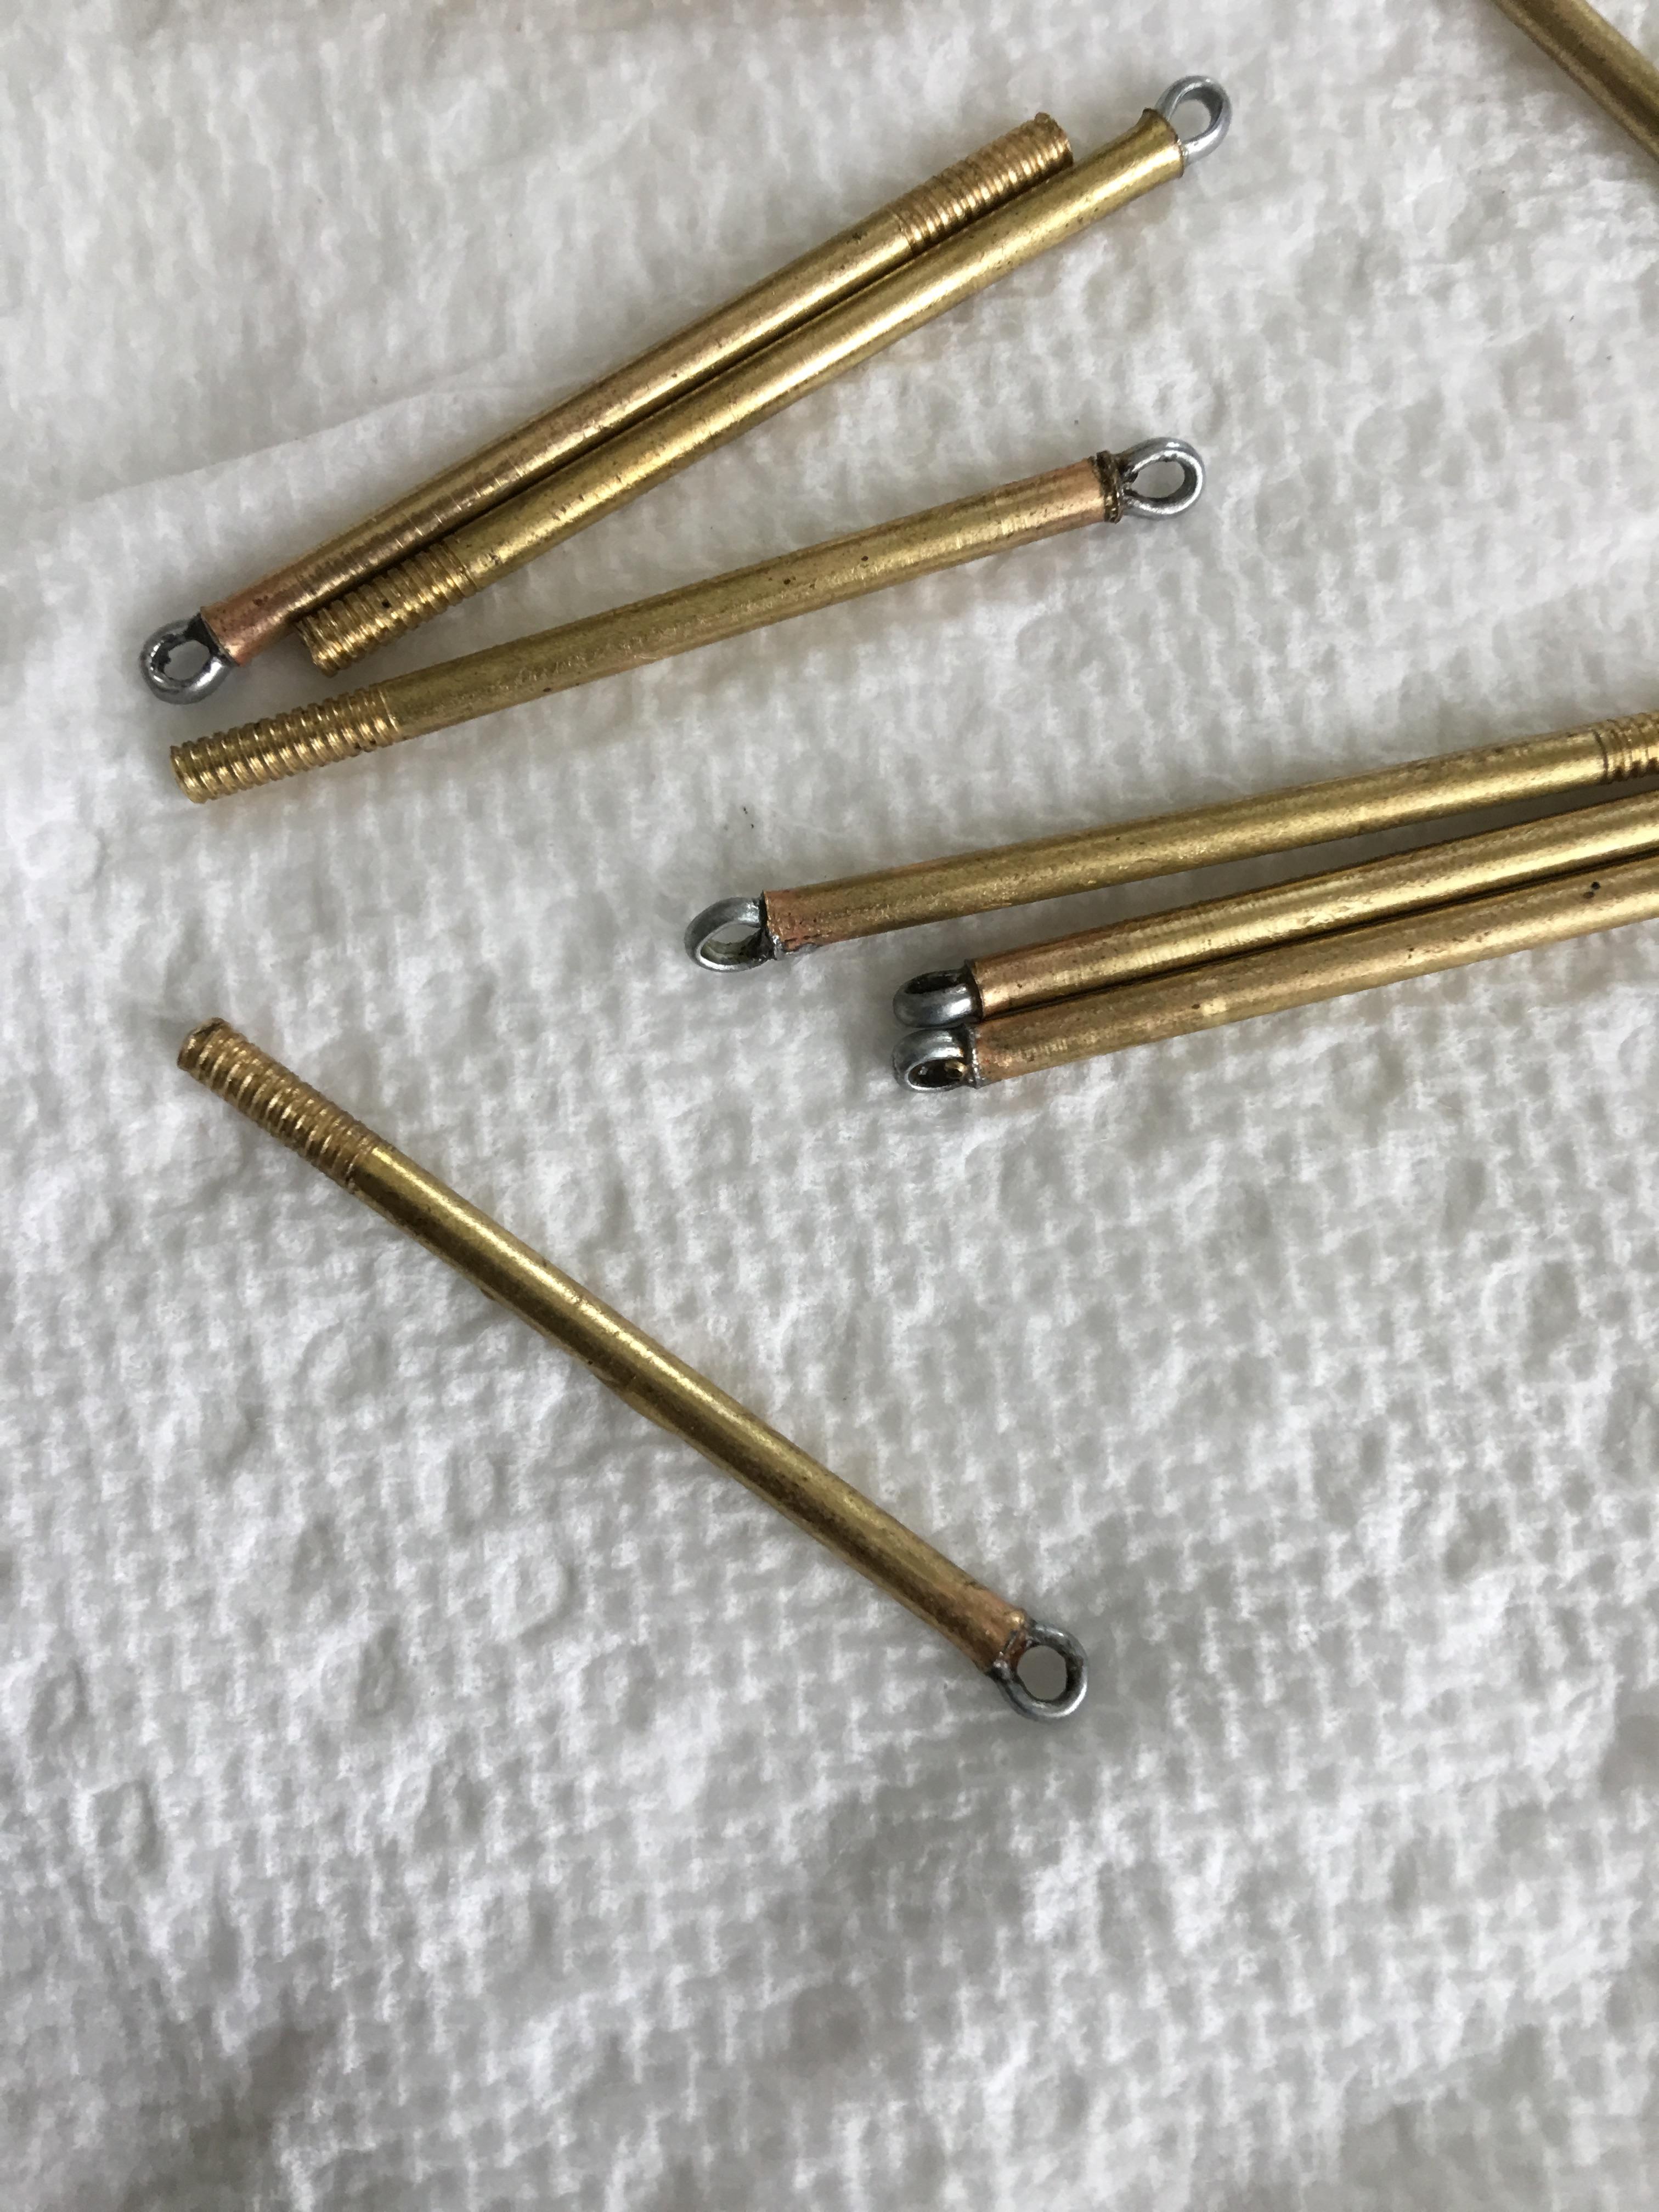
The base is a yard ornament from a garage sale, the tank are tubing, top and bottom from plastruct plastics and is 3 1/4" diameter, tank lines were done with small evergreen strip, top Led is 3mm red flashing LED and the solar panels came from Wal-Mart $.98 pathway lights. The cat walk is from 1/4" PVC sheet pvc board from home depot and was able to cut out a circle of 6' with a 3'1/4" hole in it for my catwalk. Placed scrubby lace type material on it and secured with glue, this gives it the look of skid resistant surface something like expanded steel, drilled and taped 4/40 holes around the perimeter for my stanchion that I made out of hollow brass tubing that I threaded on one end to the 4/40 thread and the other got 1/16" cotter pins soldered in to the tubing. After installing the pins, all 17 of them, I ran a 1/16" piece of brass rod threw the eyes of the cotter pins and soldered it in place. Spent quite a while designing and building the ladder for the tower using 1/16" brass rod all soldered together 1 step at a time. Little difficult as I was taking a med for a lung infection and it makes me shake more that normal, but after I got the rhythm right it wasn't too bad. Bounce 3 times, solder bounce 4 times solder, etc. The base was painted with cold galvanize spray paint and the tank and ladder were painted with Krylon brushed nickel. Being that is solar powered it turns it's self on in the evening and off during the day and with playing around with different resistors was able to have it work with some surrounding lights on. Fun build and different, I have only seen 1 other this style water tank in G scale and It was all medal.
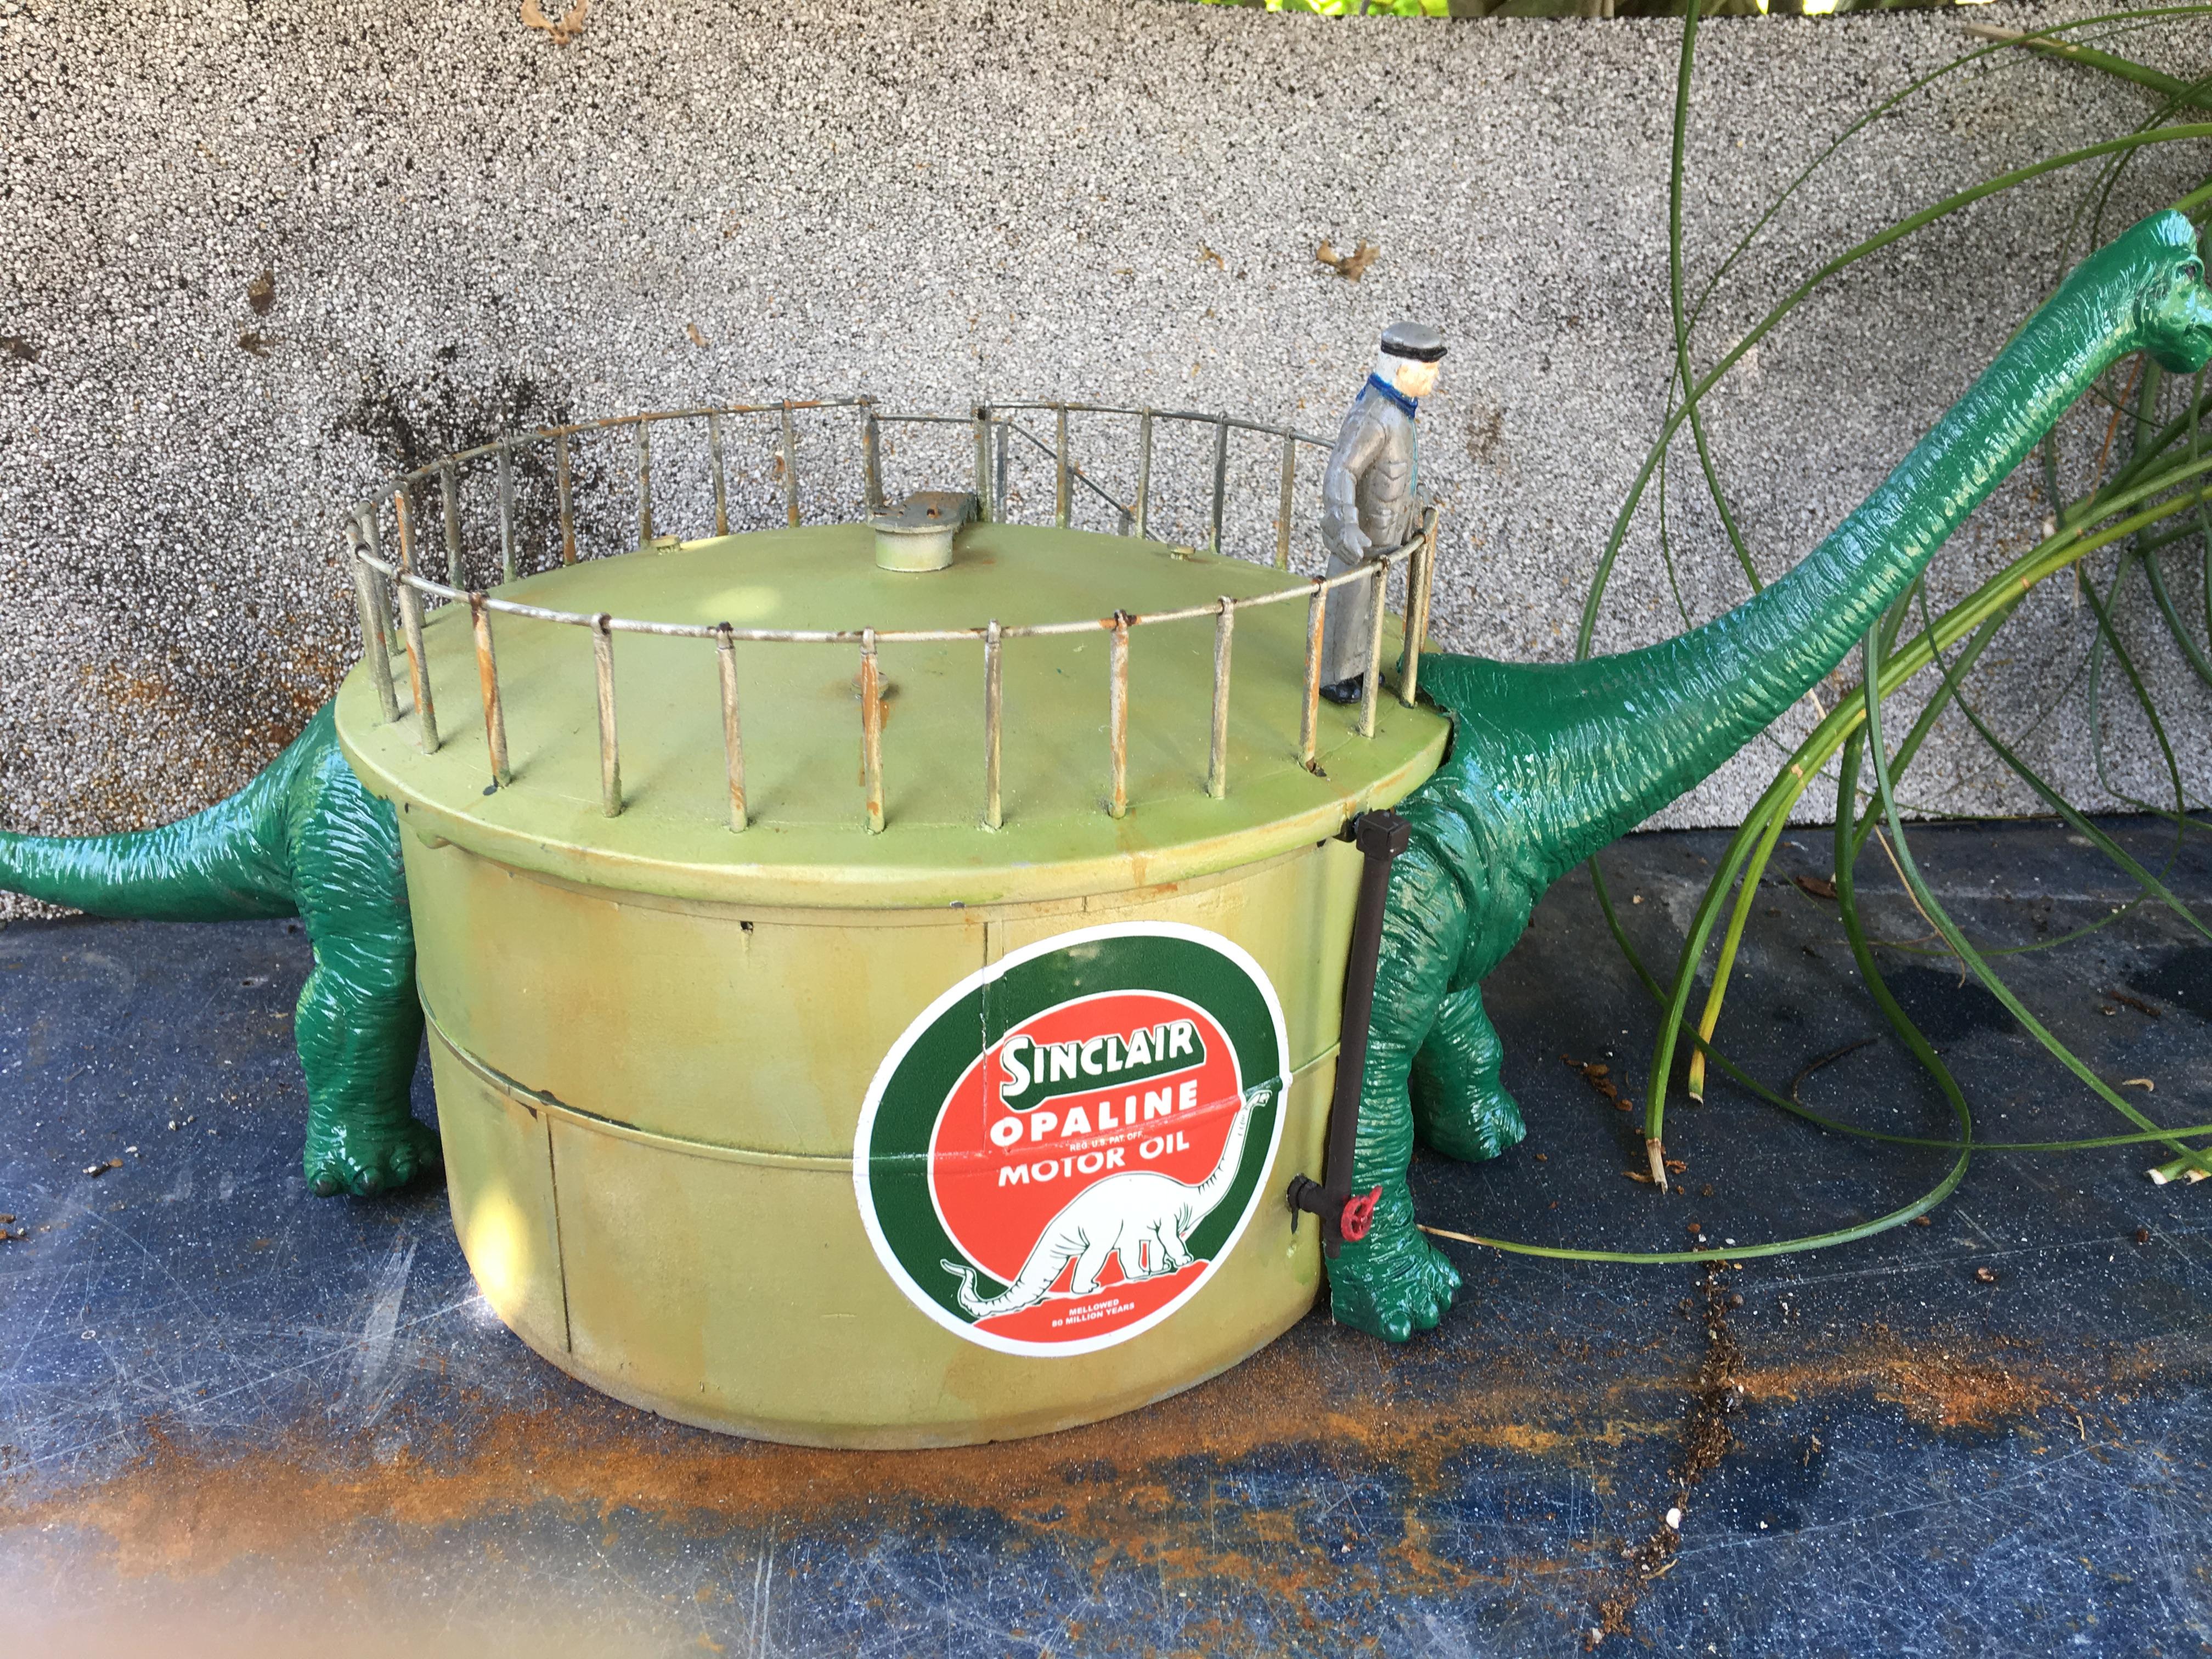
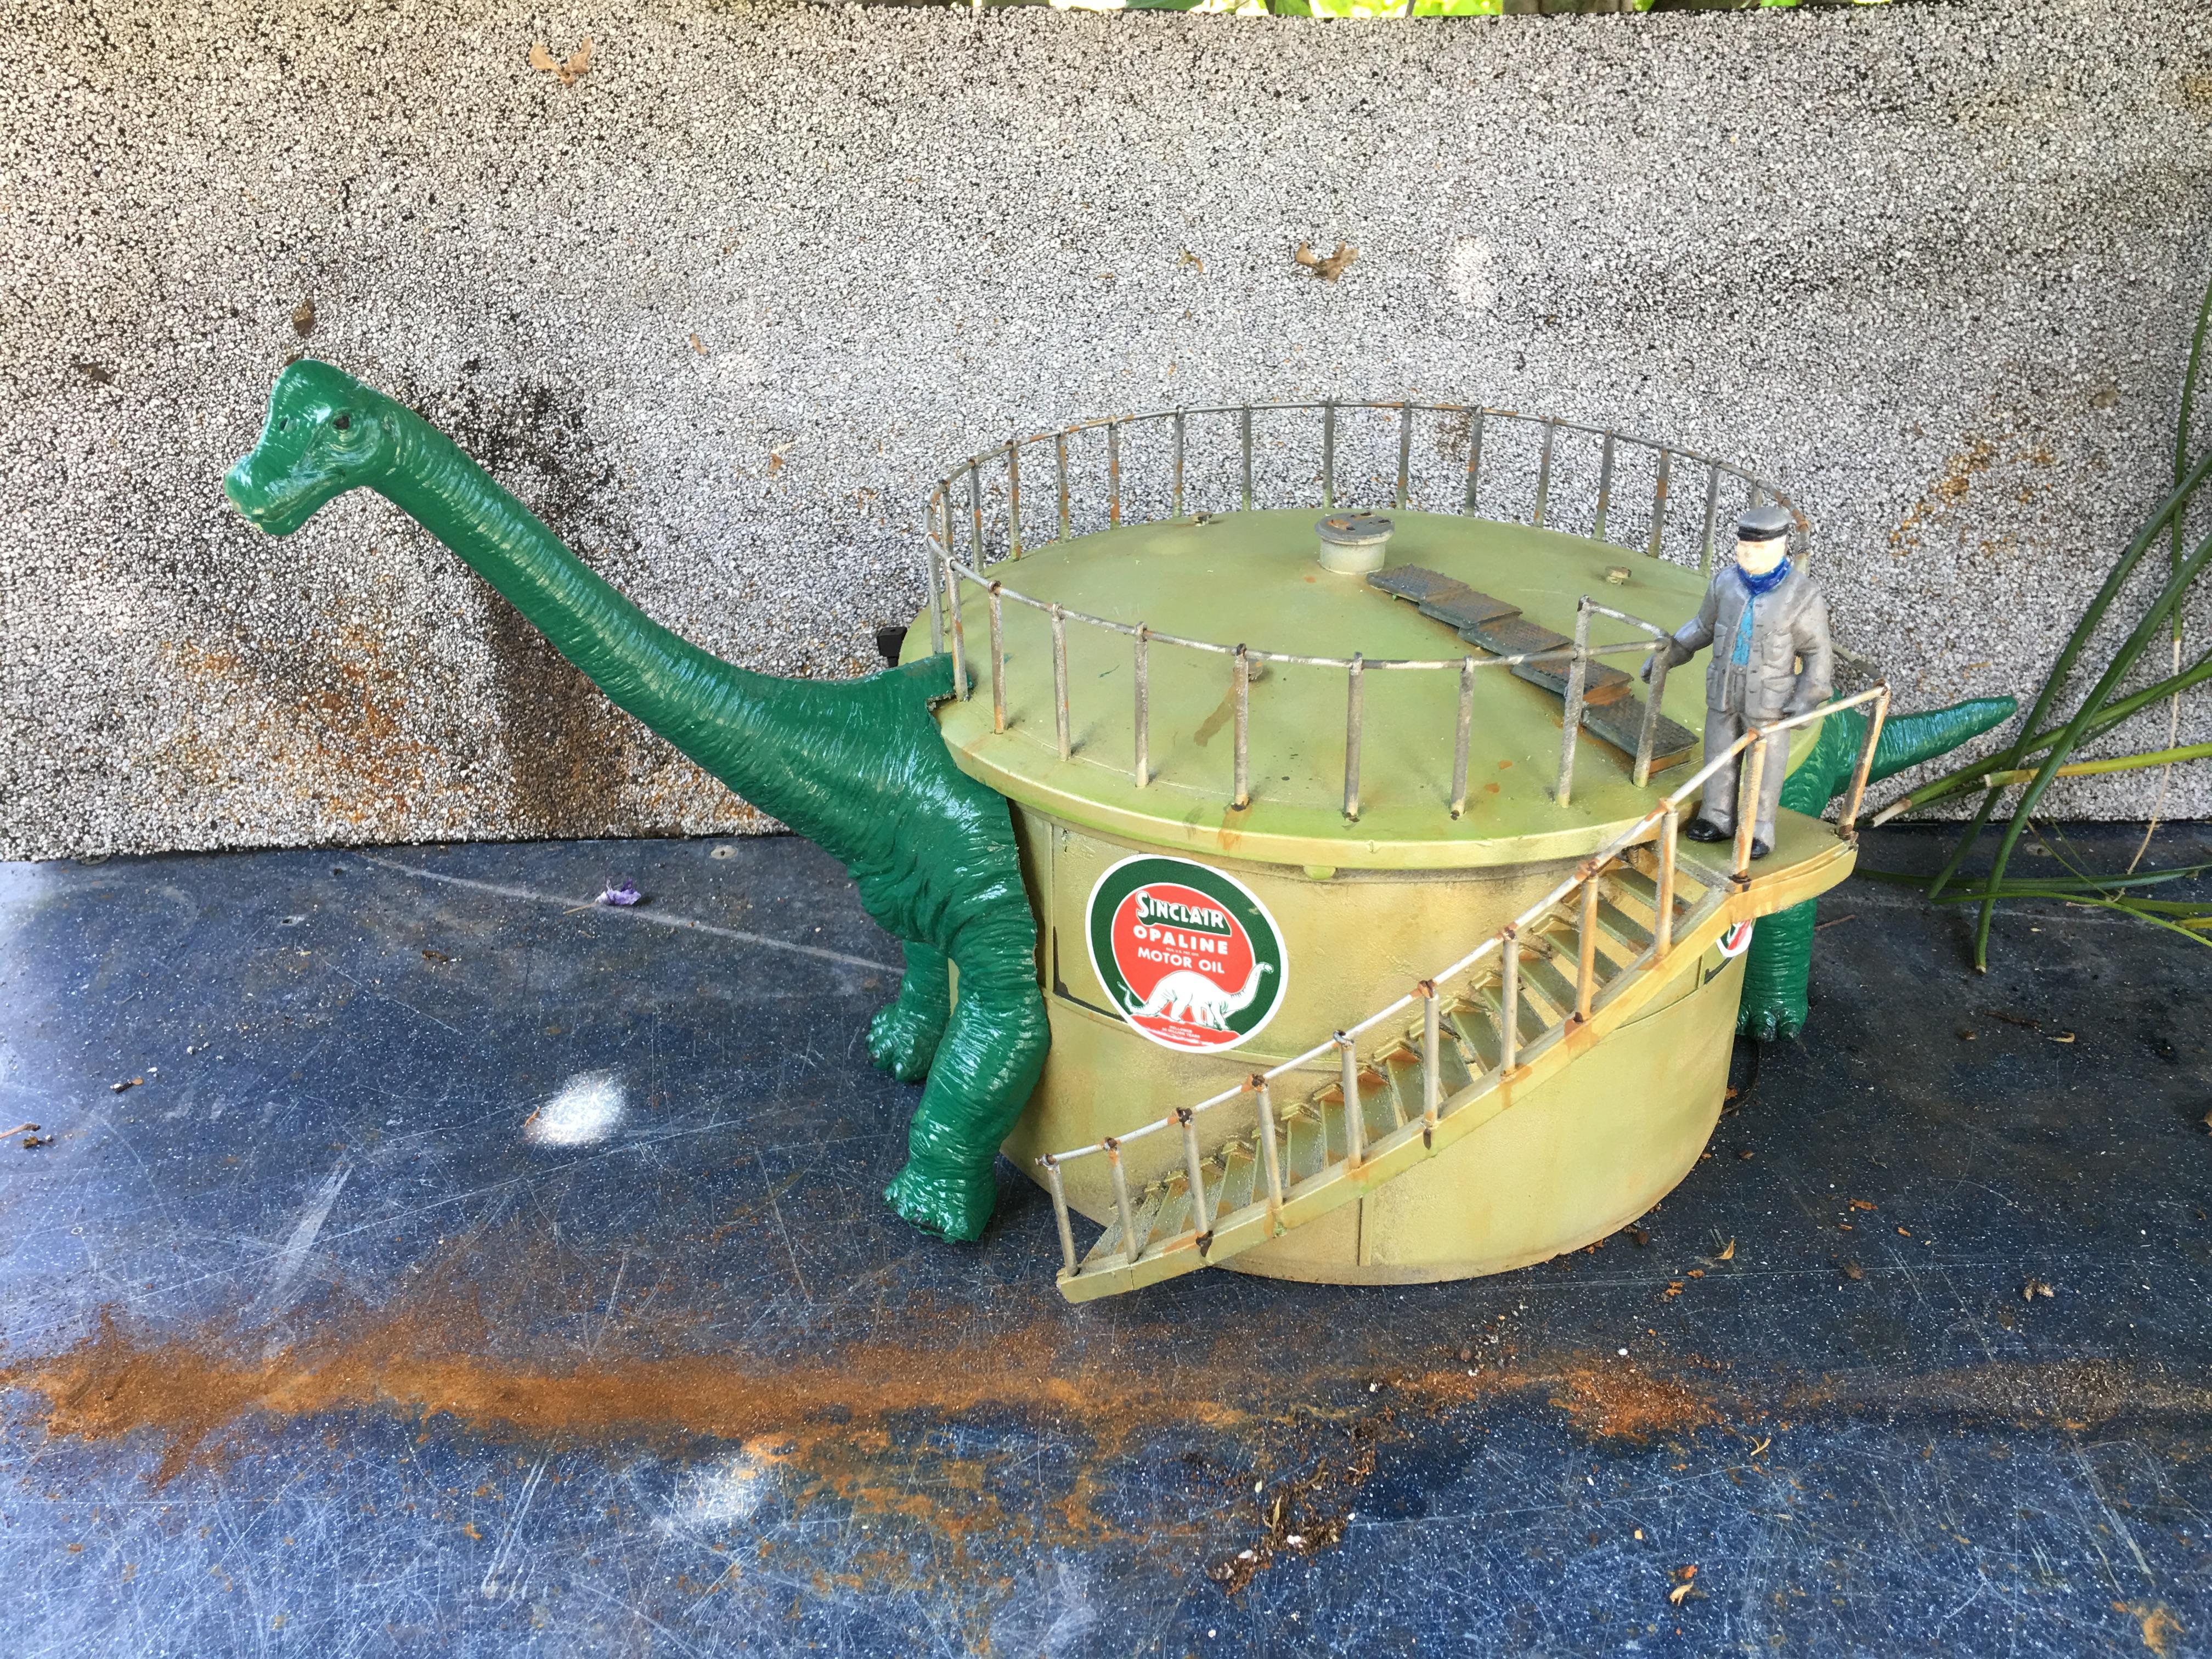
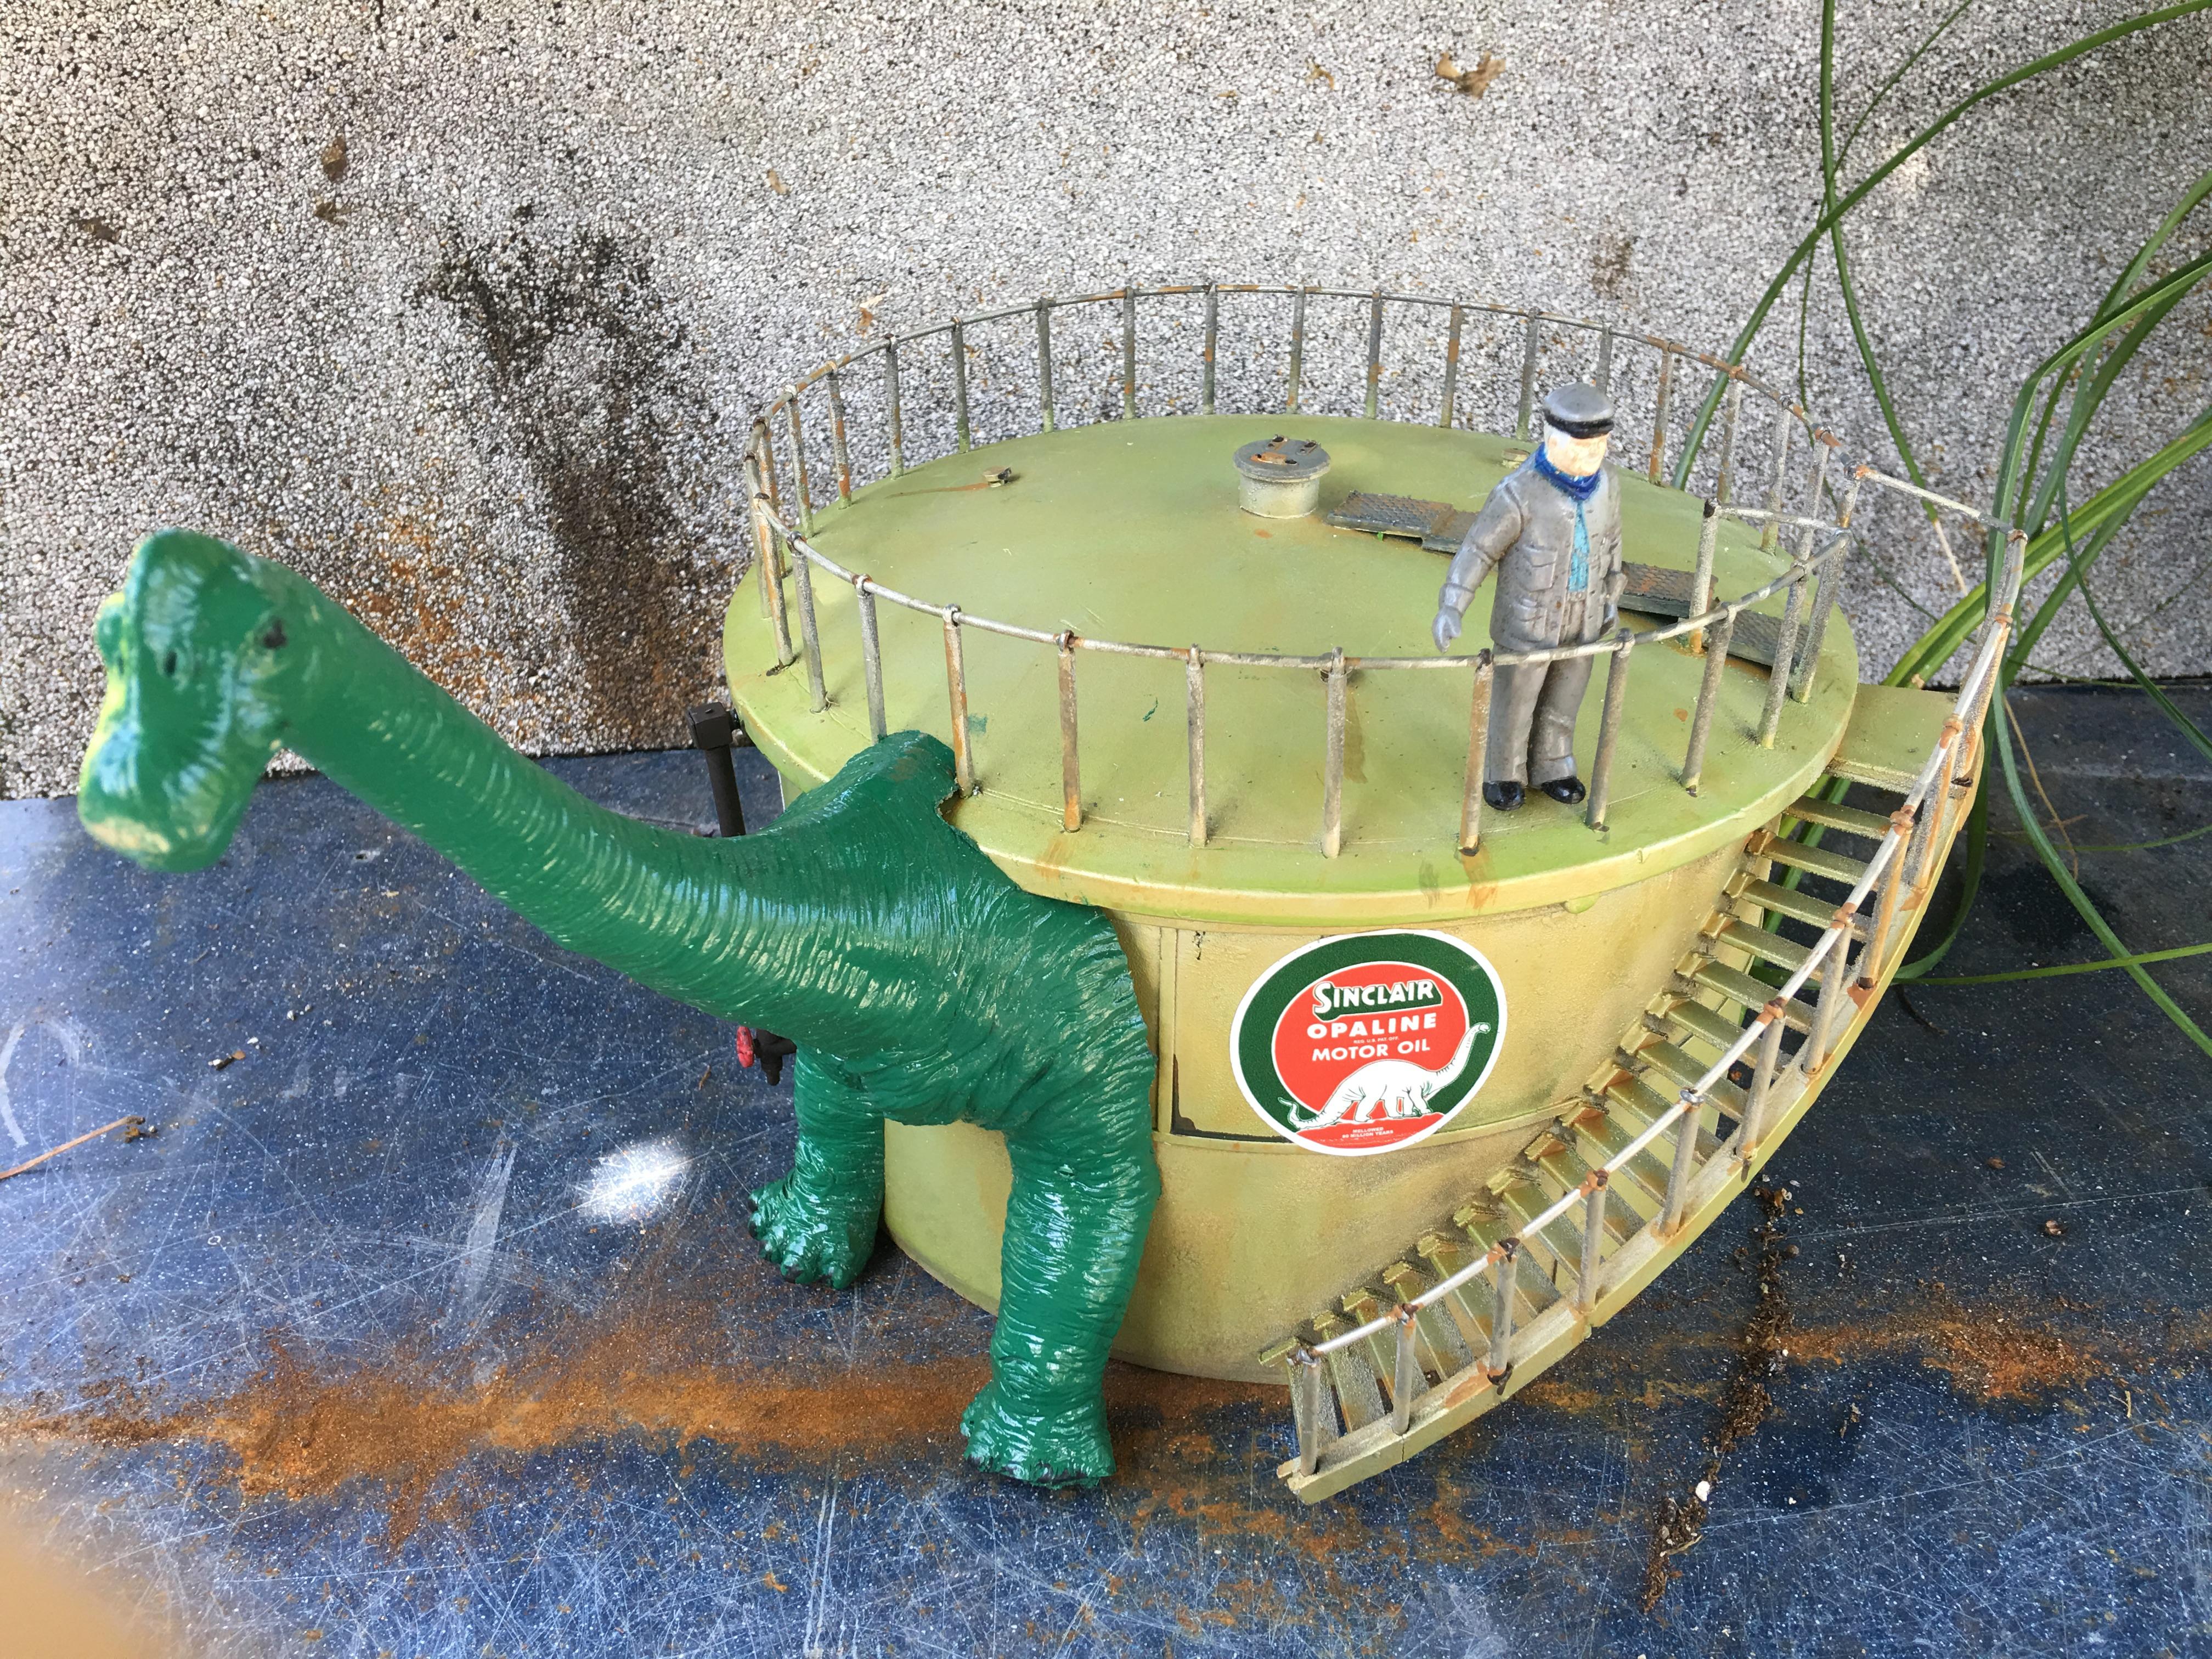
This a 9" PVC plug that I added 1/8" brass tubing to and put cotter pins in then soldered them in, taped the bottoms with 4/40 die and screwed into the top of the pvc cap that I also threaded. The stairs are plastruct that I cut out one side so that they would bend around the pvc cap. Installed piano wire through the eyelets of the cotter pins and soldered where necessary. Liked the Sinclair decals with the saying of " mellowed for 80 million years ". Remembered as a kid of a Sinclair gas station in Pa that had a Dino on the front of the station that you had to walk through to get to the inside, so I added the Dino just for fun ( jockulairty ) as it maybe. Lot of fun to build and the Grand Kids love it
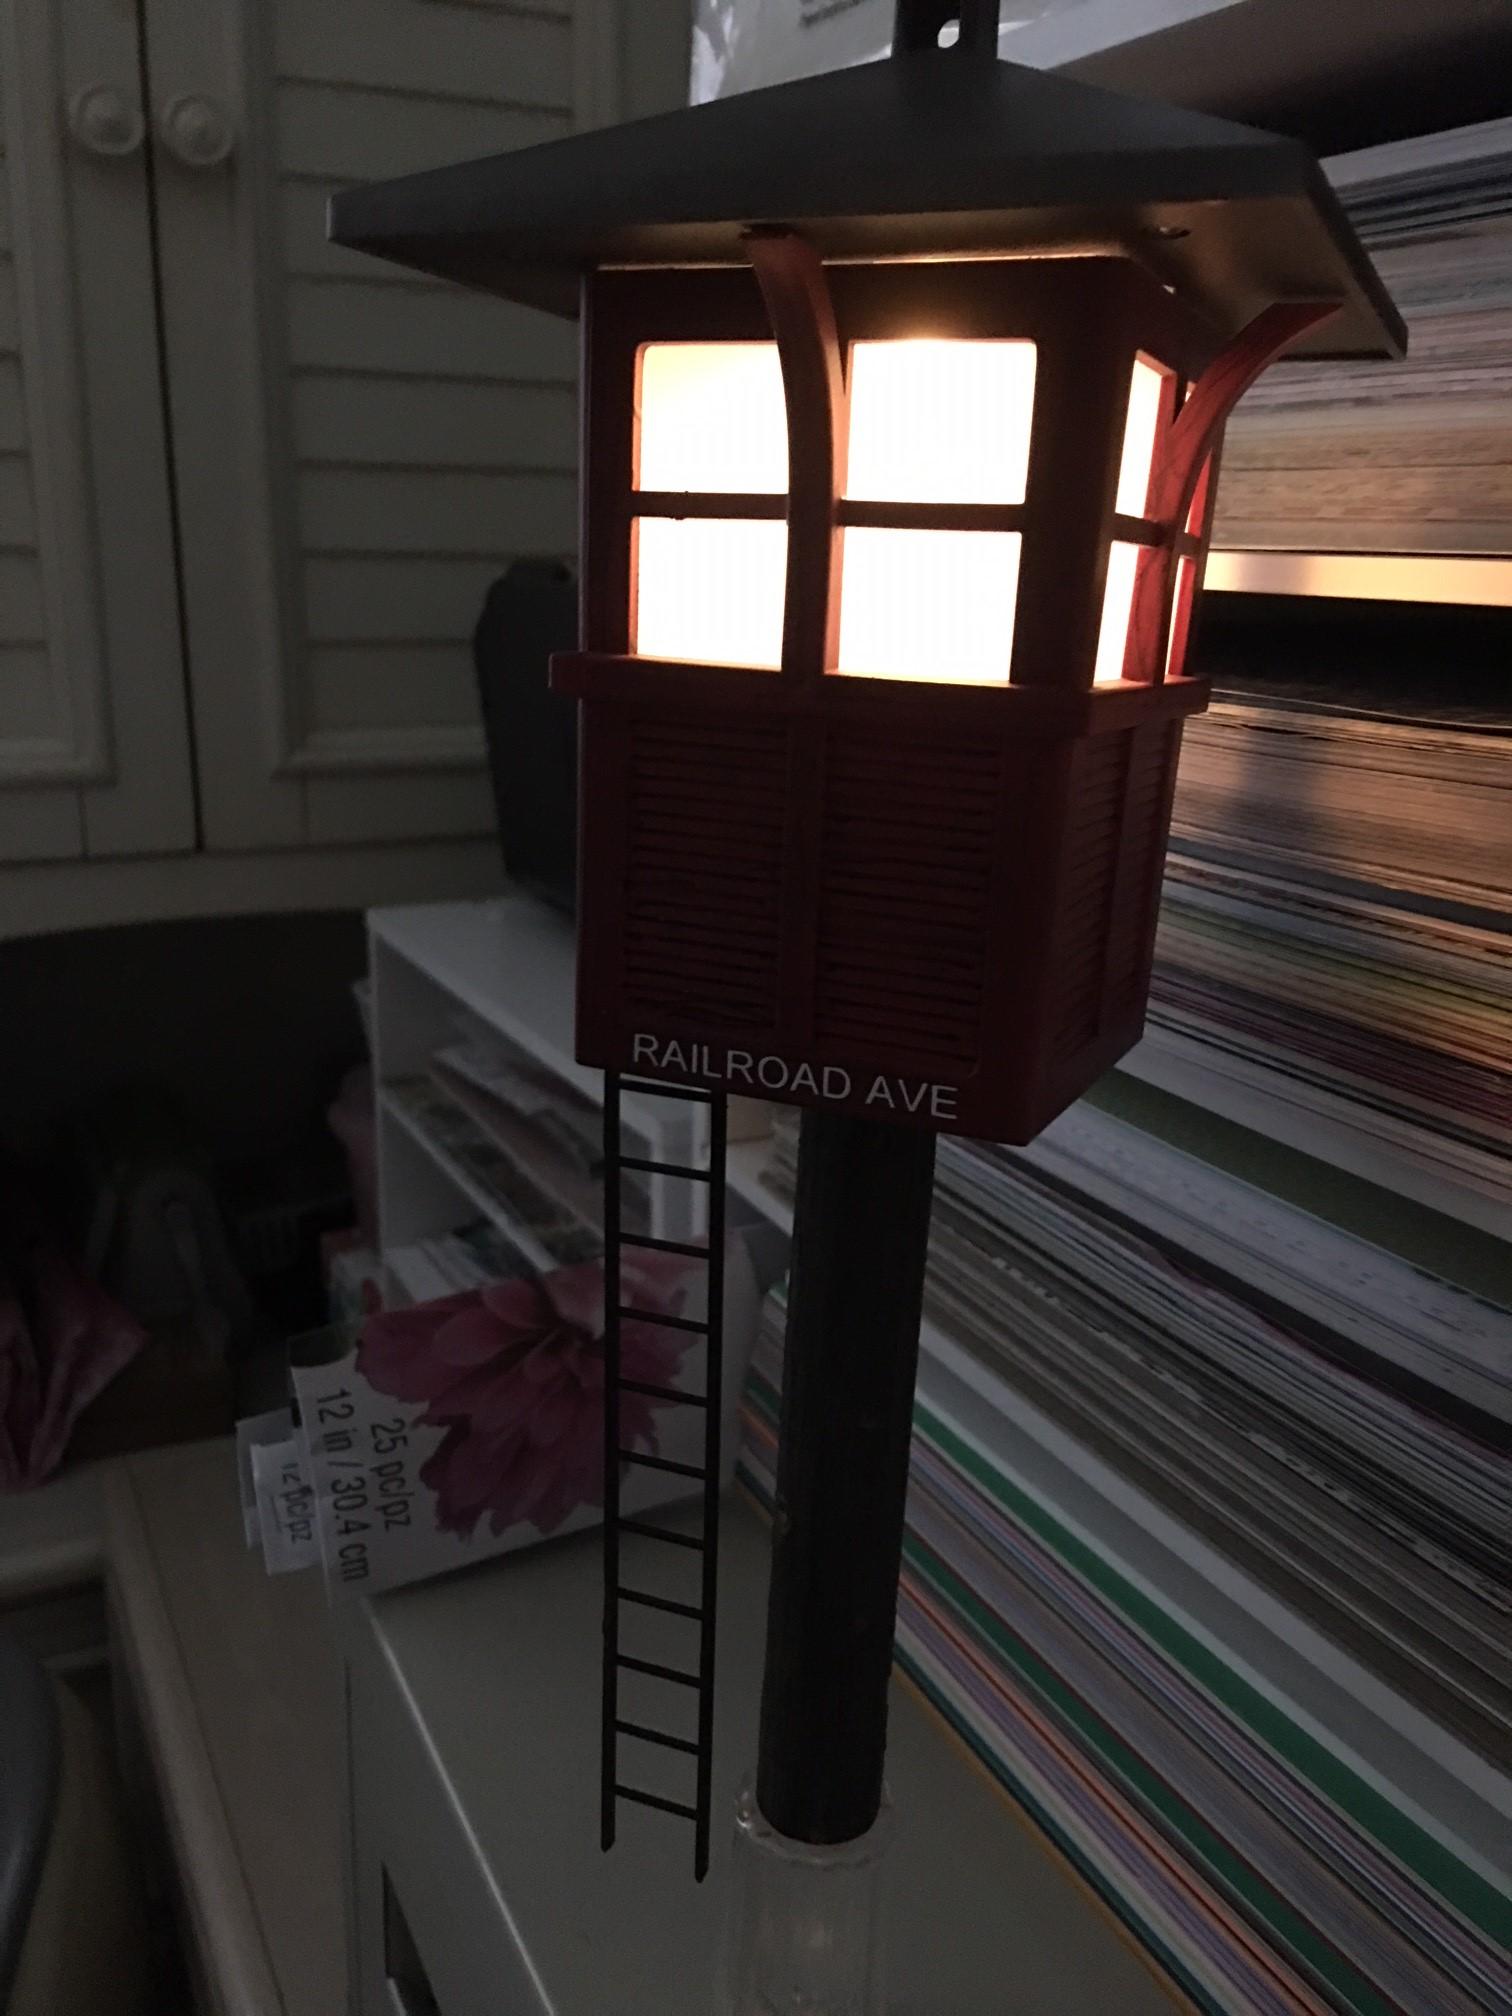
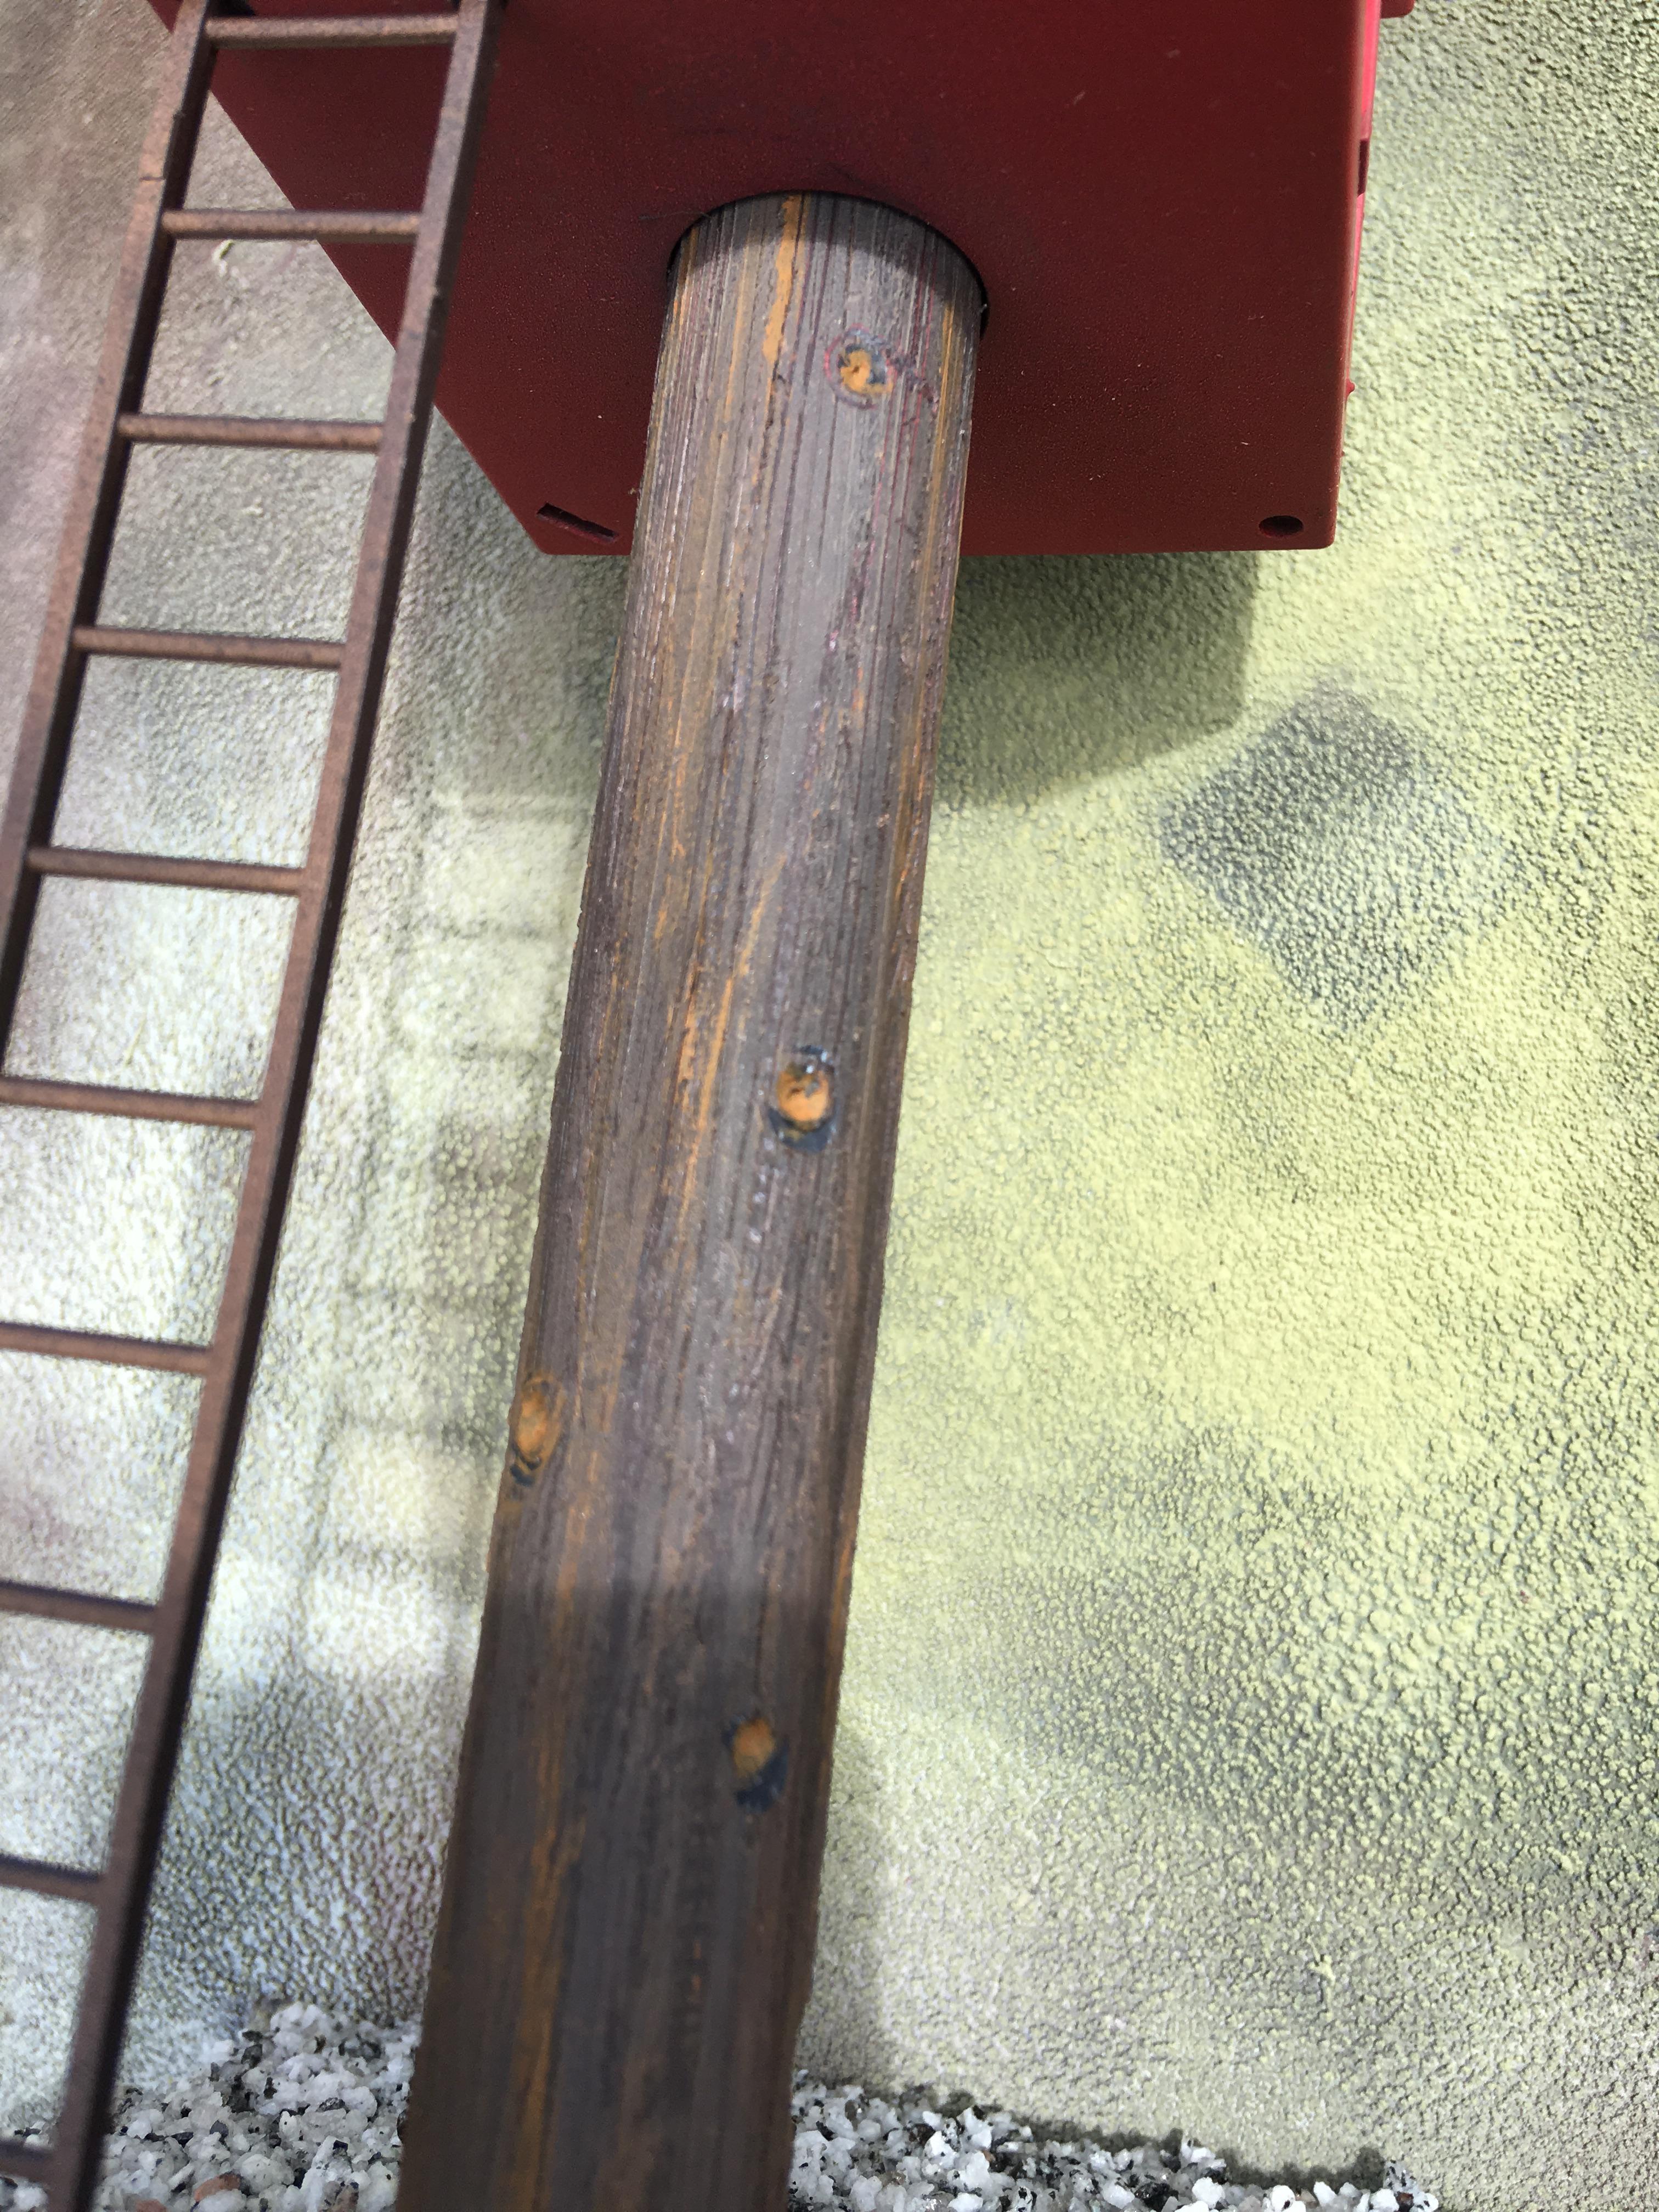
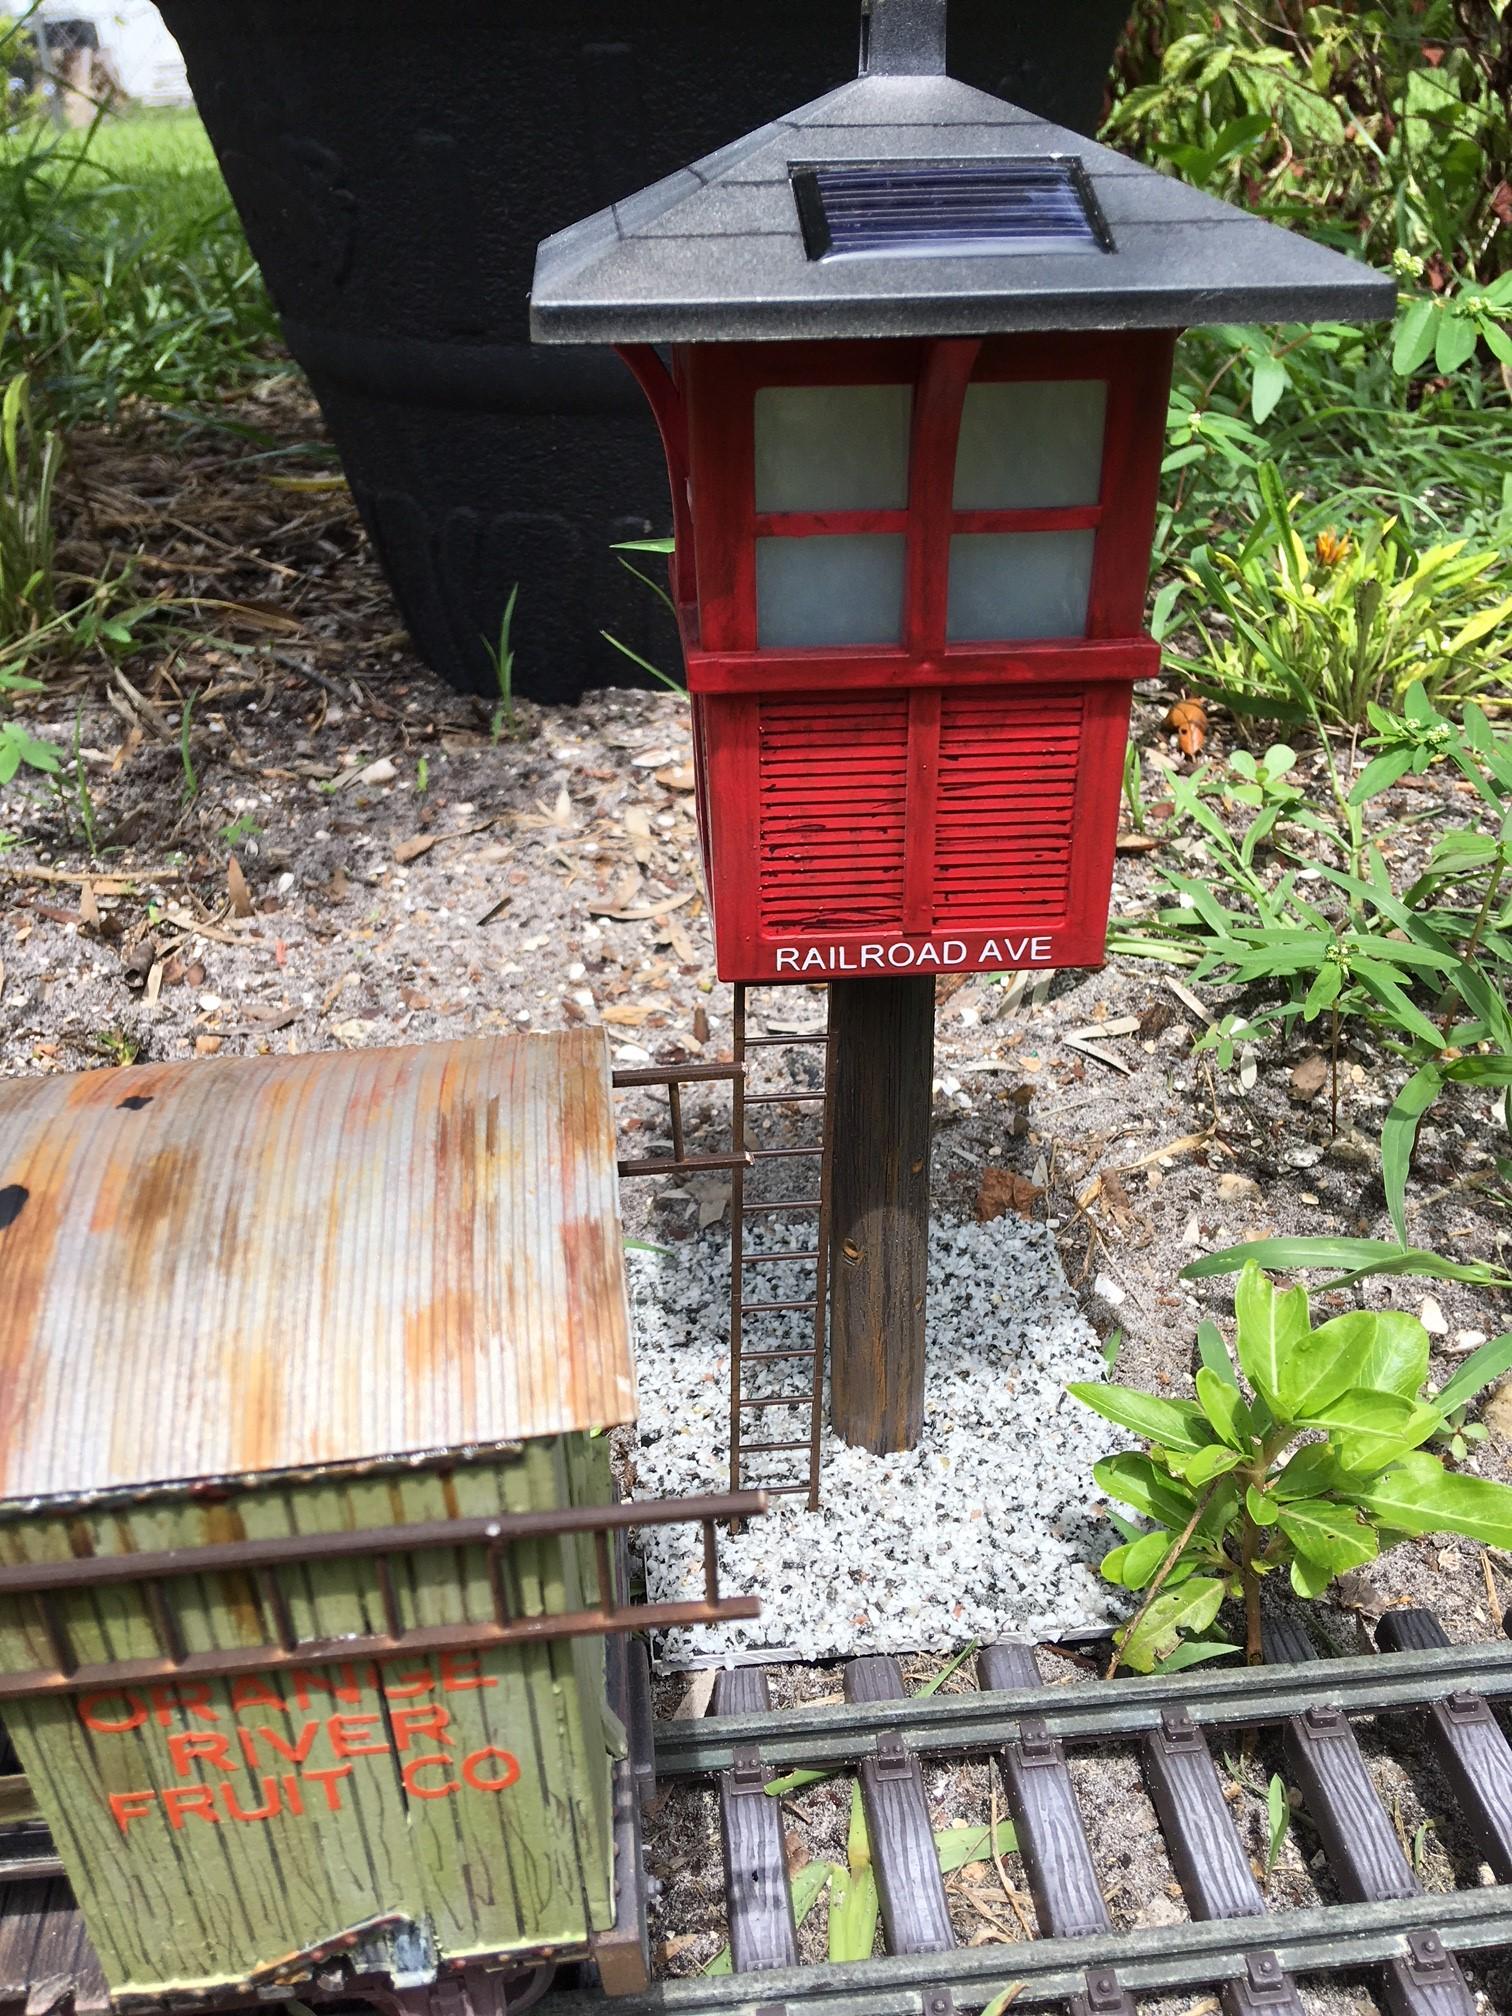
Remembering back to my HO days I always had a fondness of a Atlas switching tower, and I stumbled on to a pathway solar light that looked very similar. A little pricy at $ 30.00 when I'm use to $.98, but for 2 but not terrible. Added a little evergreen styrene building siding sheet sealed the cracks, detailed the post to look like a large tree trunk post and added a styrene ladder. Even painted red and lettered it like my old Atlas one. fun easy build.
Made my own for my LGB coaches, used styrene bar, 2 AAA battery holder, small RC car slide switch and 10mm LED's. Hid the battery pack and switch in the clearstory section of the roof and sill using the original batteries, easy cure.


Yard/Mow office
in Kitbashing & Model Making
Posted
Well in order to finish Rosy's caboose I was missing ladders and roof cat walks, I found plastruct ladders on eBay @ $10.95 + 4.95 shipping but luckily I found a Bachmann caboose less chassis for $ 10.50 with free shipping plus it had the cat walks and ladders, win-win. Caboose finished and off to new project, what to do with my new caboose shell. Decided on a yard office, painted it a dark gray primer with white trim, new roof out of evergreen, and base from old Pola bridge footing. Labeled it using silhouette and putting them on old Pola plates designed for stickers. Being as there were 2 doors 1 at each end I decided that one end would be yard office and the other MOW office, added radio antenna to end where I forgot to putty ladder holes, other end will get something but not sure at this time, and I still have a caboose cupola left, another project yet to come, maybe a drover caboose on a Kalamazoo combine. Bill