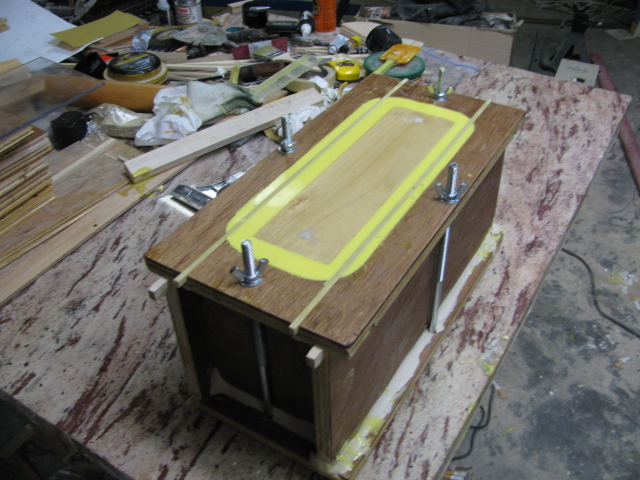
Thanks, even though this is quite a job, it's not as difficult as making everything from scratch as I have done before. Doing it this way saves lots of time. I am now preparing to make the mold for the section to be added to the MTH passenger car. Making this mold will be new to me, because I have always made the car in sections, not three sides at once, so this will be a challenge. Bob.
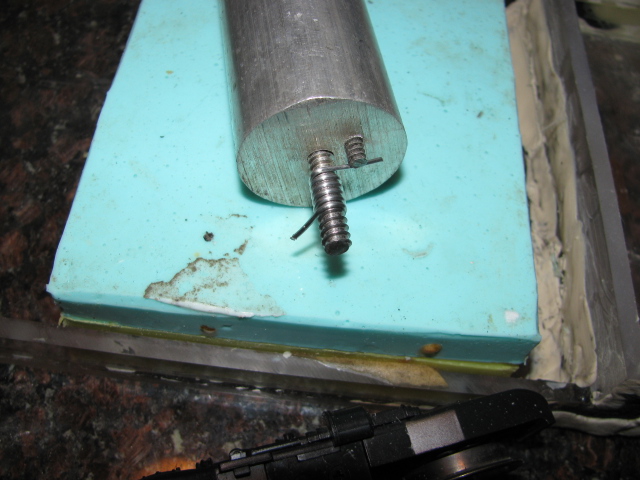
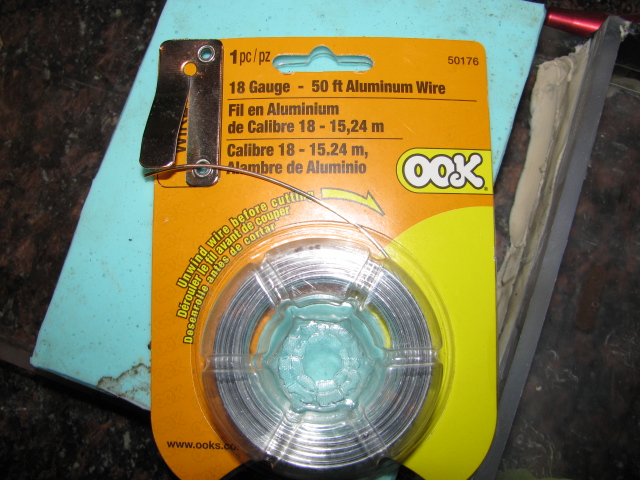
For those of you that wish to make your own springs, here is how I make mine. They are not functional, just for looks. They are made of aluminum 18 gauge and wound around a 1/4 inch, I believe to be a 14 threads to the inch thread. I mounted this in a tool handle with a peg for starting the wind. I then trim the spring to match the length. Here are some pictures.
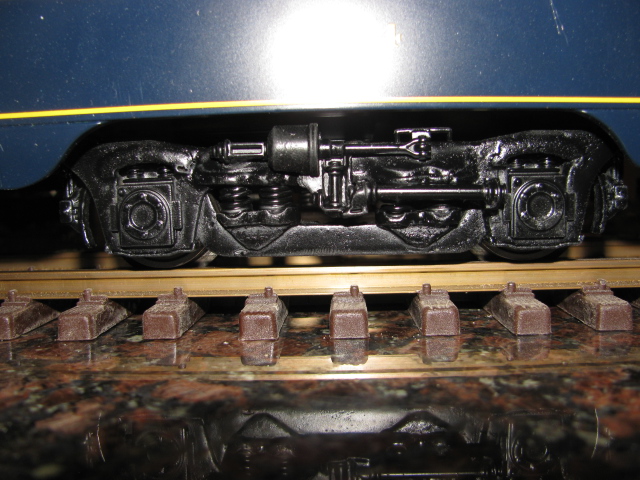
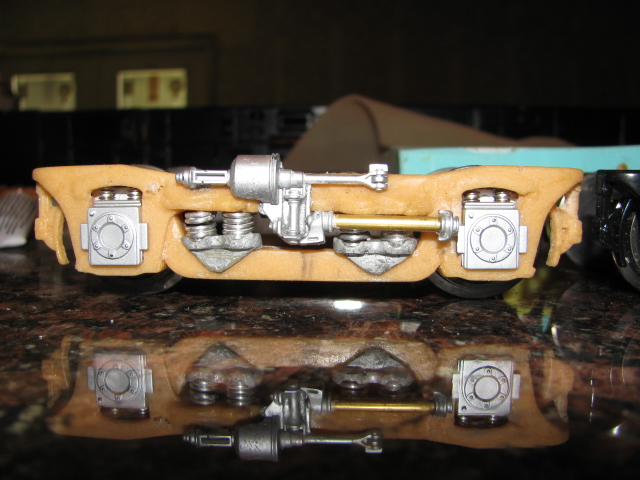
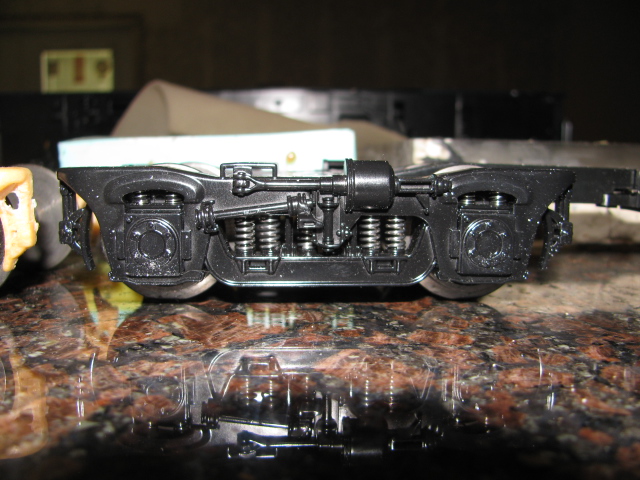
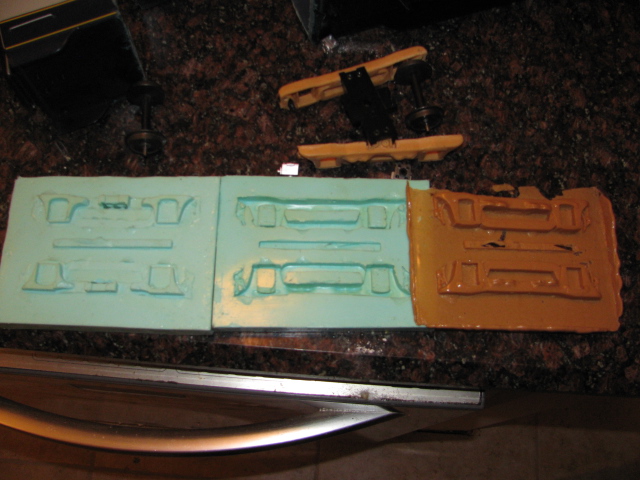
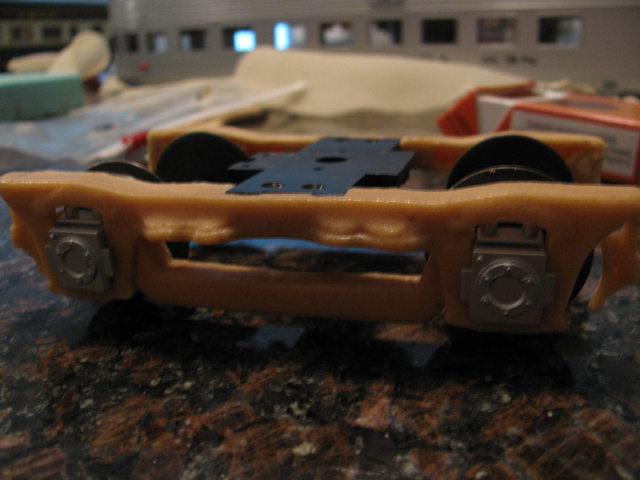
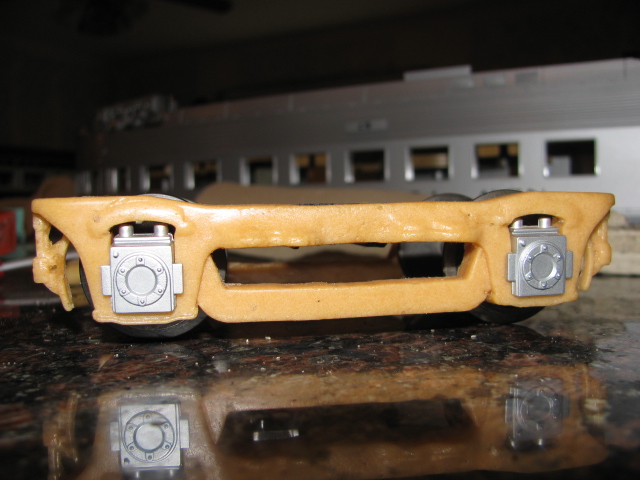
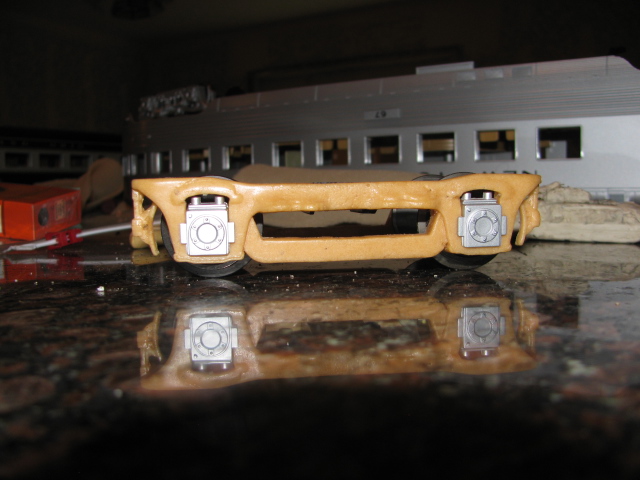
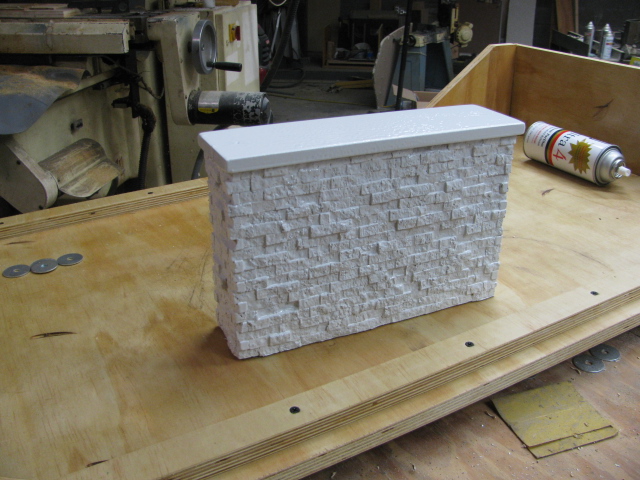
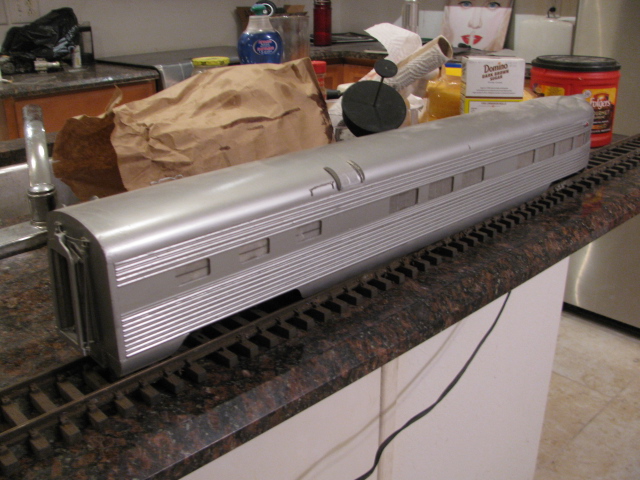
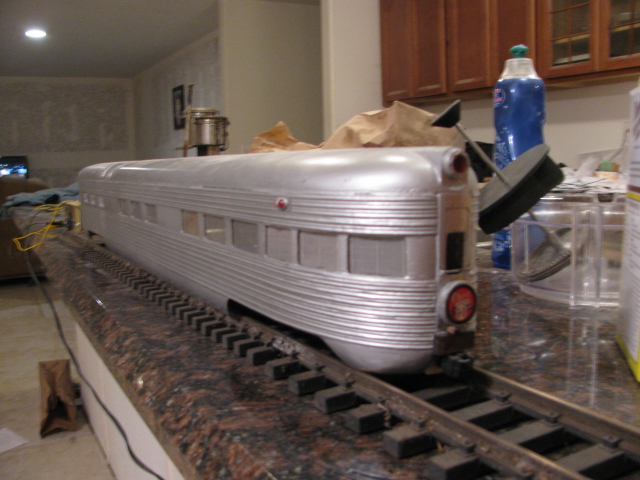
Here is the finished 41n truck minus the paint. I have stretched it 1/2 inch and tried to use most of the stock parts from the original. The sprung function also works. The only change, besides making a mold for the frame, is the stabilizer bar is also stretched a bit by using tubing to fit around the stock one, and remounting the air canister and drilling new holes and then gluing. Here are some pics, first the new one and the stock one. Also, I made new spring pads and made new springs, but I am going to try to use the stock springs. Bob.
I am using 74-20 urethane, no bubbles, no vacuum needed, from BITY mold supplies. There are many videos from these people to help you. The 74-20 urethane is cheaper than silicon and I like working with it. I haven't had any bubble problem and it pours nicely. WWW.brickintheyard.com When you mix, try to mix slowly so you don't whip any bubbles into the mix, pour away from your part and let the urethane run into the cavities, that might help.
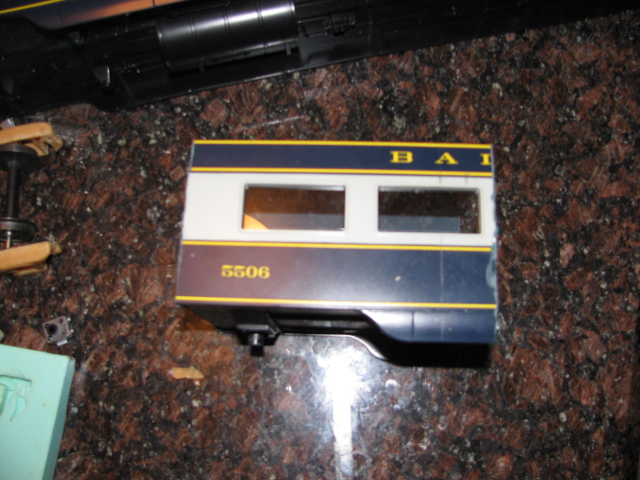
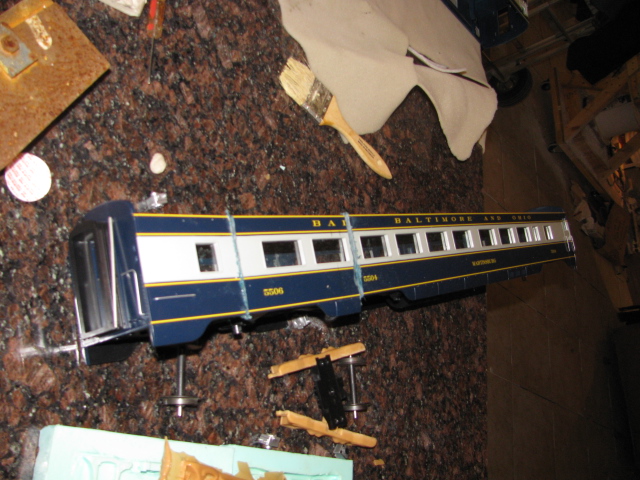
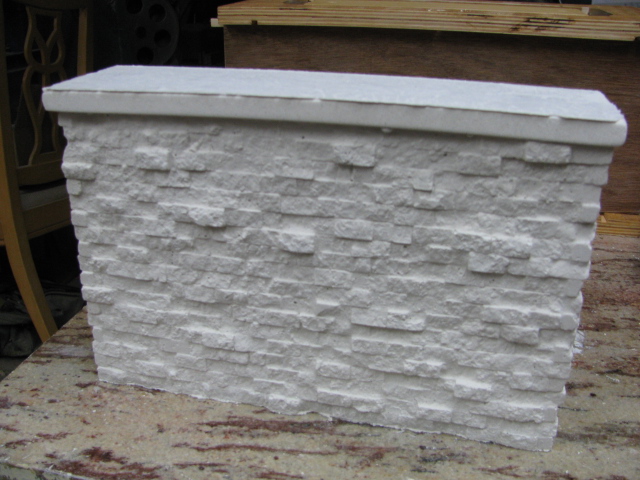
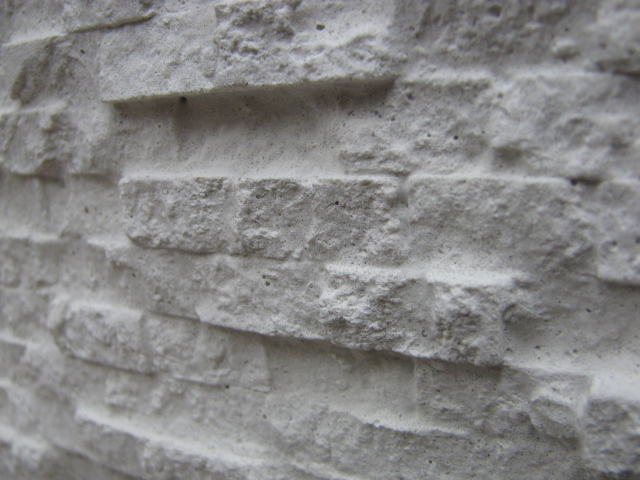
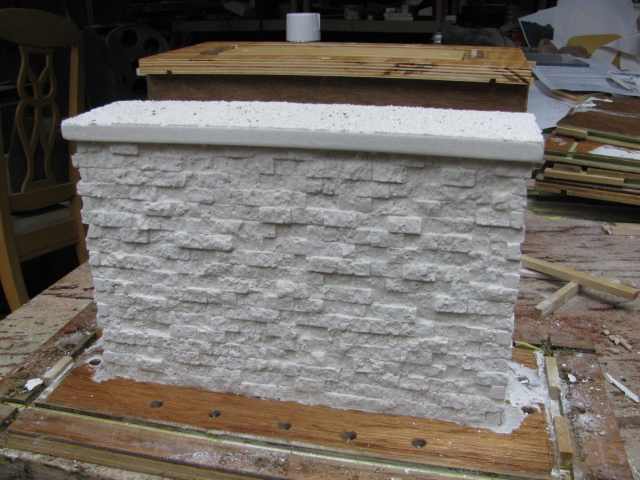
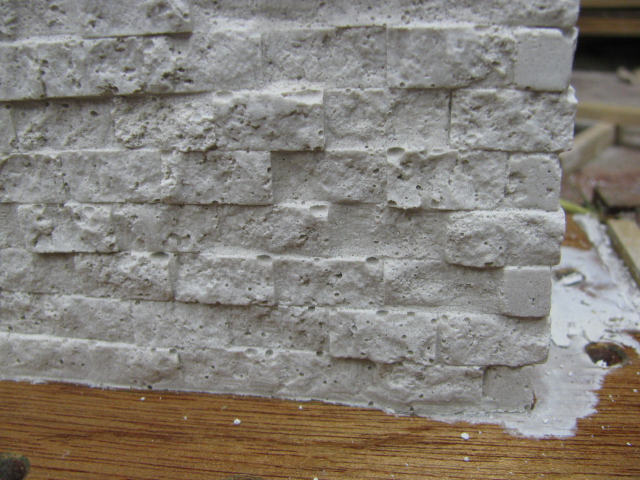
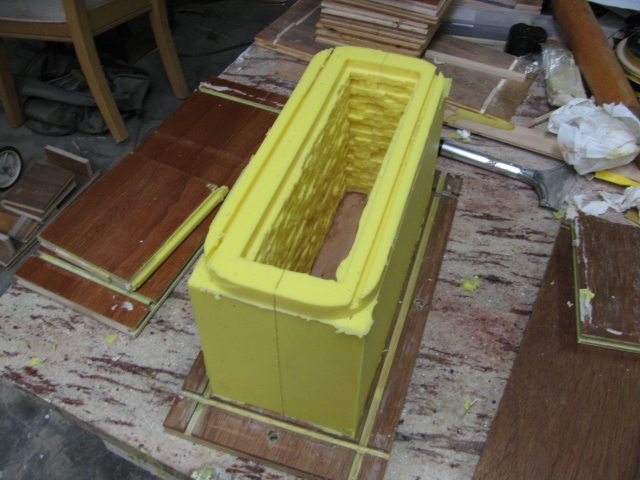
Here is what I've got. The section by itself is the one that I will be making a mold of. I am making it longer than 4 5/16 so that I can match the windows on either side of the car. The window are not spaced evenly, so when the part is made, I will have to cut the sides differently so that I can preserve the shape of the windows. I also will have to fill maybe one or two windows. I cut the section to accommodate the 1/4 movement of the bolster so that the longer truck will match the skirt opening. At the other end, the bolster mount will have to be moved toward the center 1/4 inch. Well now to make a mold for the 4 5/16 inch fill piece, I will keep you updated. Bob. It kinda hurt to slice open such a nice looking model, oh well had to make it 85 ft.
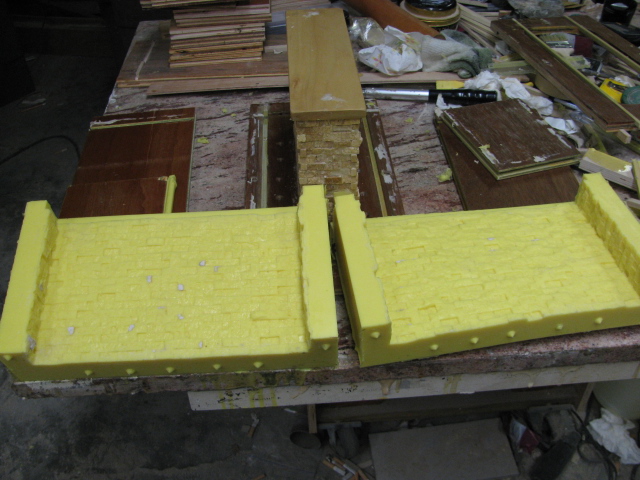
Also I will have to make a mold for the roof section.
I am stretching an MTH passenger and the trucks to make it more scale. Here is the start of the trucks. Stretched 1/2 inch. Made them to hook up to the stock MTH bolster, so using all stock parts except the side frames. Made a revised mold for the side frames. More pictures later. Bob.
Engineer Joe, I think I am going with your idea of pipes inserted length wise in the top of the structure. Using 1 1/2 pvc pipe, 4 of them I could get the weight down to about 70 lbs. I can handle that. The pipes would be secured at each end through holes in the mold and the pipes would stay in. That weight is with regular concrete. I could further reduce the weight by using the perlite mix to about 50 lbs. So, thanks for your idea. Bob. PS. Yes the little white things in the mix is Perlite.
Vermiculite absorbs water, Perlite doesn't, so I don't think for concrete lightener you want vermiculite. Vermiculite is used for soil and planting, so is Perlite mixed with vermiculite. That is the way I understand it, also Perlite is pure white. Bob.
Yes that would work. I have thought of making a core of wire cut foam the shape of the viaduct only smaller in size and suspend it in the center like a core, and then pour as normal. I have also thought of making the top part with smaller sections, that would make it lighter to handle also. Good thoughts. I will have to think of something, my back isn't what it used to be. Perlite is a mineral, mined and then processed, cooked, and when it expands, that is Perlite. Lighter than anything else, except ground foam. If I make a core, the problem will be to keep it from floating when pouring the concrete, I will have to investigate how they do that. Bob.
Here are the results of the column poured with cement sand and gravel. Very few bubbles, after vibrating for 2 minutes, it weighs 16 pounds as compared to the lightweight version of 10.5 pounds. I will go with the, 16 lb. version. There was a 35 per cent weight reduction in the lightweight version, so that means on the large section, it would weigh 110 lbs., still have to use a cherry picker for large moves, so I will probably use the all concrete version rather the one with Perlite. Also the Perlite version is impossible to finish properly the top, the perlite rolls and you can't get a smooth finish. I had to add some soup after it had dried to smooth out the top. Here is a pic. Help with painting please. Bob.
Tomorrow I will demold the one made with regular concrete and see how that one looks. I vibrated both, but still some small bubbles, can't really see them from 3 feet, so maybe I won't worry about them. I will weigh both of the columns to get an idea of the weight difference and I will post them tomorrow. The vibrator that I made worked well, lots of bubbles came out except for the small ones. Bob.
I just demolded the column and while it is OK, I think I will use not the lightweight mix, I will use the regular mix, less porosity. There are some small bubbles, not noticeable from a distance, but close up, you can see them. It demolded easily, no problems. Bob.
I just poured the, quote, lightweight version of the mix and I don't like it. I had to use much more water than the recipe called for just to get it in the mold. I will pull it out of the mold in 2 days. I am afraid I will have to use the regular concrete mix to get the detail and strength, we shall see. Bob.
Thanks for you input. Down here in Florida, very little freezing threat. When I say P gravel, the rock is at varying sizes, can't use 3/4 rock, just too big. I have poured large column bases for my house with great results, no cracks. You can view them on my channel on YouTube---omiateeful, There are about 53 videos. Just scroll down.
The top piece, if made with rock would weigh 172 lbs. If I can make it with Perlite, it will weigh about 90., again, it doesn't have to be very strong. If I can't get the looks, detail, than I will make it with rock, and have to use dollies to haul around, but I hope the lightweight stuff works out.
Lightweight concrete is weaker than concrete made with the proper sand and gravel mix. A regular mix is about 3000 psi. strength. The mix that I will use is only about 1800 psi, but it doesn't have to be very strong, it just has to hold up 1/3 of the top piece. P gravel is 3/8 in. rock or gravel. White cement is white Portland. The lightweight concrete recipe that I will use has no rock, just one cement, 2 sand and 2.2 Perlite ratio by volume. I got the P gravel to make one column to compare the weight to the lightweight version. The gravel or rock in concrete is for strength. P.S. the above picture of the column is just the pattern from the mold that I painted white, I haven't poured the column yet. Just joking since you wanted to see the end product, I will be pouring it tomorrow. Bob.
I am preparing the mold right now and maybe pour tonight or tomorrow. Just went down and bought some white cement, sand, p gravel, and some Perlite. I will make several combinations to see which is the best as far as weight and resolution is concerned, so I will post pics. soon. Bob.
I know some, who make molds keep them a secret, but I don't. All of my mold methods were created by me and some are easy and some not, but I don't keep secrets, I am willing to share them. The most unique method is machining or routing the molds that I make out of Bondo, so easy. One day, when I have a lull making my projects, I will make a video on how to make a side for an F7 or E series with a router, if there is any interest. Then one could make as many as they want. The problem is not making the sides, that is easy, the problem is making the cab. Making the cab is like sculpting. I suppose an experienced artist/sculptor could do it right the first time. Well I am not that good, it took me about 8 versions and molds until I got something that resembled a cab. Of course, it is easier to make the sides of diesel locos on a Bridgeport mill with digital readout, the method that I use now, but when I first started, I use a router and a table saw. The spacers cut, measured carefully on a table saw and then inserted on the router jig to make a cut. The skirts are made by looking at pictures of examples. The roofs of my Pullman passenger cars are made of 1 inch cuts of wood and then pieced together depending on how long the roof is. The mold that I made, I made with the boattail end on it, so that if I wanted to make another observation car, I could. The mold is extra long, therefore I can make a regular car or the observation. I also have a universal mold for the side of a Pullman standard, both a smoothie and one with flutes without windows, so I can make any car, just have to cut different combinations of windows. I also made a pattern of the Pullman dome, just a section that can be cut into the Pullman roof. I make more molds than I do cars, because I haven't had the time, but when I finish some of my other projects, I will do what I like best, and that is making passenger trains.
Here is the finished mold for the column for the viaduct. No bubbles, came out perfect even though I have never poured urethane before. No degassing necessary. mixed easily, did everything by the directions and it worked out well. Here are some pics, next I will have to try out some concrete and the vibrating table. Bob.
If you are talking about concrete, about 10 yards, not including the foundation, about another six. If you are talking about urethane, about 160 lbs., about 1200 dollars, well it's only money, but it will sure to be good looking.
Hello engineer joe. I can't sell anything at this time, sorry. My enjoyment is not only building locos and passenger cars, but also patterns and molds, these hobbies are so time consuming that all I can do is show my projects and maybe share some ideas on how to make molds and patterns. I am busy enough just building my own stuff. I have to build about 20 passenger cars, several locos, finish the molds for the viaduct, an outdoor layout that will take me probably 2 years to build, plus finish my house, and all of this before I die. I am 70. I will probably have to live to be 120 to finish all of my projects. You have probably read some of my comments about making molds and patterns, I encourage anyone to experiment and build their own molds. It's not that difficult and very much fun and a satisfying project. If one doesn't have a mill, it can be done with a router with some careful setups. I built my first E8 B unit mold with a router and the 1945 Pullman observation car all with a router. The jig for the boat tailed observation car was the most difficult tool I have ever built, but it worked. I used flat plastic sheets for spacers for the fluting and a curved surface for the curves. I have since thrown away that tool because it kept getting in the way. I kick myself for doing that, because it was a piece of art in itself. After using that tool to make a mold it was useless, so I tossed it. As to the Dash 8 trucks, I don't think the wheel base is correct. The ones to use is the NWSL 3 axle truck made specifically for the E's, about 240.00 a pair I believe. The pattern for the mold of this observation car was made with a router, no mill.


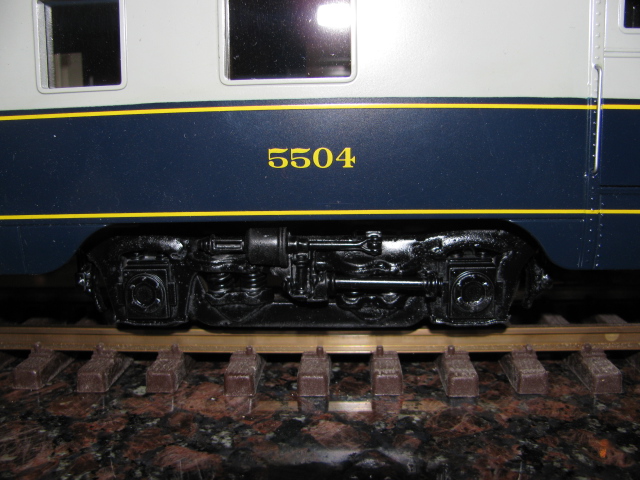


Stretched MTH passenger trucks
in Kitbashing & Model Making
Posted
Thanks, even though this is quite a job, it's not as difficult as making everything from scratch as I have done before. Doing it this way saves lots of time. I am now preparing to make the mold for the section to be added to the MTH passenger car. Making this mold will be new to me, because I have always made the car in sections, not three sides at once, so this will be a challenge. Bob.