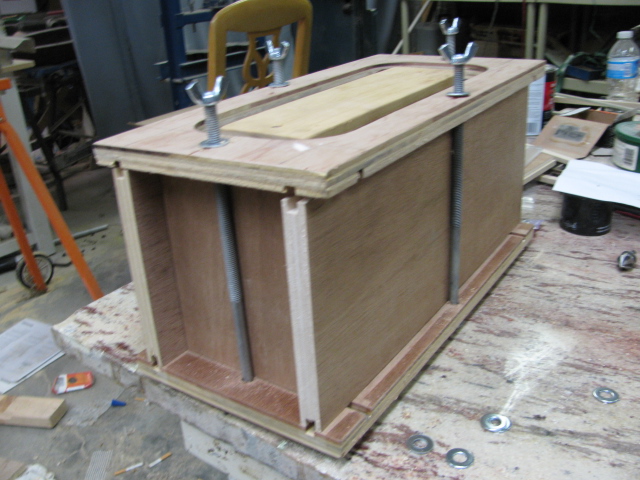
I poured the first half of the column mold with urethane rubber. It was my first time using urethane, but it was just like silicone except for the mixing ratio. It almost poured like water, a little thicker, so I am glad that I sealed all of the seams with clay or it would have ran out. Unless there is some void in the mold, it should come out fine. Here is a picture.
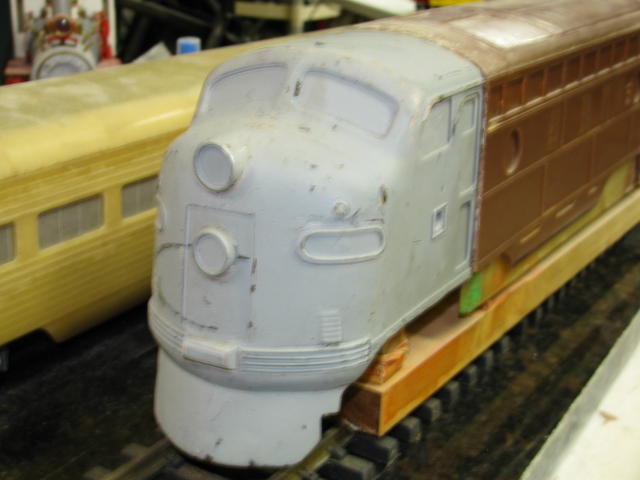
I mentioned before that the next loco that I build, F7, or E8, or E7, I would use my own cab I found a picture of it. I thought I would share. This was made by hand of about 8 evolutions until I saw something that I liked and this is it.
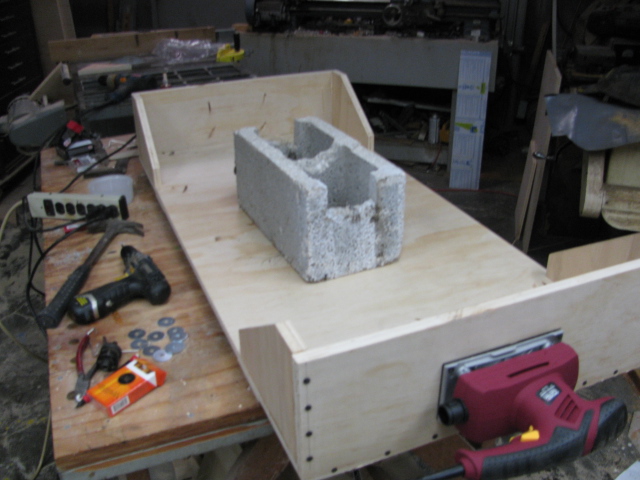
Well if it takes that, that is what I will do. Here are some pictures of a cheap concrete vibrator I made, looks like it will work. I put a video on YouTube, just search either my channel- omiateeful, or DIY concrete vibrator cheap.
Yes Jerry if I make them in white cement. White will take any colors, but looking at real viaducts, the colors are much darker and dirtier in real life. I haven't decided yet to make the look nice or realistic. Thanks for your encouragement and interest.
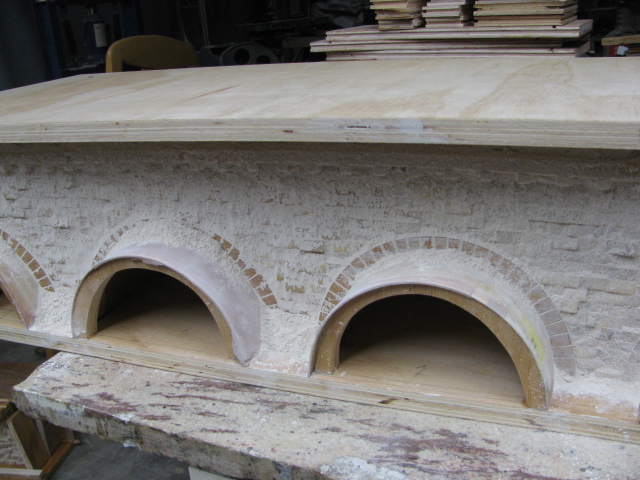
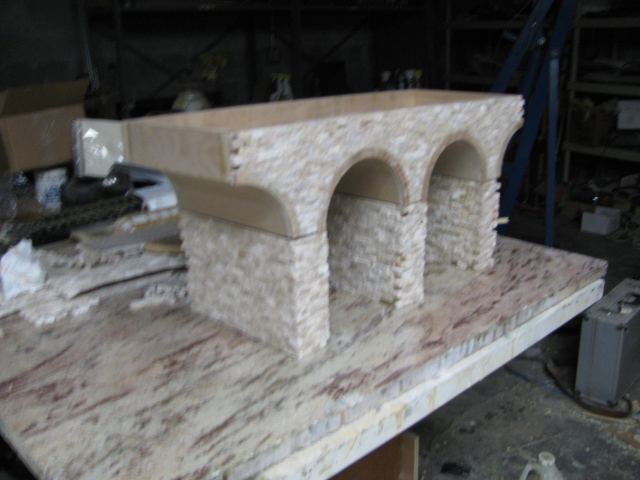
Well I finished the mold on the curved section of the viaduct for the urethane part. I wanted to share the way I grouted the blocks. At first, I used a water and grout mixture to grout, very messy. This time I spread the grout dry and packed it in with my fingers and brushed off the excess and then sprayed with polyurethane, much easier, quicker and a lot less messy and it still filled the voids. I also came across the mixture of lightweight concrete formula, should reduce weight from 172 to 85 lbs. according to the formula, so I think I can handle that. My main concern is strength and resolution of the details, I won't know until I lay a column up, should be within a couple of weeks, urethane on the way. Here are some pics.
Hi Jerry, yes it will. The large part will weigh 160 lbs. if I don't try to reduce the weight with micro balloons or perlite or foam. Regardless, I plan to use a small crane to place the large pieces. If anyone has any ideas to make the concrete lighter, let me know. I will be experimenting with the smaller columns until I get the mixture correct. I even thought of pouring them with some sort of foam, but I am afraid of the weather damage being outside. Maybe I can find some kind that holds up with weather, I don't know yet. I am making the curved section for the urethane mold right now, probably be done tomorrow.
I am posting the pictures of what I am doing as far as making the molds for the Viaduct, If anyone is as crazy as I am for attempting this. Here are some pictures of the large part of the mold ready for the pouring of the silicon or urethane, I haven't decided which one to use. I guess the silicon is twice as much as the urethane material.
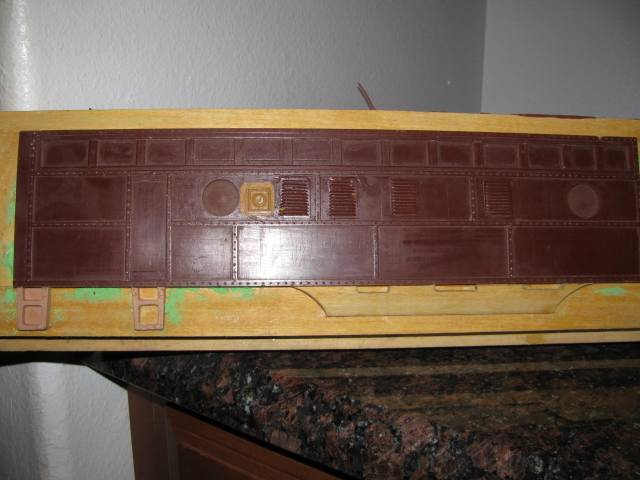
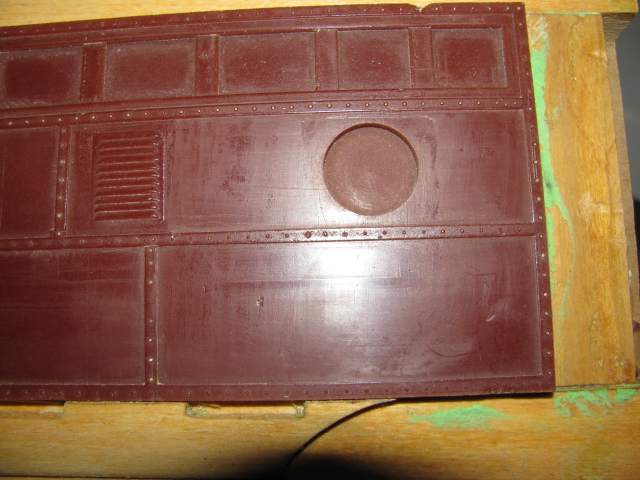
No, they don't open, they are castings from a supplier that doesn't exist anymore. I make my locomotive sides on a Bridgeport mill, but when I first started, I made the molds with a router. Any one can do it with the proper setup. You can make beautiful molds for the sides of an E8, both A and B with a router. The rivets would be done by hand with a ball mill. I have done it. A lathe would be nice for the portholes. The molds that I make are nothing more than Bondo. The nice thing about Bondo is that if you make a mistake, you simply fill the error and recut. Ask Jerry, he has seen one of my molds. They can be made easily with a router and accurate setups. I will try to find some pictures. I think I have posted some somewhere on this forum. I found the pictures. Don't be afraid to experiment. This mold and side can be made with a router, bondo, and epoxy resin and micro balloons. The brown side was made from the Bondo mold.
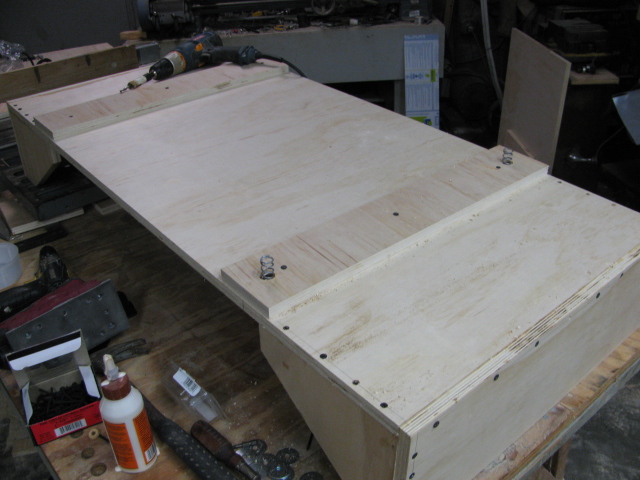
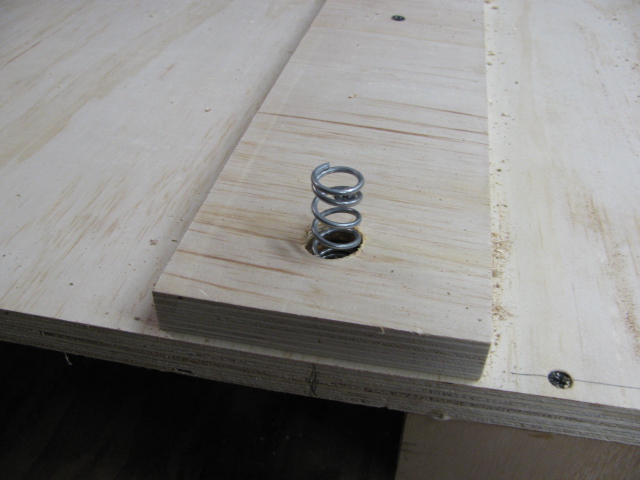
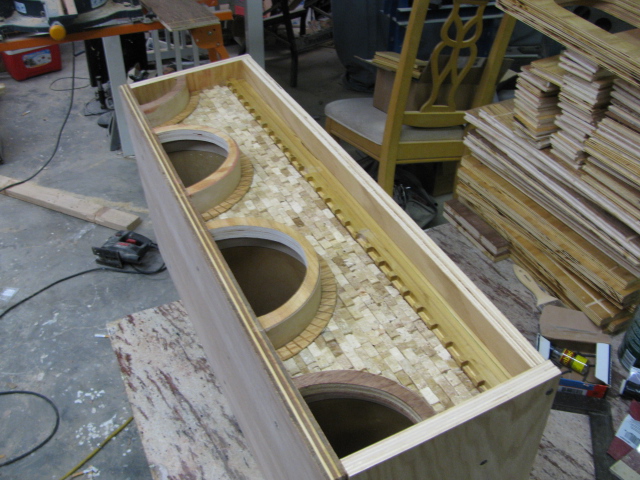
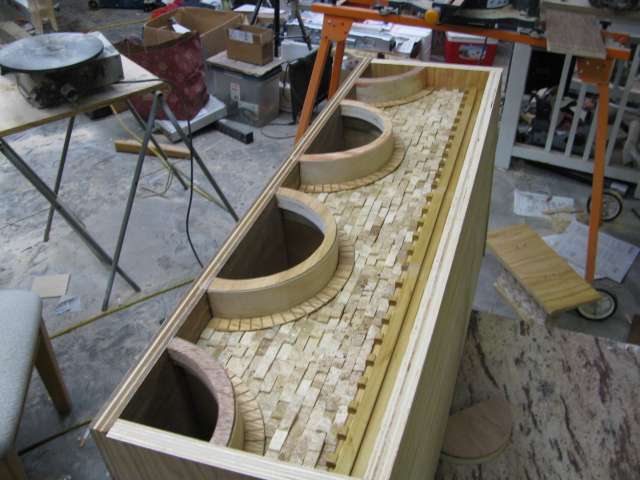
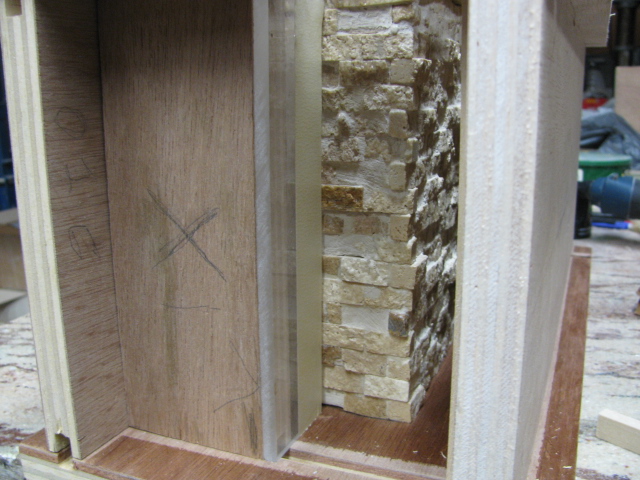
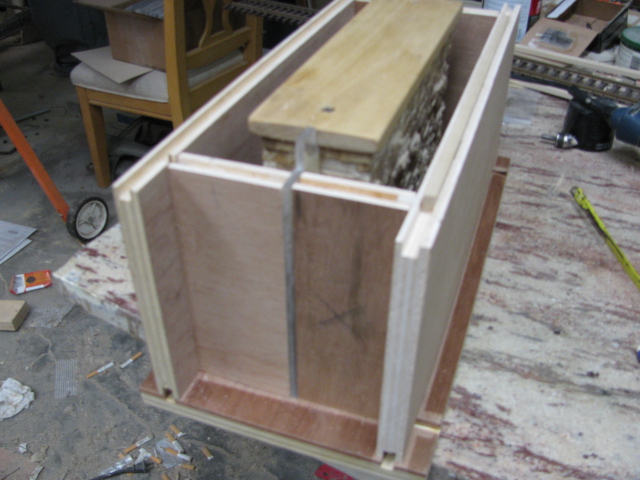
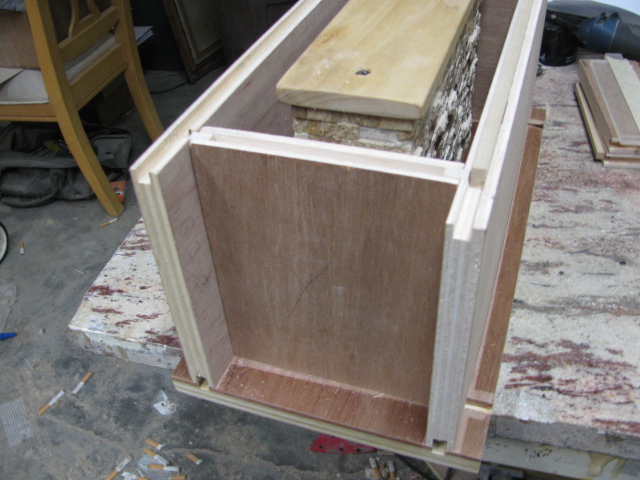
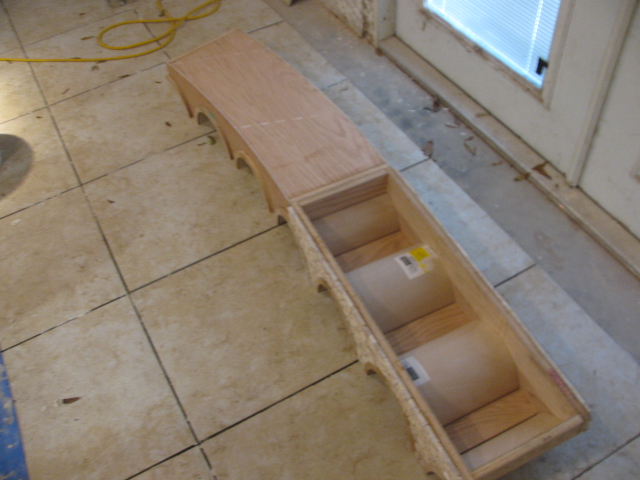
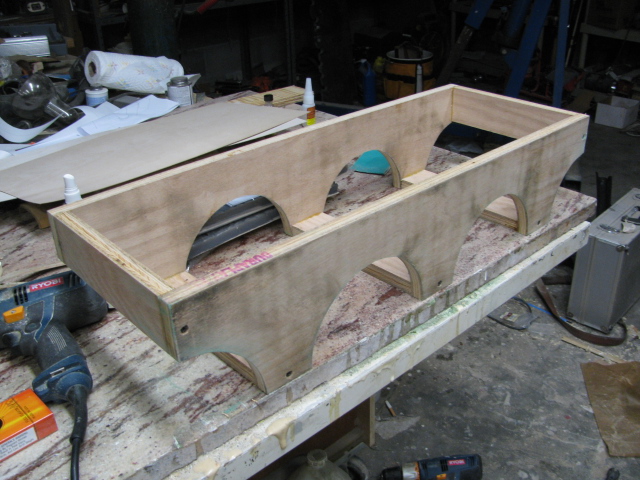
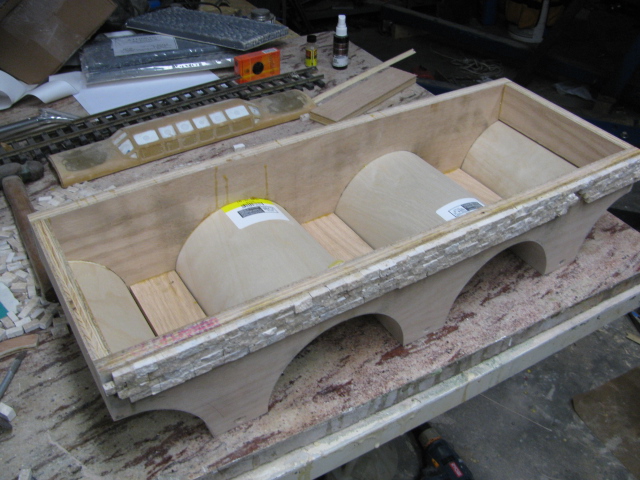
I told you that I would post some pics of the mold. Here is the design of the mold for the columns, 6 will be needed. I had to design the mold in a way that I could access the sides to be able to clay up the plastic fence for the first pour of the half of the mold. The pictures are in order of the procedure. First clay up fence. 2nd, add the other half of the mold end. At this point the first half of the mold will be poured with synthetic rubber. When it sets up, the fence will be removed and the ends will be replaced with the full width section. The second half of the mold will be poured and that completes the procedure. The bolts keep the mold together because I will have to vibrate the mold when concrete is poured. If you have any question or comments, let me know, thanks Bob.
Hey Jerry, I forgot to mention that your statement of this being a big project. I keep it in perspective because I just built my house, a 9 year project, I got it finaled the other day, so this project is duck soup compared to that one. I just figured out the plan for the mold for the columns, I can't wait to show it to you, I am working on it today. Bob.
Hi Jerry, the parts of the mold that are flat and not in contact with the stone will be made of epoxy and will make hundreds of parts. The two part synthetic rubber, made for concrete, should hold up fine. If it doesn't than I will have to. According to a commercial product made for concrete, the website says that it will make hundreds of parts also, we shall see. This will be the most difficult mold that I have made so far, because I will mixing hard molds with the rubber sections of the mold. I will post updates when I get further into the project.
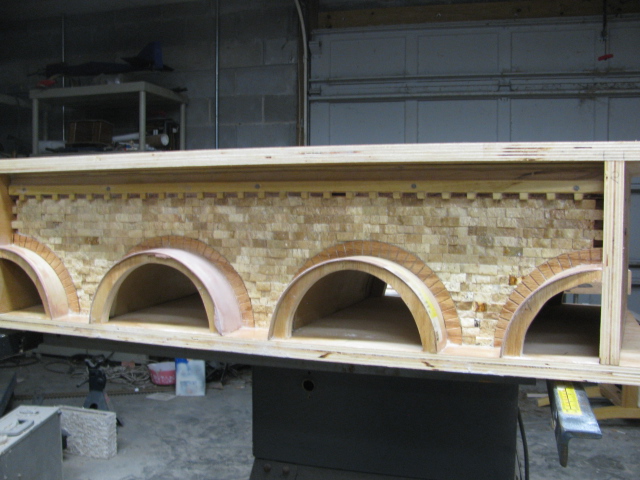
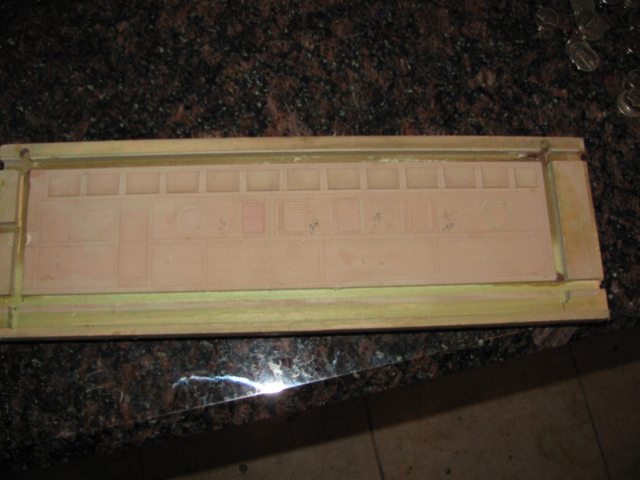
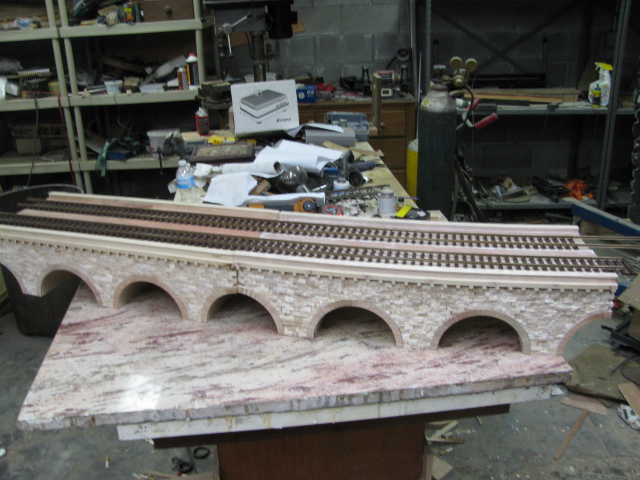
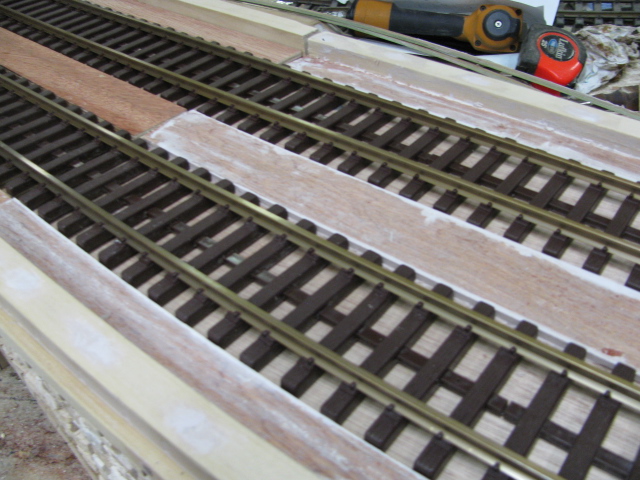
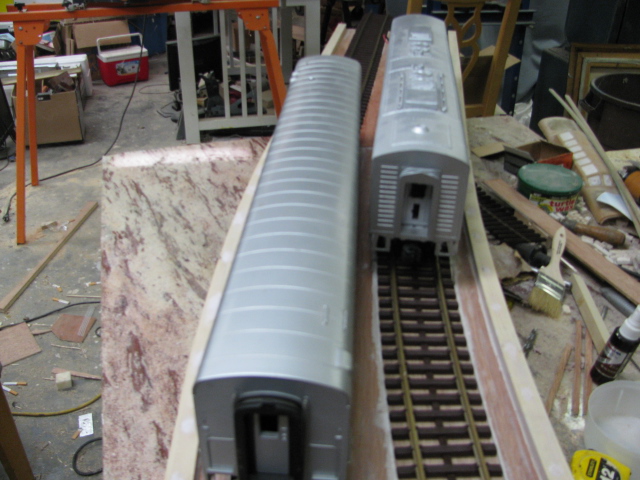
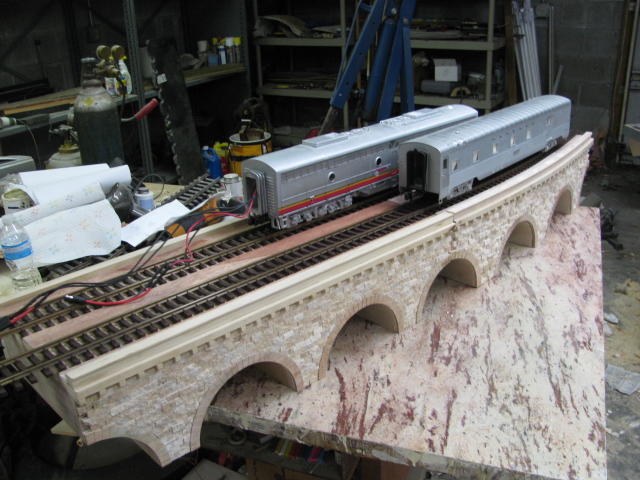
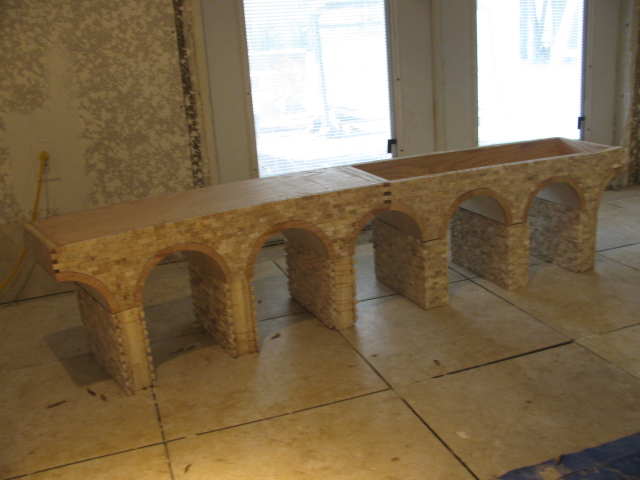
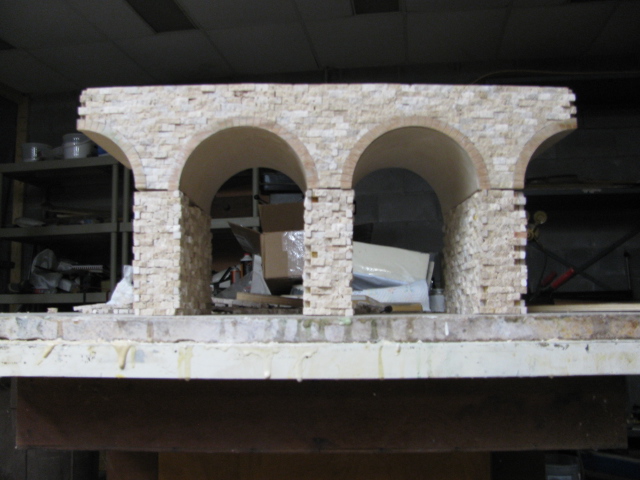
UPDATE: I am finished with the pattern. I laid the track to test the clearances. When I run the 85ft. passenger cars, I might have to run one train at a time, the clearances are close. I am ready to start making the molds. Here are some pics.
Someone mentioned it, yes the fluted roofs are Budd, I don't do Budd, just Pullman Standard and EMD. I am involved with the viaducts right now, but I started a project to stretch the MTH passenger trucks to make them look correct, added about 1/2 inch in length. If I recall, I will have to stretch the MTH passenger cars about 2 inches to make an 85 foot car, or what ever length they are. Even having molds for 85 foot, both corrugated and smooth, the MTH cars would be easier to put together than starting from scratch, and they look good. I have fun no matter which way I make them.
Hello Nick jr. I am curious why one would not like the prototypical look of banked curves? Obviously the speed is not a factor as in full scale, but is there something I am not aware of because of banking? I have seen layouts that have been banked and liked the look of the train as it goes around a curve, it looks like it should. I don't see 5 degrees being a problem, please fill me in.
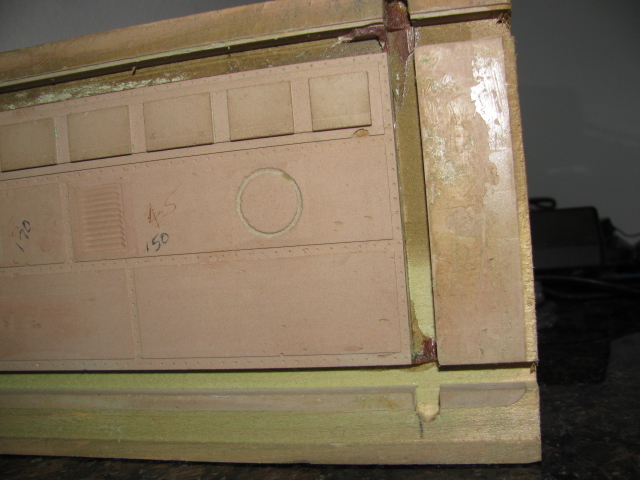
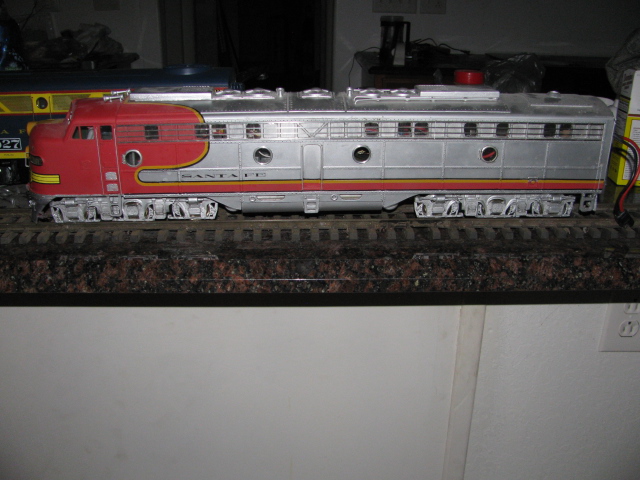
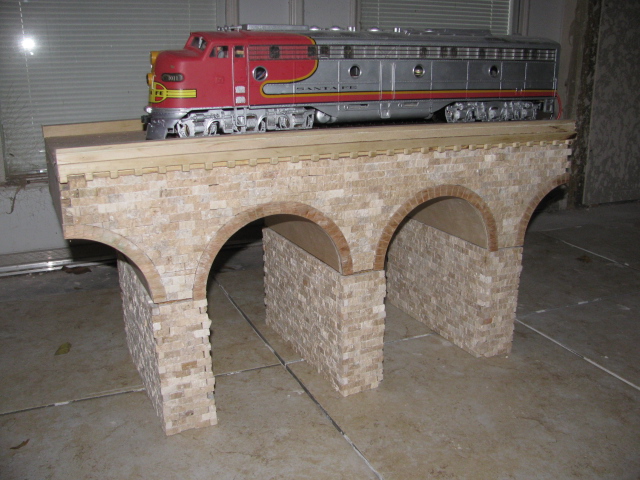
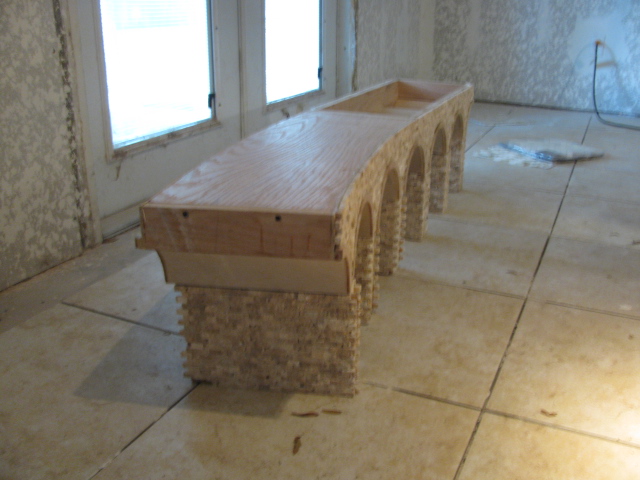
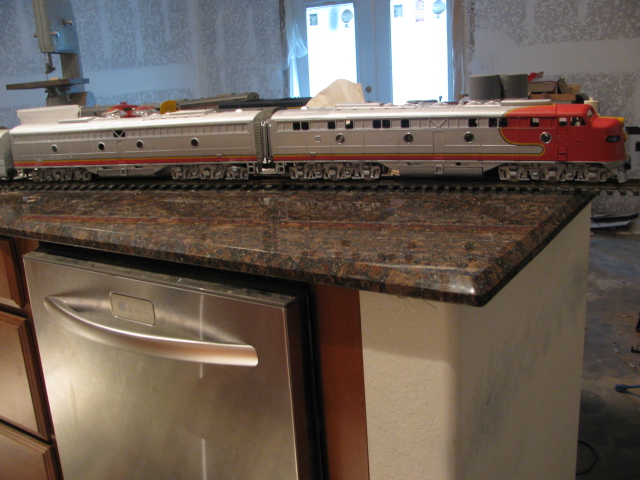
Here is the finished pattern for the mold, now the big job, making the molds for the concrete. Still working on the curved one. I am trying to imagine 300 feet of this, well, I can dream can't I. Here are some pics with the E8 on it.
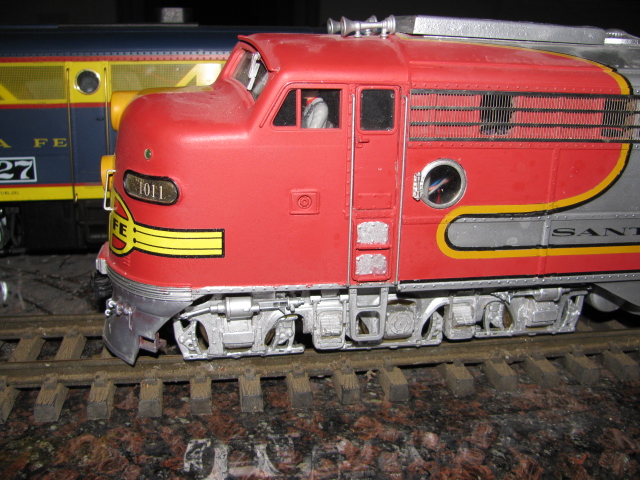
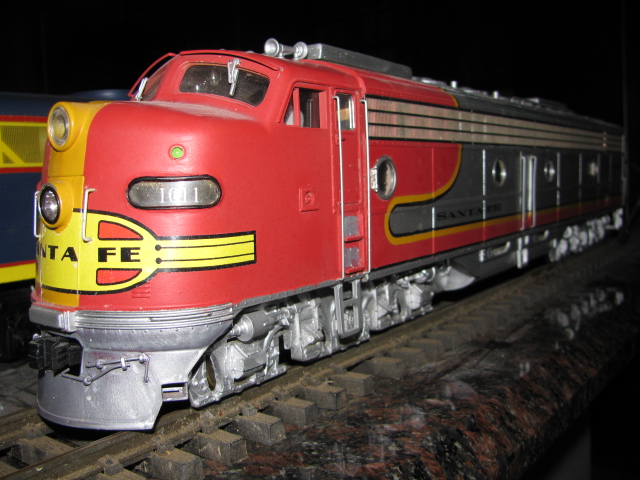
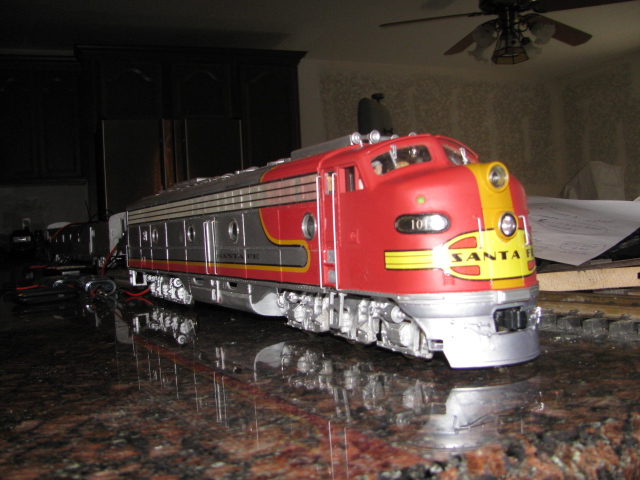
I scratched bashed them. I used an MTH cab and the rest is from a mold that I made from scratch. The electronics is MTH battery powered, TIU is in the baggage car, batteries are in the B unit. I used NWSL three axle trucks. Thanks for the interest. If you have any more questions, please feel free to ask.
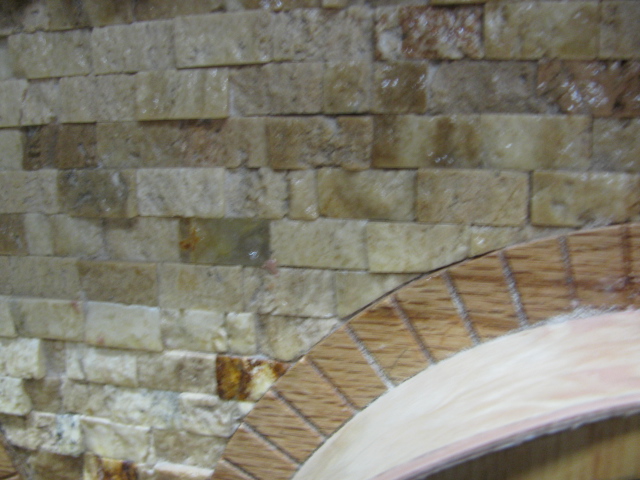
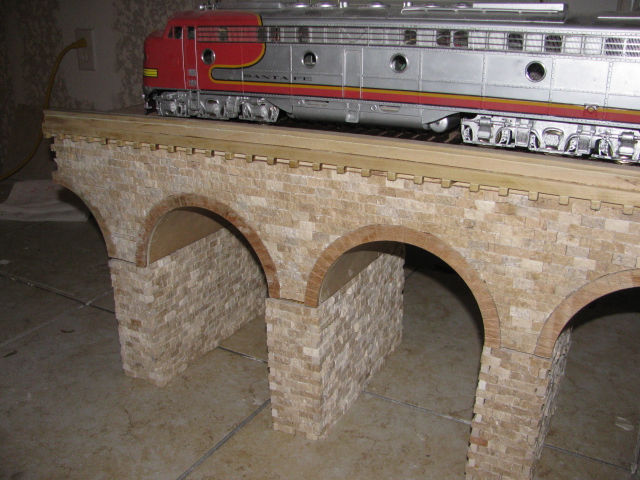
Yes, I bought them at Lowes, but they discontinued them. They can be purchased elsewhere, here is the name of the distributor, Anitolia tile and stone, 8300 Huntington rd, Vaughn ON. There are several types, some are more porous, so look for the type that is more solid, I think they are made of granite. Lowes discontinues them because they were too rough for a backsplash. You can also find the tile on Amazon. It is very time consuming, because each tile must be shaped around the curves. They have a webbed backing and in the open areas the tile can be laid quickly, but as soon as there is a curve, individual tiles must be laid.
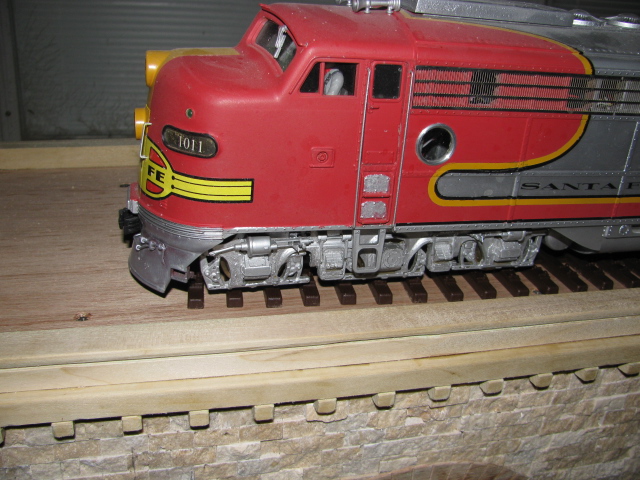
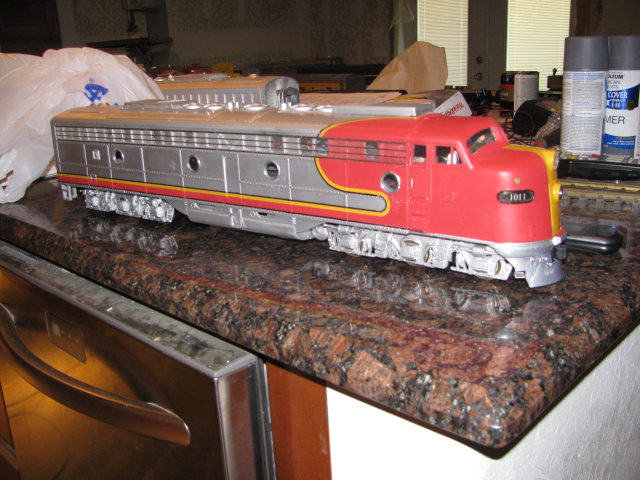
Most have seen this E8, but you said show me your engines, so maybe someone else has not seen them. They are 1:32 and battery powered MTH electronics. Robert Brown.
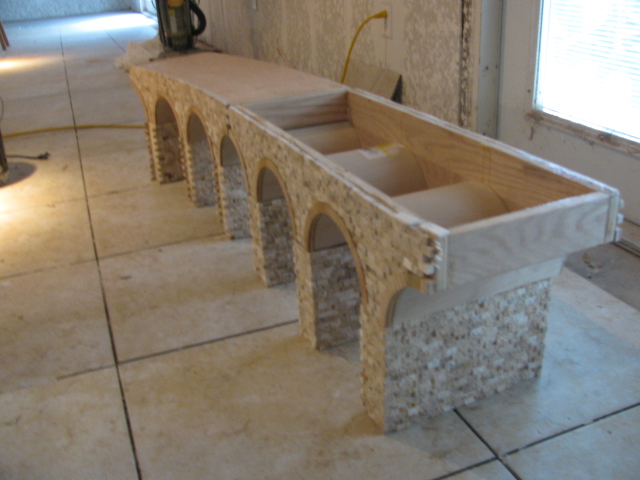
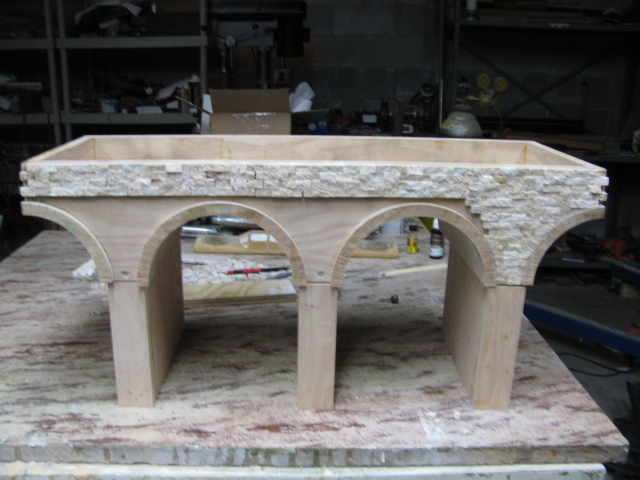
Here is a pattern that I am making for my garden layout. I am making these patterns for a mold for concrete viaducts. The entire layout will be elevated on these viaducts. I am making them 30 inches long. There will be a straight one and a curved one, 10 ft. radius. The curved ones will have banked roadbeds, about 5 degrees. There will be two tracks and maybe three on the straights. Here are some pics.
Well, running my E8, I will probably never go faster than 50, that's fast enough for me, after all, I want to be able to see and enjoy it. Thanks for your getting me straight. Robert Brown.
I did the same thing and you are right. At 60 mph, my volt meter read 12 volts and beyond that the voltage increased, but the motors sounded like they were going to explode. I wonder why he would tell me something like that. This time I sent MTH an information request for more technical information, so let's see what they say. Robert Brown.
Unfortunately, unless you pay big bucks for some finescale cars, 3500 dollars or so, we are stuck with kit bashing or making complete molds. What I did, was make a master mold without windows, and then take the part and mount it on a Bridgeport mill and then cut the windows to suit for the different cars. So, that way, you only have one mold for the sides, one for the roof, and one for the ends. The tedious part is making the trucks. I still think the best way, not having molds, is to make the section mold and stretch the cars. Bob.


1:32 Viaduct pattern for concrete
in Buildings, Figures and Accessories
Posted
I poured the first half of the column mold with urethane rubber. It was my first time using urethane, but it was just like silicone except for the mixing ratio. It almost poured like water, a little thicker, so I am glad that I sealed all of the seams with clay or it would have ran out. Unless there is some void in the mold, it should come out fine. Here is a picture.
