I just looked up and EMD built 427 E7's and 500 E8's and 48 E8 b units, Santa Fe bought 8 A's and 5 b's. I have seen 3 A's in a train and mostly an A and a B. I have seen as many as 2 F A's with 5 B's pulling freight. Amtrak used them for awhile into the 60's. Bob.
The E series, with an A and B unit took the place, power wise, of an ABBA of the F series, two motors each in the E8 a and b. Way more power than the F. The bell and horn sounds quite a bit better also. Bob.
Regardless, it still looks good. Whenever that I can use a part, I will do it, I am not proud, most of my molds were made prior to anyone making much in 1:32, but now, wow, there is lots of 1:32 for me to kitbash. Bob.
Thank you, these are techniques that I have developed over the years, some good, some not so good, but they get the job done. I will, in the future, explain how I make my molds on the Bridgeport mill, so maybe some will take that hobby up. I have some procedures that are fairly straight forward and not difficult at all. Also, just about every thing that I have done on the mill, as far as making sides, can be made, with a little care, with a router. Some of the sides that I have made were made with a router. The 1945 Pullman observation car pattern was entirely made with nominal tools, a jig, and a router. It's a lot easier on the mill. Robert Brown.
Hi Jerry, I used an air brush and the only color that I had to thin was silver, about 25 %. Do not use Badger paints. I bought about 70.00 worth and the paint is useless, might as well have been spraying water. The best is Polly Scale, but I had to hunt for them because I think they are going out of business. You can still find some on Ebay. Bob.
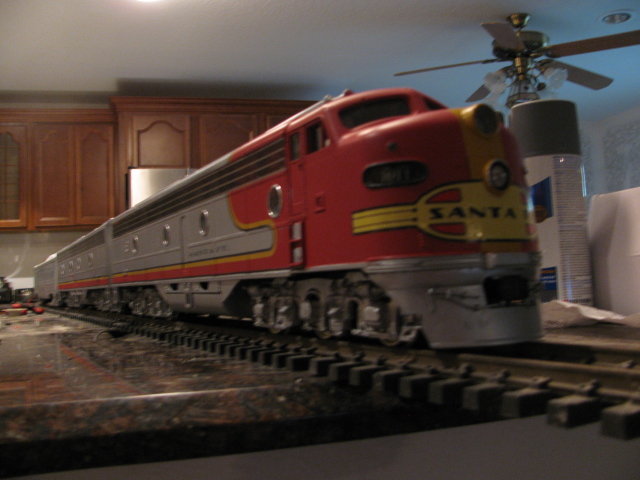
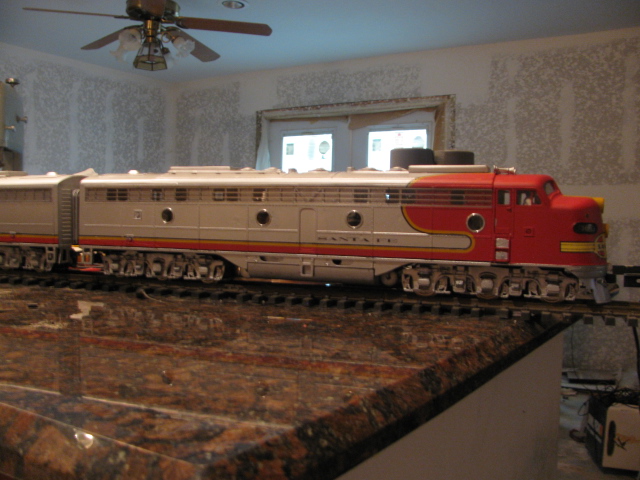
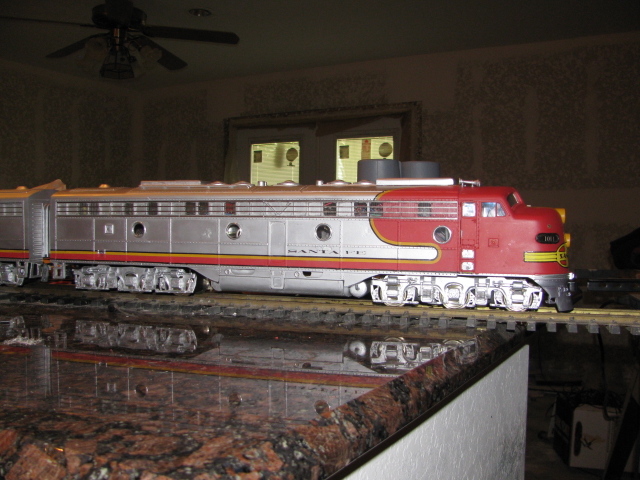
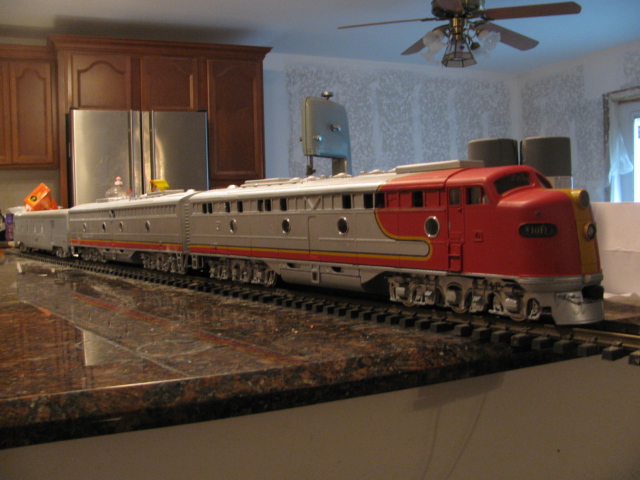
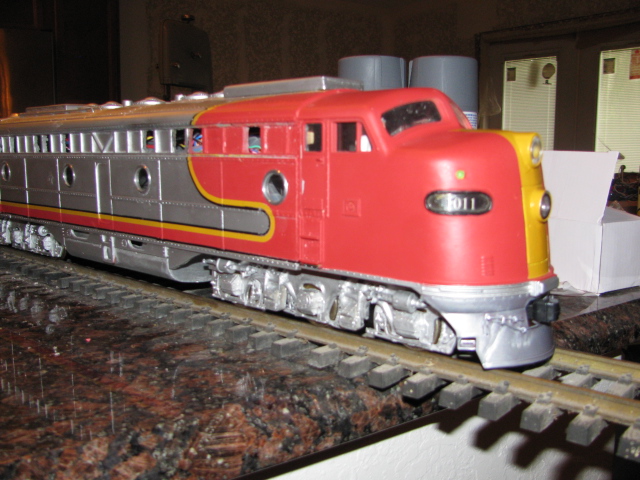
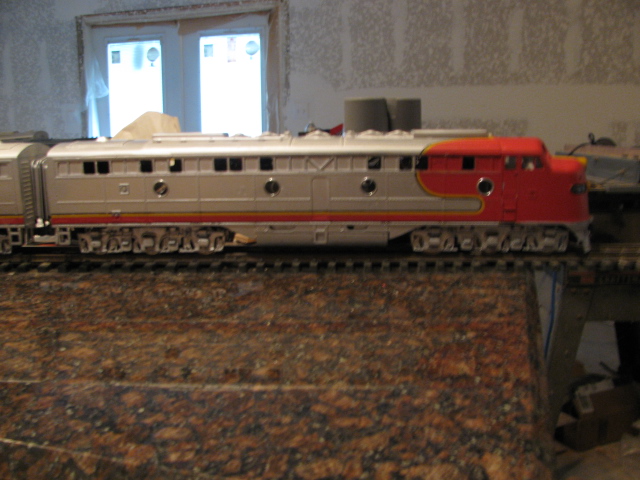
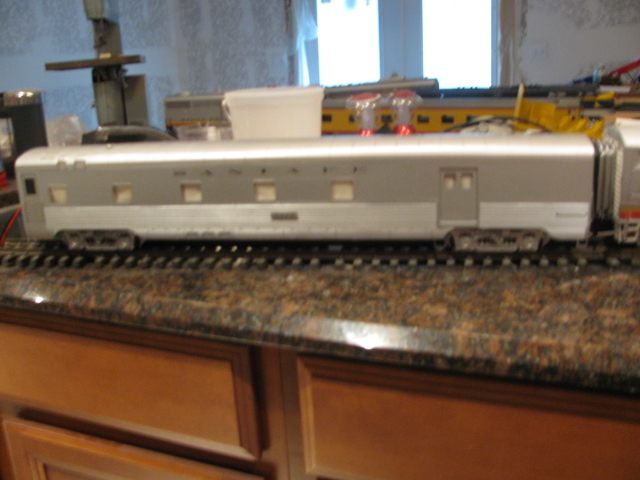
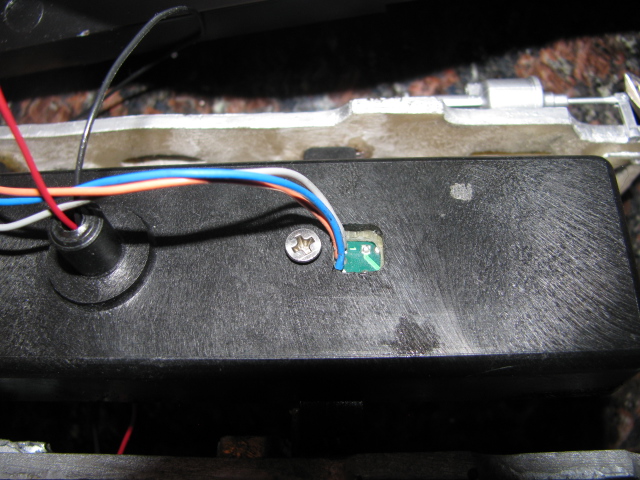
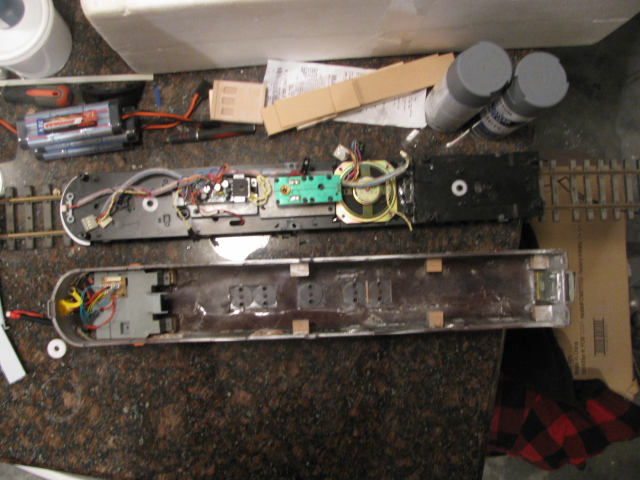
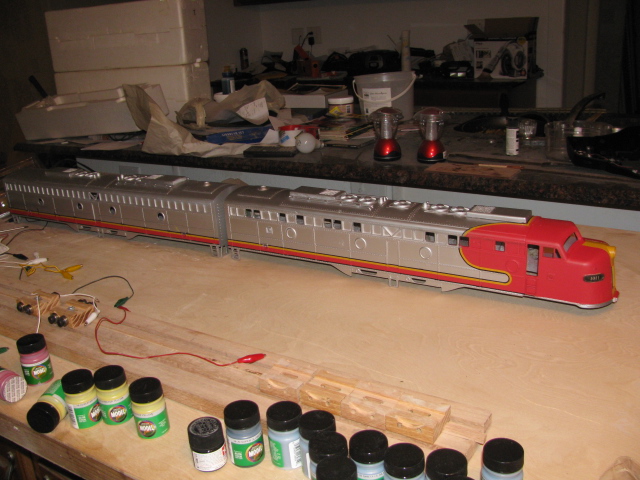
There are still a few things to install, but I am almost there. I am charging the batteries and it does function on aux power, so I think everything is alright. The cab is MTH, the sides, roof and ends are my own, machined on a Bridgeport mill. The electronics are MTH, sound, lights, everything. I am using NWSL truck and adapted the speed sensor. The B unit houses the batteries, the baggage car houses the TIU. I will be showing a video shortly of it running. I sure like the mars light and the number boards show up real bright. Does anyone know if Protosound 2 has brake squeal sounds? OK here are some pics.
Thank you very much Bart, I feel it is my duty to show people what some of my procedures are, to help someone, and I realize that there are many ways to do what I do, and my mind is open for suggestions. I am self taught with the respect of making molds, so not all of my procedures are, to some, correct, but I get the job done. Thanks again.
:(I am powering NWSL trucks 12 volts, with MTH power 24 volts. I thought by running them in series would work, but it did not. The motors ran erratically. sometimes one would start and the other would not, and also the other way around, so I went back to the parallel configuration and they ran without issue. I just thought I would share this failure. Robert Brown.
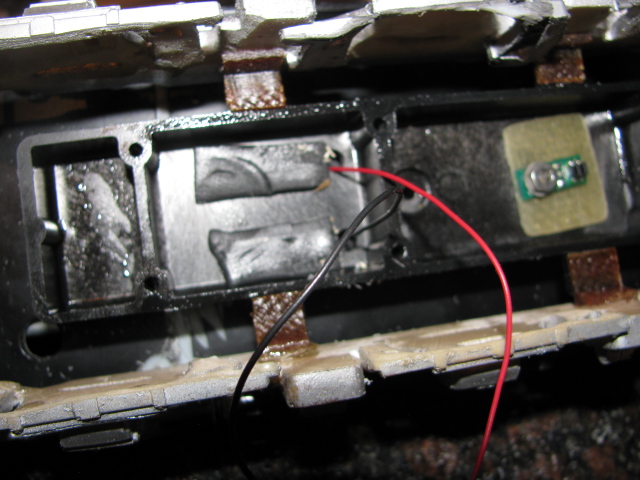
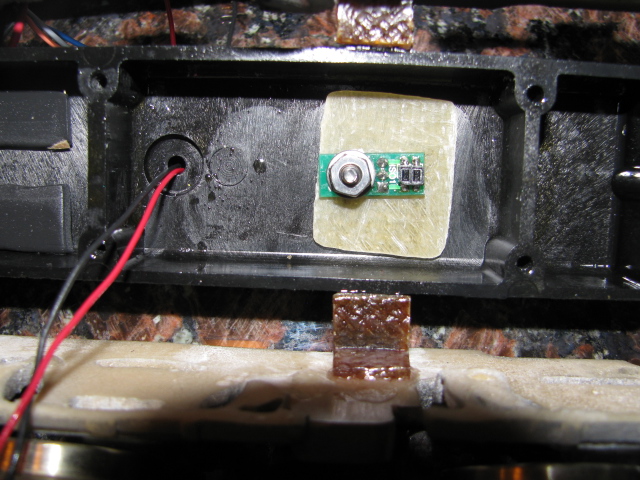
I thought I would share a problem installing NWSL trucks on my E8. By the time I made bushings for ride height and the bearing for the truck, there was not enough stem length to install the one-way washer that they provide. I don't like the one way washer because you put it on once and to remove it you destroy the motor block stem. So, here is what I did and I am following up with pictures. I drilled two holes in the top of the motor block for the wires, made a slot in the frame floor of the loco for the wires and that allowed the hole in the stem to be used for a screw and washer. This installation also allows you to remove the truck without damaging the truck. Again, any questions, I will gladly answer them, Bob.
The main reason that I do it this way is because the mold is flexible and by providing a flat surface to sit on, the parts come out the same every time. The other nice thing is the cover keeps all of the dirt off of the mold, and since I use Pam as my parting agent, it is greasy and it keeps the dust out of the area, plus the flashing is usually very thin, makes the part easy to trim. There are a 100 ways to make a mold, but this is the way I do mine.
Hello, this is Robert Brown, I think it would work on parts that detail is not important, but if resolution and detail is important, I have my questions. I have never tried it, so I don't know, but I do know this when making a pattern for reproduction, crispness and resolution is very important, so that is my two cents worth. I am attempting to place another slide video about how to make a mold, my method.
Thanks Larry, there is only one area that I penciled next to where the first tape is and that is the large radius swinging toward the front. Everything else is eyeballed because they line up with the rivet patterns on the body. Once the first tape is laid, all the rest fall into place.
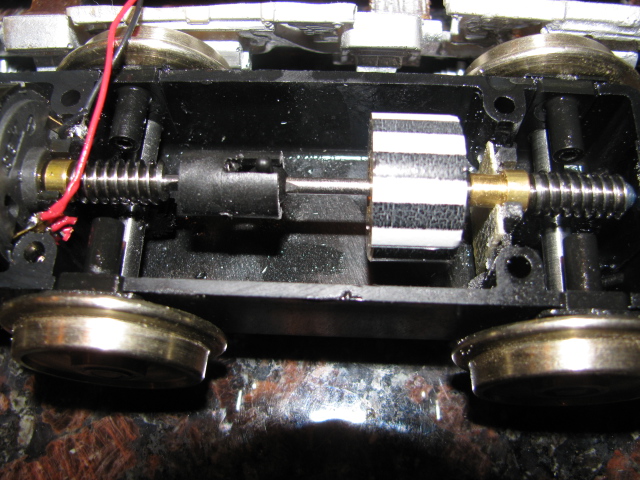
I took the guts out of an MTH F3 and put them into my bashed E8. When using NWSL trucks, there is no provision for the speedometer readout. I took the sensor and mounted it inside the shell of the NWSL truck with a .053 spacer, for proper clearance. The gear ratio of the MTH F3 truck is 10:1 and the gear ratio of the NWSL truck is 25:1, so you can see, some adjustment had to be made. The number of stripes on the flywheel of the MTH truck, both black and white, was 48, so to obtain the correct MPH readout, the number of stripes had to be reduced to 17.5. I didn't like that number, so I used 20 spaces, 10 white and 10 black. There was one more adjustment. The difference in wheel size from a scale 40 inch wheel to a scale size 36 inch wheel. That difference was 1.14 slower. 1.14 into 48, so the 2.5 times slower wheel speed, plus the difference in diameter comes out to 17.5 spaces, again I didn't like the 17.5, so I used 20, 10 white and 10 black. An odd thing happened when testing the readout of MPH. I forgot to put the striped decal on the flywheel and I still got a reading of MPH. I thought that was magic, but when I took the truck apart, I discovered that the flywheel had lines scored across the flywheel, I suppose chuck jaw marks. The lines were shiny, so the sensor picked them up with, I am sure, erroneous numbers. I then put the decal on and retried it and it appeared to read out correctly. Boy, the 25 to 1 gear ratio sure allows for some slow wheel turning, good for scale like initial movement of the loco. Here are some pics. of what the installation looks like. If you have any questions, please feel free to ask. Bob. This sensor is so sensitive, it would probably pick up a Zebra running from 20 miles away.
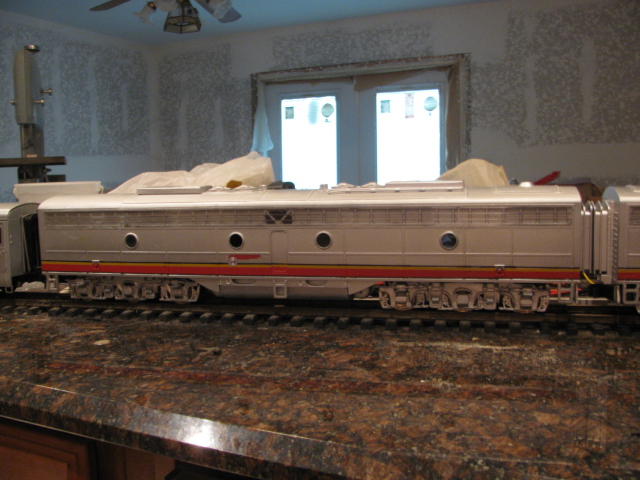
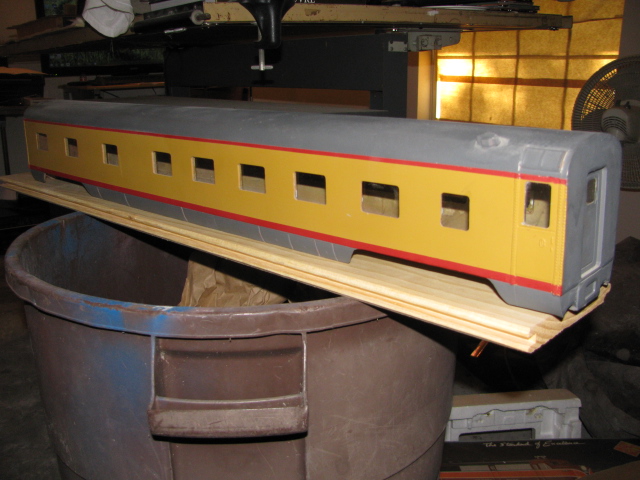
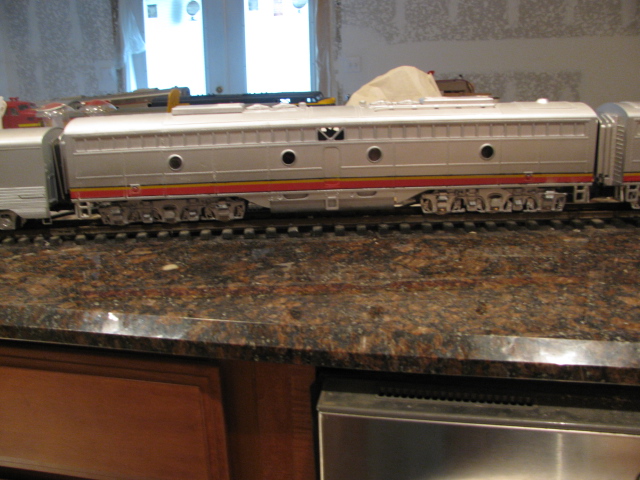
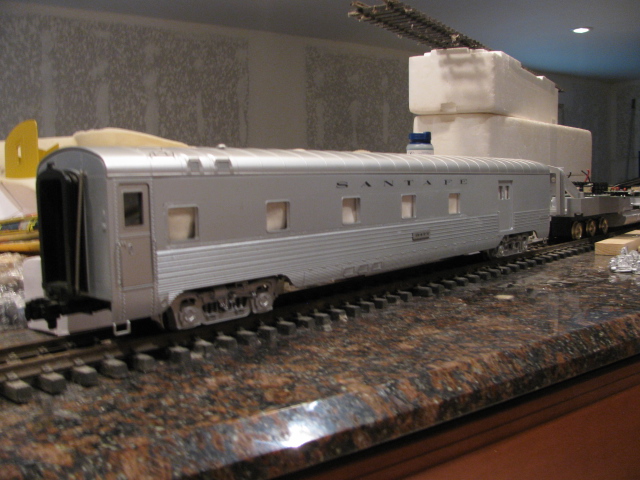
Here is the dirty side of the E-8a. I used my sides and an MTH cab, and MTH chassis modified, (stretched out). this way everything attaches stock, except for the speaker. The battery, I assume for sound, will be mounted in the fuel tank with an easy accessible door for changing. The main batteries will be mounted in the B unit and the TIU will be mounted in the baggage/dorm. car.
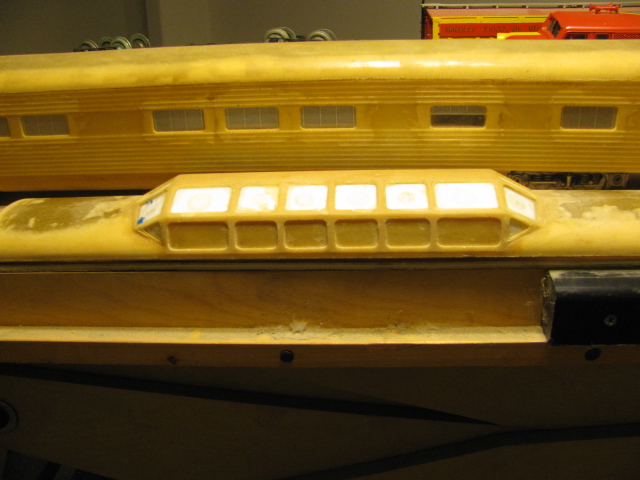
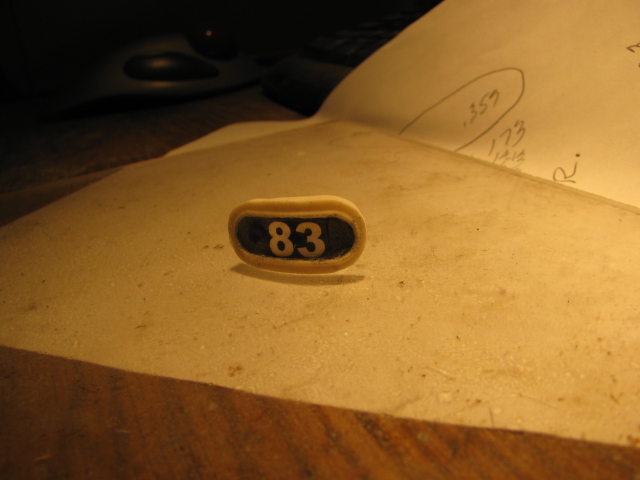
Thank you for your kind words. I will have to live to be 120 to finish all I want to do. Here is another project, a Pullman Standard dome insert for a one of my cars. And a flush number board. You can see how I made it on YouTube, search: my channel--- "omiateeful " Robert Brown. Some of my other videos might be of interest also, thanks, Bob.


E8 with new sounds
in Kitbashing & Model Making
Posted
I just looked up and EMD built 427 E7's and 500 E8's and 48 E8 b units, Santa Fe bought 8 A's and 5 b's. I have seen 3 A's in a train and mostly an A and a B. I have seen as many as 2 F A's with 5 B's pulling freight. Amtrak used them for awhile into the 60's. Bob.