| |
-
They're not, no. The frame is a one-off.
You know, the guys at the club keep asking me if I'm going to build one for myself also ...
-
Thanks, Sean
I certainly enjoy posting the pics and telling the story. Here's some more ...
I soldered low-profile nuts to the brass plate where they can be reached from below - and in strategically right places for fours screws to do the job.
Then I cut small triangular brackets for the undercarriage.
I drilled holes in the brackets approximately above the nuts, inserted screws and glued the brackets to the frame with two-component epoxy.
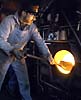
I did not have the courage to solder the brackets with a torch
Chicken, I know.
The veneer in the picture below is inserted while the glue sets to give the brackets exactly the right height for the finished car floor.
After drying, I had a bottom/floor plate for the car body matched to the frame, and the screws can be tightened as hard as I like.
Time to assemble the floor sandwich. The bottom layer of veneer has laser etched grooves to illustrate the beams being used on the real car. Yes, they are along the length of the car and not across. I've checked. The beams meet above the crossbeams on the real car too, so you don't see any joints. Later there will be a line of support struts on the outside of the frames, hiding the beam joints there.
And finally the top layer with the guide grooves for the interior walls.
Jens
-
With the annual national MR exhibition coming up, I've decided to get my guard's van presentable for the show. The side walls have now been re-cut (there was a flaw with the first batch), so I'm ready to assemble the three-layer sandwich. The middle layer is made to yield pockets for window glass, which can be inserted from the top after painting.
Glued and drying ...
Detail of the window pocket
Outer layer glued and drying ...
Two finished side walls
Details
The floor of the car body is also a three layer sandwich. Here, however, the middle layer is 1mm brass, so I can solder nuts to it for fastening the body to the undercarriage. More about that soon.
Jens
-
Allright then
Sounds like a short in the truck light circuit or something.
Well done.
-
Do the two engines have the same DCC address?
They shouldn't.
Actually with a short I meant a short from loco to loco through metal couplers. I've seen that happen in H0 once.
-
Sounds weird to me that a 5 amp system from a name brand is not able to handle two engines on the track - idling.
Any chance of a short? metal couplers, chassis connections to rail pickups, that sort of thing?
Jens
-
I just remembered - the gentleman in question is in fact the inventor of the above mentioned ballast-sorting apparatus.
If he's also the owner of Piko, he may have some explaining to do ...
Jens
-
Chanks, Chuck
Members: At my last count, 8 active, 10 "passive". Difference is membership cost and of course associated privileges. Most times there's 8-10 present at a show, fewer at operating sessions, but having found the permanent home, we're sort of finding a new rhythm, and there's been a minor shuffle in types of membership.
Command system:
- Motorola (older Märklin locos)
- mfx (newer Märklin locos)
- DCC (other brands)
All controlled by an ECoS command station by ESU and handheld controller apps on iDevices.
The popping head: That's actually one of the members of the board working on the wiring on a new crossover module
Jens
-
Thanks guys. I must admit I was against the decision to lease the space because of the price. But now it's done, and already the benefits of a permanent setup are showing: the landscape is improving, long standing minor track irregularities have been fixed and the roads for the RC vehicles are much better. Still much to do, though. Other than rewiring the modules there are plans for a roundhouse at the turntable, a branch line to a minor station / freight yard and pullout tracks / yard leads at both ends of the outside yard so switching can be done without blocking the main track. Also, some modules have been modified with fold-out stands and studs for matching to the adjacent module, shortening the setup time (and effort) considerably. On a longer term we are toying with the idea of a rotary dumper somewhere to unload the cars with "grain". Let's hope we get some new members so we can make it permanently permanent. Jens
-
I've asked around, and it's crushed granite.
The exact origins is unknown, but one of the members once got hold of a lot ... really, a LOT ... of crushed granite, and initially the guys used a sieve to sort out the right sized pieces. Progress was slow so one of the others - who works at a company that manufactures turnkey cement-plants (seriously!) - designed a two-stage shaking device with different gauges of wire mesh where the top level passed pieces with a diameter below approx. 3mm and the lower level discarded anything with a diameter below approx 1.5mm (dust and whatnot). In the end, several hundreds of kg was reduced to approx. 50 kg of suitable gauge one ballast, which will last the club for the foreseeable future. 3mm pieces are really slightly too large, but it doesn't show.
The sorting device has been dismantled, and I don't have any pictures of it.
We just discussed the matter over the phone, and if we were to get ballast today, we'd go for the type of granite you put in the bottom of fish tanks. Maybe sorted like above.
Jens
-
Gents:
My gauge one club has found a permanent home for the club layout ... or at least a semi-permanent home, because the rent is too high for any long term commitment. It does give the opportunity for the club to fix various problems, repair transport damages, rewire modules and showcase the club to attract new members.
For the latter purpose the club invited everyone to an 'open house' day, and we all had a great time. Operations were not much different from the hobby shows we've attended in the past, but simply showing up and starting operations without a 7-9 hours installation session is nice.
Here's a video from the day.
The light in the video is pure daylight from a skylight in the roof which is very different in nature from the fluorescent lighting at the hobby shows. The sun was shining outside and I had great fun experimenting with the very different lighting conditions.
Enjoy.
Jens
-
Ah yes, the P class is undoubtedly the most famous Danish steam locomotive.
It was designed by the Danish State Railways' (DSB) engineering dept. under the management of Otto Busse. It was a 4-4-2 atlantic with fairly large drivers - almost 2 meters or more than 6.5 feet - and it had a wedge shaped "aerodynamic" cab. The manufacturer Schwartzkopff of Germany had one on display at the World Fair in Brussels in 1910 where it was awarded a gold medal.
Two remain, nos. 917 and 931. Both are owned by the Danish Railway Museum, 931 is for display and 917 is retired at the steam shop in Roskilde and may one day steam again.
I don't have a good picture of a P engine although I have been on several excursions with P917 when I was a kid, but here she is at Copenhagen central station back in the 70's.
Unfortunately, soon after the P class entered service, the trains got bigger and heavier, and in a small country with many stops on the line, you don't need a fast atlantic. In the mid 30's, new "high-speed" diesel train sets entered service and took away the high speed chores from the P class. There was a general locomotive shortage, especially on branch lines with limitations on axle pressure, so beginning in 1943, a total of 7 P class engines were converted to pacifics, the PR class. The last one was completed in 1954, the same year as the first Nohab diesels entered service, and the was no need for more conversions.
The frame of the P was reused and prolonged backwards, and because the PR got smaller drivers, the frame was lowered, so the running wheels had to be extremely small. Various other parts of the boiler and from other scrapped engine types were used. The firebox was changed from a very wide type on the P (it had two firebox doors) to a more slender and standard type on the PR. The conical piece in front of the firebox is there to match the old front of the boiler with the new firebox. The steam engine was unchanged. 4-cylinder compound.
I learned to fire on the last remaining PR - no 908 - and I passed my fireman's certification test on her too. Needless to say, she's my darling. Roomy cab, steady running and easy to fire.
Here is #908 at Kalundborg, resting after the first leg of a private excursion run for an energy company, hauling 700 people to a company outing. I fired her on the way out and it was by far the largest steam train in the country since the days of revenue steam, but #908 hardly noticed. Then again, as one of the guys calmly observed: "She's built for it".
The PR class was so called to designate its origin - the P class - and its type of duties (or whatever) - the R class.
The R class was two series of 4-6-0s with two and three cylinders, respectively. They were very versatile locomotives and could do pretty much everything.
Two remain, one of each type.
#963 is retired after many years of excursions. She's at the steam shop in Roskilde and may steam again some day. I've had the pleasure of firing her briefly.
#946 is currently being restored to running condition, also after many years of excursions.
Here is R no. 946, the two-cylinder type after a parade at the 150 years anniversary of the Danish railways in 1997. Behind her in the doubleheader is #963, the three cylinder type. On the outside, the two types look alike unless you know what to look for.
The fireboxes of the R, PR, S and H classes are pretty much identical. Long and narrow with a sloping grating.
The tenders were identical for the R, P, PR and H(1) classes. After the decline of steam, many of these 4-axle tenders were converted to snow plows.
Jens
PS: Oh, and I get it about the US super power locomotives and the suspension for the drivers.
We didn't have anything even close to that kind of power here, so I guess it didn't matter too much on the DK types.
-
I think most Danish steamers could go equally fast forward and reverse. They were not allowed to go particularly fast in reverse, but that was because of any possible issues running tender first, not any physical restraint. That's why the S class was well suited for fast turnarounds on the suburban lines.
One weird quirk in the speed rules was for the D class (picture below).
It was a very versatile 2-6-0 which was used for almost all purposes all over the country. It had an allowed max speed of 70 km/h ... but relaxed to 80 km/h on Sundays
Here's D825 with an excursion train in Næstved some time in the 70's.
Jens
-
Hmm ... we have occasional power-downs on the club layout.
Does this happen with PS3 decoders running DCC ?
Jens
-
Thank you
The S class locomotives did not have the smoke deflectors from the start. The engines were built for commuter traffic around Copenhagen - thus the tank design to avoid turning the engines - and especially in the downtown tunnel north of Copenhagen central station, the problem with smoke not lifting properly was soon apparent. So they got these very large deflectors and the sloped plate in front of the boiler. They look very compact from the front.
I'm not sure Danish steamers benefited much from the developments you mention. The engineering managers were very conservative for a very long time, even questioning the use of superheating when the benefits have been well proven. Except for some experimental units, I only know one engine type - the second series of the H class freight engines - which had a LeMaitre exhaust and a wider chimney. Of course, the softer exhaust of the LeMaitre meant that these engines eventually also needed deflectors, which the first series didn't get.
Luckily one of each series is preserved, and I know that H no. 783 from the second series is being restored to running condition at the time I'm writing this. I stopped as volunteer before work began, but I was in fact on the crew that pulled H783 and a smaller switching engine from the central workshops in Copenhagen to the museum workshop in Roskilde.
Here's a picture of H783 at the central workshop in Copenhagen after it had been moved from its 'monument' position elsewhere at the facility.
And here's a picture of the night train hauling H783 and F class no. 500 to Roskilde. The picture is taken at Høje Tåstrup station west of Copenhagen.
Pulling the train is MZ class no. 1401 - the first of its kind. Also a Nohab build, but with a 16-cylinder GM 645 prime mover in it.
Jens
-
In addition to the above mentioned books and magazines I have now located the original Budd drawings of the hi-level coaches (2nd series it seems). So far only drawings of the chair coaches, but I hope and expect that the diners and sky-lounges are also there.
Still, one type is enough to start with, which brings the next question: how to design a 1:32 hi-level coach ?
I've been considering some manufacturing methods of the car bodies, and the method of choice will to a large extent be dependent on the volume.
The primary methods I've considered are:
1) Molding
2) 3D printing
3) Aluminium extruding
Re 1): Molding is expensive, not least because there are 3 basic types of coaches - the chair, diners and sky lounges. You need large volume to justify the cost of the molds.
Re 2): 3D printing will probably be prohibitively expensive due to the time consumption of such large models. There is new tech arriving which cuts an 11-hour job down to 6 minutes, but I don't know when that will be commercially available and at what cost.
Re 3): Not as far fetched as it sounds. I have a reasonable price indication for the initial cost and I have a work relationship in the business. I need to check. I am very intrigued by this method. The three types of coaches have identical profiles, so an alu extrusion could be used for all types. The windows (and perhaps vent grilles) would be milled out according to type, and various minor parts could be molded or 3D printed. This requires some volume, but not as much as professional moldings.
Volume?
Do I make this for myself?
I'm not sure I'd want to be in charge of a production run. I would very much like to design it or be part of a design team.
One thing I've thought about is that if such coaches are manufactured in Europe (where I sit), the shipping cost to the US will kill them - and vice versa.
Crowdsourcing?
Joint effort?
Across-the-world collaboration?
Open source?
DIY kit?
Complete design offered to established manufacturer?
What?
Any thoughts?
Jens
-
Guys, here's a video of a vast collection of gauge 1 and some gauge 2 models from a German collector.
Enjoy the video. The collection and the layout is incredible.
Below I'll explain why I think this is the problem with European gauge 1.
Collections like these are - while awesome - the symptom of what's wrong with European gauge 1. Or maybe it's just an explanation why the models are so crazy expensive compared to MTH for example. These models are not cheap brands. They're the most ridiculously expensive brands like Lemaco/Lematec, Fine Models, Proform, Fulgurex, Dingler etc. Seriously expensive.
If you look at around the 5:50 mark, you'll see a bunch of Austrian class 310 2-6-4 lococomotives. The ones with the odd boiler. They're from Fine Models. Same brand that makes a simple 2-axle freight car priced at 1000 Euro. The 310 class models were built in 5 versions. I see 6 models in the collection and all versions seem to be there, so there must be a double in the bunch somewhere.
I'm told that the collection is owned by the owner of Spur 1 Exclusive which also own Fine Art Models. Want an Allegheny or Big Boy with no expense spared? Check the previously owned models section. There's no price tags. If you have to ask, you can't afford it. They're in the video also. I think I noticed two Alleghenys next to the Challenger and the Cab Forward.
And this is what I think is wrong with the European gauge 1 market. All manufacturers keep making these ridiculously expensive models because a few really really rich collectors are capable of absorbing the entire production. This is why gauge 1 stays a niche market here. Average Joes just can't afford the damn things.
There's nothing wrong with that in principle, but as Chuck pointed out a while back, MTH is proving that it is indeed possible to make affordable models with reasonable quality. Sure, MTH model detail is not up there with the top notch European brands, but pick any model from Lemaco or Fine Models and see how much MTH stuff you can get for the same money. There's just no contest.
I suggest that the European gauge 1 brands - with the possible exception of Märklin - are not particularly interested in volume. They're geeks locked in a race for most detailed models no matter the cost, and they have a market for it. They're simply not interested in volume or making the gauge popular for a broader audience by making slightly less detailed models with a price tag that more people can afford.
Harumpf!
OK, rant over.
This is why I'm happy that I have found MTH which is capable of offering good value for my money. They have some way to go still (the passenger coaches I don't like), but the F7s and other diesels are right on target.
This is why I think MTH would have a shot at the European market if they'd make what I call "90% models" - models that are 90% correct, but where - for production reasons - some details have been omitted or made from cheaper material or a cheaper production method or whatever. It's the last 10% that make up 90% of the cost. Okay, maybe not quite, but you know what I mean.
If MTH did this and if, say, they teamed up with Märklin, they would have a 1:32 market with no competitors. All the others are locked in a battle for detail.
Jens
-
Can't take the shipping estimates seriously anymore. They'll ship when they ship.
-
Nope, it's not just you. They're gone.
-
Not sure what happened there.
This was the video I meant to show you up there. Not that the other one is bad, but this one shows the design of the case better.
-
There are different approaches. The one you saw on the club video is home made and the wall, ends and top flips to one side. A lugging handle is on top, which means you can't stack it.
I prefer cases made by a Dutch gentleman, Ernst Jorissen. Below is one of his presentation videos.
He's designed an entire section of his layout to fit the cases, but the point is that the cases open on both sides and the handles are attached to the loose ends. This way the cases can be stacked. I still only have one engine (cancelled my order for a second BR50 recently), so I only have one case, but I like this design better.
Jens
-
Some sort of carrier for the locomotives is highly recommended.
On the club layout, we have a track specifically for connection to carrier cases. See 5:11 in this video.
The Swiss electric had decoder problems at that particular time, so it needed a little help from my BR50, but normally we can run the engines right into and out of the cases.
Jens
-
-
US News link doesn't work, Ray.
-
NS livery narrow-nose Dash-8 now on the MTH facebook page.
We'll probably see all versions in the next couple of days
Jens
|
|